Do you want to know the HDR meaning? And do you want to know how to use HDR to create perfectly exposed iPhone photos? In this article, you’ll discover exactly what HDR is. Then you’ll learn how to use the HDR feature to take better photos with your iPhone!
9 Tips For Incredible Children Photography On Your iPhone
Do you want to take unbelievable photos of children with your iPhone? Doing incredible children photography may seem difficult. But you can take stunning photos of children! Read on to discover 9 tips for wonderful child photography.
9 Tips For Fantastic Travel Photography On iPhone
Do you struggle to take amazing travel photos with your iPhone? iPhone travel photography can be extremely rewarding—if you know how to do it. In this article, you’ll discover 9 tips for stunning iPhone travel photography. You’ll come away with the ability to take amazing photos of your next trip!

Read More
13 Tips For Stunning Portrait Photography On iPhone
Do you want to take stunning portraits with your iPhone? The iPhone is a powerful tool for portrait photography, but taking incredible iPhone portraits can be challenging. In this tutorial, you’ll discover 13 excellent techniques for taking stunning portrait photos with your iPhone.
10 Tips For Taking Incredible iPhone Travel Photos
Are you planning a vacation and wondering what camera to take? If you’re thinking of carrying bulky camera equipment, you should reconsider! Whether you’re planning a weekend city break, a family vacation, or a round-the-world adventure, your iPhone is the perfect travel camera. In this tutorial, you’ll discover 10 ways to guarantee success with your iPhone travel photography.
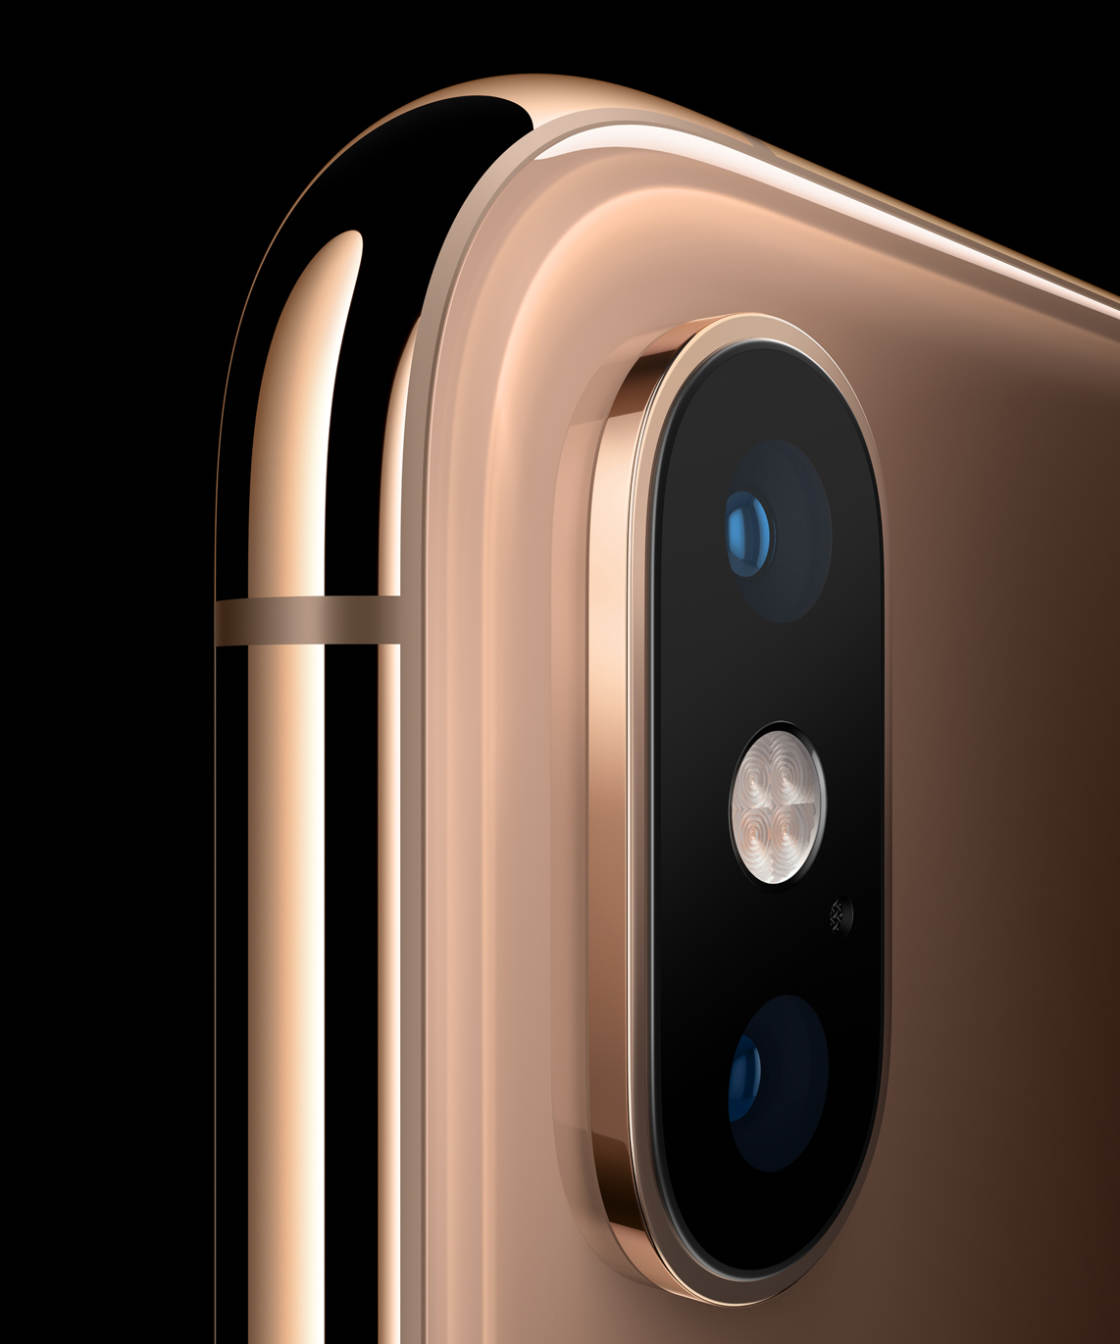
How To Use iPhone XS Camera To Shoot Spectacular Photos
Do you want to discover the features of the iPhone XS camera? These new iPhone camera features that will take your photography to the next level. In this article, you’ll learn how to use all the features of your iPhone XS camera. And you’ll come away with the ability to take extraordinary photos—photos that nobody will ever believe were shot with an iPhone!
Read More
How To Use iPhone 8 Plus Camera To Shoot Incredible iPhone Photos
Are you struggling to take beautiful photos with your iPhone 8 Plus camera? Capturing incredible iPhone images can seem difficult, but it’s actually easy to get the hang of. In this article, you’ll learn how to effortlessly operate your iPhone 8 Plus camera. And you’ll come away with the ability to take jaw-dropping iPhone photos that will satisfy you for years to come.
Read More
How To Shoot Fascinating iPhone Time Lapse Videos
Do you want to shoot spectacular iPhone time lapse videos? In this tutorial, you’ll discover how to capture beautiful, high quality time lapse on iPhone. You’ll learn how to control your iPhone time lapse settings and video speed. And you’ll discover the best iPhone time lapse app for your needs. Read on to start shooting amazing time lapse videos that will unleash your creativity in a whole new way!
Table Of Contents: iPhone Time Lapse
Click any title link below to go straight to that section of the article:
1. What Is A Time Lapse Video?
2. What Makes A Good Time Lapse Subject?
3. Built-In Camera App: Use Time Lapse Shooting Mode
4. How To Change iPhone Time Lapse Settings
5. Hyperlapse App: Control iPhone Time Lapse Speed
6. OSnap App: Ultimate Control Over iPhone Time Lapse Settings
7. Choose The Best Time Lapse App For You
8. Pro Tips For Capturing Incredible Time Lapse On iPhone
1. What Is A Time Lapse Video?
A time lapse video involves capturing lots of photos of a scene over a period of time. These images are then assembled to create seamless sped-up video footage.
Time lapse is the opposite of slow motion video, where time appears to be moving slower than normal.
Creating a time lapse video might sound like a lot of work. But luckily, your iPhone makes it easy!
2. What Makes A Good Time Lapse Subject?
Before you learn how to shoot time lapse videos, it’s a good idea to understand what makes a good time lapse subject.
Anything that moves or changes slowly is perfect for time lapse photography. The sped-up nature of a time lapse video can reveal movement that you’d barely notice with the naked eye.
Try capturing the sun rising or setting, clouds rolling through the sky, or the tide coming in at the beach. You could even create a time lapse of the moon and stars moving across the night sky.
Busy scenes can also look great in a time lapse video. Try recording a busy street scene, rush-hour traffic, or children running around. You could even look for small insects in your garden, and capture them going about their business.
Time lapse videos are also great for capturing a process over a period of time. You could record a time lapse of someone painting a picture or building a model airplane. Or light some candles and shoot a time lapse of them gradually burning down.
While time lapse videos are usually shot with the camera stationary, you can also shoot while on the move.
Try capturing a journey through a beautiful landscape. Or record your journey to work. You could also create a time lapse as you walk through a busy scene, such as a crowded city or event.
3. Built-In Camera App: Use Time Lapse Shooting Mode
The time lapse shooting mode of the built-in iPhone Camera app is very easy to use. Open the Camera app, then select the Time Lapse shooting mode.
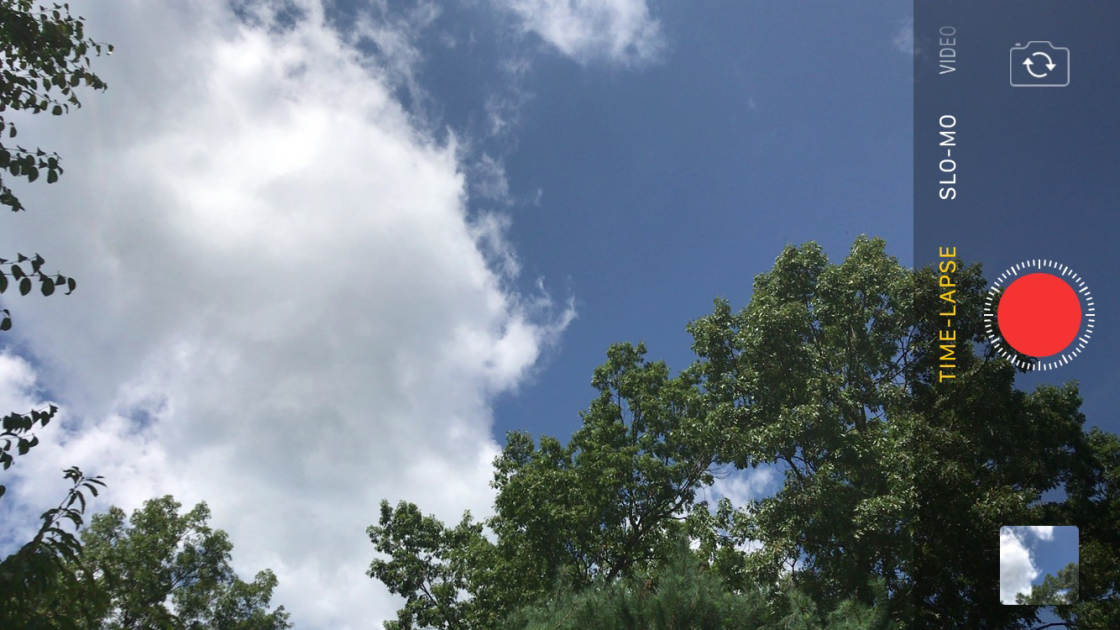
To select a shooting mode, swipe horizontally across the screen. If you’re holding your iPhone in horizontal orientation, you’ll need to swipe vertically. As you swipe, the active shooting mode next to the shutter button appears in yellow.
Just as you would when taking a still photo, you can tap the screen to set the focus point. You can then swipe up or down to adjust the exposure (image brightness).
You can also tap and hold to lock focus and exposure. You’ll see AE/AF Lock on the screen when these settings are locked. This ensures the focus and exposure don’t change, even if the lighting or subjects alter in the scene.
When you’re ready to start recording your time lapse video, tap the red shutter button. A rotating indicator appears around the shutter button when your iPhone is recording.
Tap the red shutter button to stop recording. Your time lapse video will save to the built-in Photos app on your iPhone. You’ll find it in the All Photos album, as well as the Time Lapse album. Tap the Play button (arrow in circle) to play your time lapse video

You can even use the video editing tools in the Photos app to edit your time lapse video.
You can trim, crop, and straighten your video. And you can make the footage more beautiful by adjusting brightness and color. You can even convert your time lapse video to black and white.

4. How To Change iPhone Time Lapse Settings
The beauty of the iPhone’s built-in time lapse feature is its simplicity. But if you’re serious about time lapse photography, you’ll want more control over your iPhone time lapse settings.
There are some great time lapse apps that let you change the settings. For example, you can change your iPhone time lapse speed to slow down or speed up the footage.
You can specify how many images get captured per second. Or you can delay the start of the recording. Some time lapse apps even let you add music or voice-over to your time lapse videos.
Next, you’ll discover how to use the Hyperlapse and OSnap apps to control your time lapse settings.
Hyperlapse lets you control the speed of your time lapse videos. OSnap gives you control over a wide range of iPhone time lapse settings.
Once you’re familiar with each app, you can decide with iPhone time lapse app best suits your needs.
5. Hyperlapse App: Control iPhone Time Lapse Speed
Are you wondering how to slow down time lapse on iPhone, or how to speed it up?
The built-in Camera app doesn’t let you set the speed that your time lapse videos play back. But the free Hyperlapse app makes it easy to control your iPhone time lapse speed.
Hyperlapse is very easy to use, with a clean and simple user interface. To shoot a time lapse with Hyperlapse, open the app and tap the screen to set focus and exposure. Tap and hold if you want to lock focus and exposure. A blue circle with padlock icon appears when focus and exposure are locked.

Tap the white shutter button to start recording. When the app is recording, you’ll see two numbers next to the shutter button. The first number is the amount of time that you’ve been recording. The second is the duration of the final time lapse video.

Every 6 seconds of recording will result in 1 second of time lapse footage. So if you record for 60 seconds, you’ll end up with a 10 second time lapse video. However, you can adjust the speed and length of your video once you’ve stopped recording.
When you tap the shutter button to stop recording, your time lapse video will start playing. At the bottom of the screen you’ll see the time lapse speed slider.

By default, the speed is set to 6x. For every 6 seconds of recording, you’ll get 1 second of time lapse video.
Use the slider to change the speed of your time lapse video. Drag the slider left to slow down the time lapse speed, or right to make it faster. The faster the speed, the shorter the final time lapse video will be.


When you’re happy with the speed of your time lapse, tap the green checkmark at the top of the screen. This saves the video to your iPhone’s built-in Photos app.
On the next screen, tap New Hyperlapse to start shooting another time lapse video. You also have the option to share your time lapse to Instagram or Facebook.

Sometimes you might not want to adjust the speed immediately after shooting. If you’d rather do it later, tap the red X at the top of the screen when your video appears. Then tap Edit Later.

When you save videos to edit later, you’ll see a blue circle with a number at the bottom of the Hyperlapse screen. This indicates how many videos you have ready to edit.

Tap the blue circle to open your latest unedited video. Adjust the time lapse speed, then tap the green checkmark to save.
If you don’t want to keep the video that you just recorded, you can delete it immediately after shooting. Tap the red X instead of the green checkmark, then select Delete Hyperlapse.

Another benefit of the Hyperlapse app is its built-in image stabilization. When you shoot a time lapse video, your footage is stabilized to smooth out any camera shake.
This allows you to shoot polished time lapse videos without a tripod. Hyperlapse is perfect for shooting time lapse videos on the move. Try capturing footage while you’re walking, running, cycling, or traveling at high speed.
6. OSnap: Ultimate Control Over iPhone Time Lapse Settings
OSnap is an advanced time lapse app. It has everything you need to create professional time lapse videos with your iPhone.

This app provides ultimate control over your iPhone time lapse settings. It also lets you edit your footage, and add audio to enhance the final video.
There are two versions of the OSnap app. The free version of OSnap is great for testing out the app. But you’ll need to pay an in-app purchase fee to access certain features.
If you want access to all features, you can download OSnap Pro for $3.99. This paid version gives you access to voice-over recording, unlimited projects, and the option to shoot at a higher resolution.
When you open the OSnap app, tap Create A Project to get started. Tap New Project to start shooting or adjust your time lapse settings. Or tap Choose Preset Project for a range of quick and easy projects using built-in presets.

When you start a new project, you’ll need to give it a name. You can also select the shooting orientation and camera you want to use.

Tap Create, then choose to either Start Shooting or Adjust Settings. The Stay Here option keeps you on the current screen. From here you can open an existing project (if you have any) or start a new project by tapping the [+] icon.

If you tap Adjust Settings when you create a new a project, you’ll see the following options.

Note that you can access these time lapse settings at any time by tapping the Settings icon at the bottom of the screen.

If you’re currently in shooting mode, you’ll need to tap the back arrow to see the Settings icon.
There are many settings in OSnap, so we’ll just cover the most useful options here.
The Timer Interval lets you choose how often a photo is captured by the app. You can set photo-taking intervals anywhere from 0.25 seconds up to 48 hours. Use a long interval to create a time lapse of something that happens very slowly, like a seedling growing into a plant.
The Delayed Start option is great for when you don’t want to start capturing footage straight away. And the Blackout Periods setting lets you specify certain times of the day when no images will be captured. The Darken Screen To Save Battery option is useful when shooting long time lapse videos.
The Frames Per Second (FPS) setting affects the playback speed of your time lapse video. To speed up the time lapse, set the FPS to a higher number. To slow down your video, set the FPS to a lower number. However, be aware that the footage won’t appear smooth if you use very low FPS numbers.
Once you’ve chosen your preferred settings, tap the back arrow at the top of the screen, then tap Shoot.

Before you start shooting, you can tap to set focus and exposure. At the bottom of the screen you’ll see three small padlock icons. These let you lock focus, white balance (color) and exposure (brightness). If you don’t want the focus, color tone or exposure to change during your time lapse, lock them using the padlock icons.

When you’re ready to start capturing the images for your time lapse, you have several options.
You can trigger the shutter manually by tapping the camera icon. Tap it every time you want to take a photo. Each photo that you take will eventually create your time lapse video.

To capture photos at the time intervals you specified in Settings, tap the Timer icon (circled below).

Tap Start Timer to begin shooting. Or tap Adjust Current Timer Settings to adjust the timer interval, e.g. 0.5 seconds, 3 seconds, 1 hour, etc.
When OSnap is shooting in timer mode, tap the white stop button (octagon icon) to stop capturing images.
Another interesting way to trigger the shutter in OSnap is with sound. Tap the Sound icon (circled below). The camera will only take a picture when there’s a loud sound. Try clapping loudly to test out this feature. Tap the white stop button to exit this shooting mode.

When you’ve finished capturing the images for your time lapse, tap the back arrow to exit the camera. Tap Play to view your time lapse video. While playing the video, you can slow it down or speed it up using the FPS arrows at the bottom of the screen.

To exit Play mode, tap on the screen, then tap the back arrow.
If you want to add music or other audio to your time lapse video, tap the Music icon. Select a music track to apply it to your video.

If you’ve paid for the Pro version of OSnap, you can record a voice-over for your video by tapping the Microphone icon. If you want to use this feature in the free app, you’ll need to pay $0.99 to unlock the voice-over setting.

When you’re happy with your time lapse video, save it by tapping the Share icon (square with up arrow).

Tap Create Video, then tap Render Video. To save the video to your iPhone’s Photos app, tap Share when the video has finished rendering. Then tap Camera Roll.
Another option when you tap the Share icon is to Save All Photos To Camera Roll. Use this if you want to save all of the individual frames that make up the time lapse video. The images save into the iPhone’s built-in Photos app.
7. Choose The Best iPhone Time Lapse App For You
Choosing the best iPhone time lapse app for your needs will ensure you get great results every time. So which time lapse app is best for you?
If you don’t need to change any time lapse settings, the easiest option is to use the iPhone’s built-in Camera app. Select the Time Lapse shooting mode, then tap the shutter button to start shooting.
 Time Lapse mode in the Camera app offers an easy way to shoot time lapse videos
If you’d like to control your iPhone time lapse speed, the Hyperlapse app is a great option. The speed slider makes it easy to slow down or speed up your footage. It also has image stabilization which smooths out shaky footage when hand-holding the camera.
 Hyperlapse app lets you easily control your iPhone time lapse speed
For ultimate control over your iPhone time lapse settings, it’s definitely worth downloading the OSnap app. This app is quite complex, but it’s perfect for shooting professional-quality time lapse videos.
 OSnap app gives you ultimate control over your iPhone time lapse settings
8. Pro Tips For Capturing Incredible Time Lapse On iPhone
Knowing how to use a time lapse app is a great start. But to help you capture amazing time lapse videos, here are some tips you should follow.
Shoot For At Least A Few Minutes
You’ll need to record for a lot longer than you want your finished time lapse video to be. If you only shoot for a few seconds, you won’t have much video footage to play back once it’s been sped up.
You generally need to shoot for at least a few minutes. But don’t be afraid to shoot for several hours if the scene you’re capturing is changing very slowly. Some scenes, such as a tree changing through the seasons, may require you to capture a single frame every 24 hours or more.
Use A Tripod For Shake-Free Footage
To avoid shaky time lapse videos, use an iPhone tripod, together with an iPhone tripod mount. Or rest your phone on something steady while you record.

Hands-free shooting is especially useful for recording a scene over several minutes or hours. You can set your iPhone up on the tripod, and leave it recording for the duration.
Another interesting technique is to mount your iPhone on a rotating cookery timer. As it slowly rotates, it creates amazing smooth panning footage.

If you want to capture a time lapse video while you’re on the move, use the Hyperlapse app. This app has built-in image stabilization to smooth out shaky footage.
Use Good Composition
Set up your camera in the best position to capture your subject or scene. Choose your viewpoint carefully. And use proven composition techniques to add to the visual appeal of the video.
In this time lapse of a train station, the bridge and train tracks act as leading lines. They do a great job of leading your eye from the front of the scene into the distance where the train appears from.
Other composition techniques include framing your scene, using the rule of thirds, and including foreground interest.
If your subject is likely to move within the scene, compose your shot with enough room to capture them as they move.
Consider The Weather & Sky
If you’re shooting outdoors, consider how the weather will affect your video. A dull gray sky won’t be very interesting.
But a blue sky with white fluffy clouds moving through the scene will add extra interest to your time lapse. Shooting at sunrise or sunset will add beautiful colors to your scene.
Lock Focus & Exposure
Do you want focus and exposure to remain the same, even if the light or subjects in the scene change? If so, ensure you lock the focus and exposure before shooting.
In the Camera app and Hyperlapse app, tap and hold to lock focus.

In OSnap, use the padlock icons. In this app you can also lock white balance.

How To Use Camera+ App To Shoot & Edit Amazing iPhone Photos
Camera+ is one of the best camera apps for iPhone. While the iPhone’s native camera app is great, sometimes you need to use manual iPhone camera controls to get the perfect shot. Camera+ gives you control of manual focus, shutter speed, exposure, white balance and more. Not only that, but it’s also a photo editor app for enhancing images. In this tutorial, you’ll discover how to use the brilliant Camera+ app to shoot and edit fantastic iPhone photos.
7 Perspective Photography Tips For Unique iPhone Photos
Do you want to transform your iPhone photography from ordinary to extraordinary? One way to accomplish this is to change your perspective or choose a different vantage point when you compose a picture. In this tutorial, you’ll learn how to move away from the standard practice of shooting from eye level. With these seven perspective photography tips you’ll discover new and exciting ways to capture the world around you, making your iPhone photos far more interesting and unique.

