ProCamera is the best iPhone camera app for DSLR-like control on your iPhone. Whether you’re a beginner or advanced iPhone photographer, this app suits everyone as you can shoot in automatic mode, semi-auto mode or full manual mode. In this tutorial you’ll learn how to use each camera mode and function that ProCamera has to offer, so that you can propel your iPhone photography to the next level.
ProCamera App Tutorial: Table Of Contents
Click a title below to go directly to that section of the tutorial:
Section 1: ProCamera App Settings
Section 3: Exposure Compensation
5.1 Rapid Fire
5.2 F/E Lock
5.3 Grids
5.4 Tiltmeter
5.5 Manual Mode
5.6 SI Mode
5.7 White Balance
5.8 Histogram
5.9 Aspect Ratio
5.10 Anti-Shake
5.11 Self-Timer
5.12 Display Mode
5.13 File Format
1. ProCamera App Settings
If you’re a first-time user of ProCamera, you’ll see several messages appear when you first open the app.
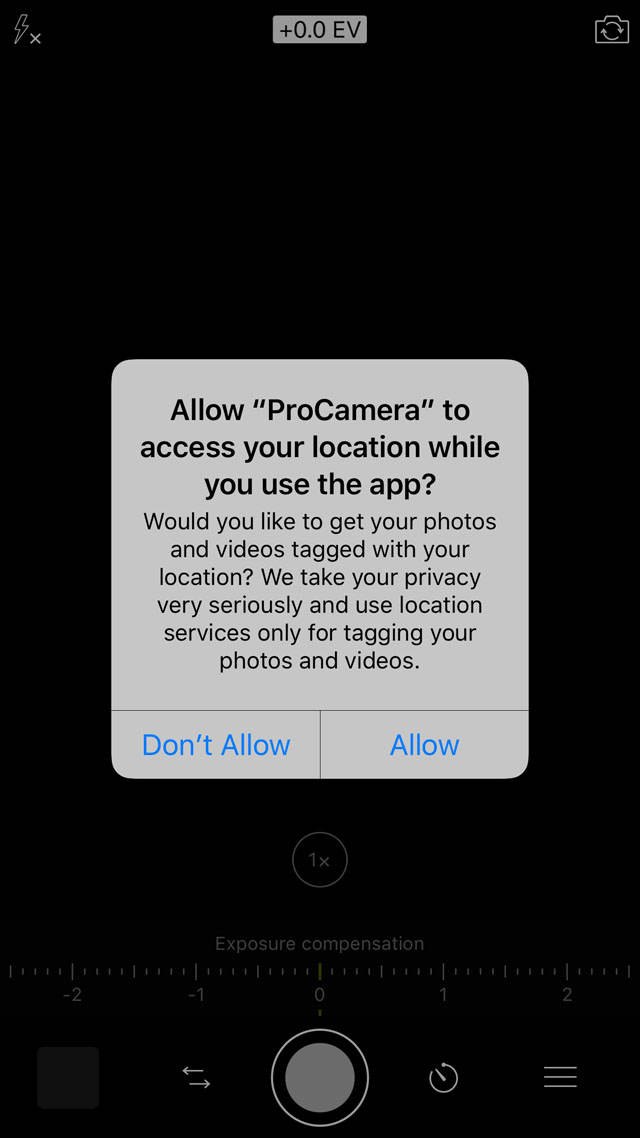
You’ll be asked if you want to allow the app to access your location. If you tap Allow, the app will remember where each photo was taken (also known as geotagging). This can be helpful for remembering where you took each picture:
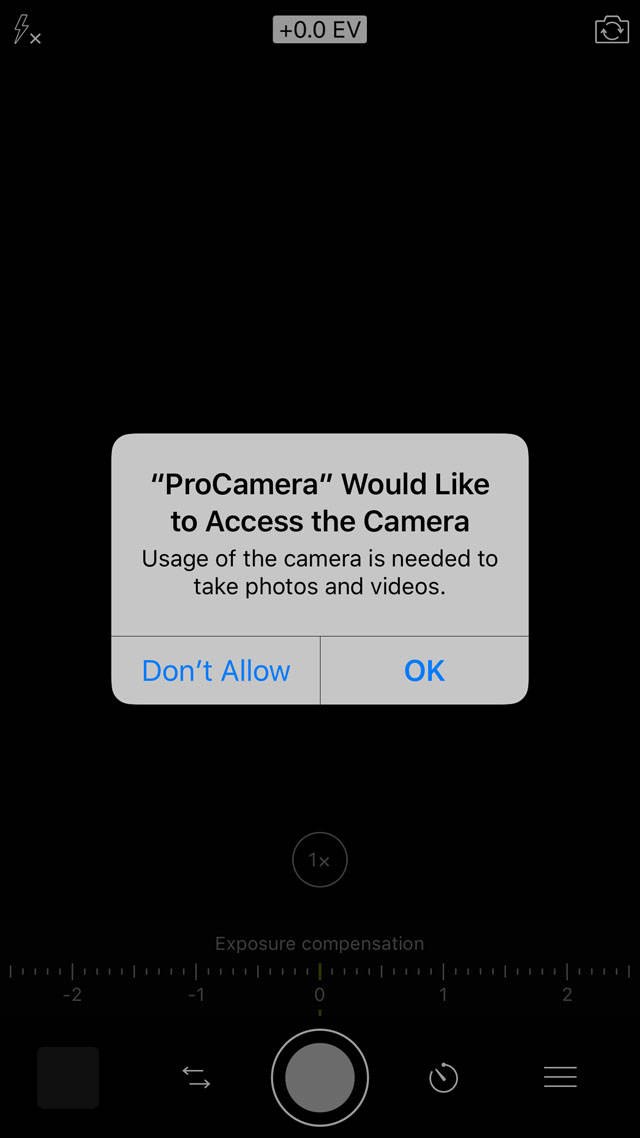
On the message that says ProCamera would like to access the camera, tap OK so that you’ll be able to use the app to take photos:
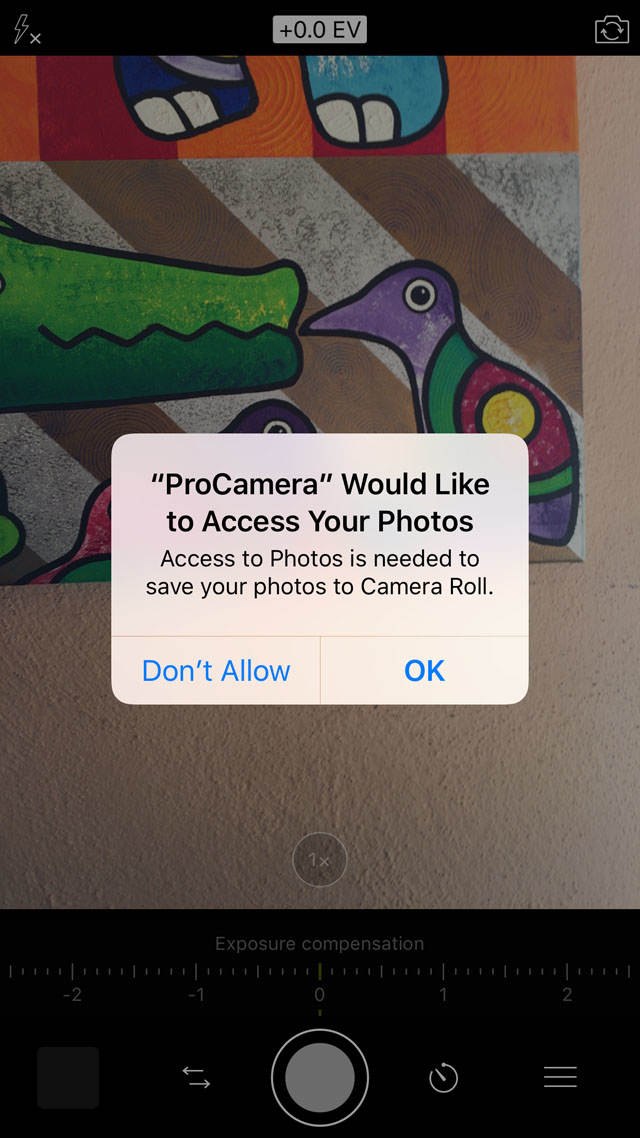
On the message that says ProCamera would like to access your Photos, tap OK so that the photos you take will be saved into the iPhone’s native Photos app:
On your iPhone’s screen you’ll now see the normal camera view, ready to take a photo. Before you start shooting pictures, you should make sure the camera is set to shoot at the highest quality setting.
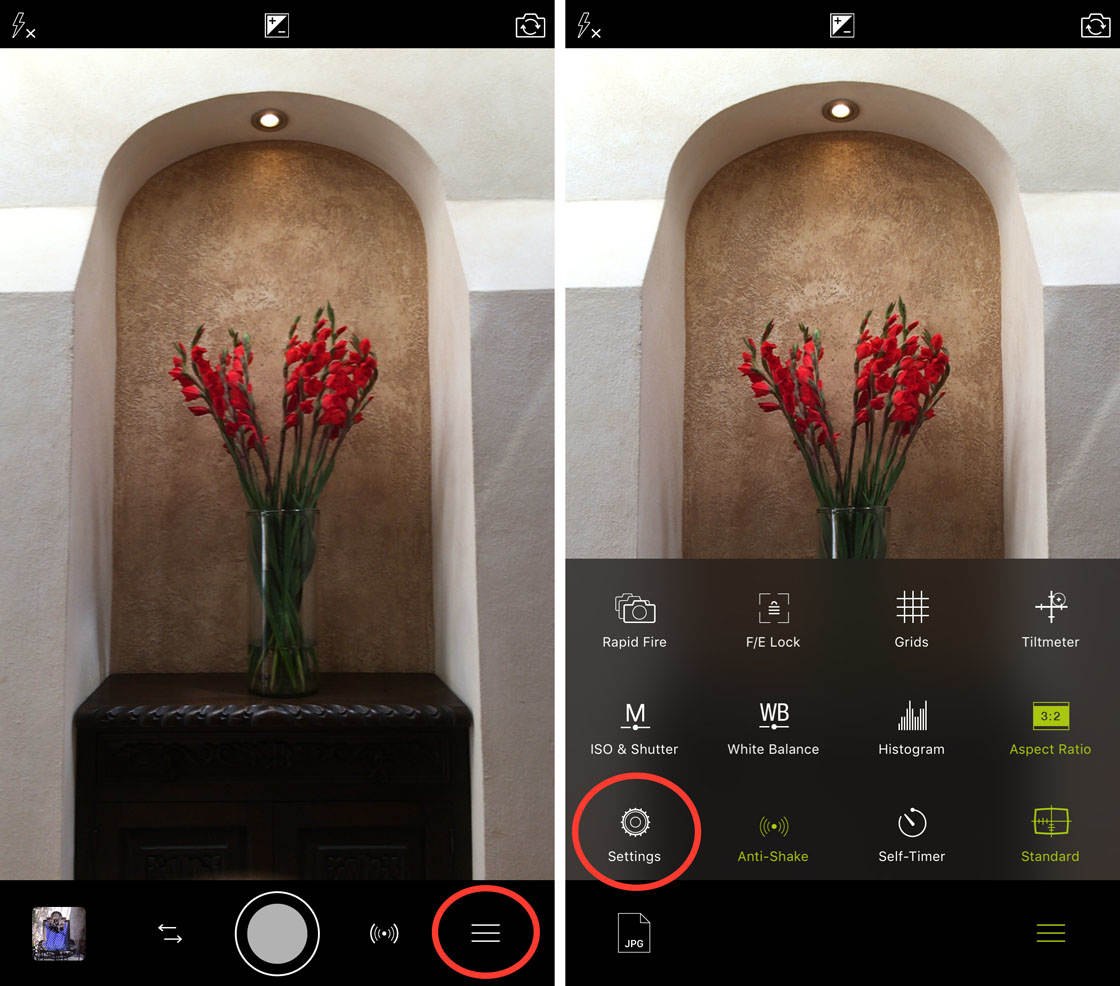
Tap the Menu icon (three lines) at the bottom right of the screen, then select Settings:
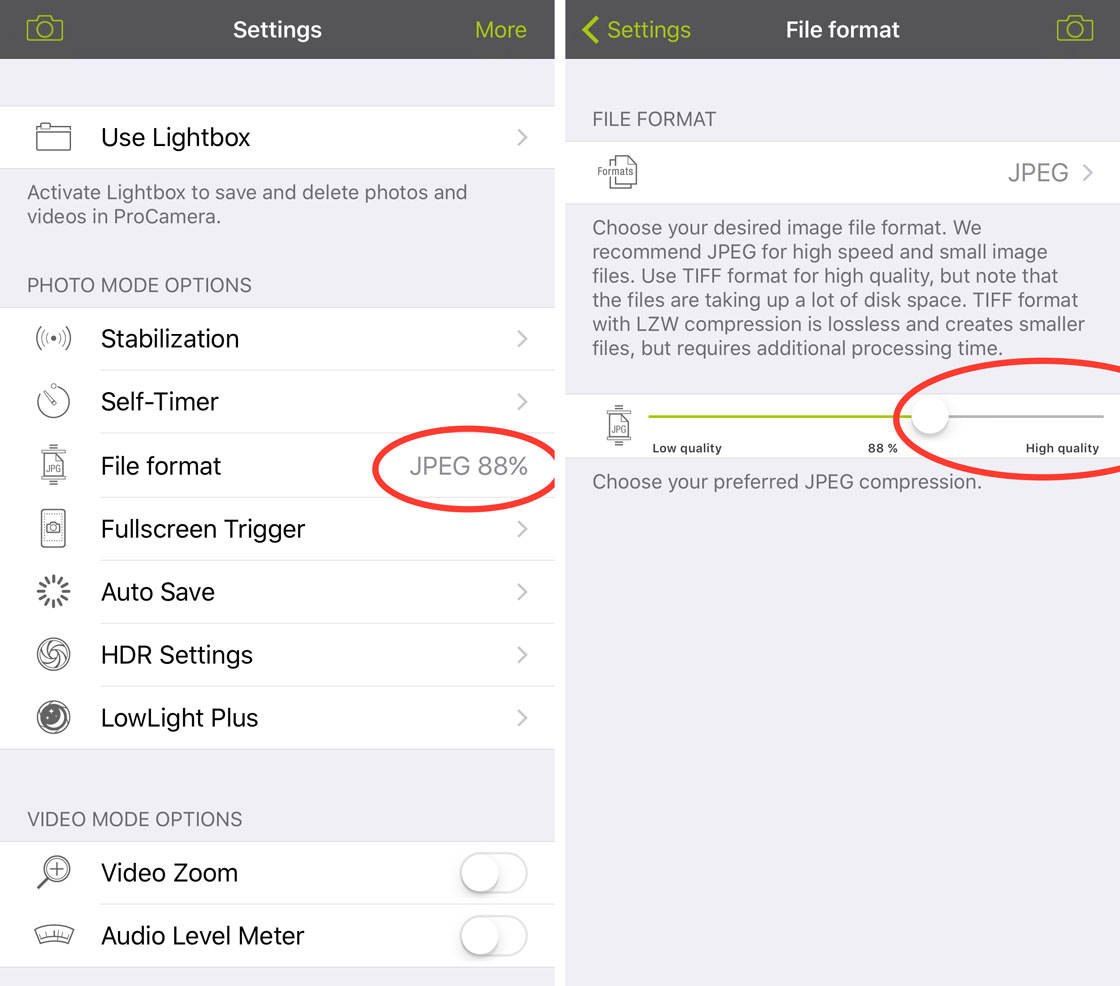
Tap the File Format (JPEG) option, then drag the Quality slider all the way to the right to 100%:
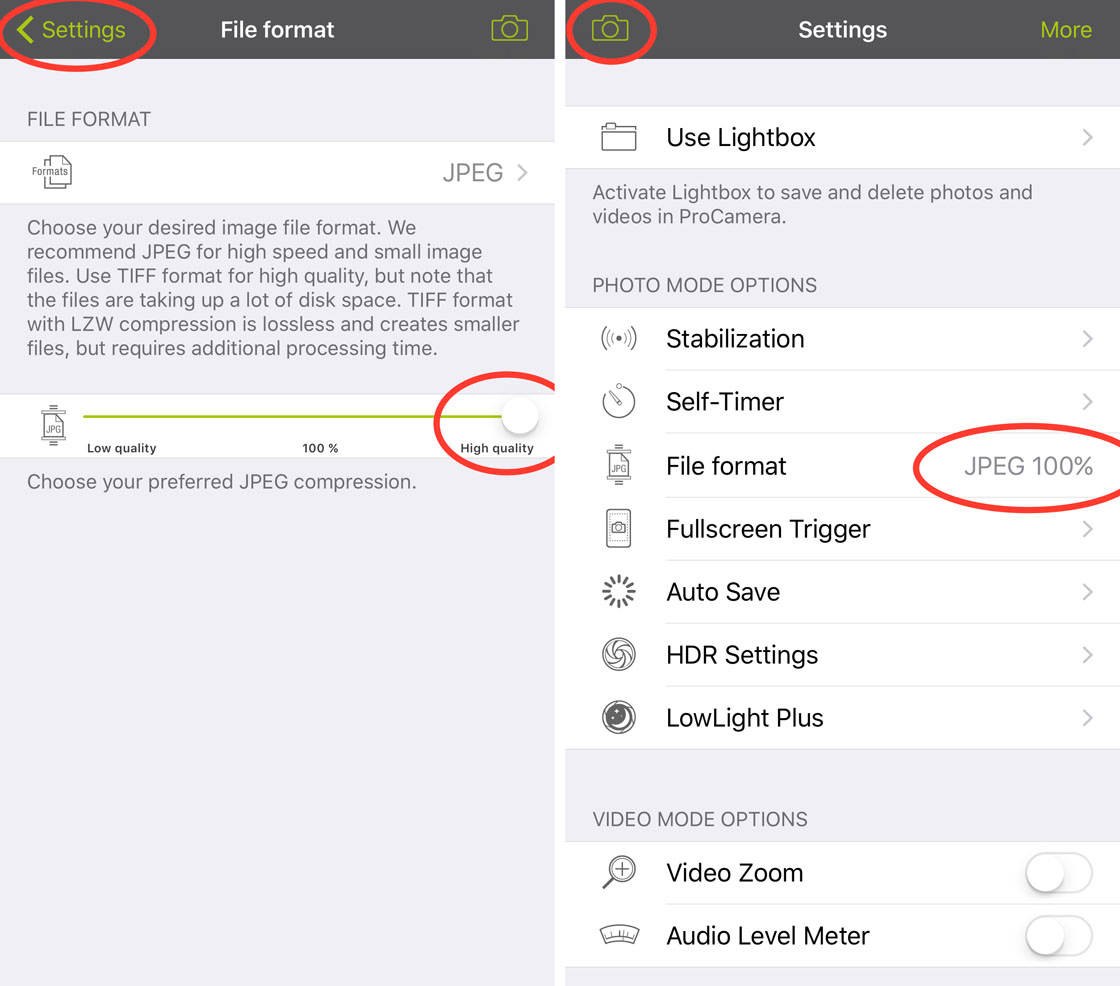
When the quality is at 100%, tap Settings at the top left. After confirming that your JPEG quality is at 100%, tap the Camera icon at the top-left to return to the camera screen:
2. Flash
Sometimes you might want to use the camera’s flash to illuminate a dark subject or brighten up the shadows in a scene. To turn on the flash, simply tap the Flash icon (lighting bolt) circled in red below:
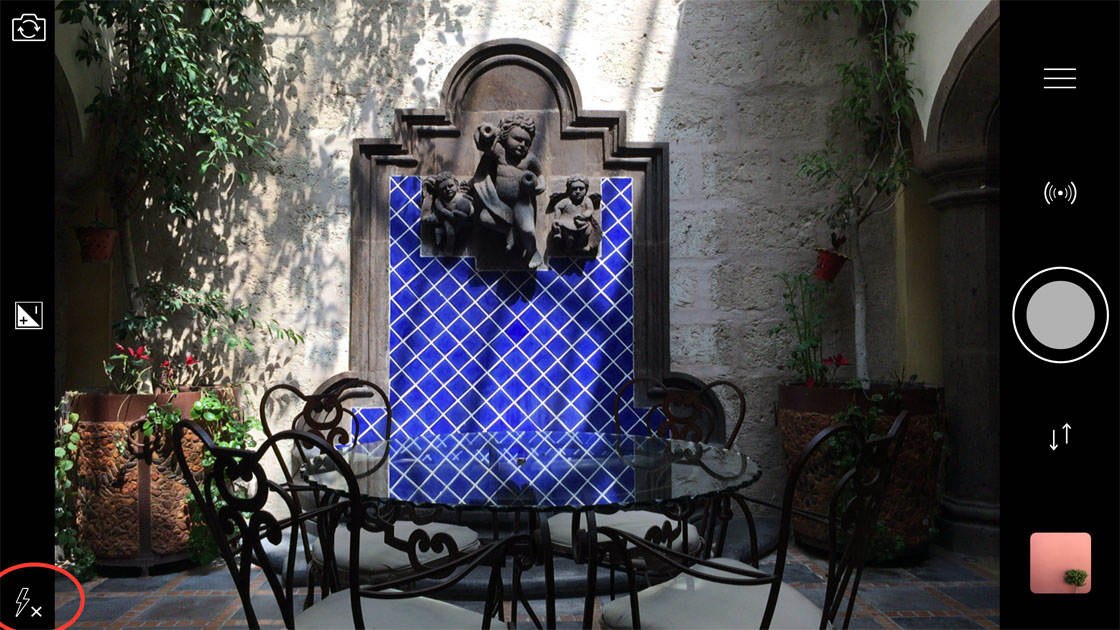
The flash icon should now appear solid white to indicate that the flash is switched on. Tap the shutter button to take your photo with the flash:
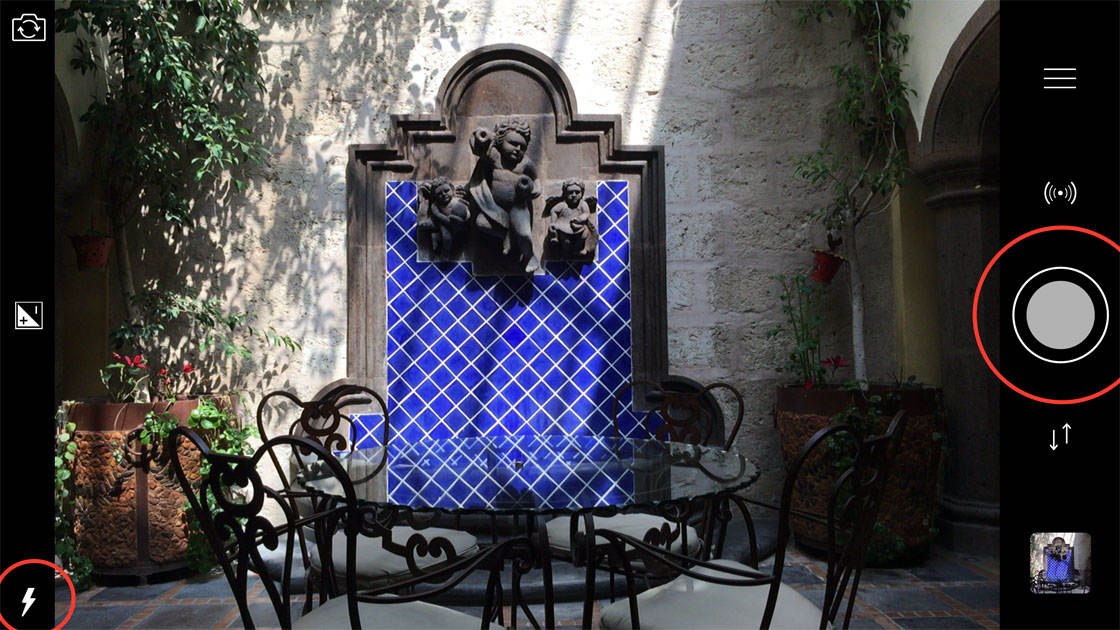
To turn the flash off, tap the Flash icon so that it appears with a small X next to it.
Below is a comparison of what this scene looked like with and without using the flash. As you can see, using the flash will brighten up shadowed areas in your scene.
No flash:
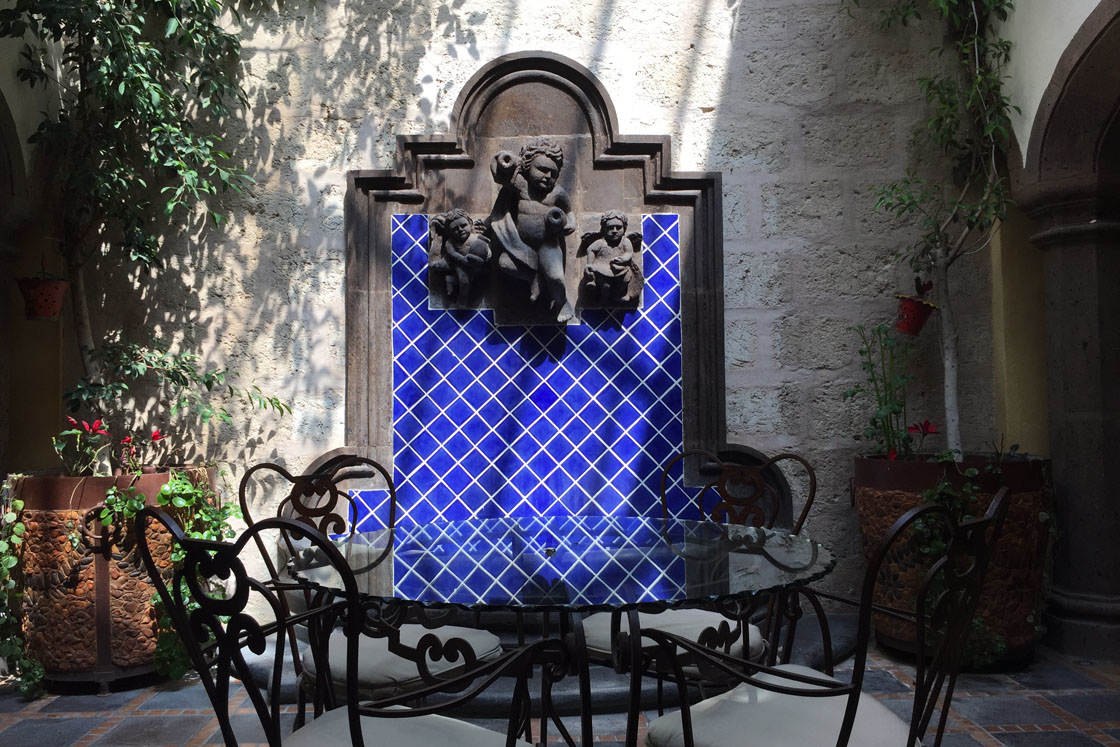
With flash:

3. Exposure Compensation
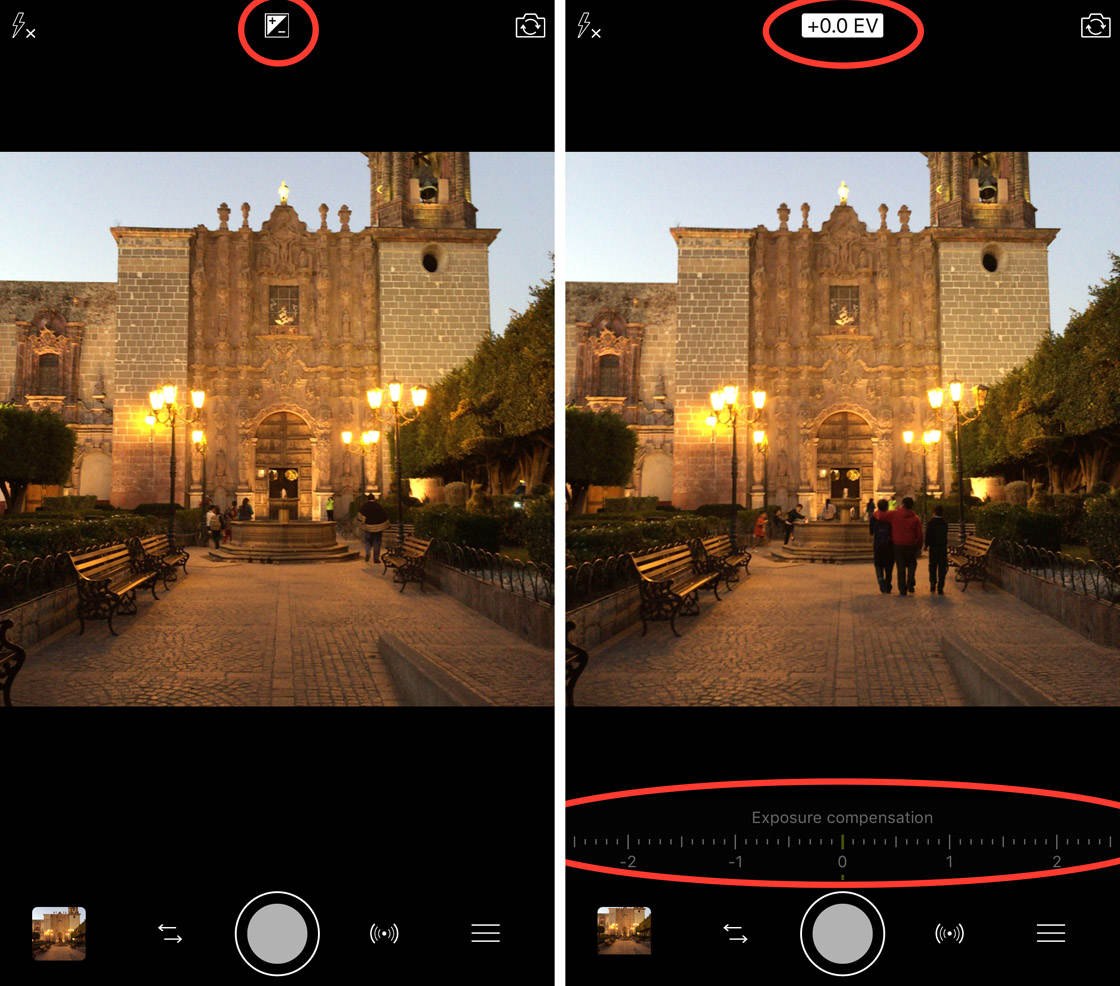
The Exposure Compensation setting in ProCamera allows you to easily control the exposure (brightness) of your image. With a simple swipe you can make the image brighter or darker before you take the shot.
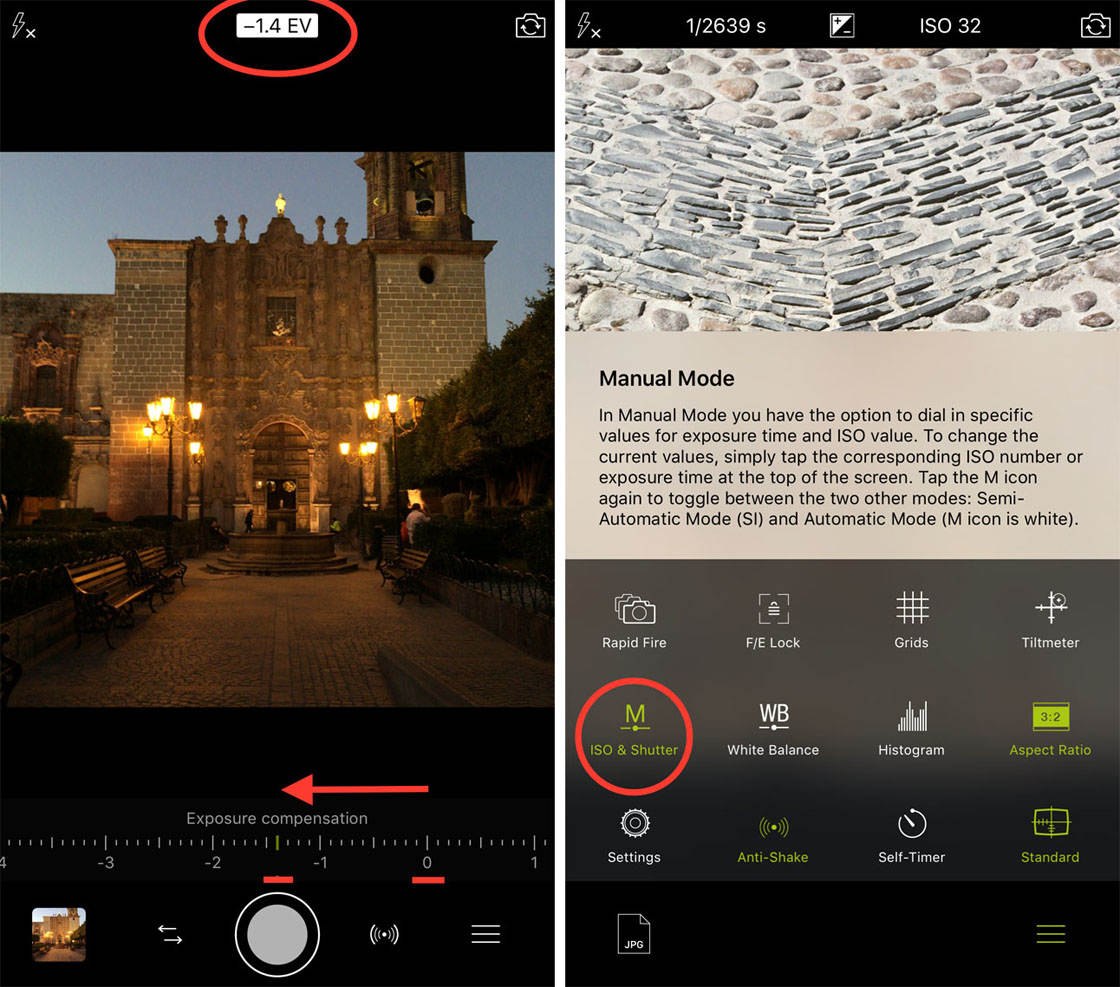
Tap the +/- icon at the top of the screen to display the Exposure Compensation scale at the bottom of the screen. At the top of the screen you’ll see that the EV (Exposure Value) is currently set to 0.0 – this is the normal exposure value:
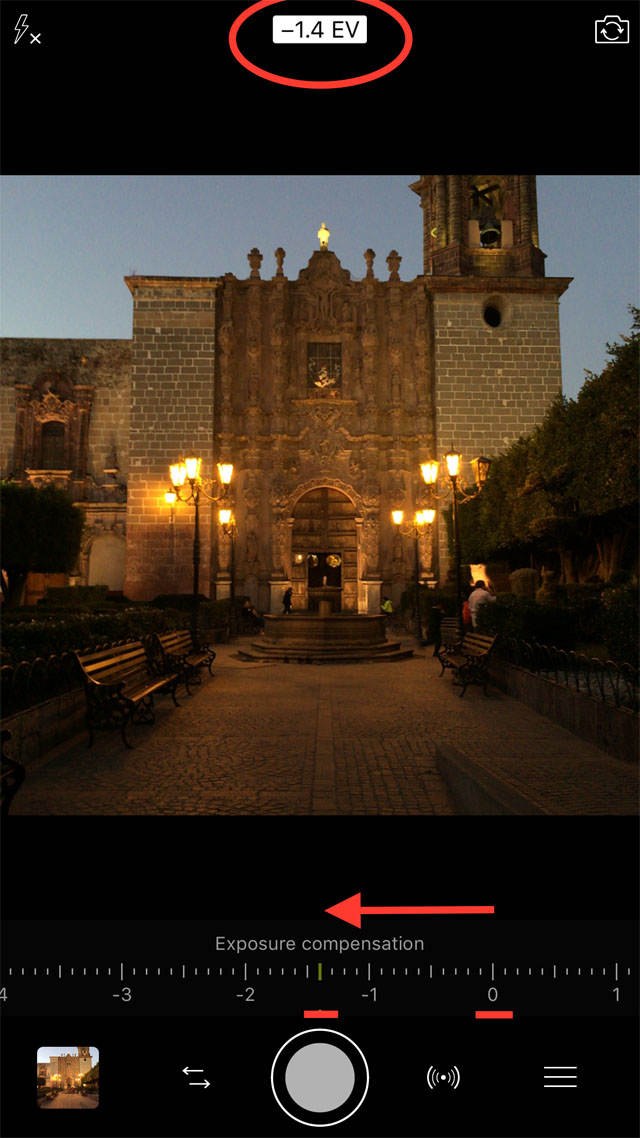
To make the photo darker than normal, drag the Exposure Compensation slider to somewhere in the negative (darker) side. In the photo below the EV was set to -1.4. Notice how much darker the image is now:
To make the photo brighter, drag the Exposure Compensation slider to the positive (brighter) side. In the photo below the EV was set to +1.2 which made the image much brighter:
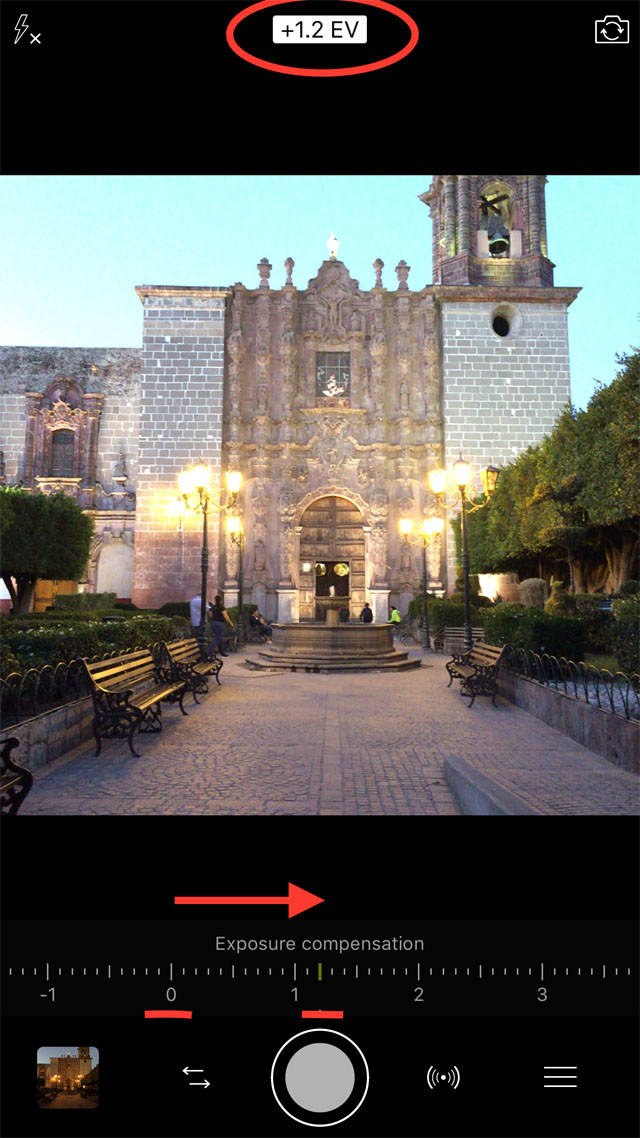
Below are the three photos of this scene shot at normal exposure (0.0 EV), darker exposure (-1.4 EV) and brighter exposure (+1.2 EV):
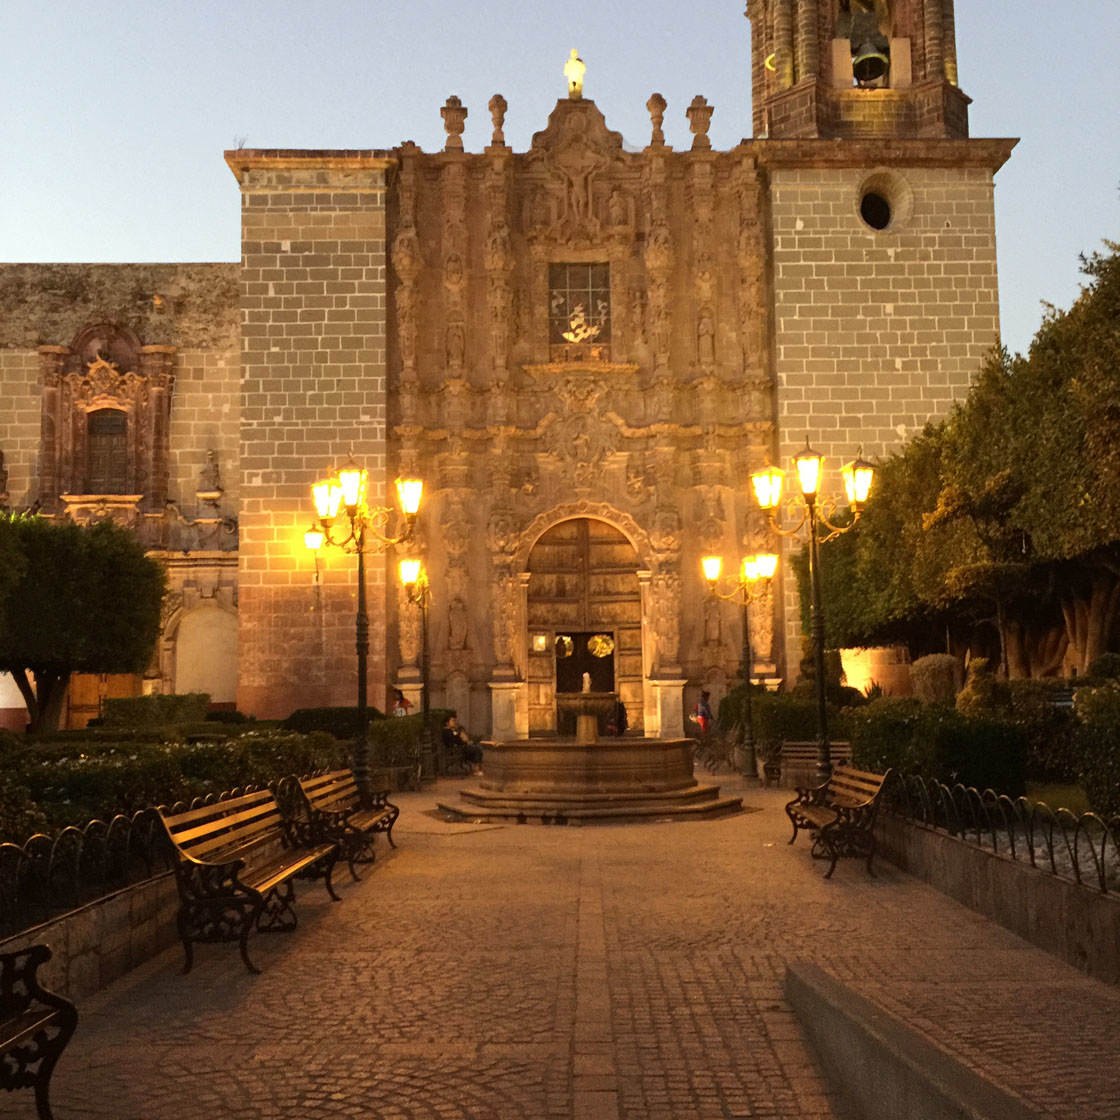
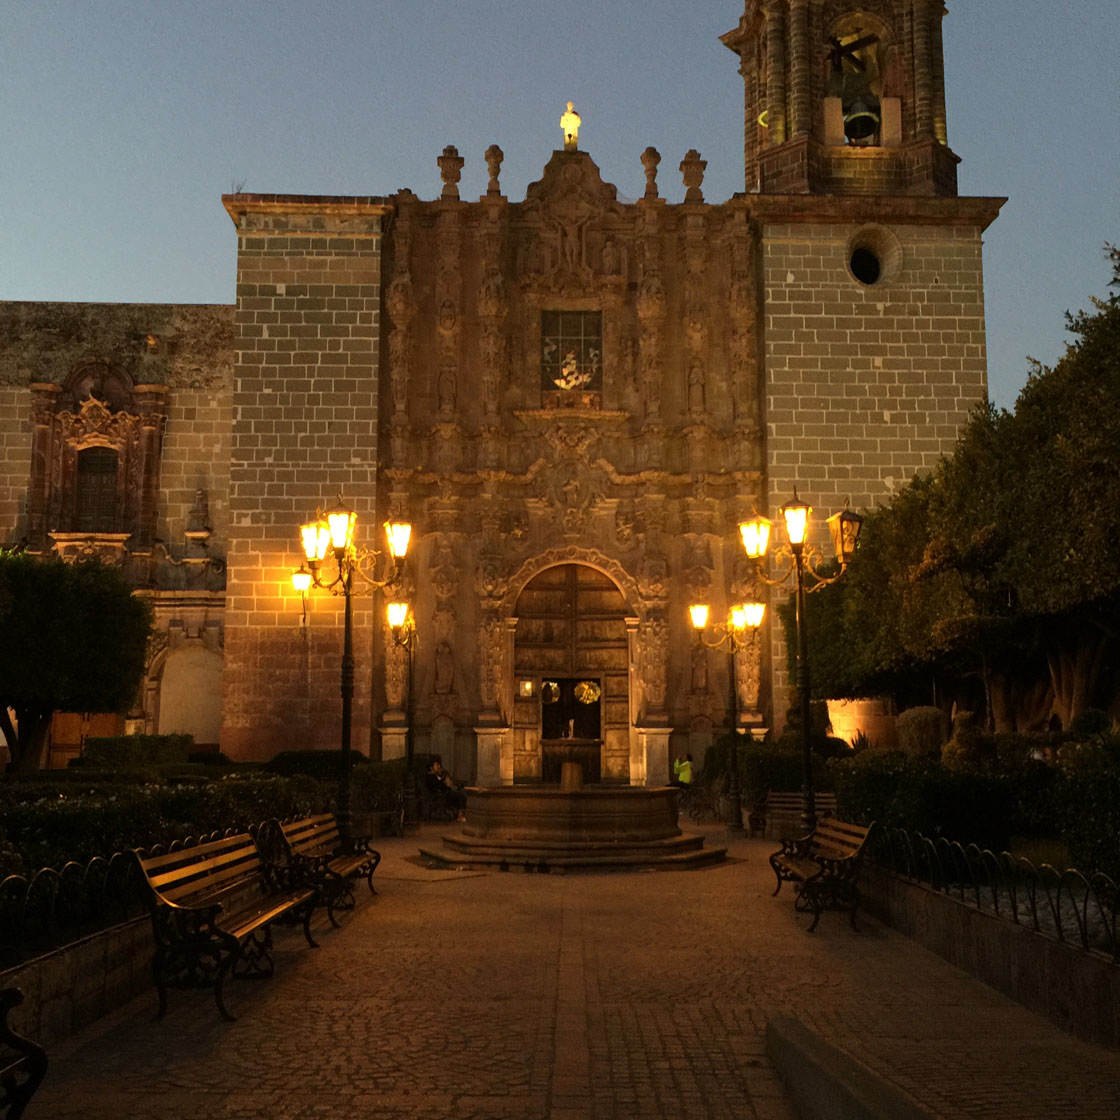
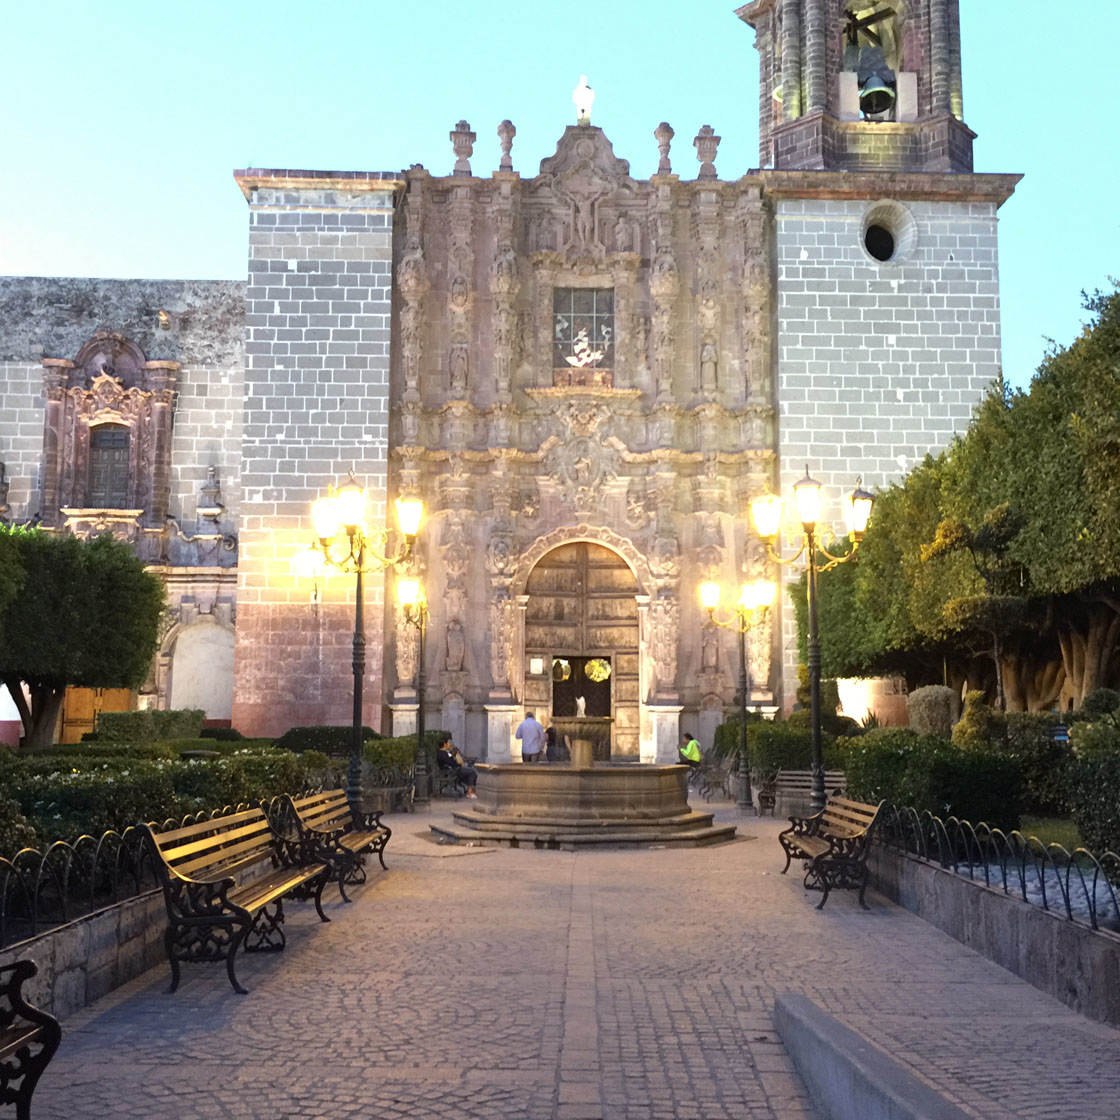
As you can see, if the camera suggests an exposure that isn’t what you like, it’s very easy to use the Exposure Compensation slider to make your photo darker or lighter.
4. Front Camera
If you want to take a self-portrait photo, you’ll need to tell the ProCamera app to use the front-facing camera. To switch to the front camera, simply tap the little Camera icon at the top right of the screen:
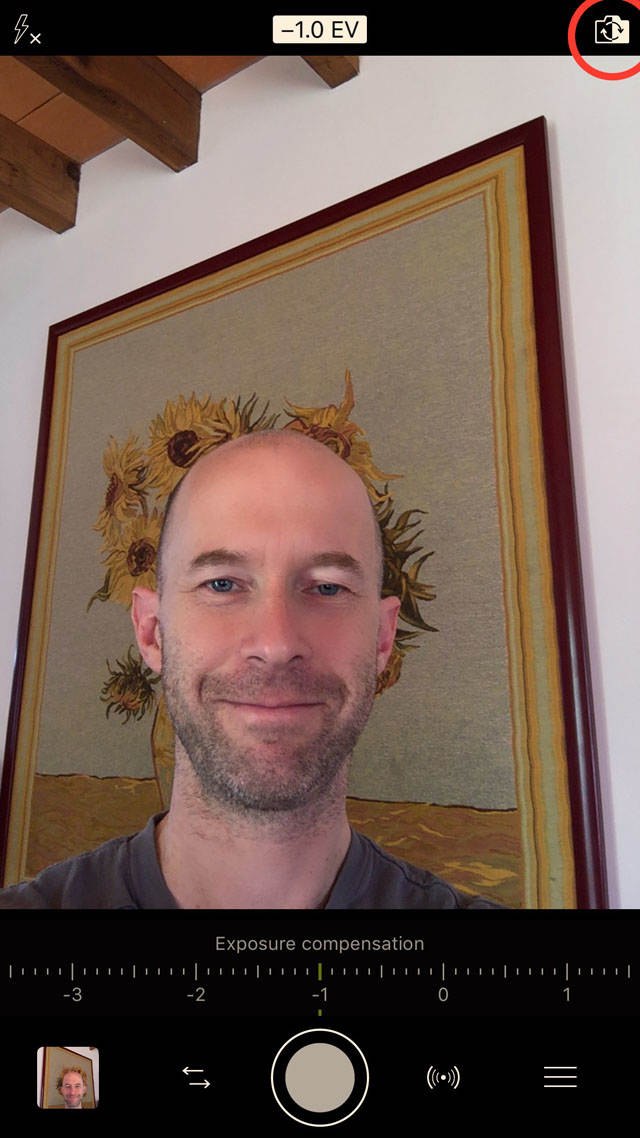
If you need to make your face brighter or darker, use the Exposure Compensation slider at the bottom of the screen to adjust the exposure (brightness).
After taking your photo, you can return to the rear-facing camera by tapping the Camera icon at the top of the screen.
5. Photo Mode
ProCamera has a range of different shooting modes for different situations and conditions, but Photo mode is the one you’re likely to use most often. This mode gives you access to the standard camera, as well as a useful selection of manual iPhone camera controls.
To ensure you’re in Photo mode, tap the opposing horizontal arrows icon to the left of the shutter button, then select the Photo shooting mode:
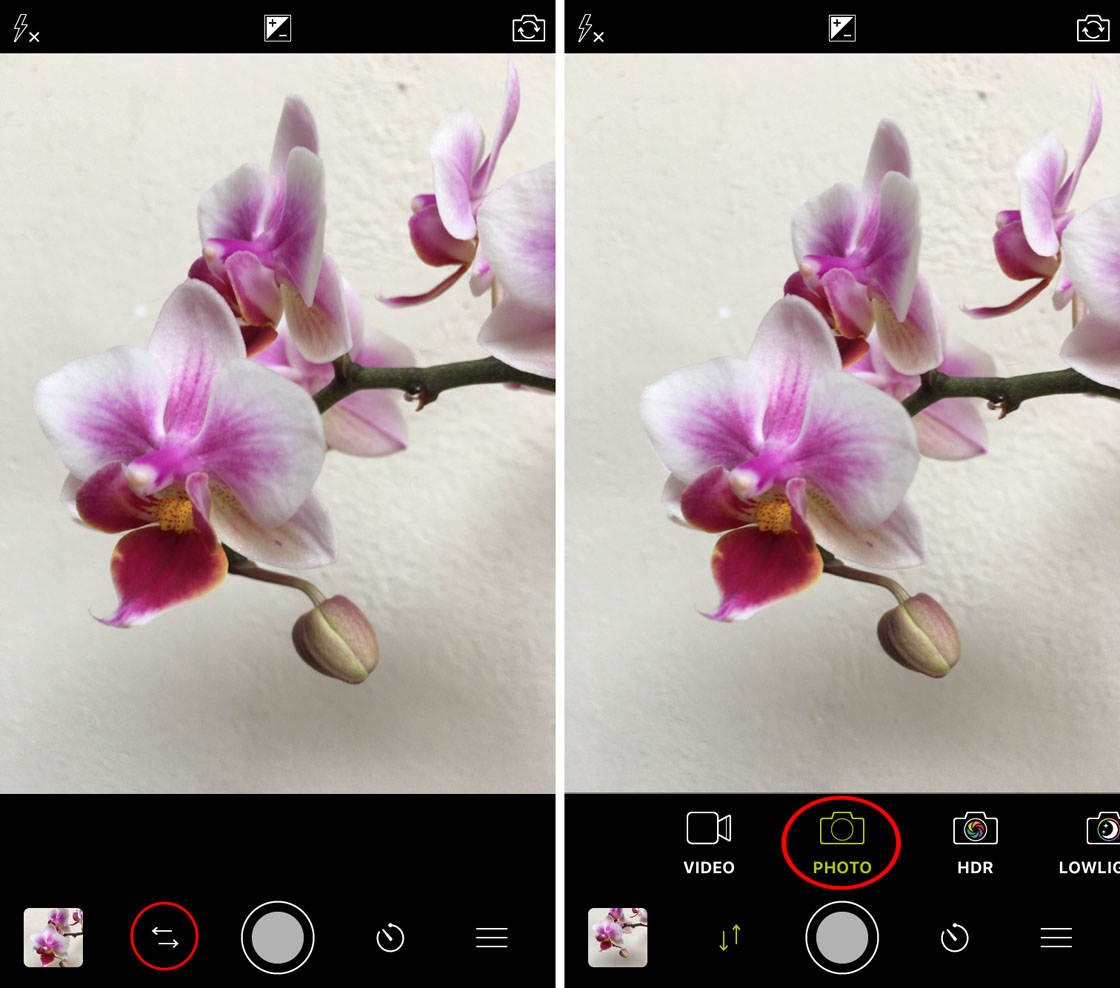
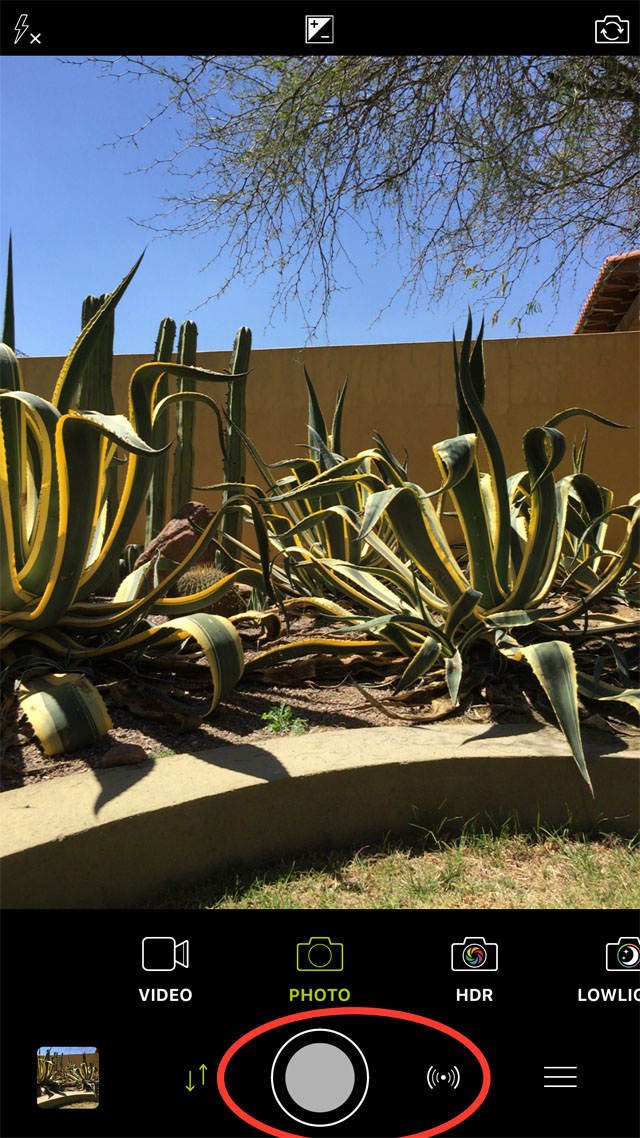
To take a picture, simply tap the round shutter button at the bottom of the screen:
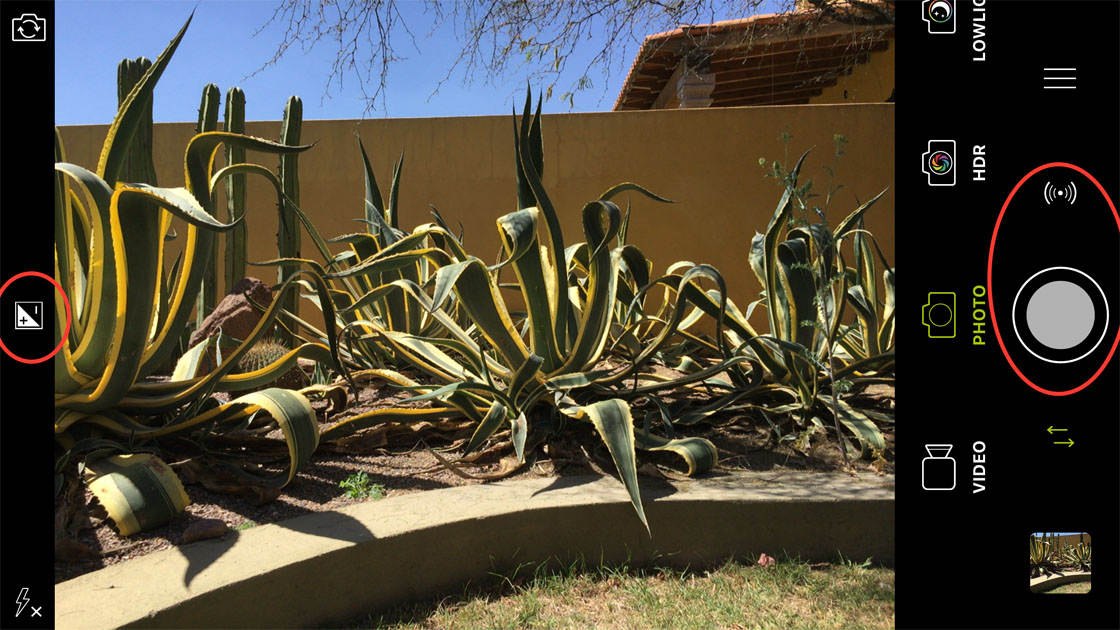
You can, of course, also take photos in horizontal orientation. When shooting like this the shutter button will appear on the right of the screen. Don’t forget that you can also tap the +/- icon to adjust exposure compensation (image brightness) before taking your photo:
To access the camera’s settings, tap the Menu icon (three lines) to the right of the shutter button (or above the shutter button if shooting in horizontal orientation). The camera setting icons will appear in the lower half of the screen:
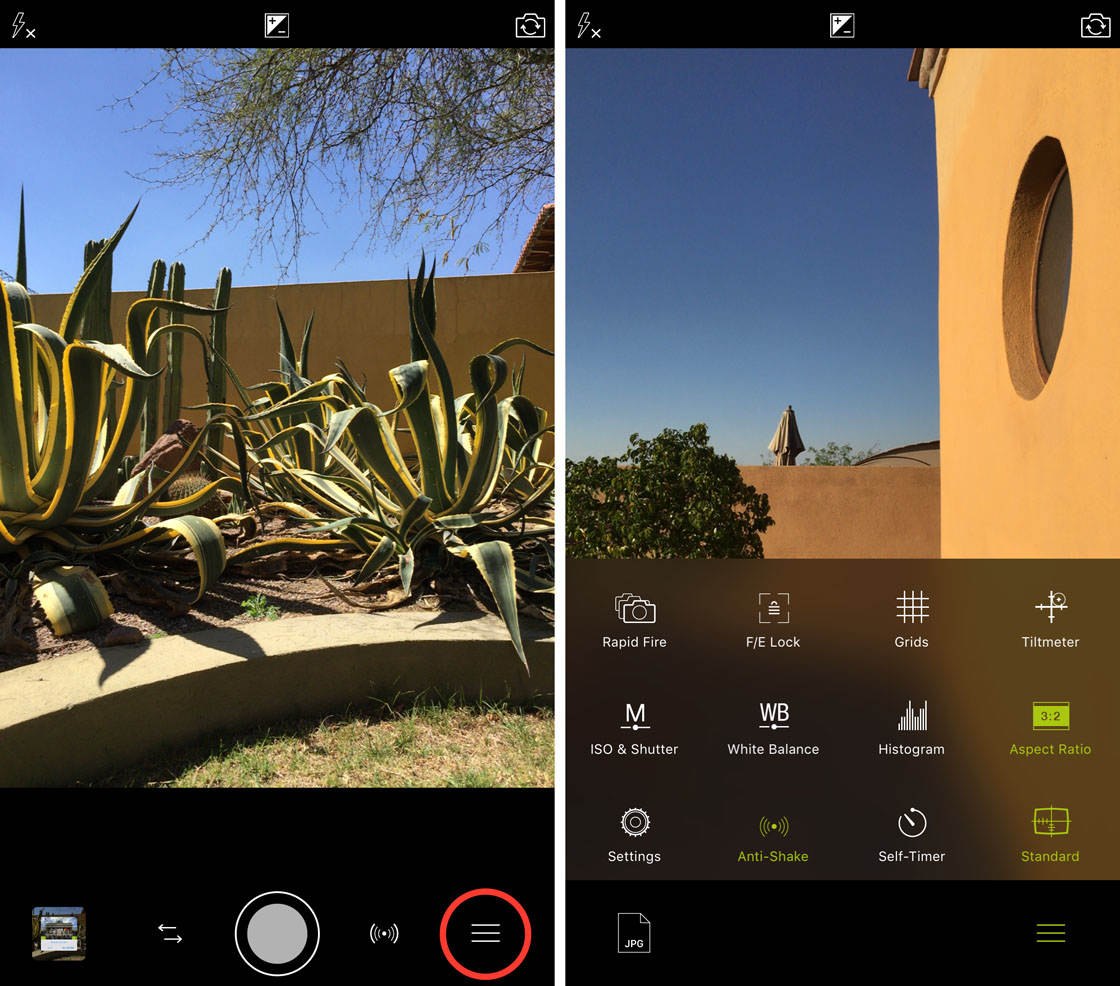
We’ll now explore how to use each of these camera settings…
5.1 Rapid Fire
Rapid Fire is the same as the Burst Mode feature in the iPhone’s native camera app. It’s great for photographing moving subjects as it allows you to take many photos very quickly, one after the other, for as long as you press and hold the shutter button.
To switch on Rapid Fire, tap the Menu icon (three lines) then select the Rapid Fire option. The icon will turn green to indicate that it’s switched on:
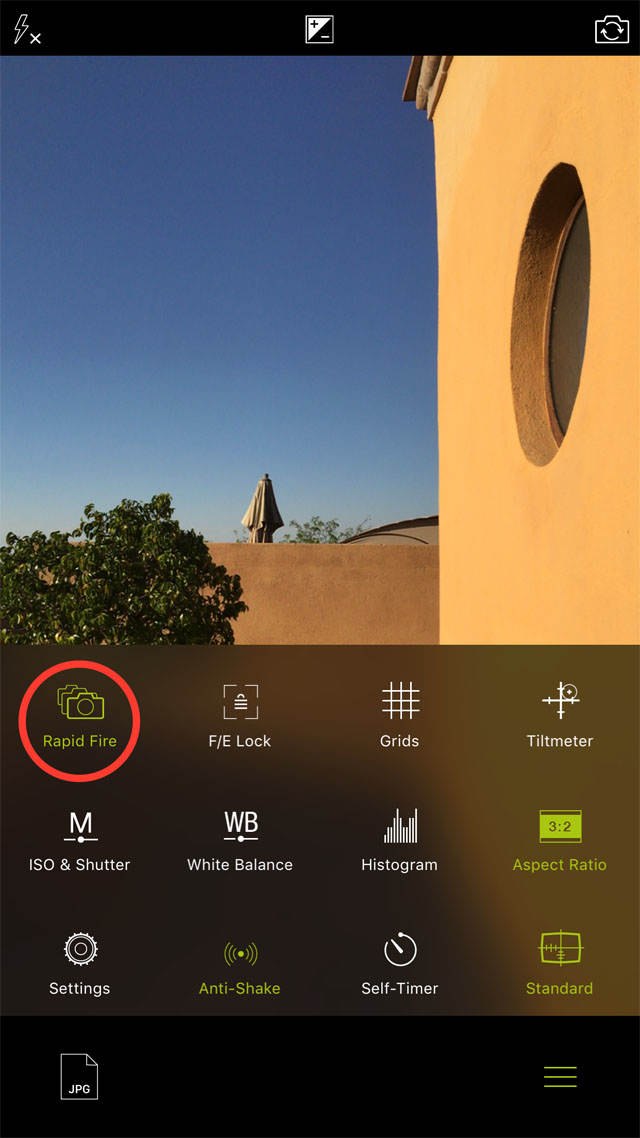
Tap the Menu icon again to hide the camera settings icons. When you’re ready to start shooting, simply press and hold the shutter button for as long as you want:
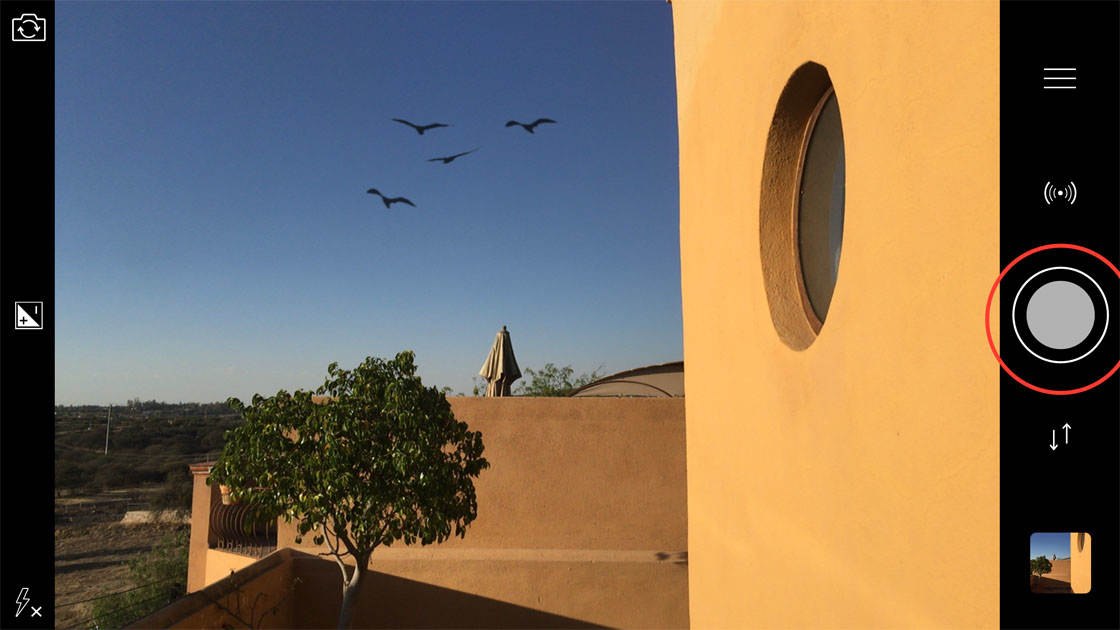
When you’re finished shooting, you’ll see multiple photos of the scene in your photo library. You can then delete the ones you don’t want and keep only the best shots.
5.2 F/E Lock
F/E Lock stands for Focus and Exposure Lock. You can use this feature to lock and maintain the focus and exposure values when taking photos.
Once the focus point and exposure level is locked, you can point the camera at different parts of the scene while maintaining the original focus and exposure settings that you chose.
Once you’ve composed your shot, tap once on the screen to display the focus and exposure icons – focus is the blue square and exposure is the yellow circle. You can now drag the focus and exposure points to different parts of the screen:
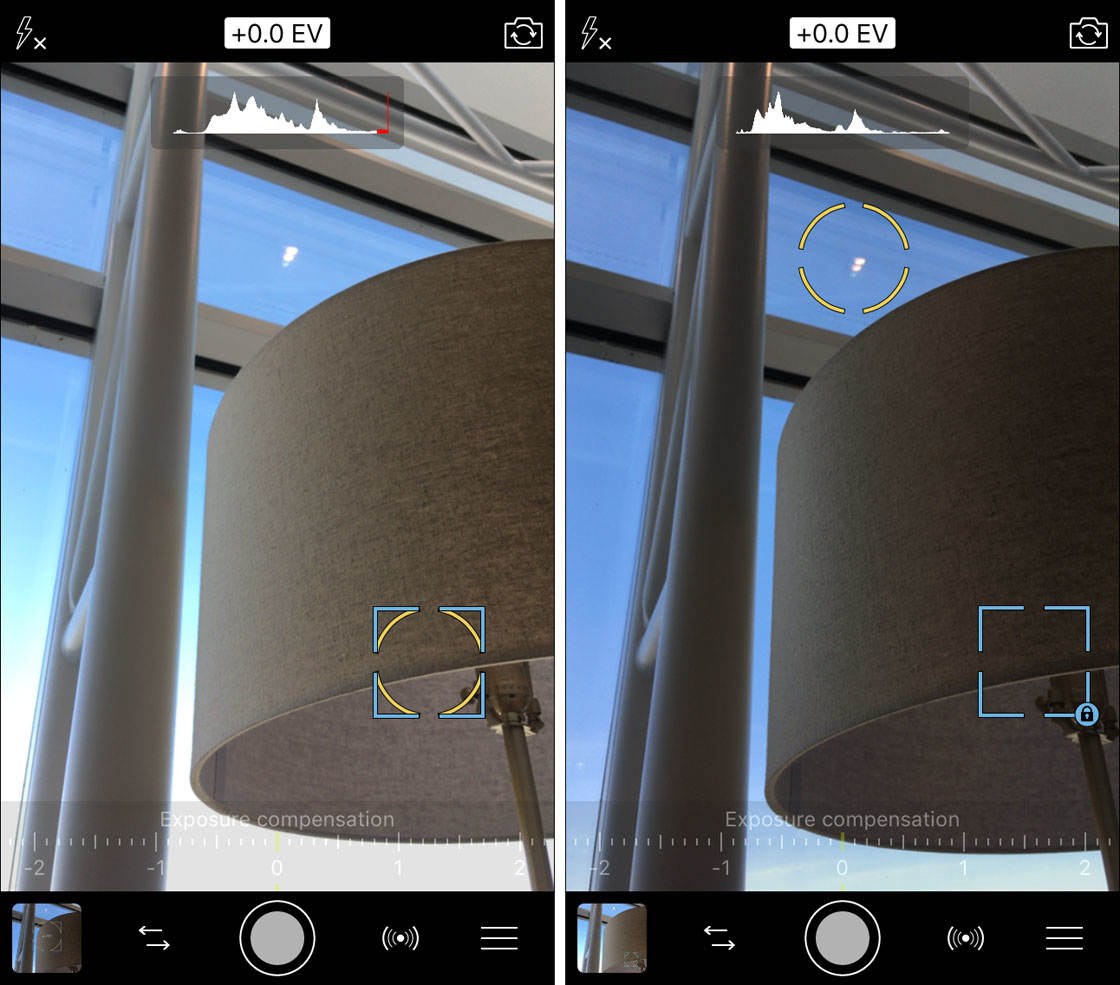
Drag the focus point (blue square) onto the subject that you want in sharp focus. Drag the exposure point (yellow circle) to the area that you want correctly exposed, e.g. the sky, foreground, subject, etc. Notice how the image brightness changes depending on how bright or dark the area is that you’re exposing for:
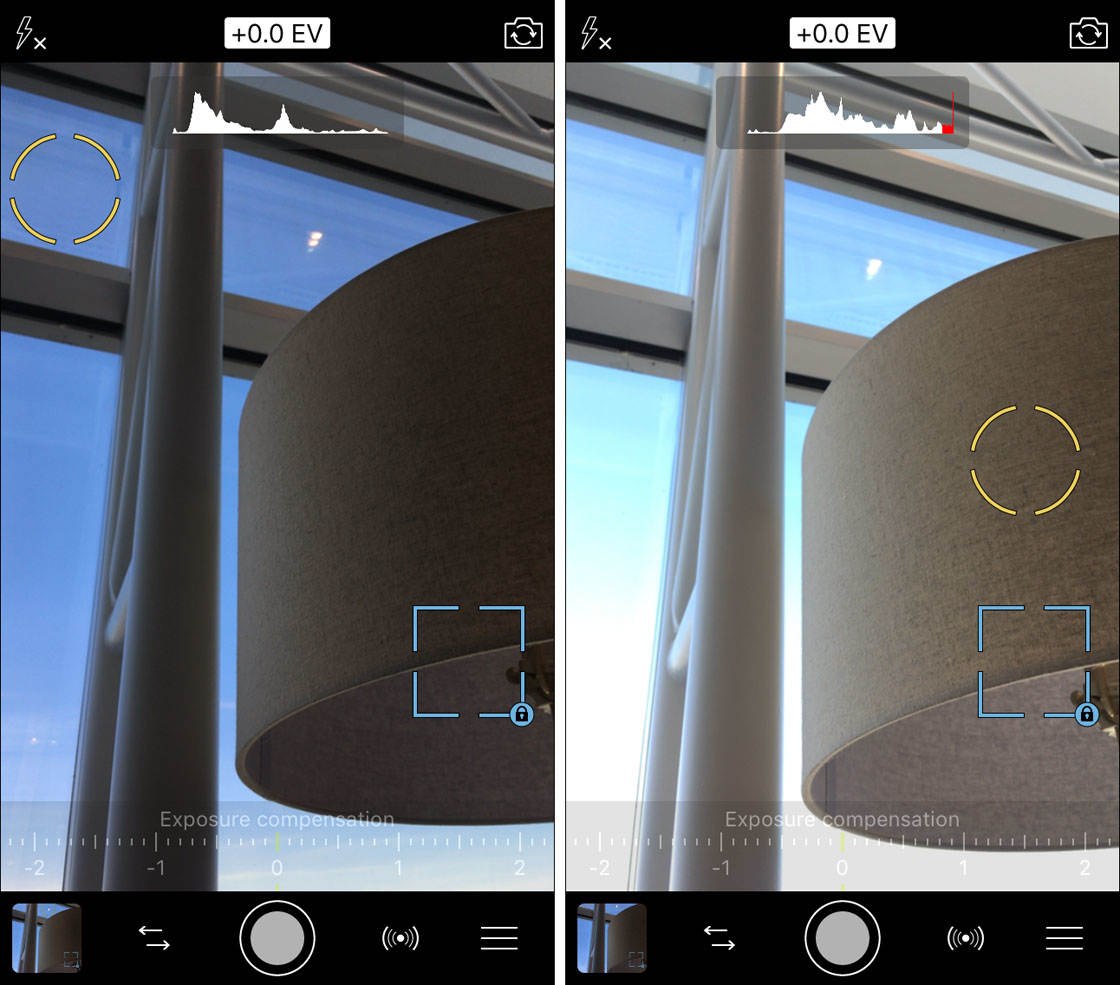
You could take the photo now, but if you want to try out different compositions by moving the camera slightly, you’re going to have a problem… As you move the camera, the exposure/brightness will change depending on where you point the lens.
To stop this from happening, tap the Menu icon (three lines) then select F/E Lock:
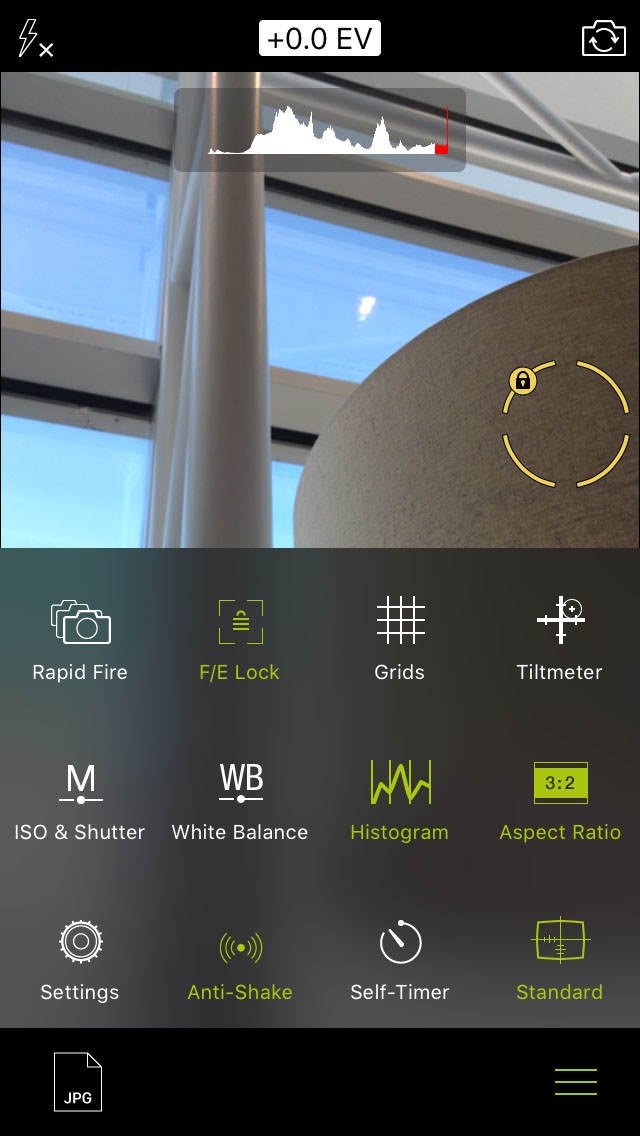
The focus and exposure values will now be locked, and won’t change no matter where you point the camera. When you’re done taking photos with the locked focus and exposure values, tap the Menu icon and turn off the F/E Lock option.
5.3 Grids
Switching on gridlines in the ProCamera viewfinder will help you when composing your photos. The grid helps you line up elements in your photo to ensure horizons are level and architectural lines are straight. It’s also great for helping you compose a photo according to the Rule of Thirds.
To switch on the gridlines, tap the Menu icon (three lines) then select Grids. Keep tapping the Grids option to display different types of gridlines on your screen:
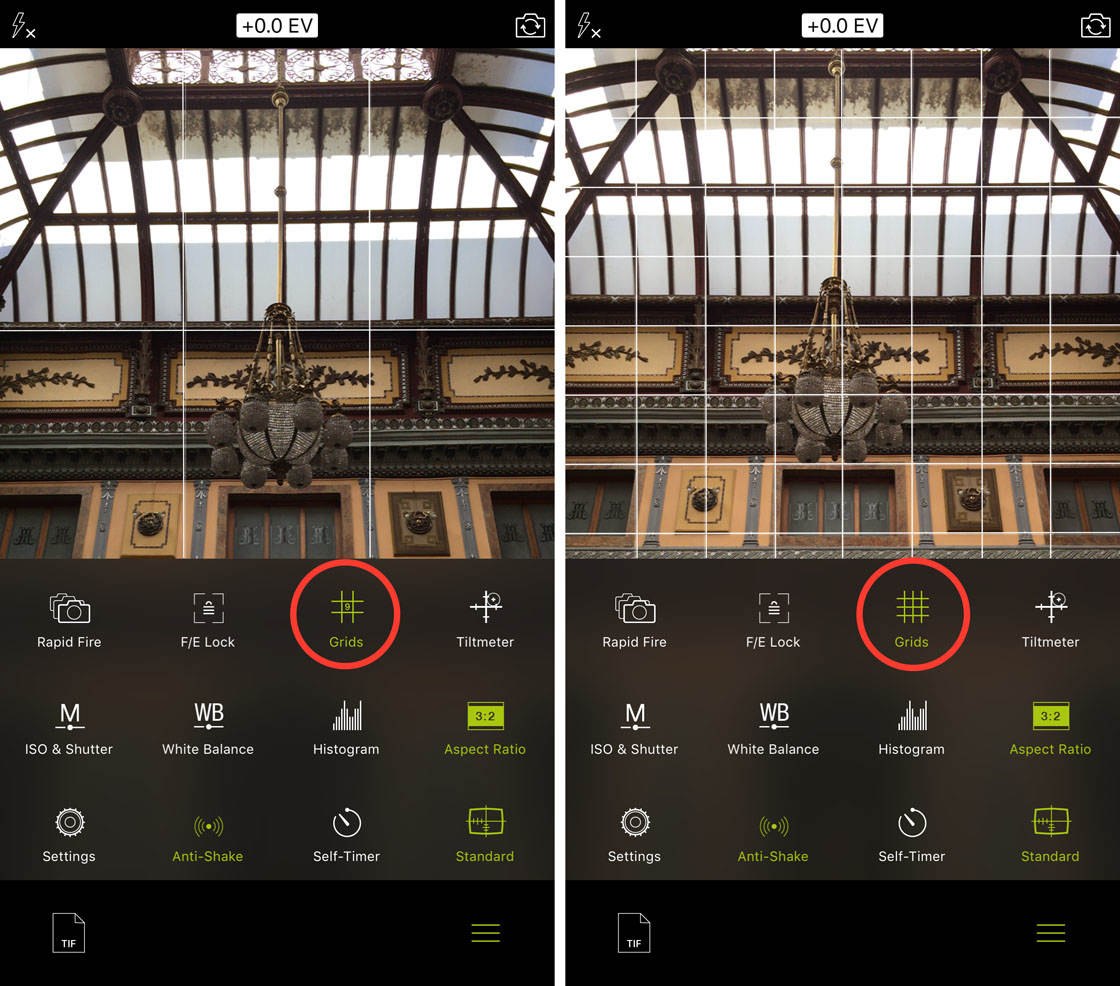
When you’ve selected the type of grid that you want, tap the Menu icon to hide the camera setting icons. You can now use the gridlines on the screen to help you compose your photo.
To switch off the gridlines, tap the Menu icon, then keep tapping the Grids option until it turns white.
5.4 Tiltmeter
The Tiltmeter is a simple graph-like method of showing how straight or level your iPhone is when taking a photo. The Tiltmeter is a fantastic tool for ensuring horizons or other lines in your photo are straight.
Tap the Menu icon, then select Tiltmeter. You’ll now see a large cross appear in the middle of the screen. Tap the Menu icon to hide the camera settings icons. As you tilt your iPhone, you’ll see a small + symbol appear beside the Tiltmeter:
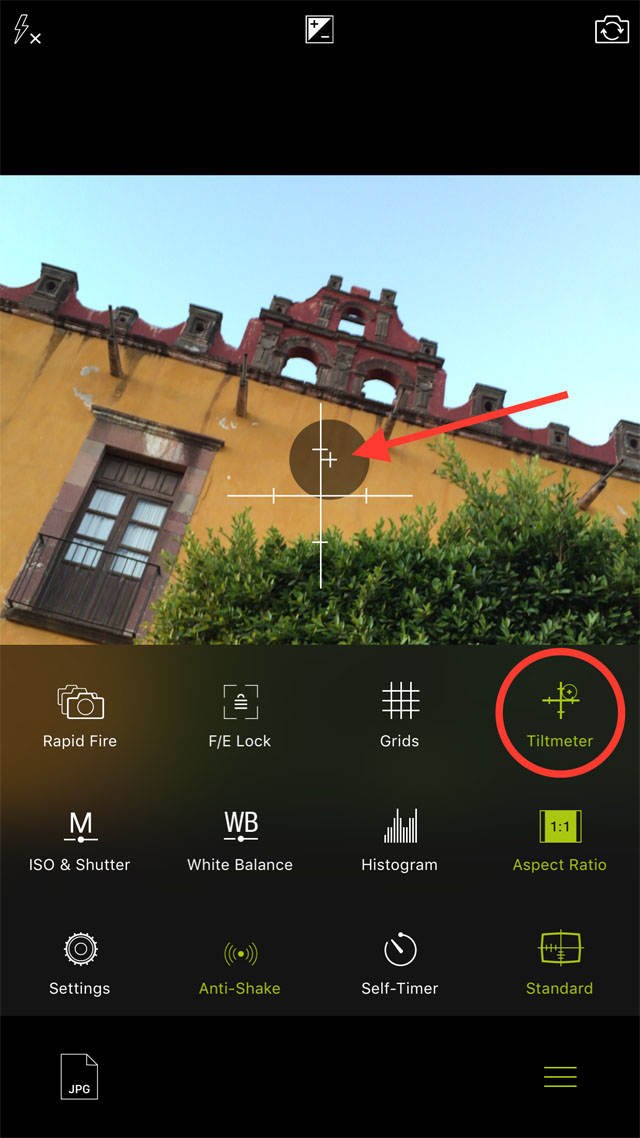
When the + symbol lines up exactly with the Tiltmeter grid, the Tiltmeter will turn green and you know that your iPhone is perfectly level.
To turn off the Tiltmeter, open the Menu and tap Tiltmeter so that the icon appears white.
5.5 Manual Mode
Manual Mode allows you to control shutter speed and ISO. These settings can be used for fine-tuning the exposure, just like you can on a DSLR camera. Tap the Menu icon, then select the ISO & Shutter option so that the M appears green:
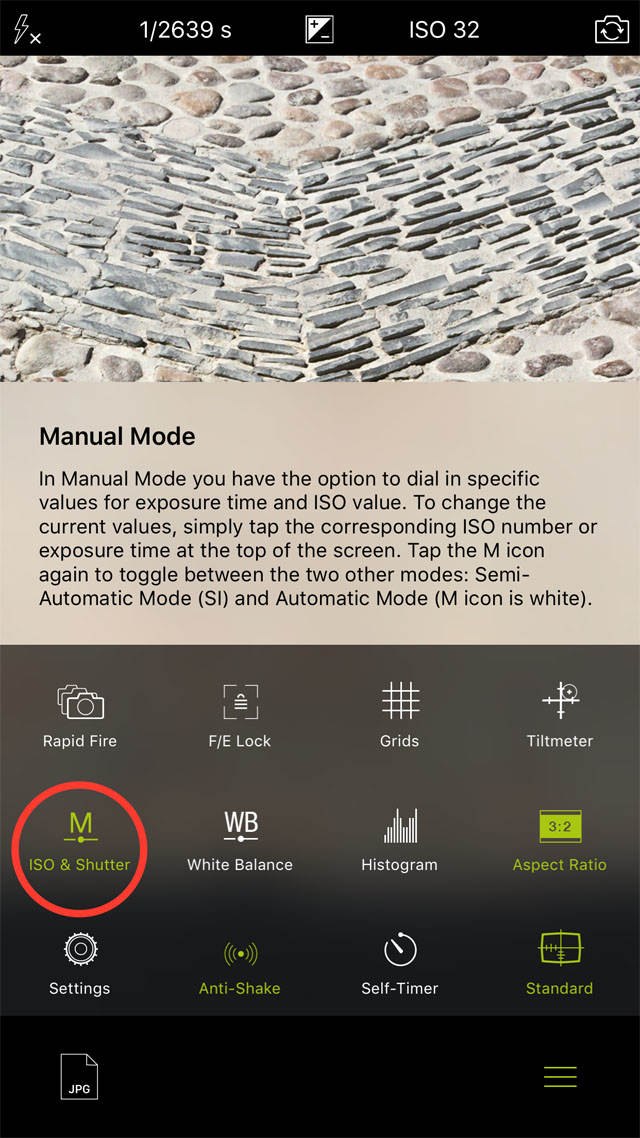
Tap the Menu icon to hide the camera setting icons. To adjust the shutter speed, tap the top left Shutter Speed icon as shown below. At the bottom you’ll see a sliding scale of shutter speeds that you can swipe across:
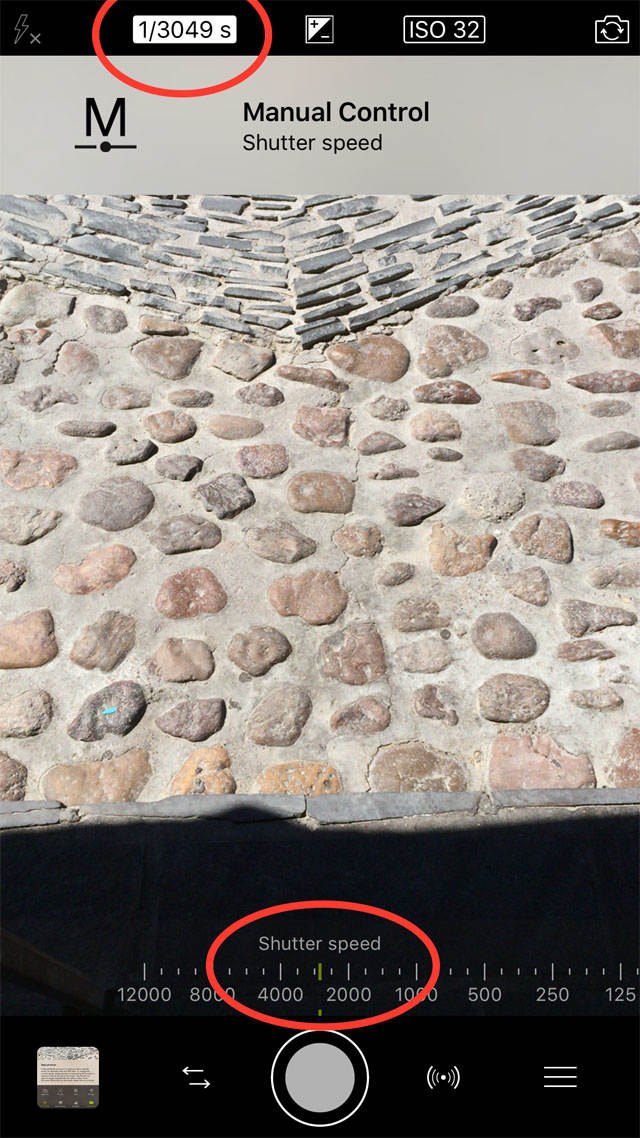
The Shutter Speed setting lets you adjust the exposure time. Using a faster shutter speed helps you avoid camera shake in low light due to the shorter exposure time, and will result in a darker photo. A slower shutter speed lets more light in, but can result in blurry photos if the camera is moved during the exposure.
A fast shutter speed will freeze any movement in the scene, whereas a slow shutter speed will capture movement as motion blur.
To adjust the ISO, tap the top right ISO icon as shown below, then use the ISO slider to dial in the value you want:
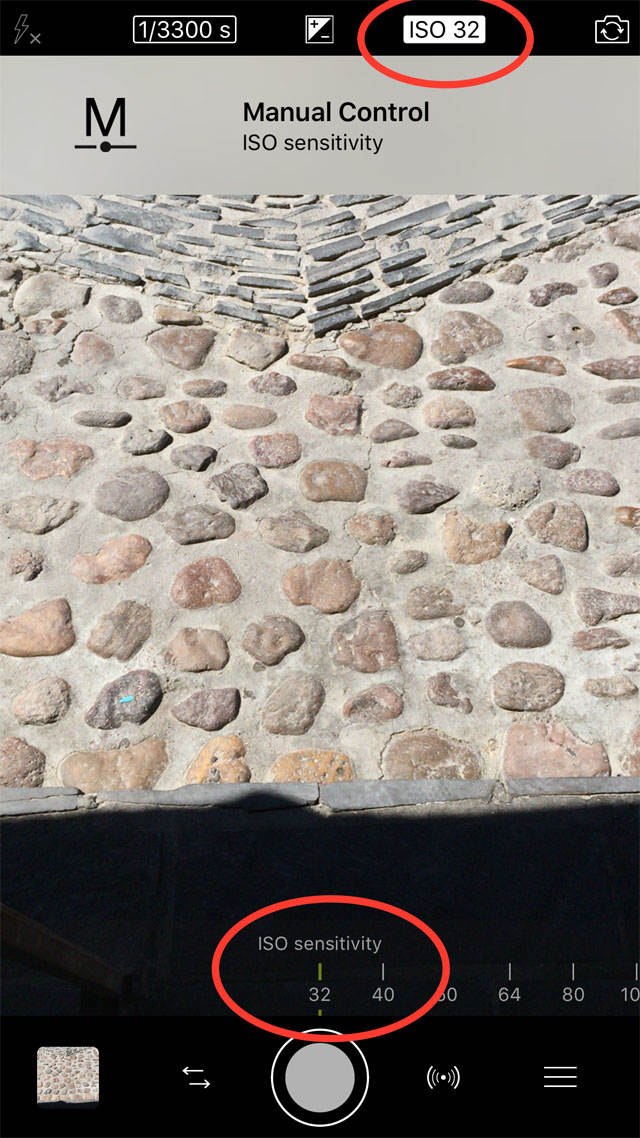
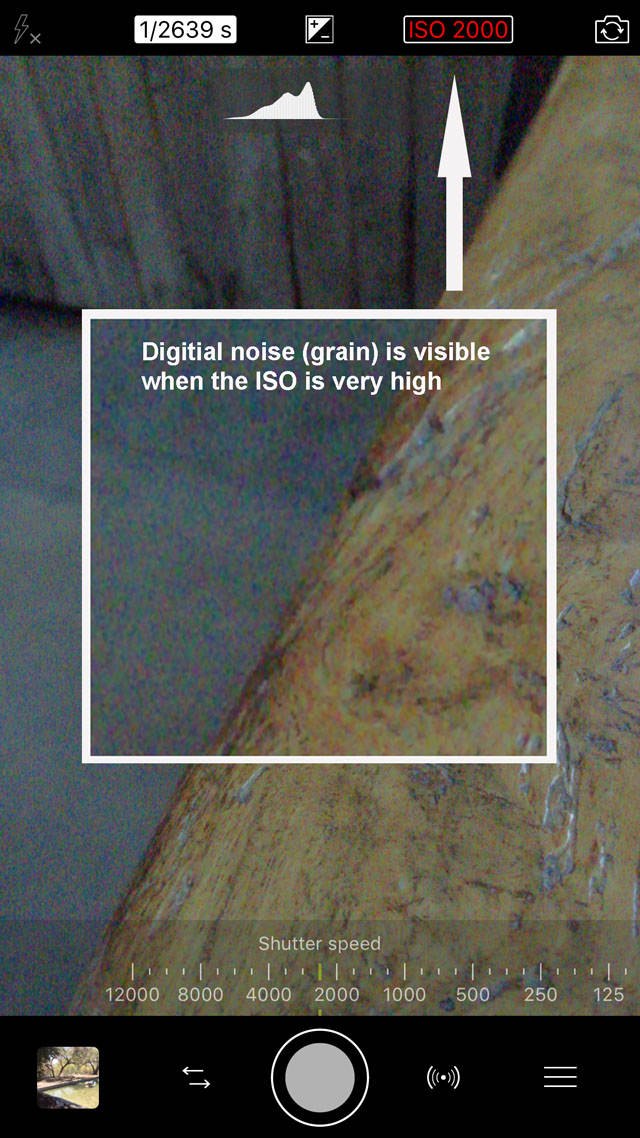
The ISO setting makes the camera more or less sensitive to light. Increasing the ISO makes the camera more sensitive to light, which means the camera can use a faster shutter speed in low light, helping you to avoid camera shake. However, keep in mind that increasing ISO often introduces noise (grain) into your photo:
When you’re happy with the exposure of the image, tap the shutter button to take the photo. To turn off Manual Mode, open the Menu and keep tapping the ISO & Shutter option until the M appears white.
5.6 SI Mode
SI stands for Semi-Automatic mode. This mode is used for altering either the shutter speed or the ISO. It’s different to Manual Mode where you can alter both the shutter speed and the ISO settings independently of each other.
With SI mode you either choose the shutter speed, and the app will choose the appropriate ISO to ensure you get a good exposure. Or you choose the ISO, and the app will choose the best shutter speed.
To switch on SI Mode, tap the Menu icon, then keep tapping the ISO & Shutter option until you see SI appear in green:
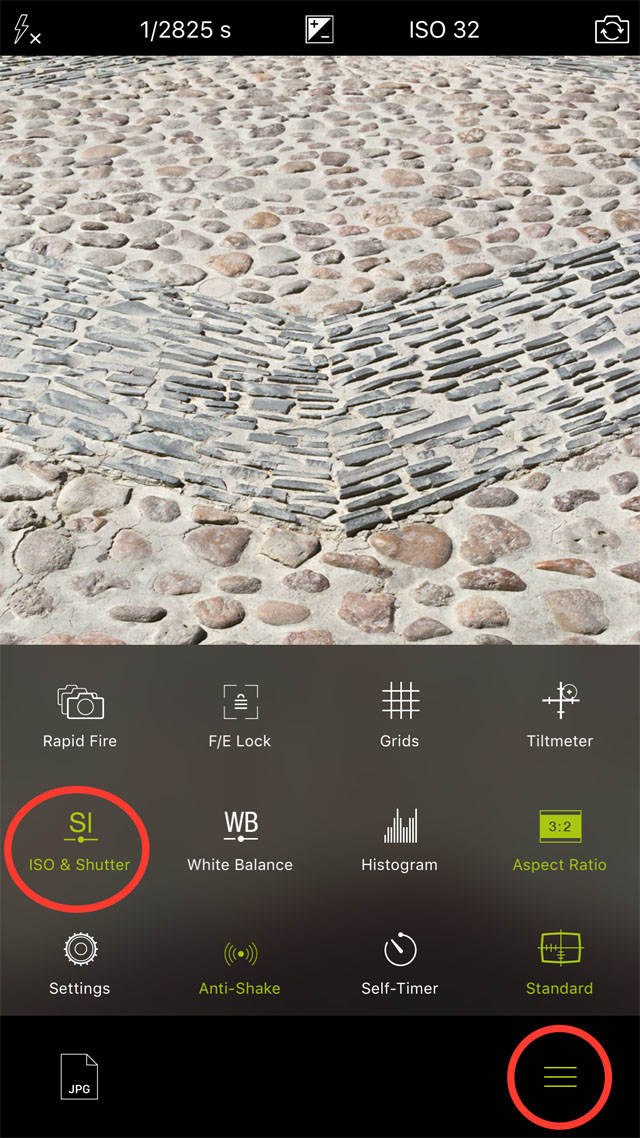
Tap the Menu icon to hide the camera setting icons. To change the ISO setting, tap the ISO icon at the top right of the screen, then use the ISO slider to dial in the setting you want:
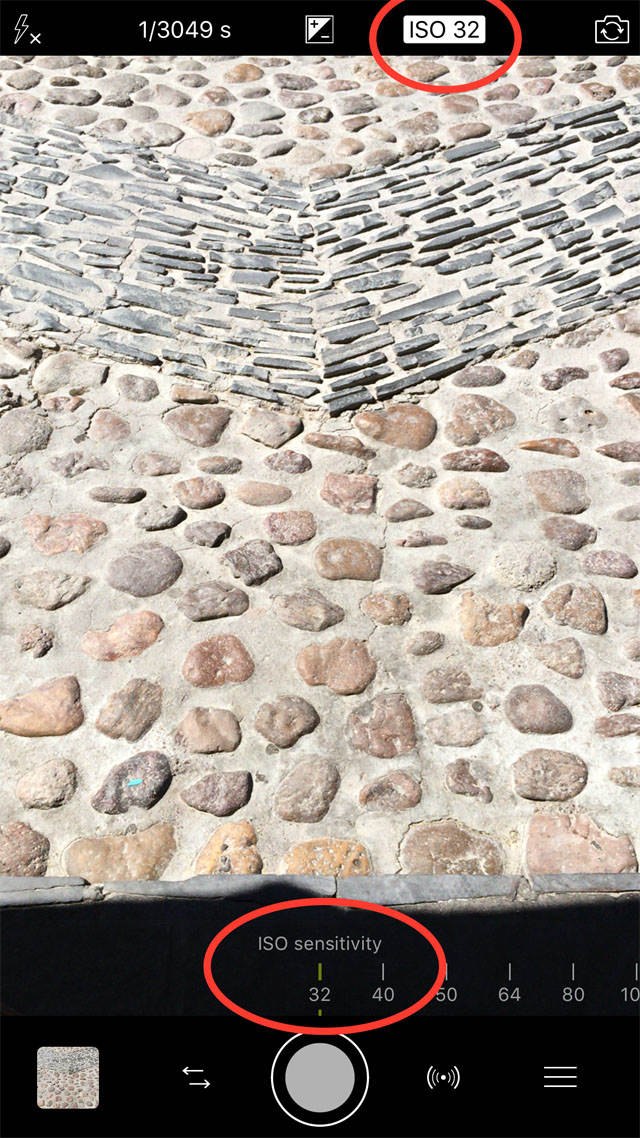
When you adjust the ISO setting, notice how the shutter speed setting at the top left of the screen automatically changes.
To set the shutter speed, tap the Shutter Speed icon at the top left of the screen, then use the shutter speed slider to dial in the setting you want:
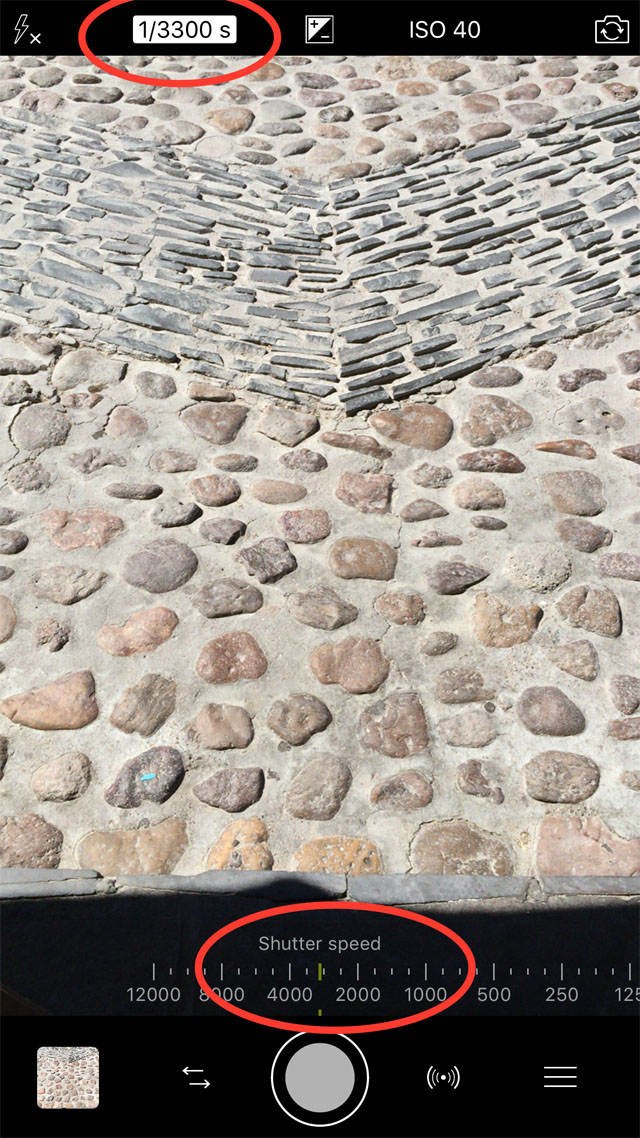
When you adjust the shutter speed, notice how the ISO setting at the top right of the screen automatically changes.
To turn off SI Mode, open the Menu and keep tapping the ISO & Shutter option until the icon appears with a white M.
5.7 White Balance
White Balance allows you to alter the color temperature of your image to either make the colors cooler (more blue) or warmer (more yellow). Tap the Menu icon, then select White Balance:
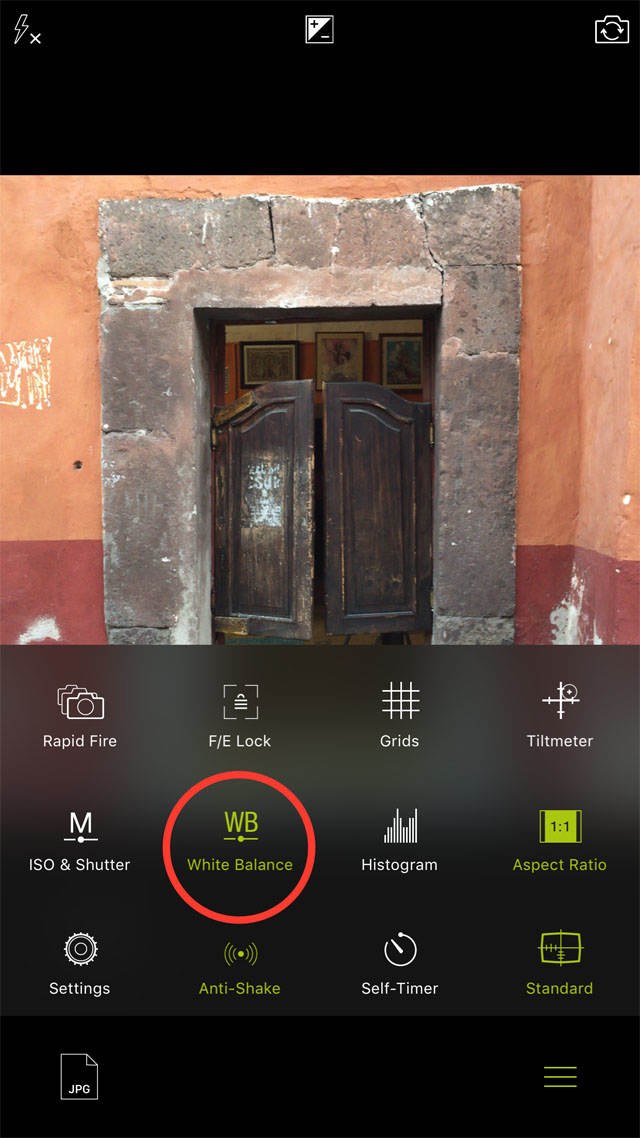
Tap the Menu icon again to hide the camera setting icons. Tap the AWB icon at the bottom of the screen to exit the Automatic White Balance mode, and enter the Manual White Balance mode where you can adjust the color temperature of the image:
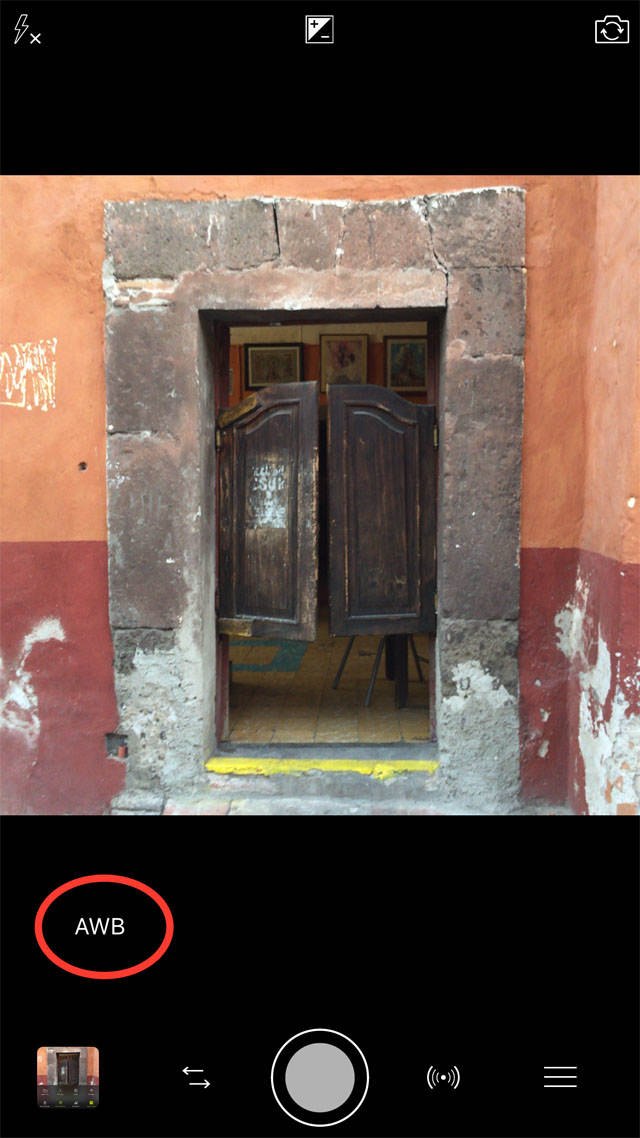
Color temperature is measured in Kelvin (K), which is a numbered system that describes how blue-toned or yellow-toned your photos are. The sample photo below of a Mexican doorway is at a normal 5988 K:
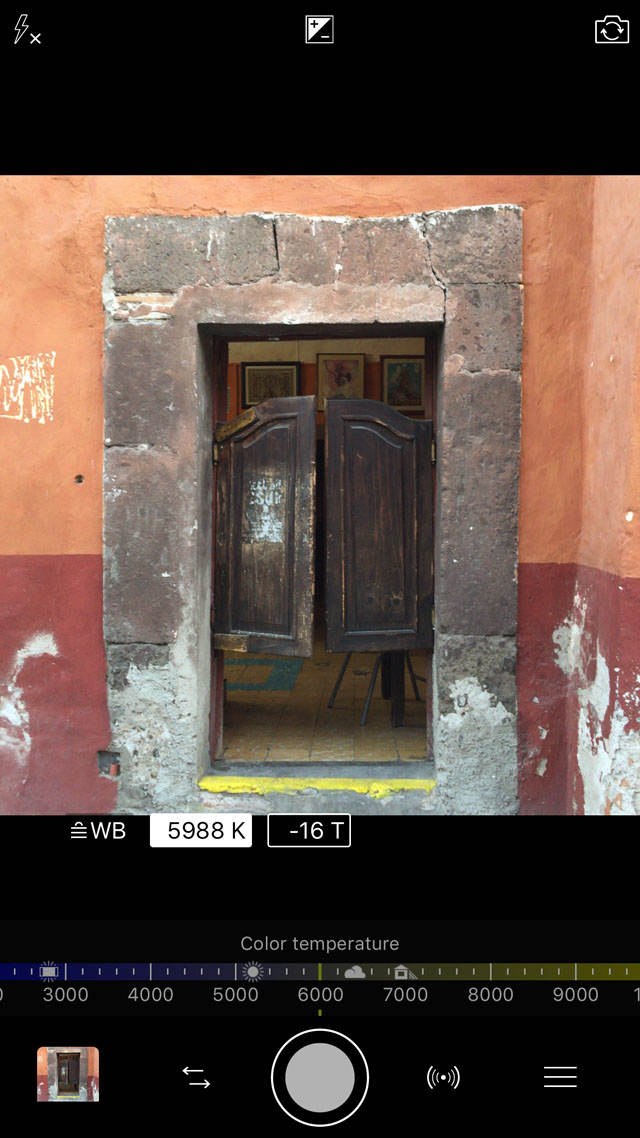
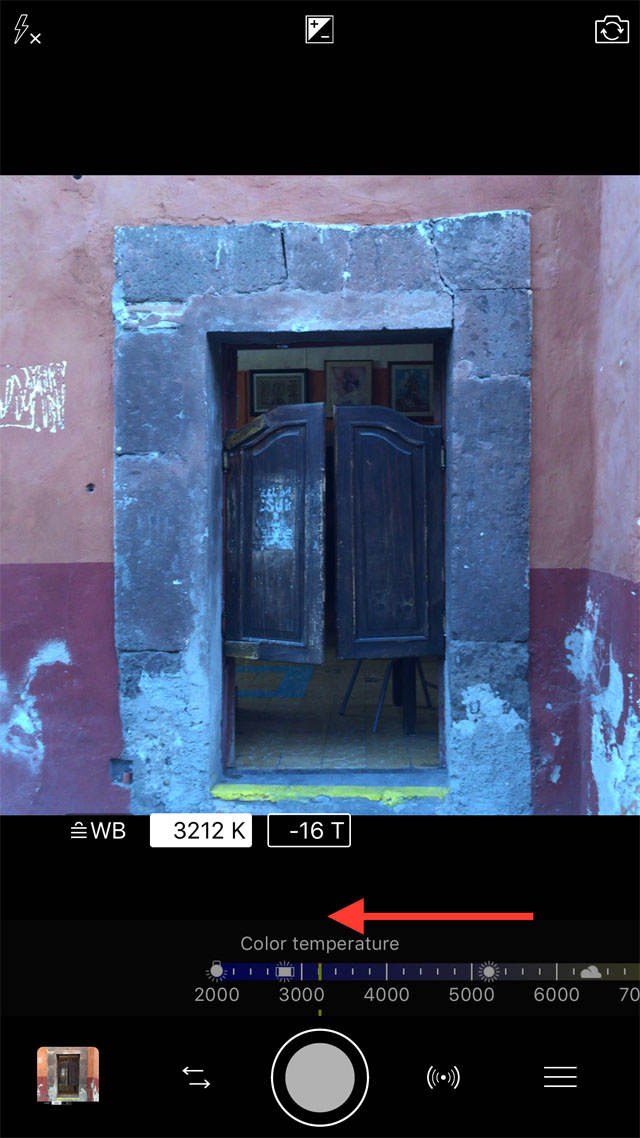
To add a blue tint to your photo, drag the Color Temperature slider toward the smaller numbers on the scale. In this case the photo was changed from 5988 K down to 3212 K. The photo becomes more blue as the Kelvin numbers get smaller:
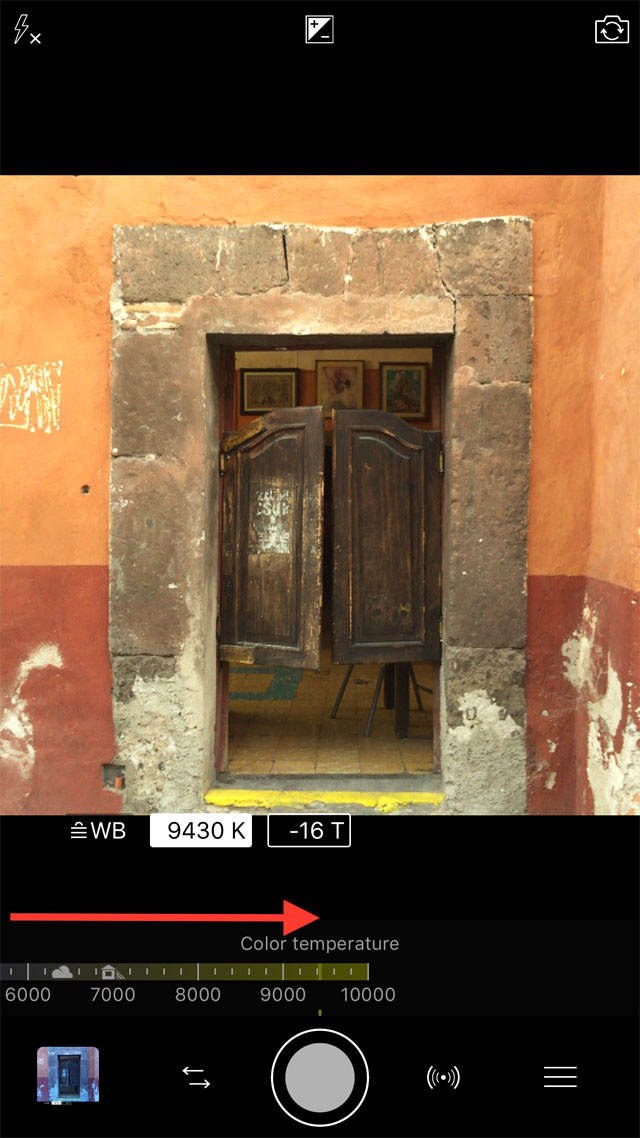
To add a yellow tint to your photo, drag the Color Temperature slider toward the larger numbers on the scale. In this case, the white balance was set to 9430 K. The photo becomes more yellow as the Kelvin numbers get larger:
To turn off the White Balance settings, open the Menu and tap the White Balance option so that it turns white.
5.8 Histogram
A histogram is a graph that shows a visual representation of the brightness or darkness of the pixels in your photo, i.e. how your photo is exposed. It helps you to understand whether your photo has a good balanced exposure, or whether it might be under-exposed (too dark) or over-exposed (too bright).
To display the histogram on your screen, tap the Menu icon, then tap the Histogram option. At the top of the screen you’ll see a series of vertical bars that look like a mountain:
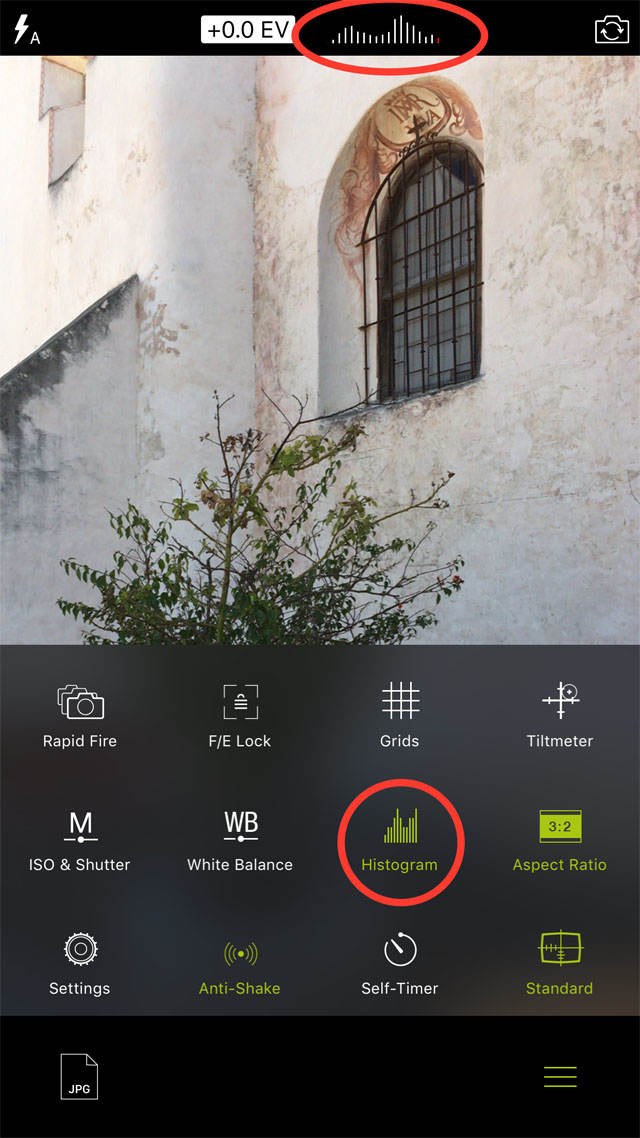
If you point your camera at different parts of a scene, e.g. a bright sky then a dark foreground, you’ll notice that the position of the bars on the histogram change according to the brightness of the scene.
The left side of the histogram graph represents the shadow or black areas. The right side represents the bright areas or highlights. The middle section represents mid-tones (tones of a medium brightness).
The height of the peaks in the graph represent the number of pixels of a particular brightness (shadows, mid-tones, highlights).
A high peak on the left of the histogram means you have a lot of dark tones in your image, indicating that it may be under-exposed. A high peak on the right means you have a lot of bright tones in your image, indicating that it may be over-exposed.
If you use the Exposure Compensation tool (+/-) to adjust the exposure of your photo, you’ll instantly see these changes reflected in the histogram. For a balanced exposure, try to aim for an even distribution of vertical bars across the entire length of the histogram.
There are actually three different visual representations of the histogram in ProCamera. If you keep tapping the Histogram icon in the menu, you’ll see the histogram displayed in different ways across the top of the screen:
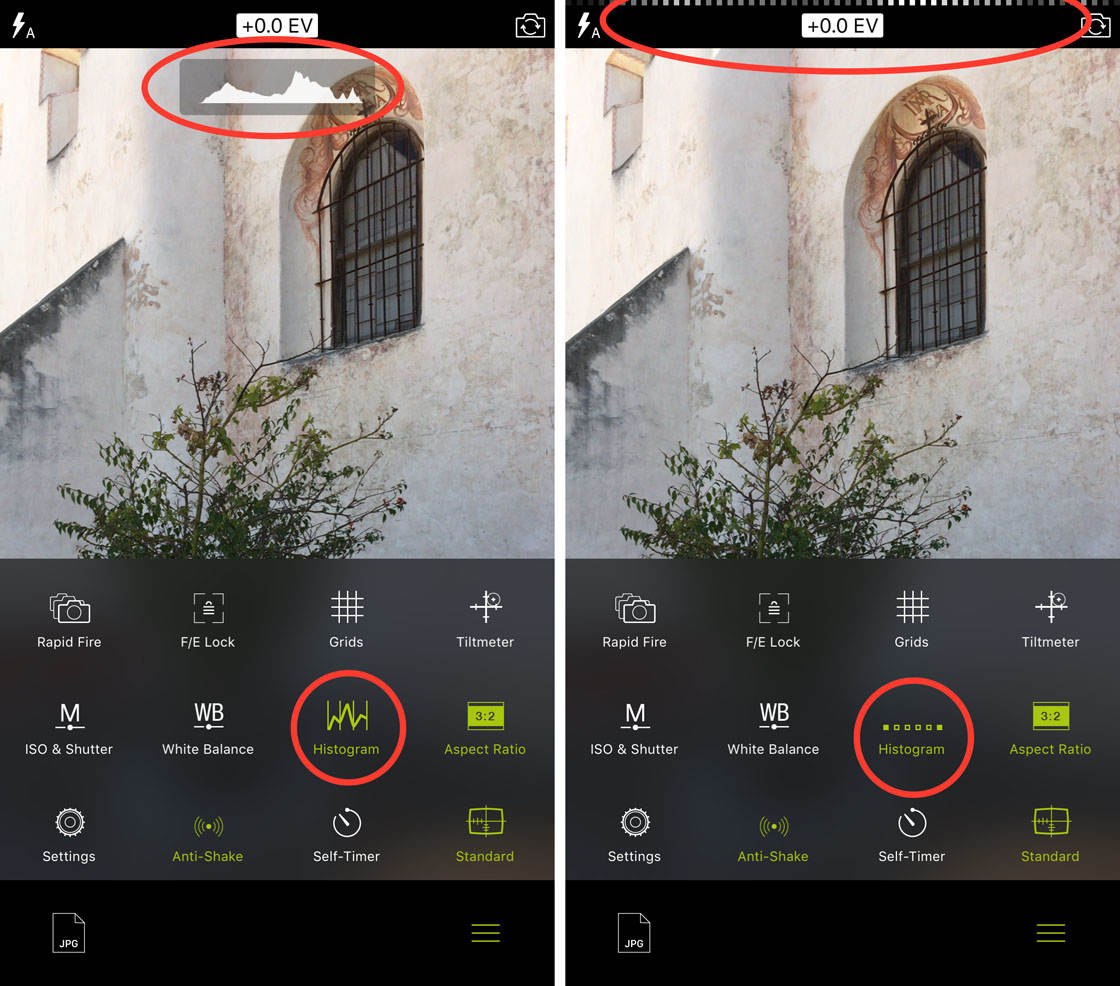
If you don’t want to see the histogram on the screen when taking photos, open the Menu, then keep tapping the Histogram option until it turns white.
5.9 Aspect Ratio
Aspect ratio is a term that describes the relationship between how wide your photo is to how tall it is. Have you ever purchased a frame at a store and then found that your favorite printed photo has the wrong dimensions to fit the frame? This is because the aspect ratio of the photo is different to that of the frame.
In ProCamera you can change the aspect ratio to fit your photographic style and pre-plan for your photo framing needs.
For most cameras the default aspect ratio is 3:2. Tap the Menu icon and you’ll notice that the Aspect Ratio is currently set to 3:2 (unless you’ve already changed this setting previously):
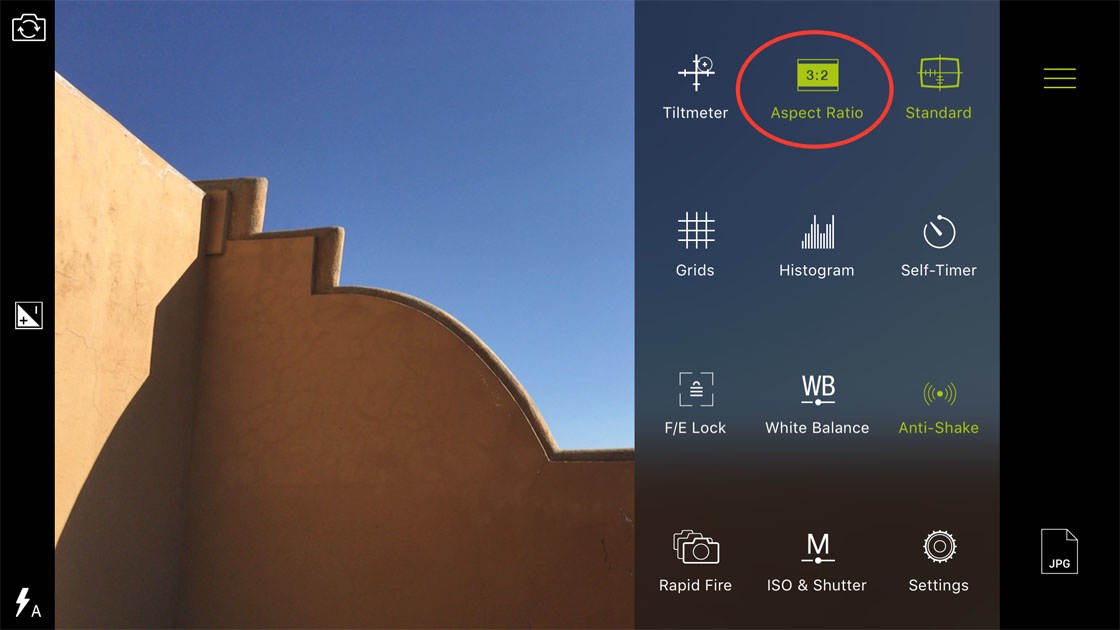
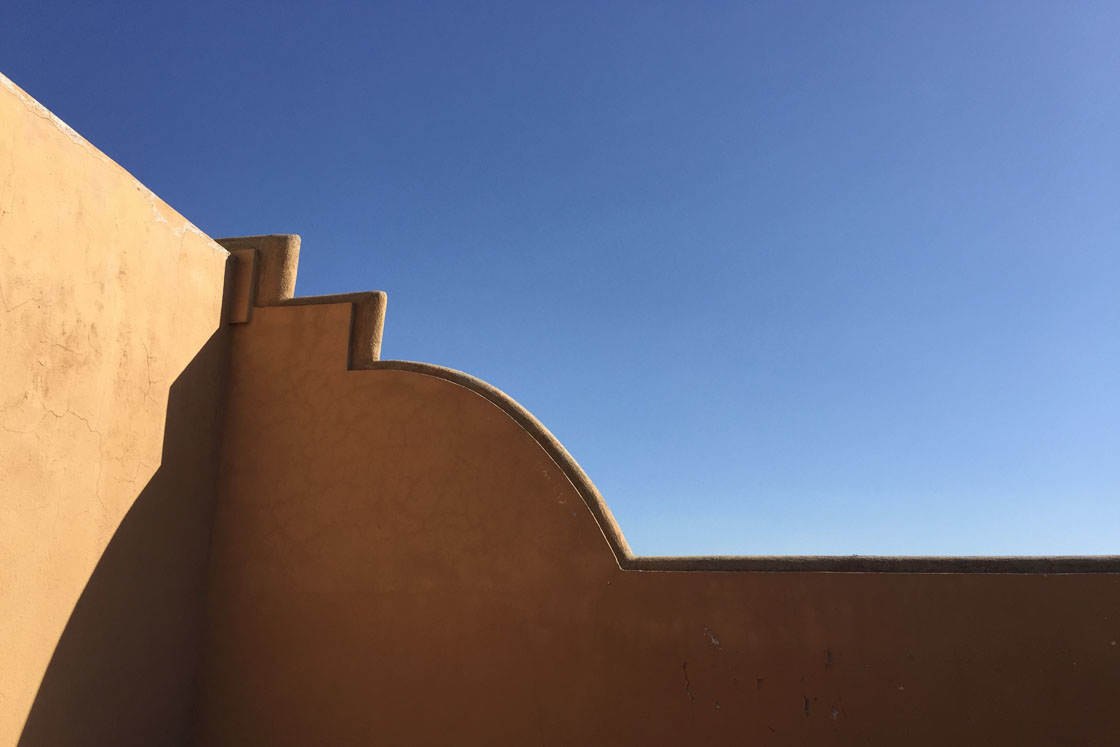
Use the 3:2 aspect ratio if you want to print out your picture to fit the following frame sizes: 4×6, 8×12, 16×24 inches. Below is an example of a photo taken using the 3:2 aspect ratio:
If you keep tapping the Aspect Ratio icon in the menu, it will toggle through all of the aspect ratios that you can shoot in. The 16:9 aspect ratio creates a wide image that’s very good for using in video or movie productions as it’s the same ratio as HD television sets and many computer screens:
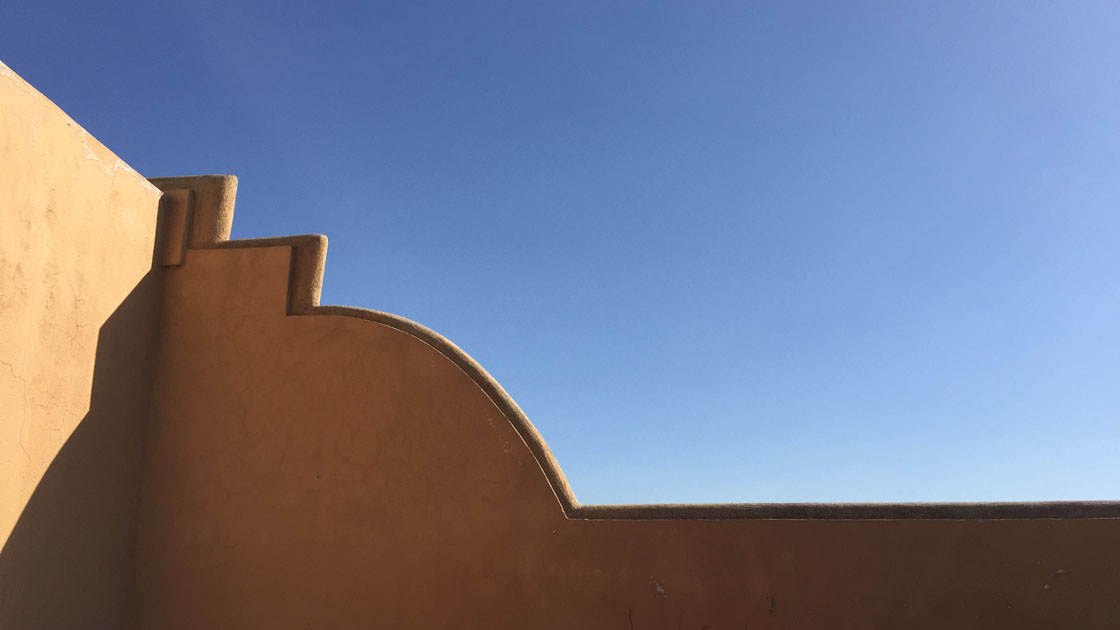
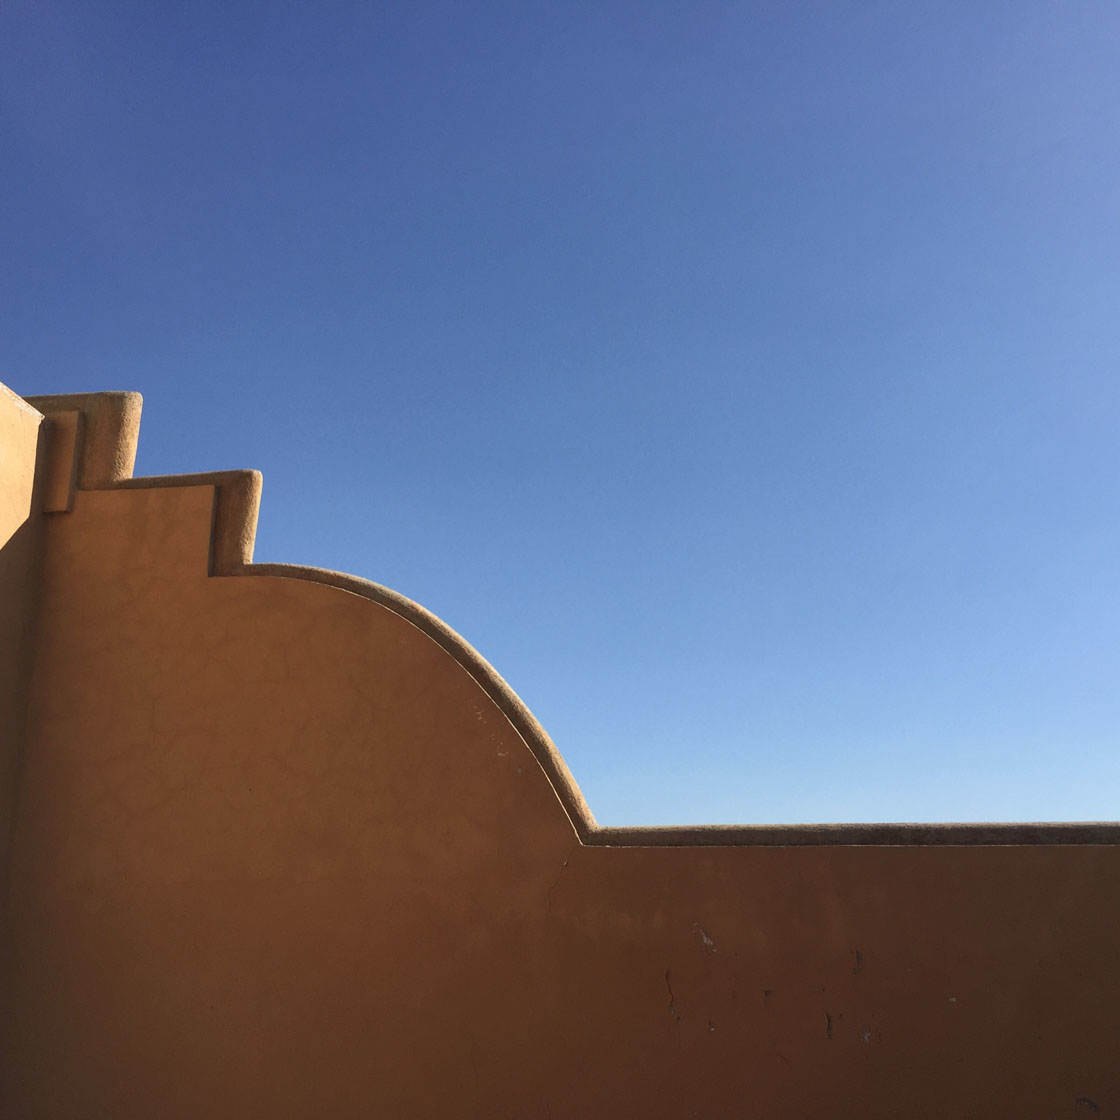
The 1:1 aspect ratio is a perfect square. The square 1:1 ratio works well for any photo frames that are square-shaped, and also for photos that you intend to upload to Instagram in square format:
The 3:1 aspect ratio is called a panoramic ratio. A panoramic ratio of 3:1 is excellent for shooting wide landscapes, as the resulting image is very wide:

If you’ve studied art theory, you might like to use the Golden Mean aspect ratio. The Golden Mean is a mathematical formula developed by the early Greeks to help artists create the most pleasing compositions possible:
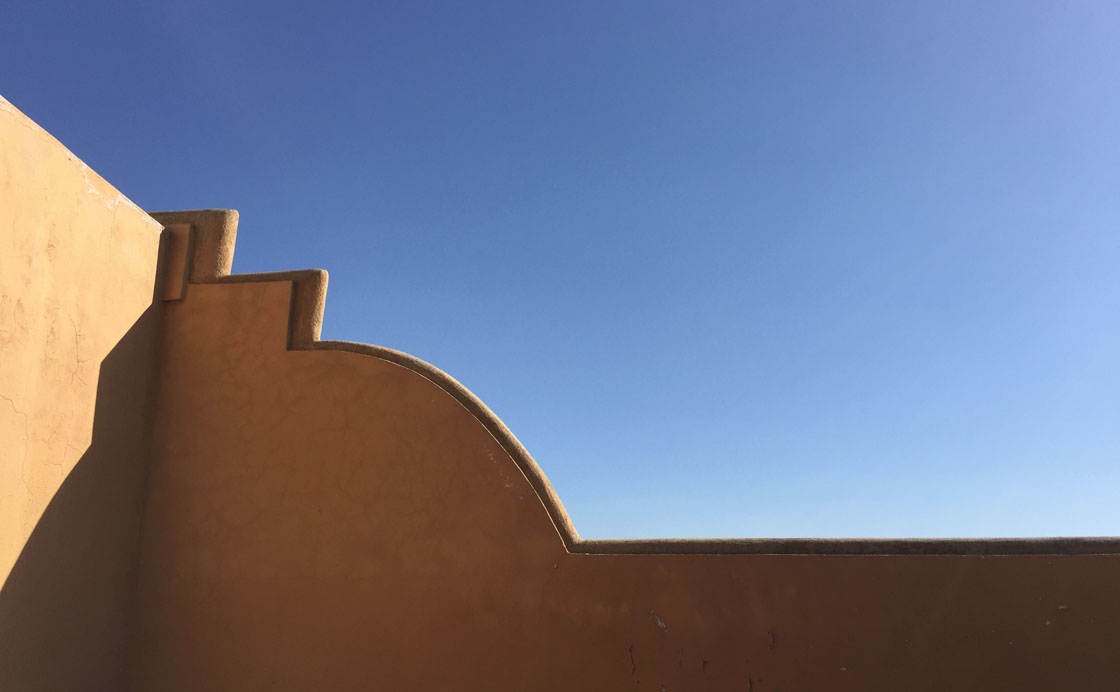
The 5:4 aspect ratio is one of the most popular ratios for framing print-outs of your photos. Use the 5:4 aspect ratio if you want your photo to fit inside a frame measuring 4×5, 8×10 or 16×20 inches:
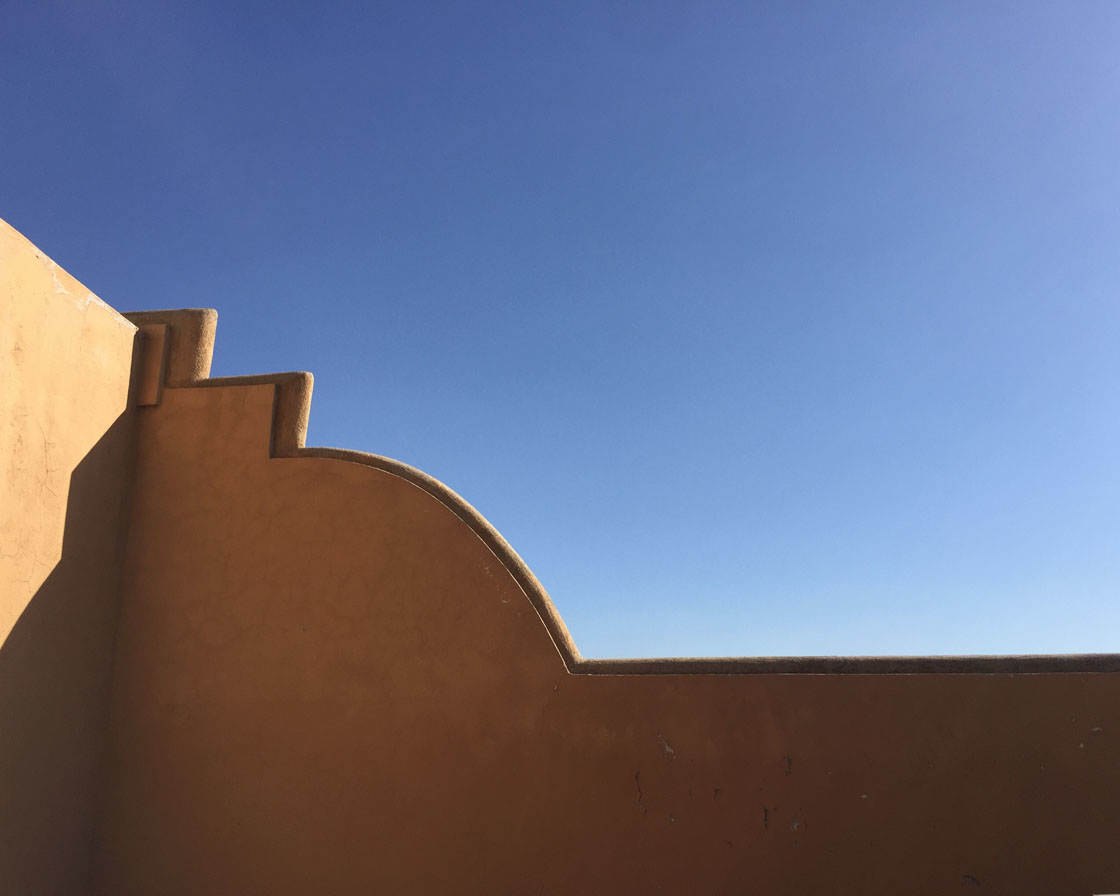
The 4:3 aspect ratio isn’t a very popular dimension for framing, but it’s the standard dimension for almost all North American video editing prior to the advent of HD video. Also called the NTSC aspect ratio, this format isn’t used any more for video work as the HD video’s 16:9 aspect ratio has taken its place:
5.10 Anti-Shake
The Anti-Shake feature helps you create sharper photos by reducing the effects of camera shake – which is a particular problem when shooting in low light.
Anti-Shake is usually turned on by default. If you open the Menu, you’ll see that the Anti-Shake option is probably green which means it’s switched on:
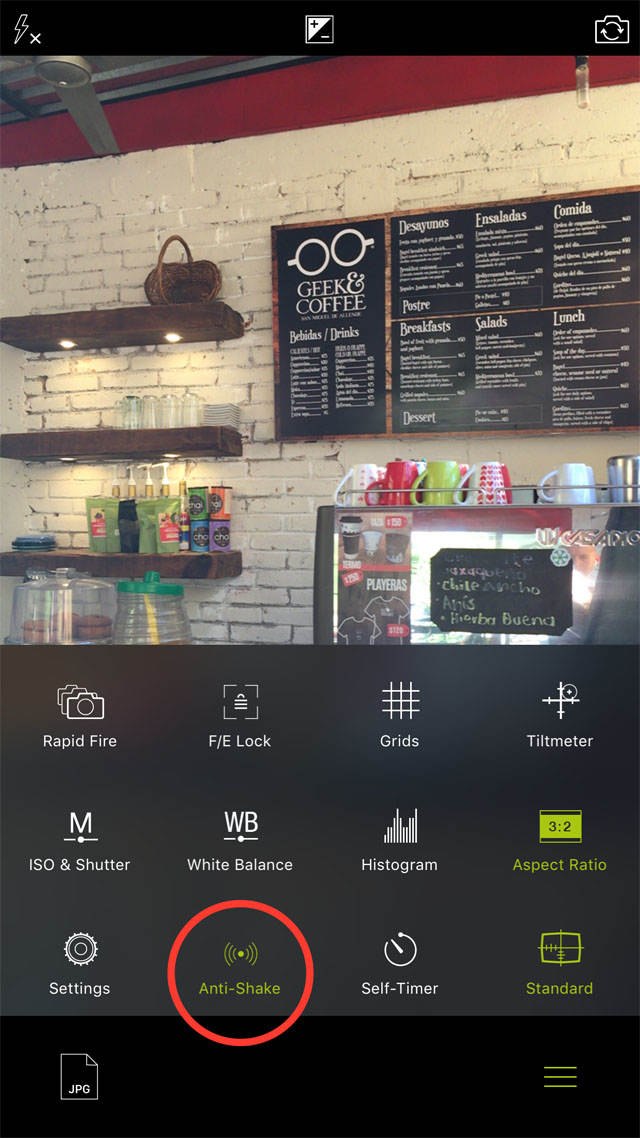
To shoot with the Anti-Shake feature, hide the camera setting icons by tapping the Menu icon again, then tap the Anti-Shake icon to the right of the shutter button at the bottom of the screen.
The Anti-Shake feature uses the iPhone’s built-in gyroscope to detect when the device is held steady, and delays taking the photo until the camera is still.
5.11 Self-Timer
The self-timer allows you to set a 10 second delay between pressing the shutter button and the photo being taken. This can be useful in a variety of shooting situations.
For example, if you’re using an iPhone tripod and iPhone tripod mount, you can use the timer delay so that you can appear in the photo yourself.
It’s also very helpful when shooting in dark environments with a tripod. Even with a tripod, you can introduce camera shake when you press the shutter button. Leaving a 10 second delay ensures that the camera will be perfectly still by the time the photo is taken.
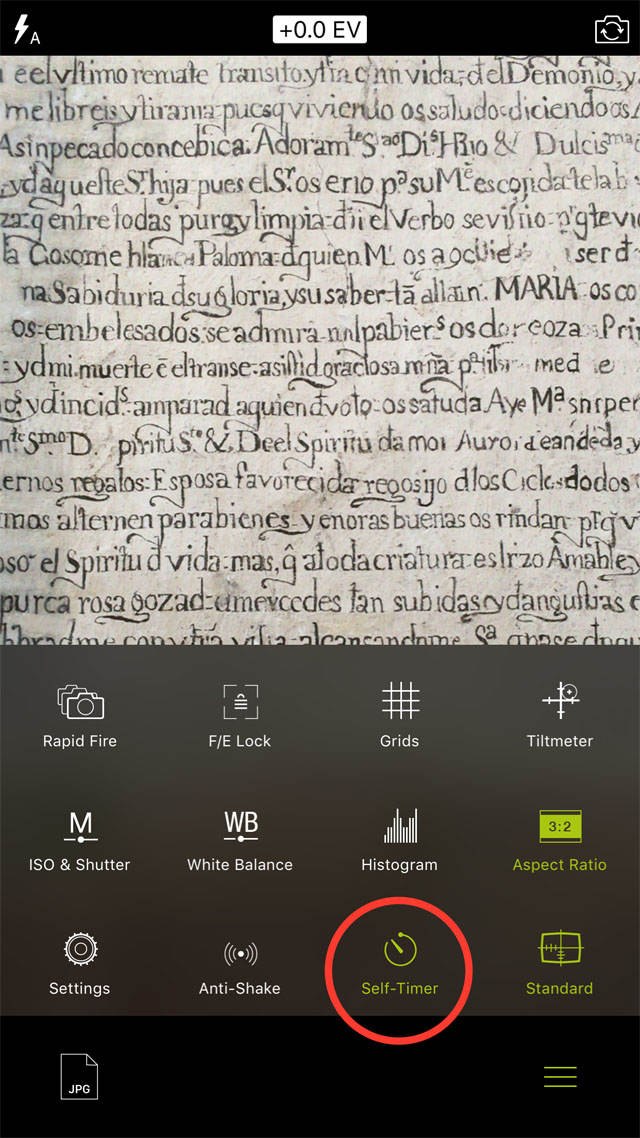
To activate the timer, tap the Menu icon, then select Self-Timer. Hide the camera setting icons by tapping the Menu icon again:
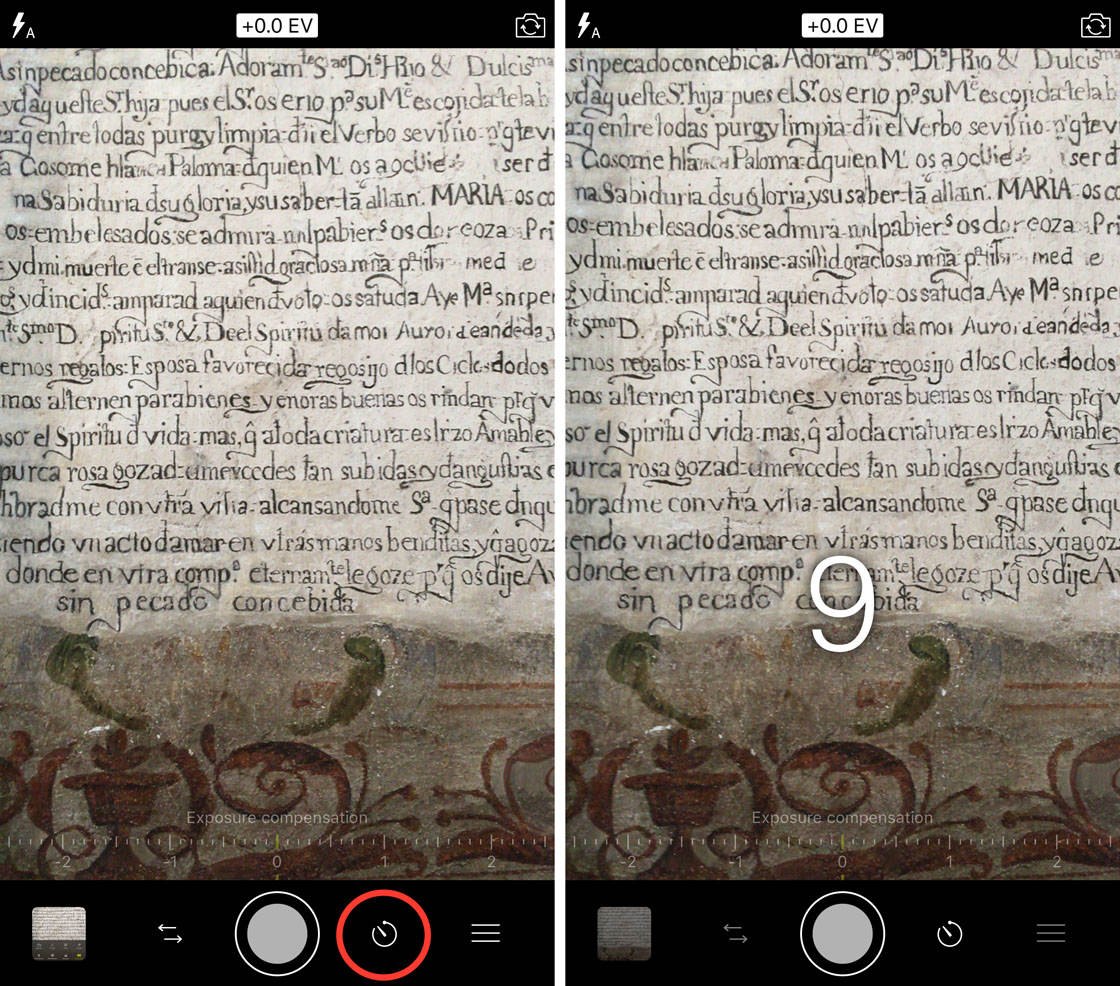
To take a photo with a 10 second delay, tap the Self-Timer icon to the right of the shutter button at the bottom of the screen. You’ll know that the timer is working when you see the numbers counting down from ten to zero:
5.12 Display Mode
The Display Mode option lets you choose what kind of information and icons you see on the screen when taking photos. Some people like to see a lot of technical information and icons on their screen. Others only want to see the picture in front of the camera, with no additional text getting in the way of their composition.
Tap the Menu icon, and you’ll find the Display Mode option at the bottom right. Keep tapping this icon to toggle through the three different display modes:
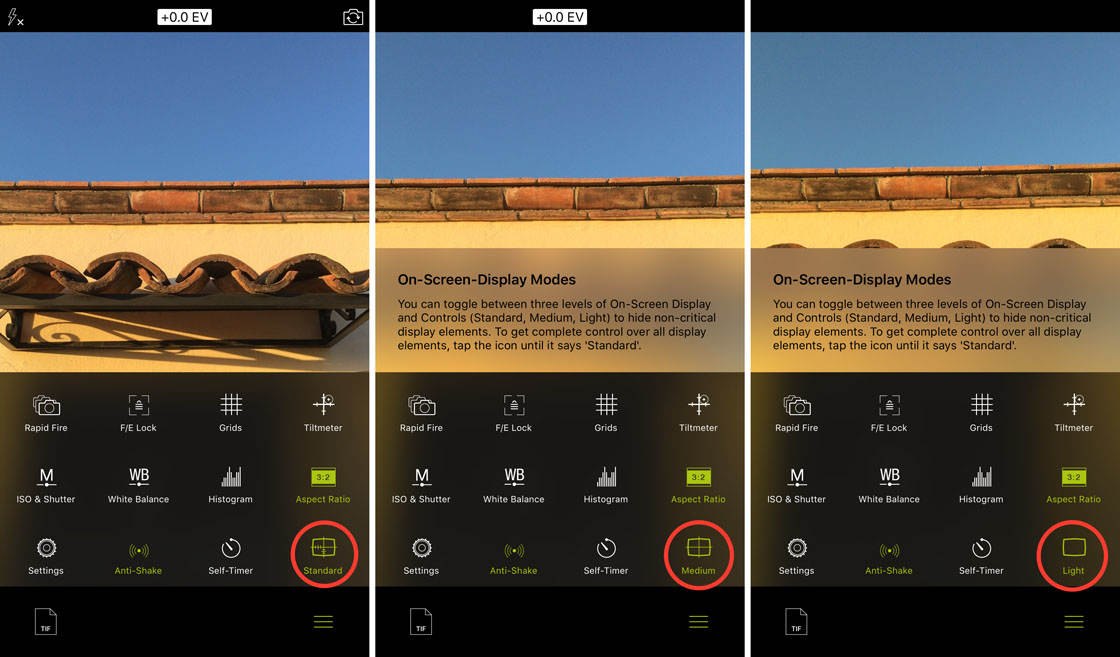
Standard displays all technical data and icons on the screen while you’re composing photos. Medium displays only a small amount of information. Light doesn’t display any information or icons.
5.13 File Format
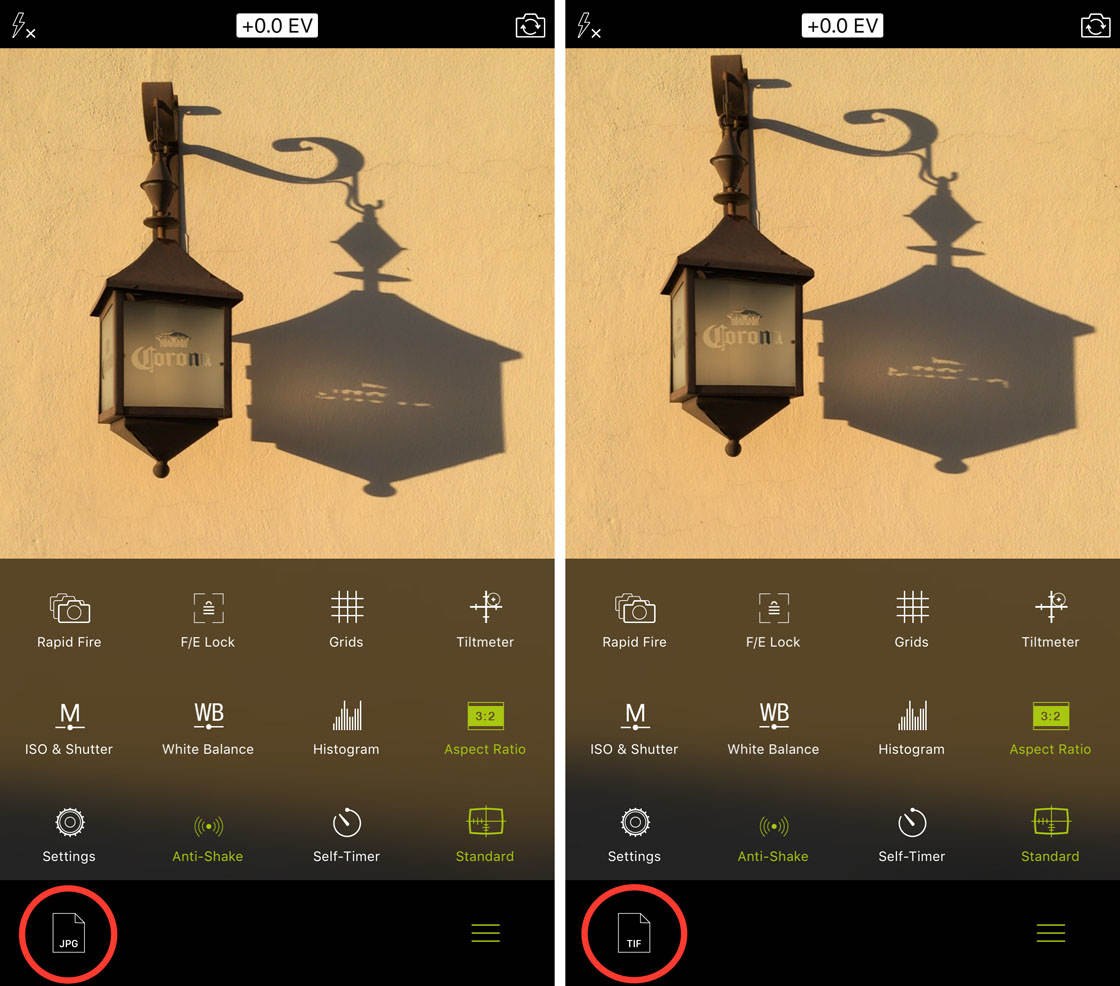
When you take a photo with your iPhone, the default file format for saving images is JPEG. The benefit of JPEG images is that they’re compressed so you can fit a lot of photos on your device. However, JPEG compression does result in a slight loss of image quality.
If you want to shoot uncompressed high quality images, you’ll need to shoot in TIFF or RAW format – and the ProCamera app allows you to do just that. The downside is that the file size of these images will be much larger, so they’ll take up more storage space on your iPhone.
To select which file format you want to shoot in, tap the Menu icon, then keep tapping the icon at the bottom left to toggle through the different file formats: JPEG, TIFF, RAW and RAW+JPEG:
6. Video Mode
To record video footage using the ProCamera app, tap the opposing horizontal arrows icon to the left of the shutter button, then select the Video shooting mode:
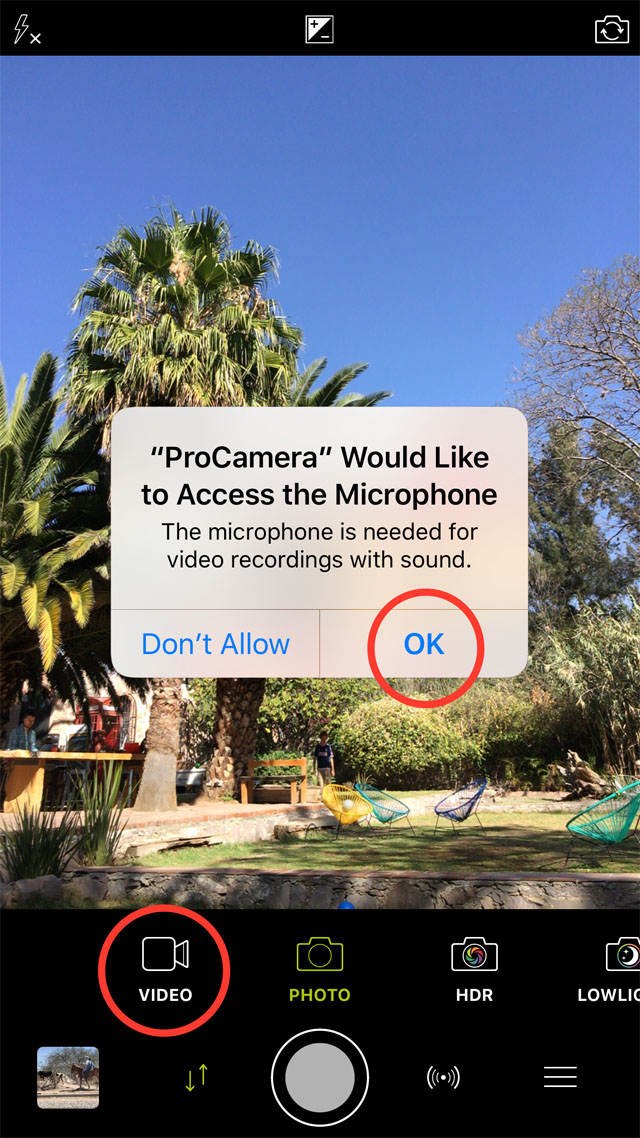
If this is the first time you’ve used Video mode, the app will ask for permission to access the iPhone’s microphone. Tap OK to ensure that the video will record sound. To start recording your video, tap the red Record button:
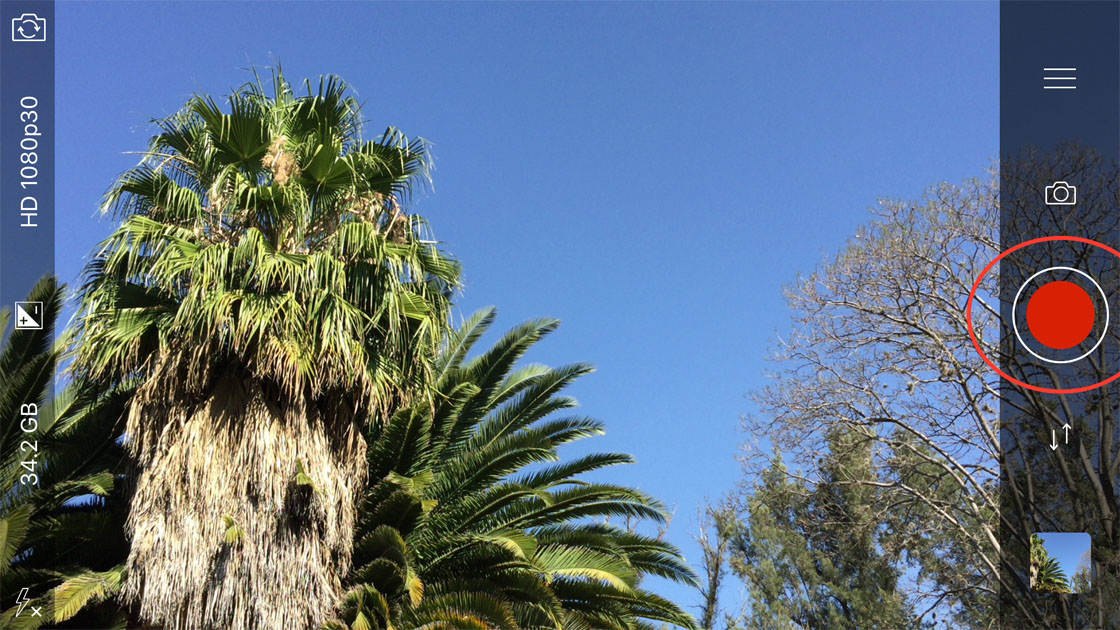
You’ll know that your video is recording when you see the seconds increasing at the top-middle of your screen.
Video Mode in the ProCamera app also allows you to take still photos at the same time that your video is recording. To take a photo, tap the little Camera icon while video is still being recorded:
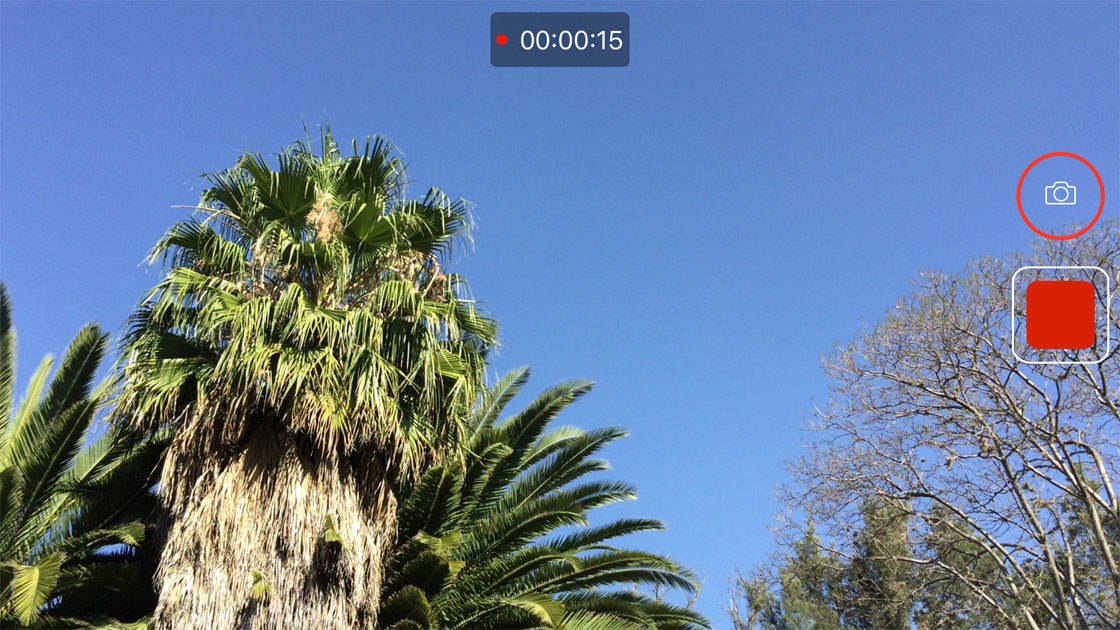
To stop recording video footage, tap the red Stop button.
7. HDR Mode
iPhone HDR settings help you create more balanced exposures when shooting high contrast scenes that have both bright and dark areas. In HDR Mode the camera takes multiple photos at different brightness (exposure) levels whenever you press the shutter button. The app then combines these images to create an evenly exposed photograph.
HDR is particularly useful when shooting landscapes where you have a bright sky and darker foreground. By combining multiple exposures you can ensure that color and detail will be visible in both the bright and dark areas.
The HDR feature in ProCamera is only available as an extra in-app purchase costing $3.99. If you don’t think you’ll use this feature there’s no need to buy it, but if you think it would be a useful addition to the app, tap the opposing arrows icon to the left of the shutter button, then select the HDR shooting mode:
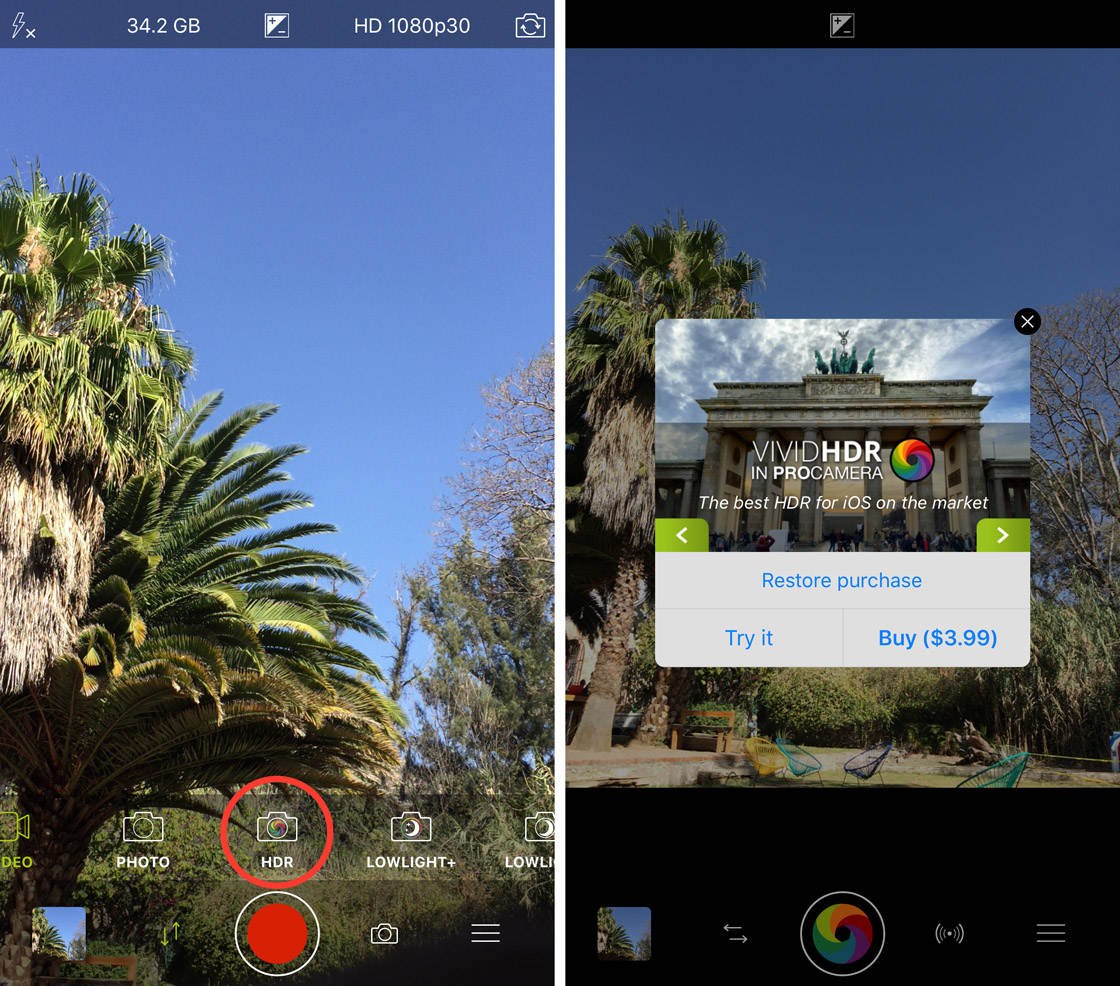
To purchase the Vivid HDR feature, tap Buy. Alternatively, you can try out the HDR feature for free by tapping the Try It option – however, you’ll get a watermark on your photo unless you purchase the full HDR Mode.
If you don’t want to purchase Vivid HDR, or would like to purchase it later, tap the X at the top right of the purchase box.
8. LowLight Mode
Lowlight Mode is used for photographing dark scenes where there’s little available light to illuminate your subject. To access this mode, tap the opposing arrows icon to the left of the shutter button and select LowLight:
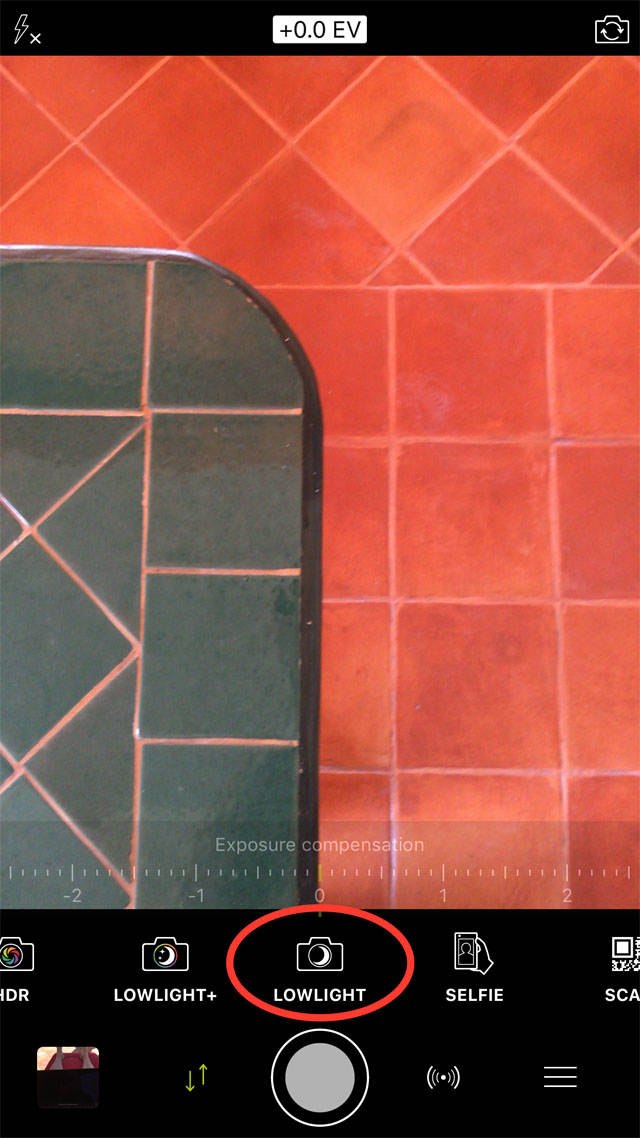
This tiled floor and counter was photographed in a dark kitchen with the lights out. The LowLight function works great for poorly lit scenes, both inside and outside. When you’re ready to take the photo, tap on the shutter button with the moon icon:
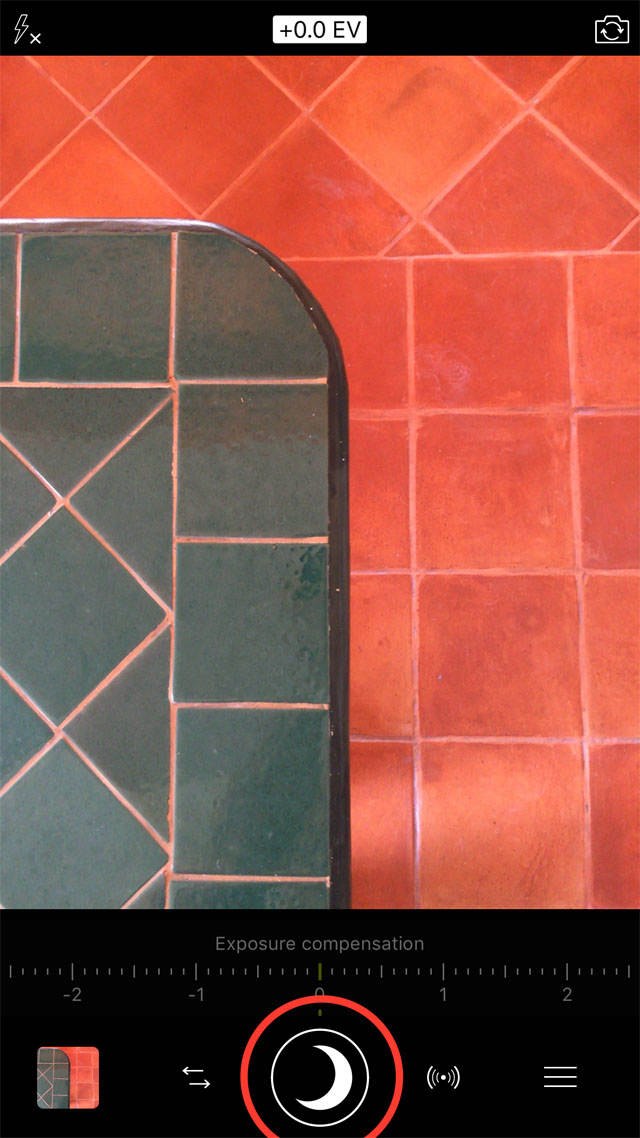
9. LowLight Plus Mode
LowLight Plus Mode is for photographing very dark scenes, such as at night with a tripod. The ProCamera app uses various techniques to give you the best possible exposure, even in very dark environments.
Like the HDR feature, this option is only available as an extra in-app purchase costing $3.99. If you think you’ll use this feature, tap the opposing arrows icon to the left of the shutter button, then select the LowLight+ shooting mode:
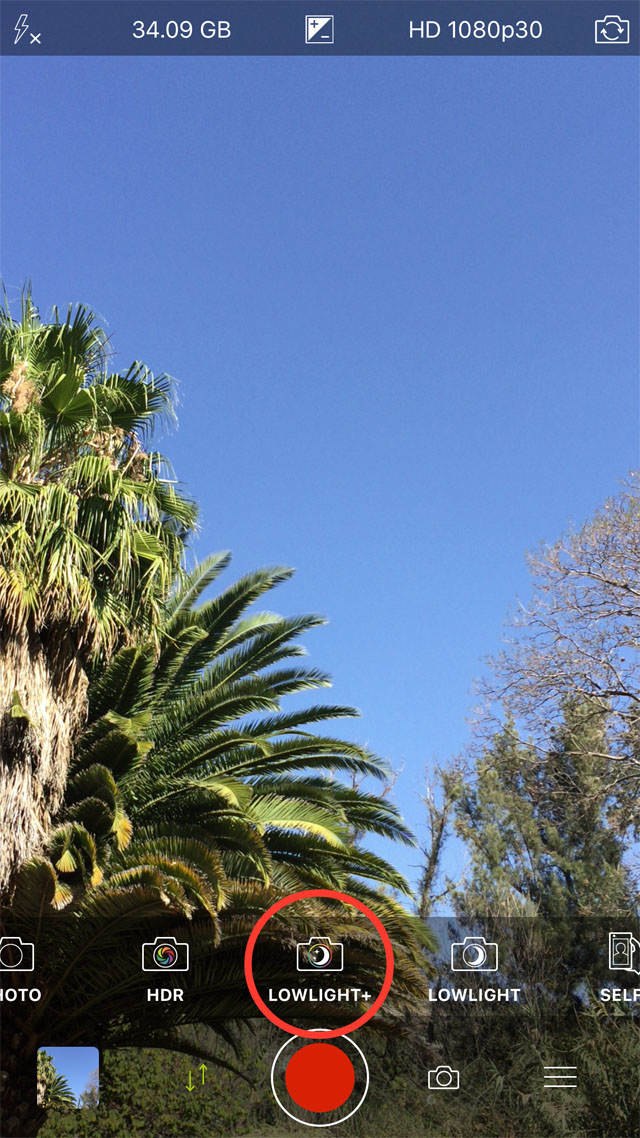
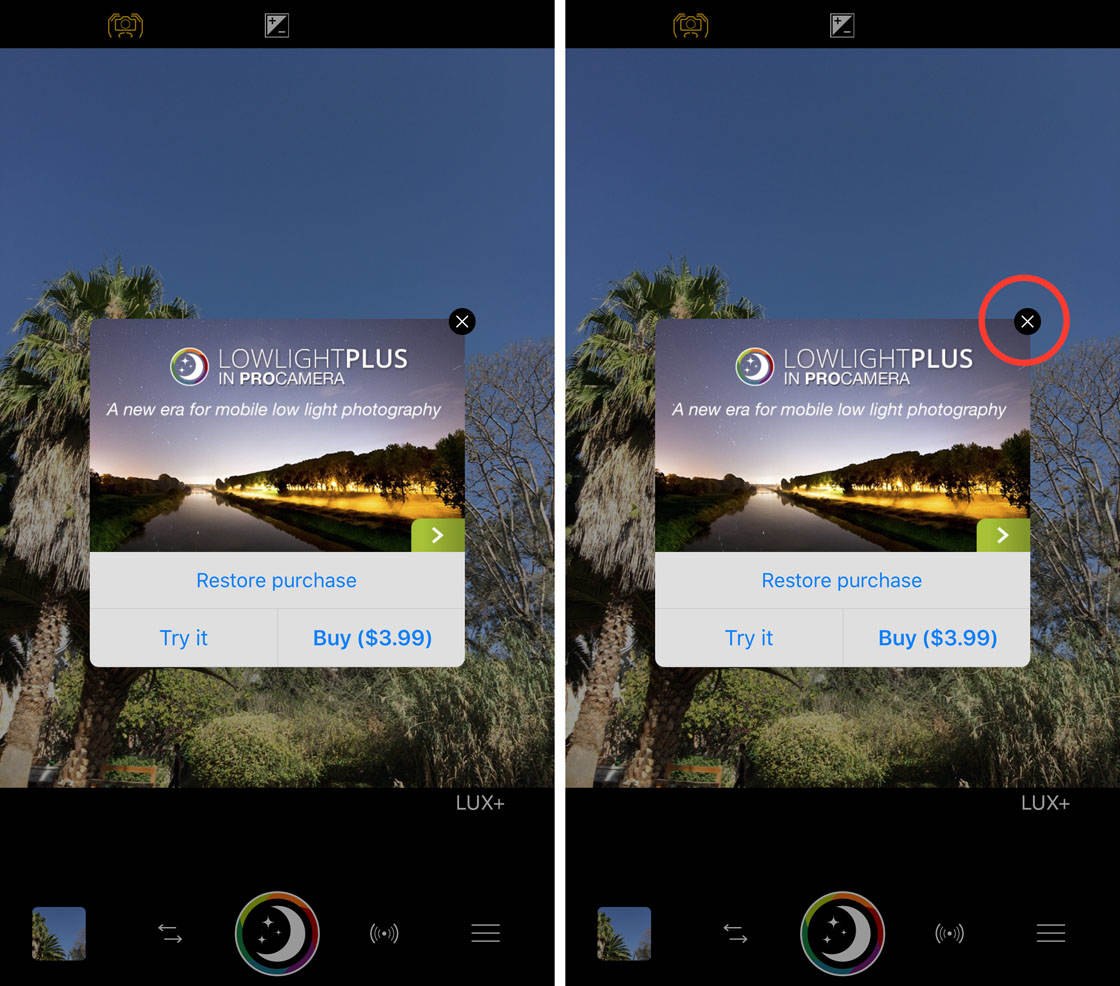
To purchase the LowLight Plus Mode, tap Buy. Alternatively, you can try out the LowLight Plus feature for free by tapping the Try It option. If you don’t want to purchase LowLight Plus, or would like to buy it later, tap the X at the top right of the purchase box:
10. Selfie Mode
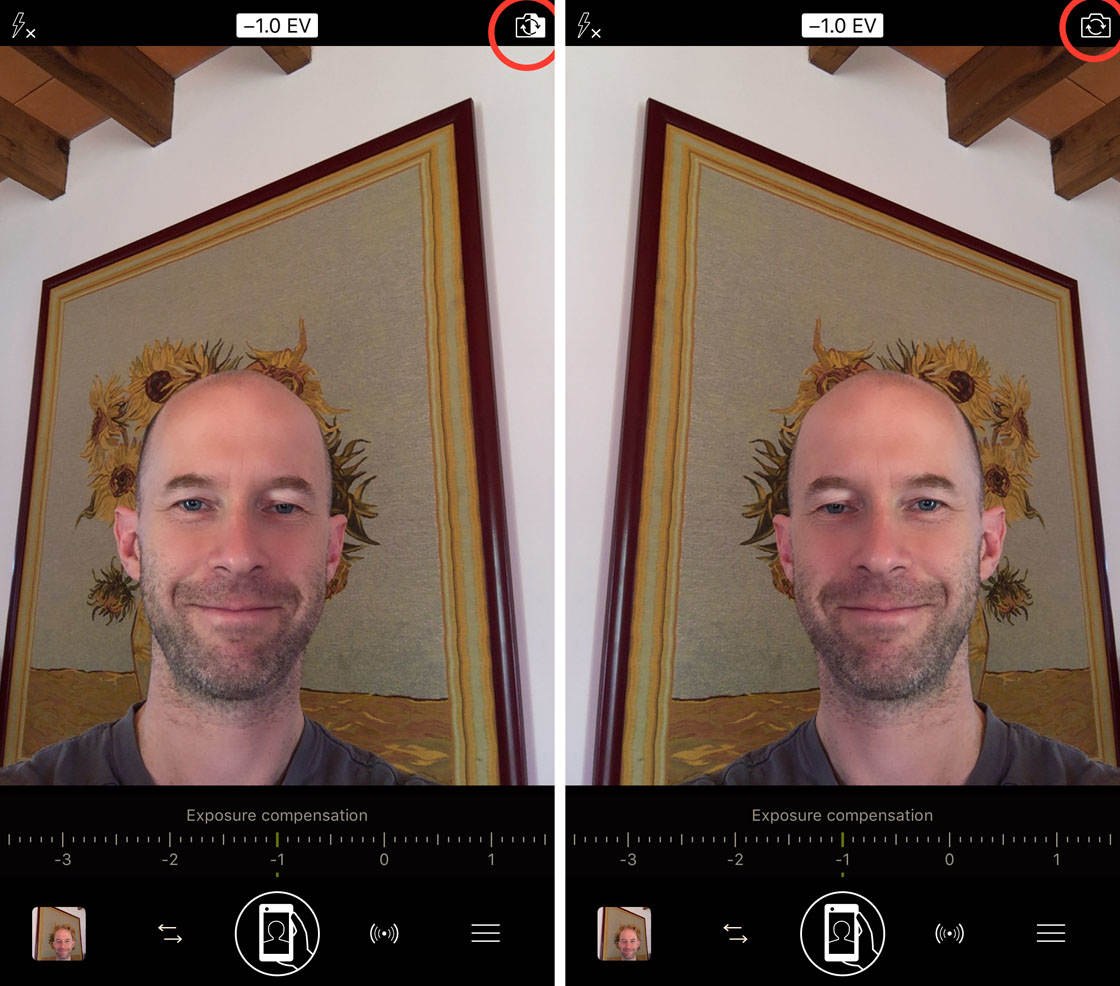
The Selfie Mode in ProCamera allows you to take self-portrait photos using the front camera – with the added feature of being able to flip the image horizontally.
Tap the opposing arrows icon to the left of the shutter button, then select the Selfie shooting mode. To flip the scene horizontally, simply tap the Camera icon at the top-right of the screen. The image of yourself should now be flipped. To flip back to the normal view, tap the Camera icon once again:
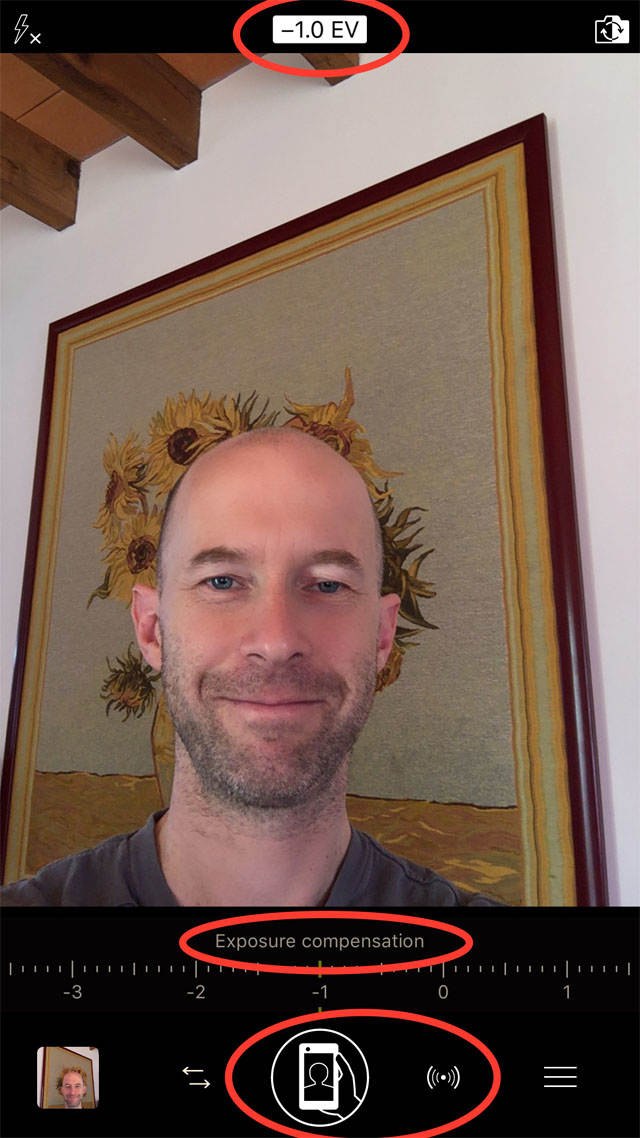
If your face appears too bright or too dark, you can adjust the image brightness using the Exposure Compensation slider at the bottom of the screen. When you’re ready to take the photo, tap the shutter button:
11. Scan Mode
The Scan mode isn’t actually for taking photos – it’s for scanning printed QR codes (similar to a bar code) on products, in magazines, in shopping malls, etc. When you scan a QR code, the app will direct you to a website with more information about that product or location.
If you see a QR code, tap the opposing arrows icon to the left of the shutter button in ProCamera, then select Scan. Use the camera’s lens to position the QR code on the screen:
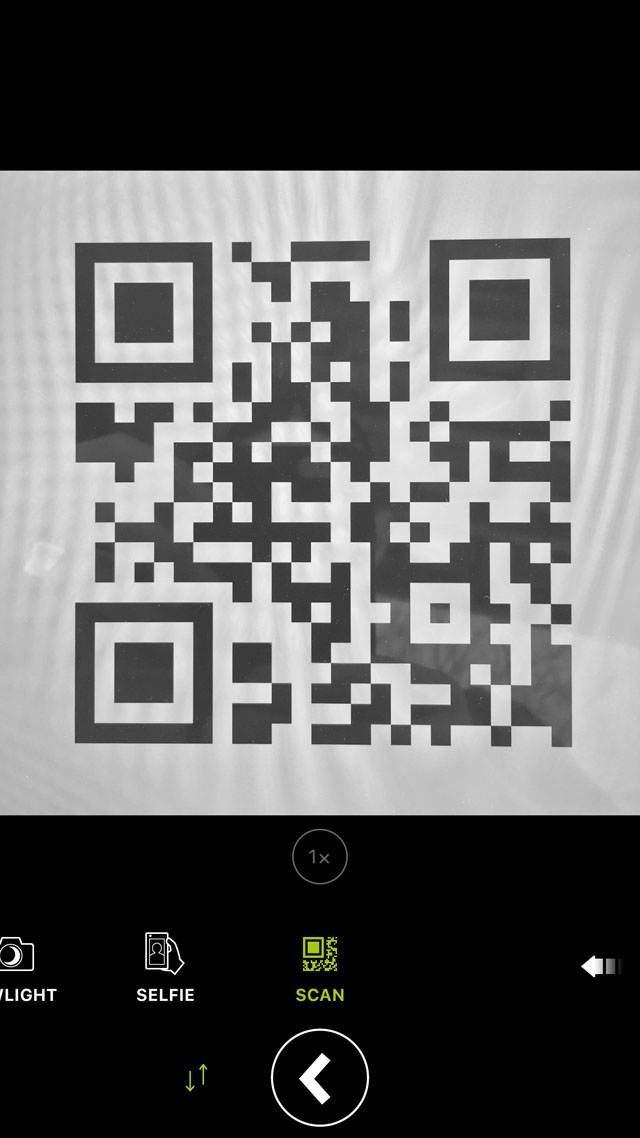
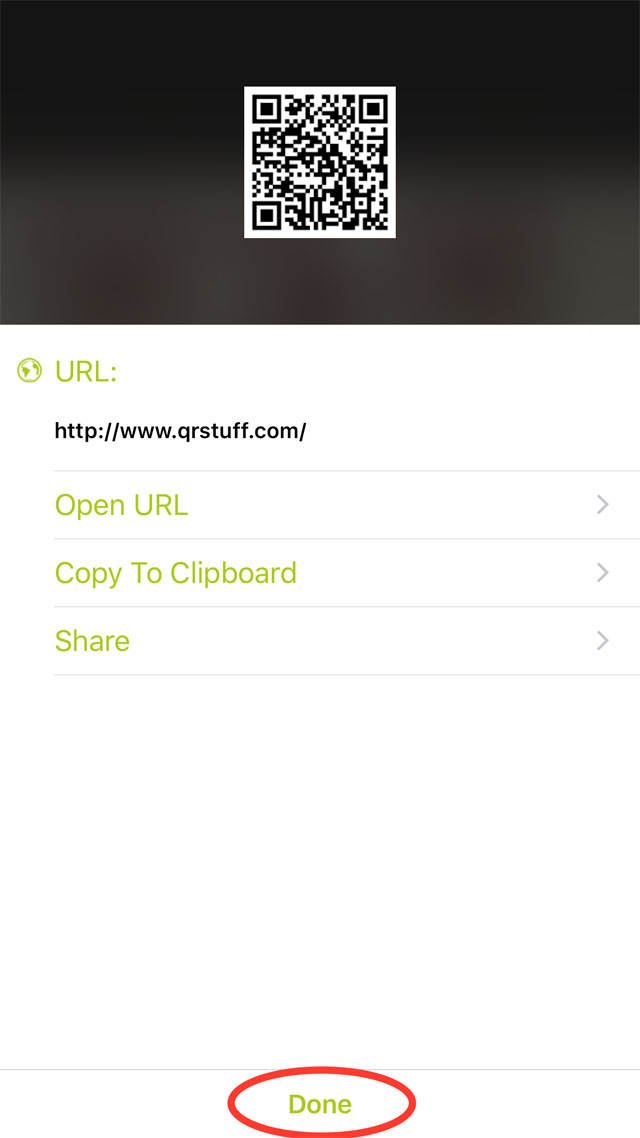
In the example below, the ProCamera app displays a website URL to visit, the option to copy the URL to your iPhone’s clipboard, and the option to share the URL. When you’re finished with this page, tap Done:


Excellent tutorial!
Thank you!!!
I’m very glad you enjoyed it Lisa, and thanks for the comment!
On behalf of ProCamera – thanks for this comprehensive tutorial!
Lindy
My pleasure Lindy! I love using the app and enjoyed writing about it 🙂
Awesome tutorial, app seems pretty cool! I think I would buy it (:
If I had iPhone that’s it….
Awesome
Very comprehensive tutorial
Glad to hear you found it helpful Luis.
I have iPhone7 and would like to pause video while recording but unfortunately I cannot do it because it is not supported in iOS (10.3). Is ProCamera app supports pause/resume vwhile recording video?
Hi Basharat, this is currently not possible, but we do get this question more often so it is high on our list of future updates. An extensive overhaul of video mode is on our schedule, it will probably be addressed this year – but it’s a big project so please understand we cannot make any promises about when this can be implemented. All the best, Lindy – ProCamera Support team
Hoping this gets implemented! Pause resume would be amazing! Beat Apple to it, they don’t seem to want to add it but it’s a very nice feature
I have an iPhone 7 plus and used this app during a recent trip to Eastern Europe. I used it in place of my Nikon. I was happy that I could shoot in RAW which is why I decided to use just the phone. Now I’m home but when I tried to upload my raw photos to Lightroom LR says that it doesn’t recognize them as RAW photos. Have I screwed myself by using the phone? I have a few hundred shots.
Great recommendations, definitely need to try it out!
That was an excellent guideline to use the various function of I phone camera.
Yes it is a handy APP. My only issue is in RAW it is not possible to zoom. I used to have a Nokia Lumia which had this ability. The Lumia was a fantastic camera but useless phone, so bought iphone.
I just bought this app & it’s the best photo app i’velPurchased the Addons are worth buying the vivid hdr & low light + are outstanding so you know i’ve Been into photography for years. If you are thinking about buying one app this is the one.😎
This tutorial does not say anything about the iPhone 7 Plus on screen zoom facility. Can you still use this facility when shooting with this app? Thank you
Is it possible shooting in black & white and/or monochrome with the ProCamera app?
Mark, appreciate the simple to read and a super review of the app, explained further with pictures – will proceed to purchase now – many thanks
The app is technically amazing; however, it does suffer from UI discoverability problems. You need the manual for many basic actions and features. It should expose more settings as simple buttons and sliders, not obscure gestures. But unfortunately this is a general trend nowadays in the Church Of “Clutter Reduction” 😉