Conveying size and scale in your iPhone photos can be challenging. The key is to create a relationship between the elements in the scene. This gives the viewer a much better idea of the size of the objects in your image. In this tutorial you’ll discover eight easy ways to create a sense of size and scale, allowing you to shoot more compelling and engaging iPhone photos.
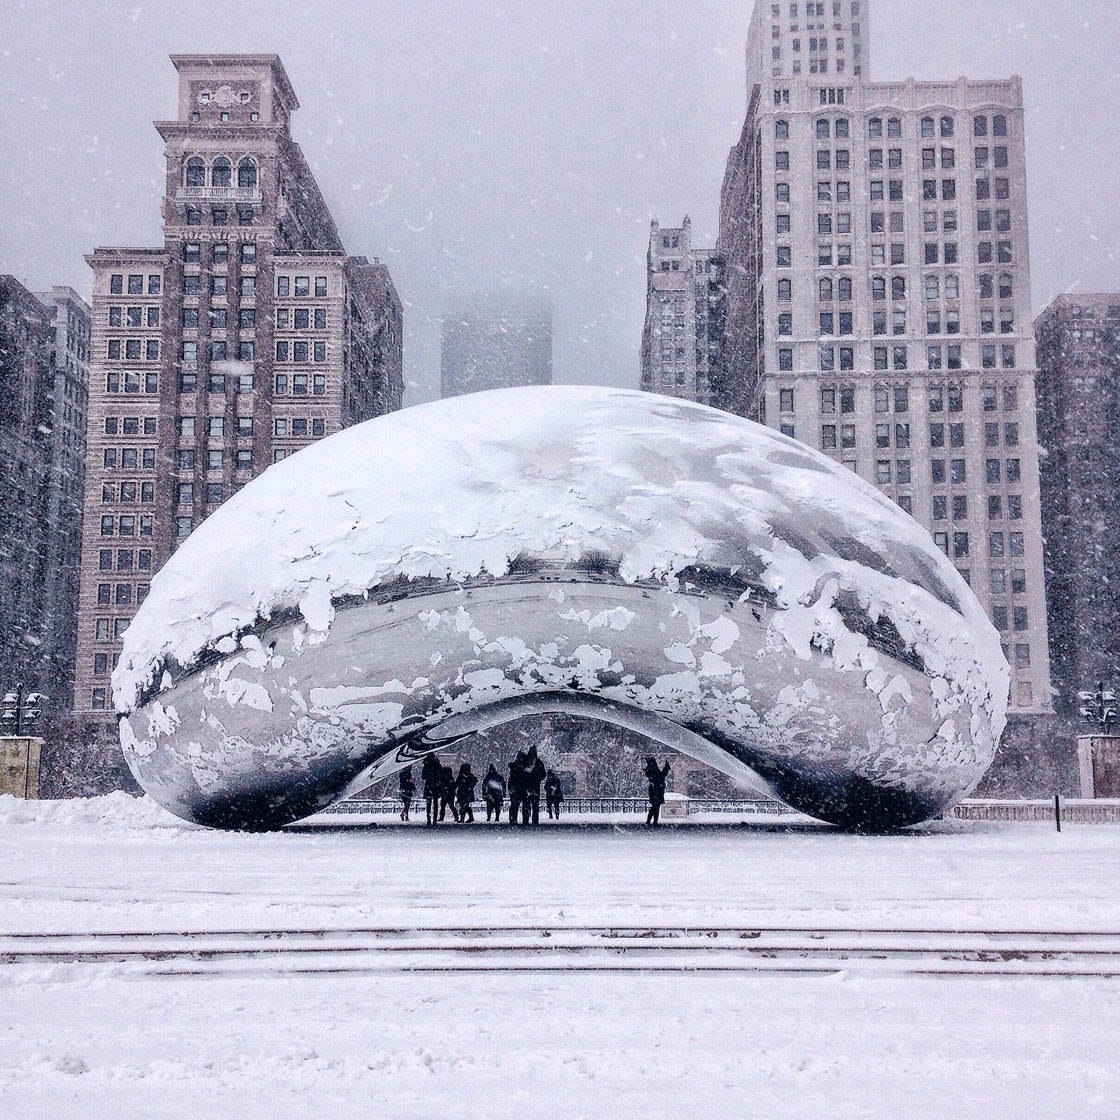
1. Include A Person In The Scene
In order to get an idea of the size of an object in a photo, you need to include another object of a known size.
This gives the viewer a reference point which allows them to work out the size of one object by comparing it to another object that they already know the size of.
Everyone knows the average size of a person, so including a human in your photo is a great way to add a sense of scale to the scene.
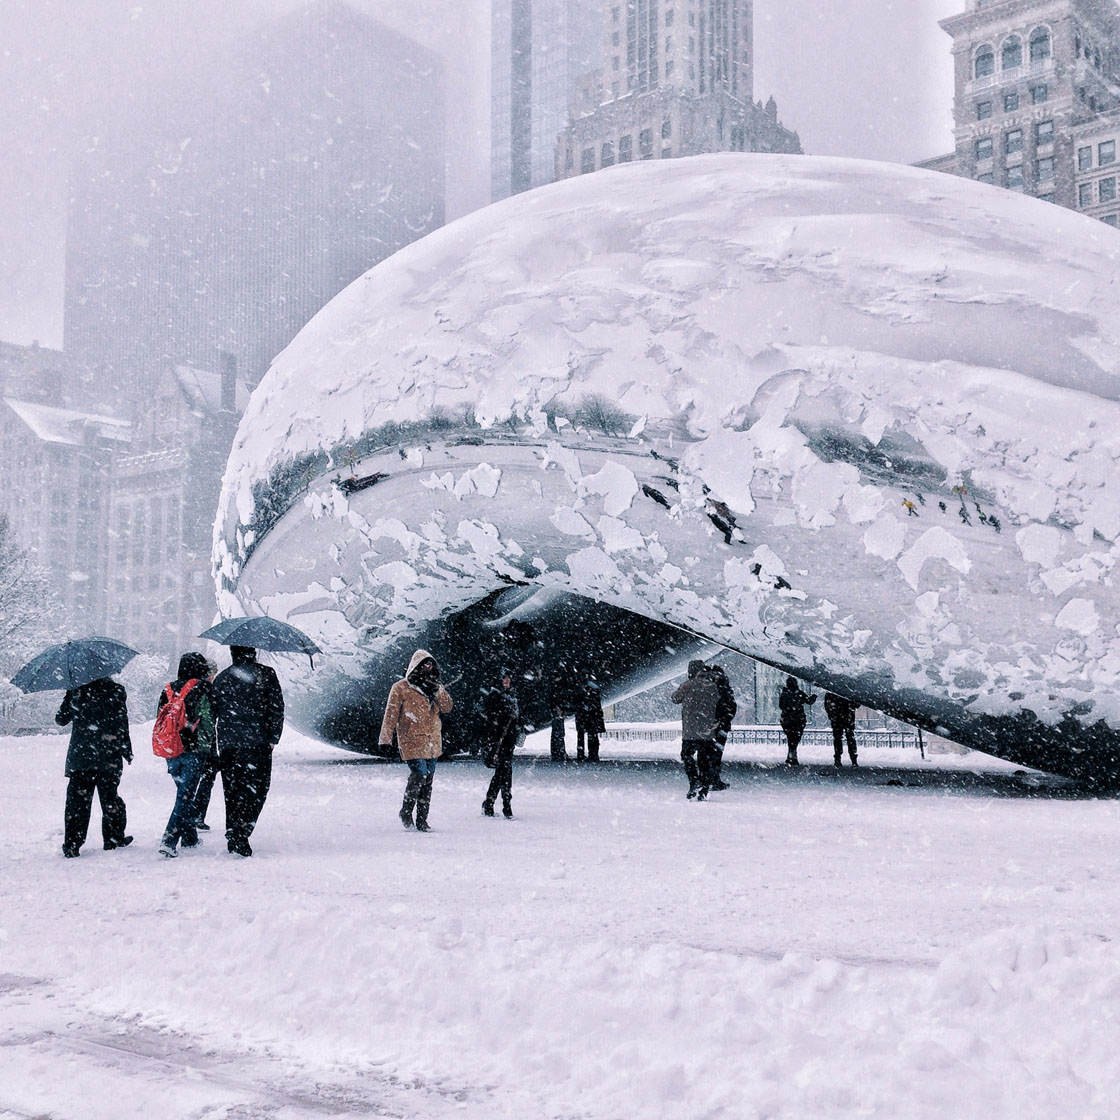
This is a really great technique to use when photographing architecture.
Without a person in the scene it can be very difficult to convey the size of a building that you’re shooting.
Having a relatively tiny person in a vast space helps the viewer to realize just how large the surrounding objects are.
The person also creates a strong focal point, making sure that the viewer doesn’t get lost in the scene.
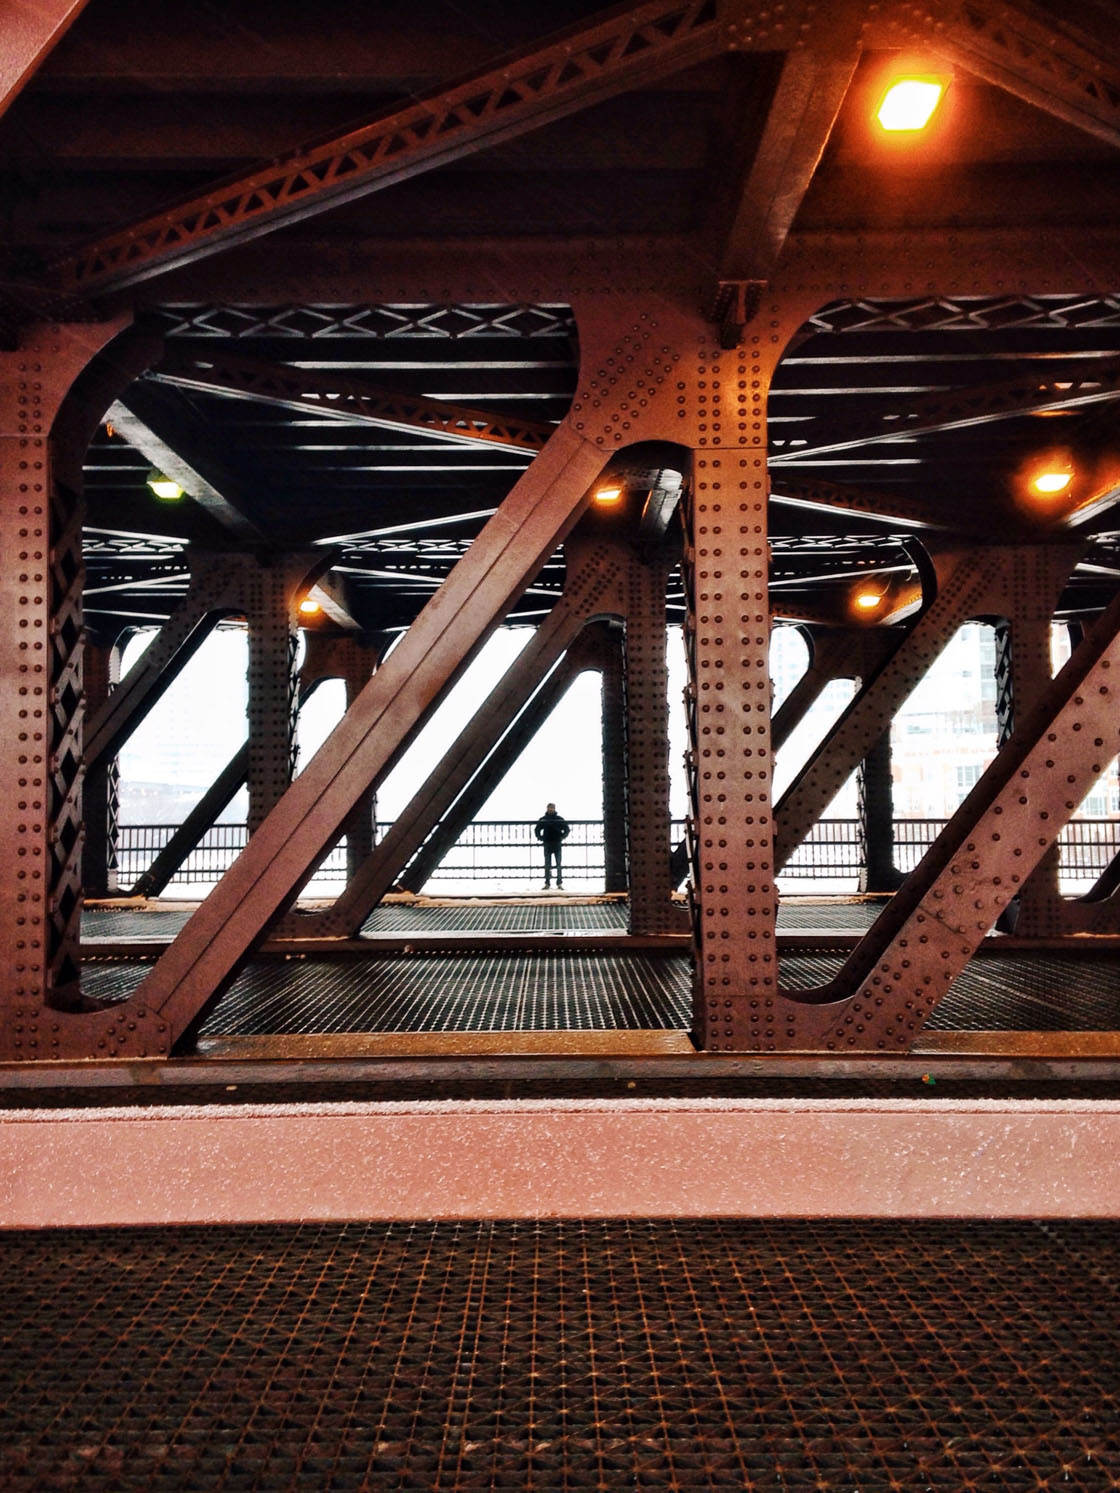
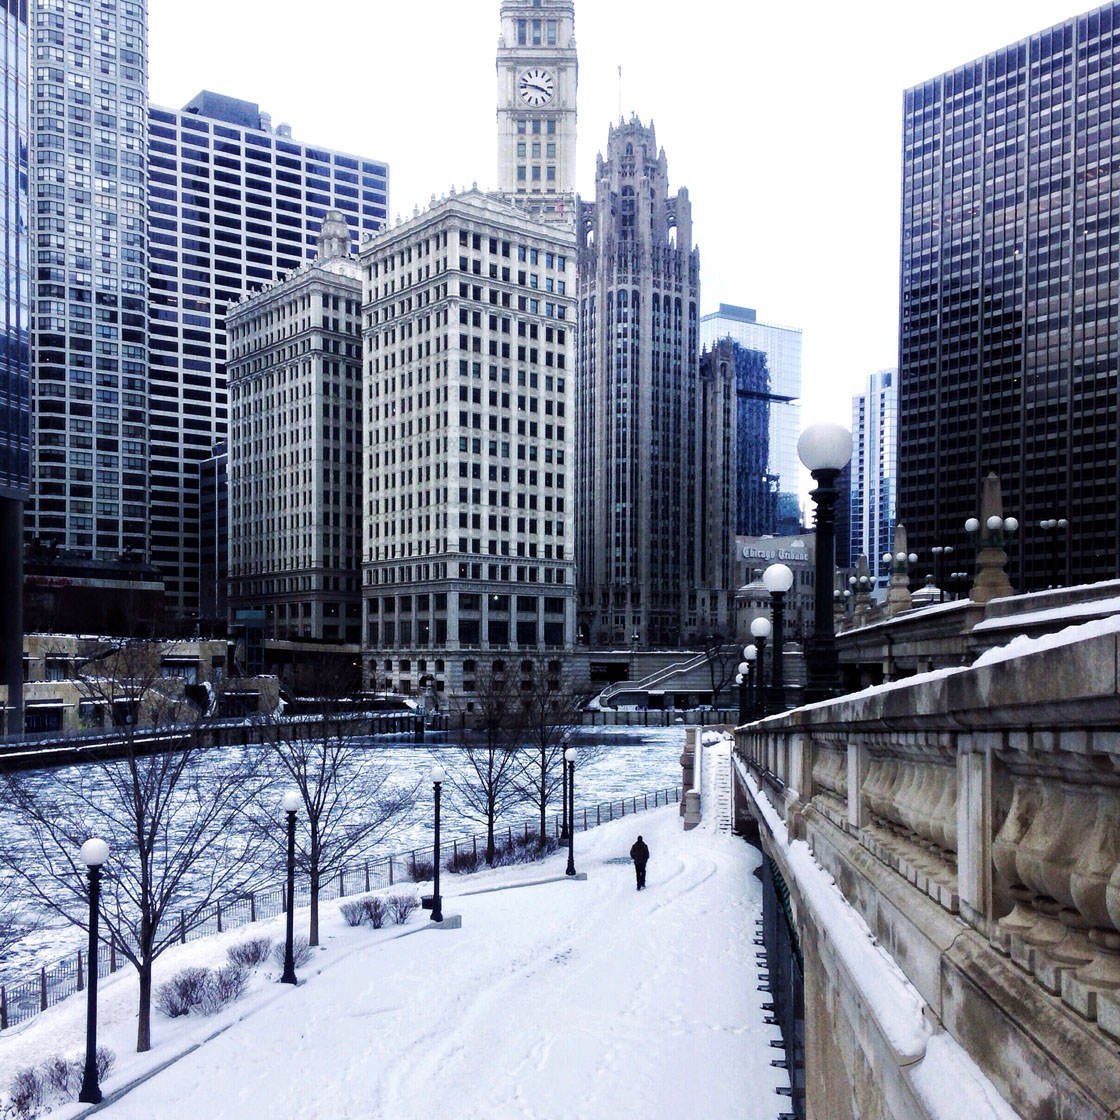
2. Use Other Objects Of A Known Size
In addition to people, try to think of other objects that you could use to add a sense of scale. As long as the viewer knows roughly how big that objects is, it will work perfectly well.
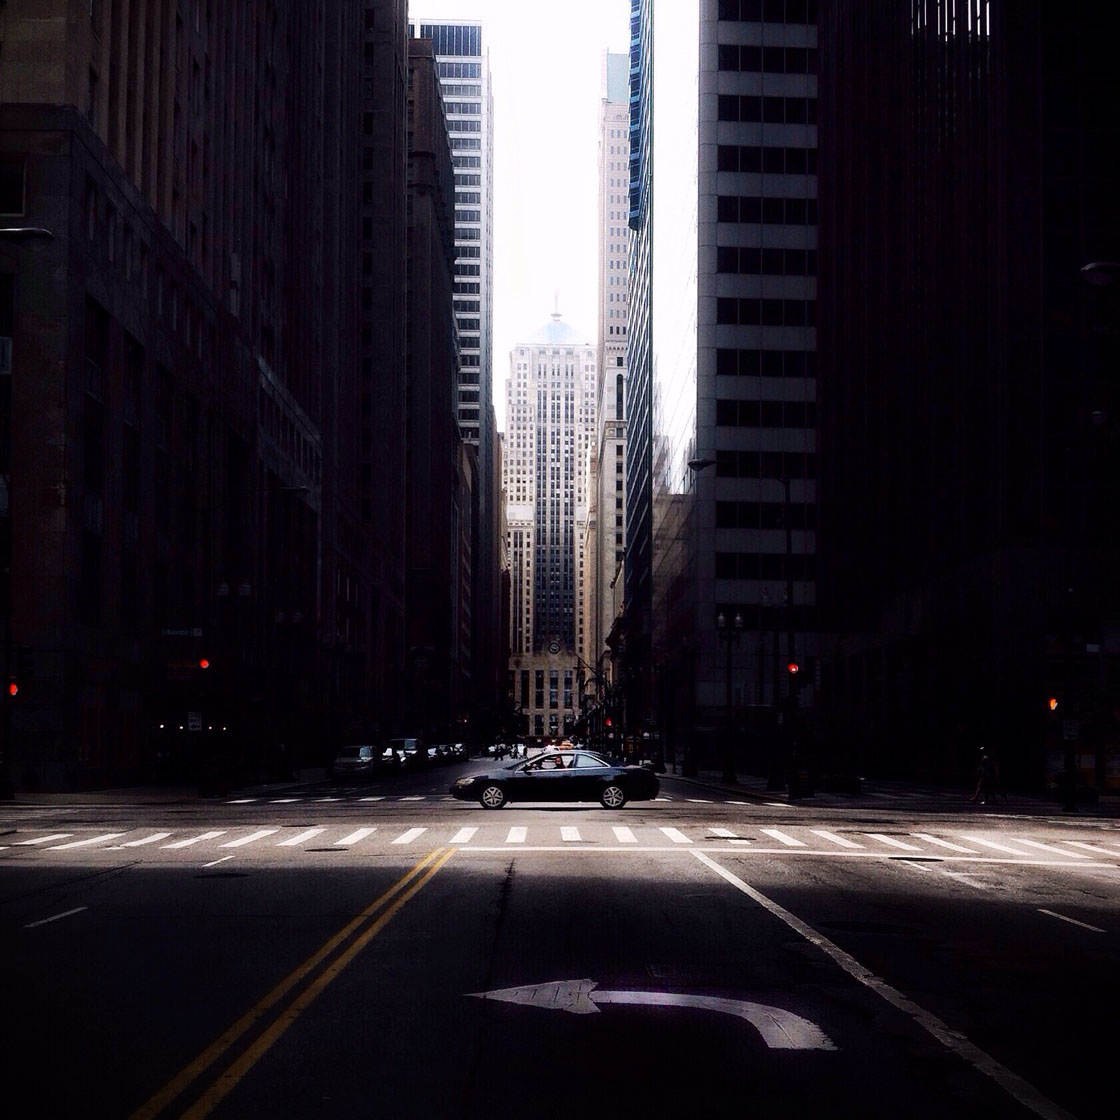
In cityscapes, great examples, include cars, bicycles and trains. Without the car in the photo above, you might not get a sense of just how tall the surrounding buildings are.
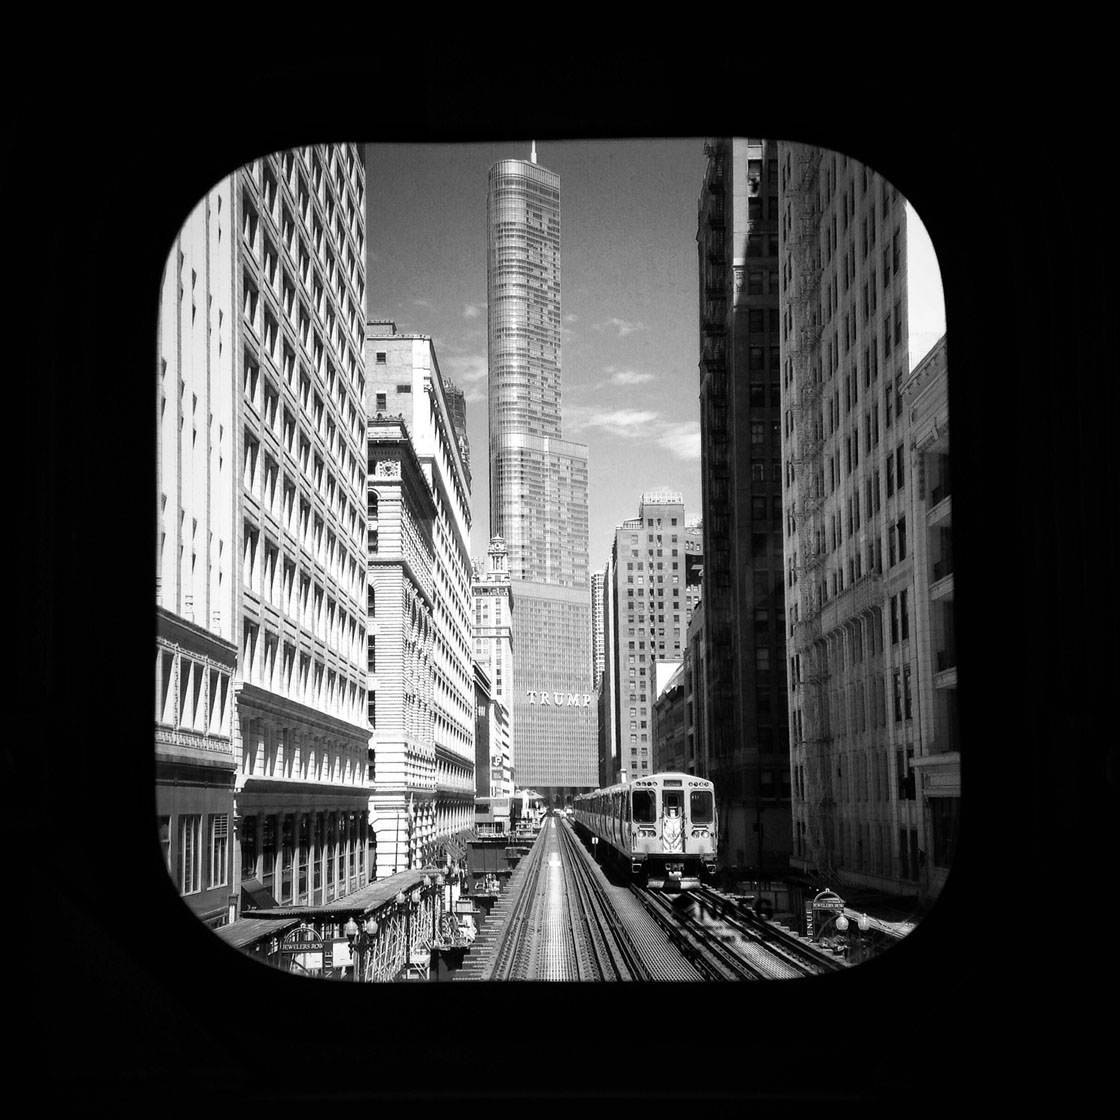
We normally think of trains as being quite big, but when captured next to these tall buildings it appears dwarfed by them. This creates a fantastic sense of size and scale in the image.
Any object of a known size will help the viewer relate to the scene you’re photographing, especially when they’re not familiar with the other elements in that location.
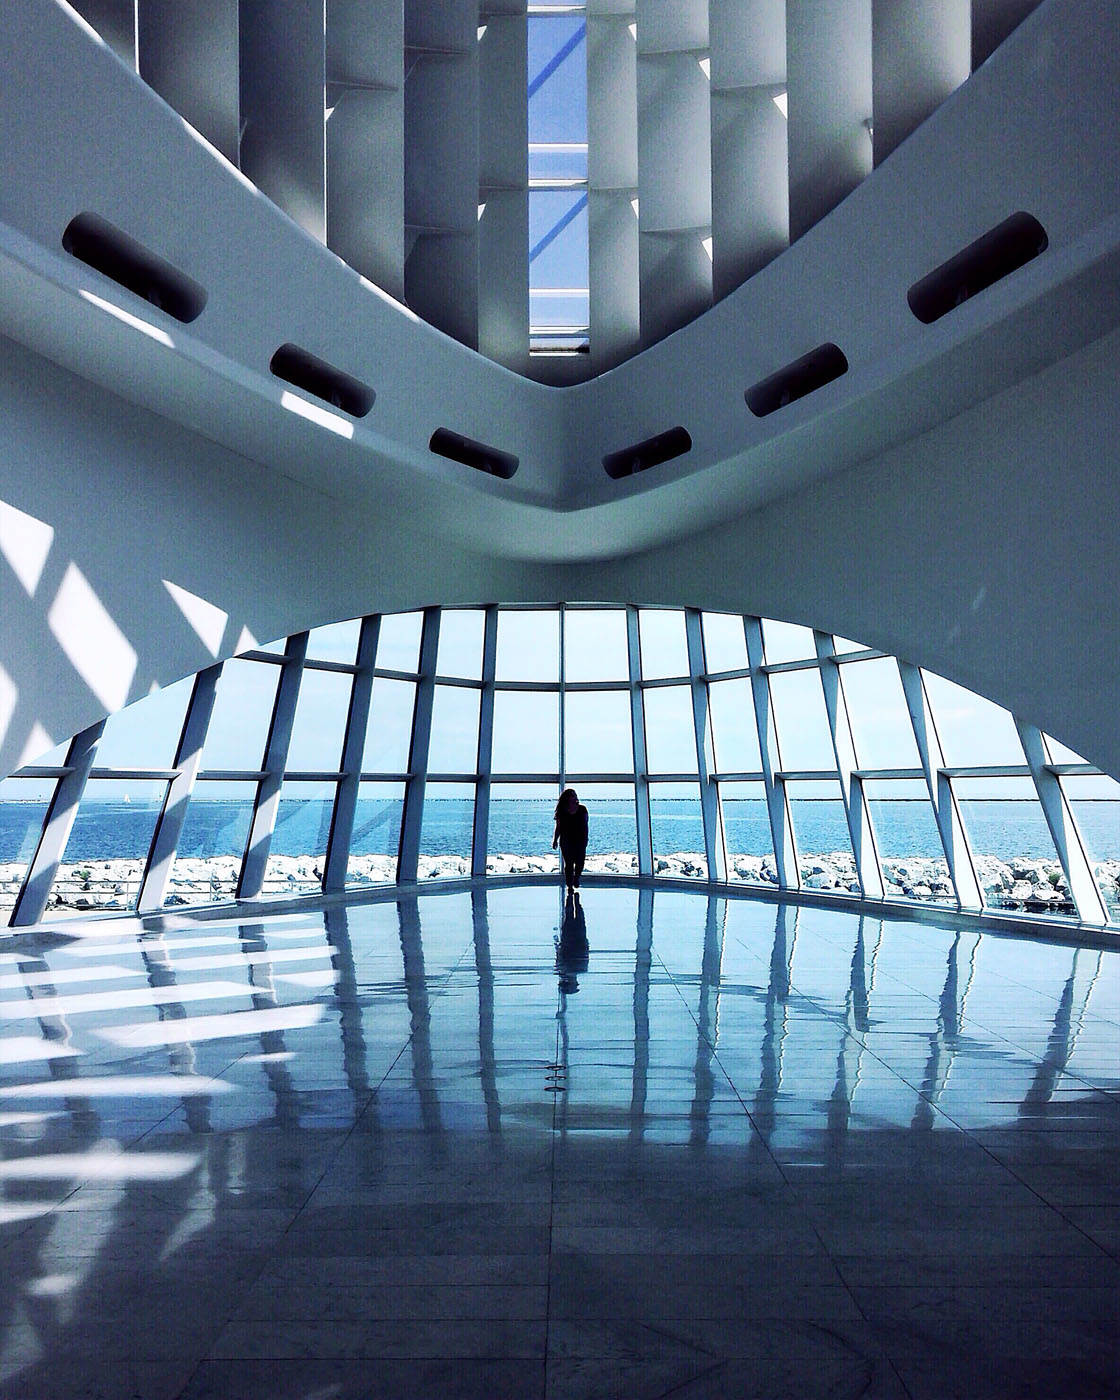
3. Include Lots Of Negative Space
If you want to emphasize the vastness of a scene, try including lots of empty space in your composition. In photography, this empty space is referred to as negative space.
You can use this technique in landscape photography and in urban environments.
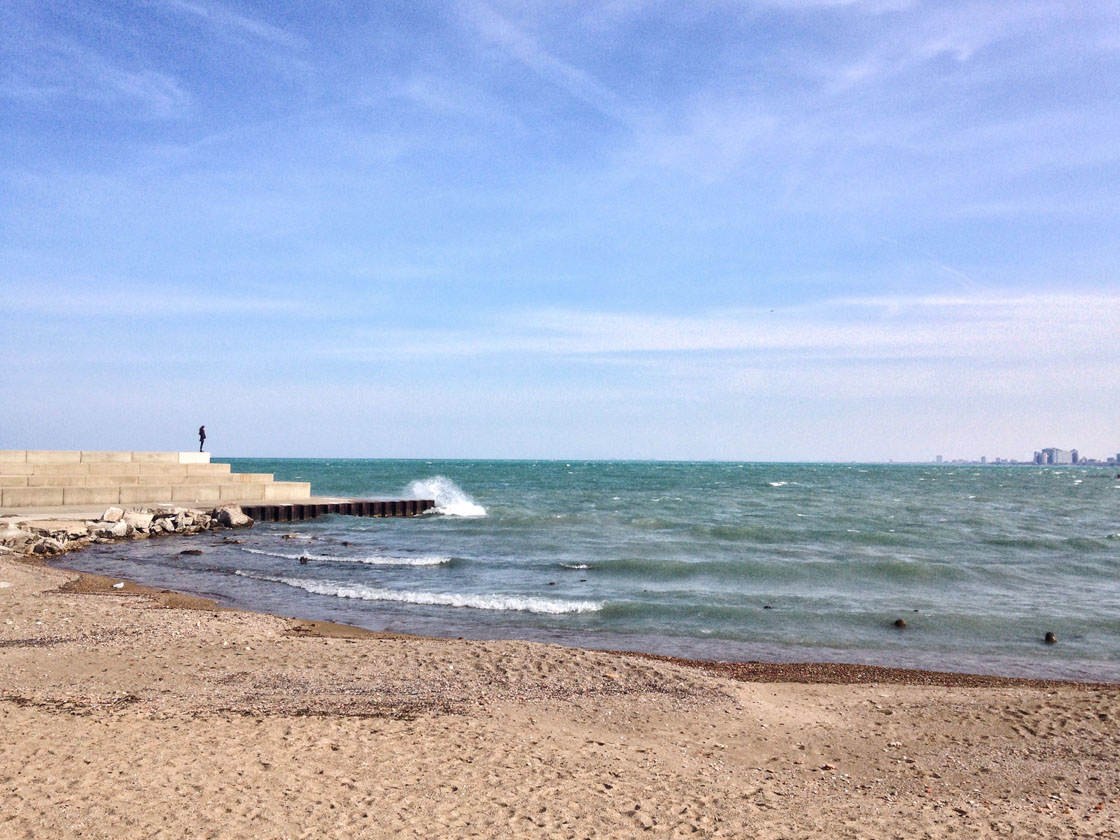
Having a person stand in front of a large wall, or including a large amount of sky overhead makes the subject look small compared to their surroundings.
You can even use large areas of dark shadow as negative space in your photos.
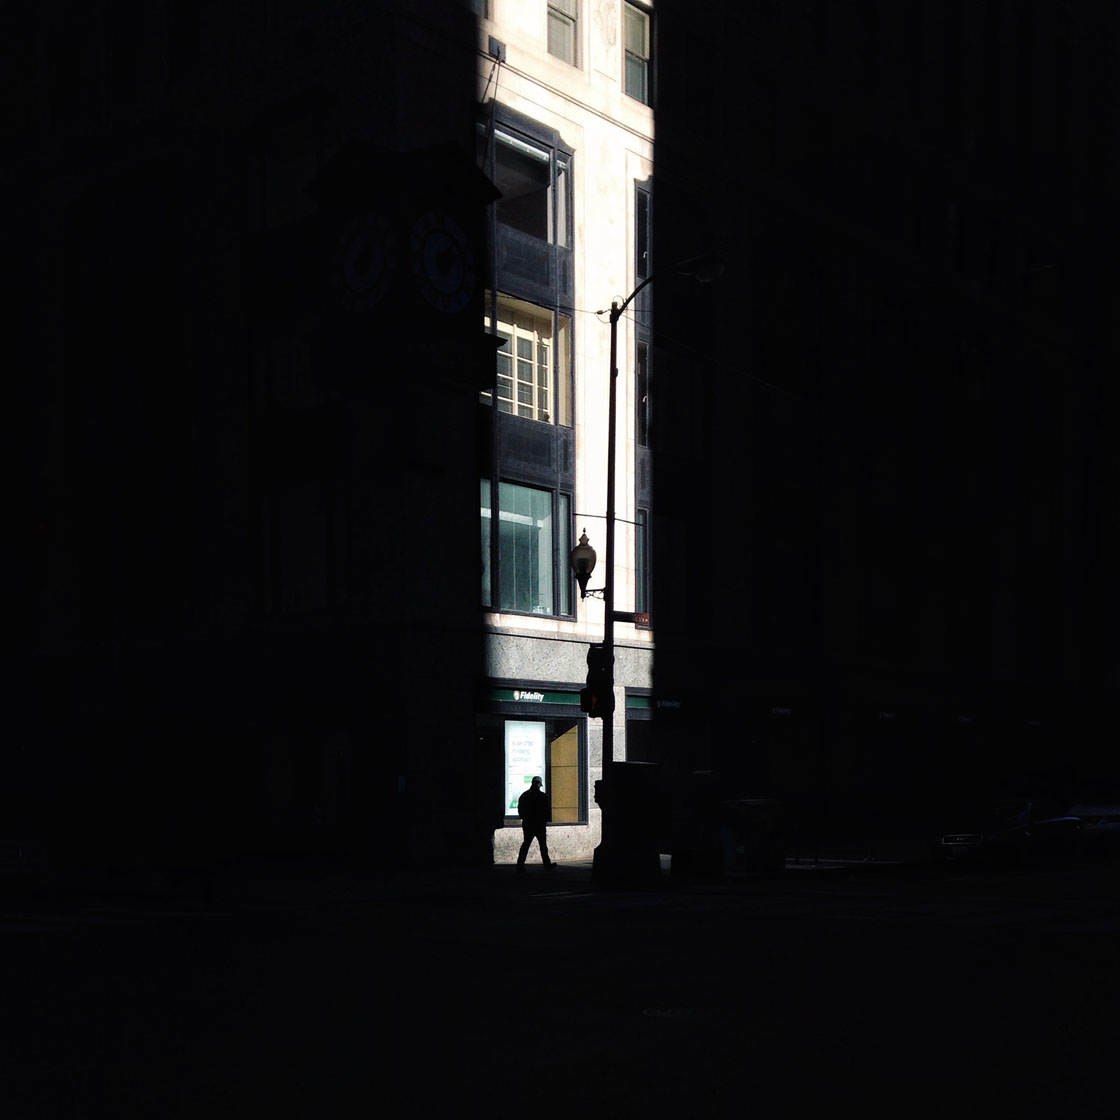
Make sure you include a focal point such as a person somewhere in the scene. Having a small main subject within the negative space helps to convey the huge scale of the scene.
The focal point also draws the viewer in and gives them somewhere to focus their attention. The negative space will actually help the main subject to stand out, even if they’re very small within the frame.
4. Shoot From A Low Angle To Make The Subject Look Larger
If you want to make your main subject look larger than they actually are, shooting from a low angle is a great option.
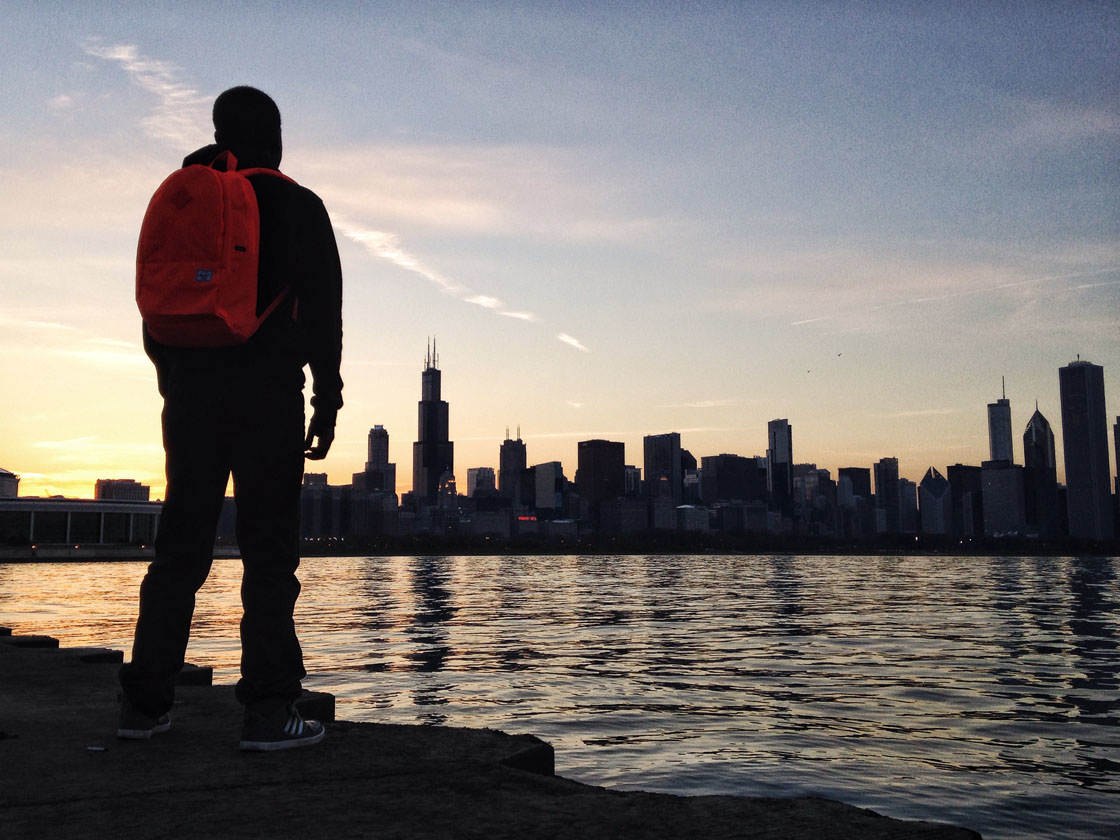
By crouching down when I took the photo above, I was able to make the man appear strong and powerful, as if he’s towering above the buildings in the distance.
Compare this to the photo below. It was taken at the same location with the same subjects, but I shot it from standing height and a little bit further away.
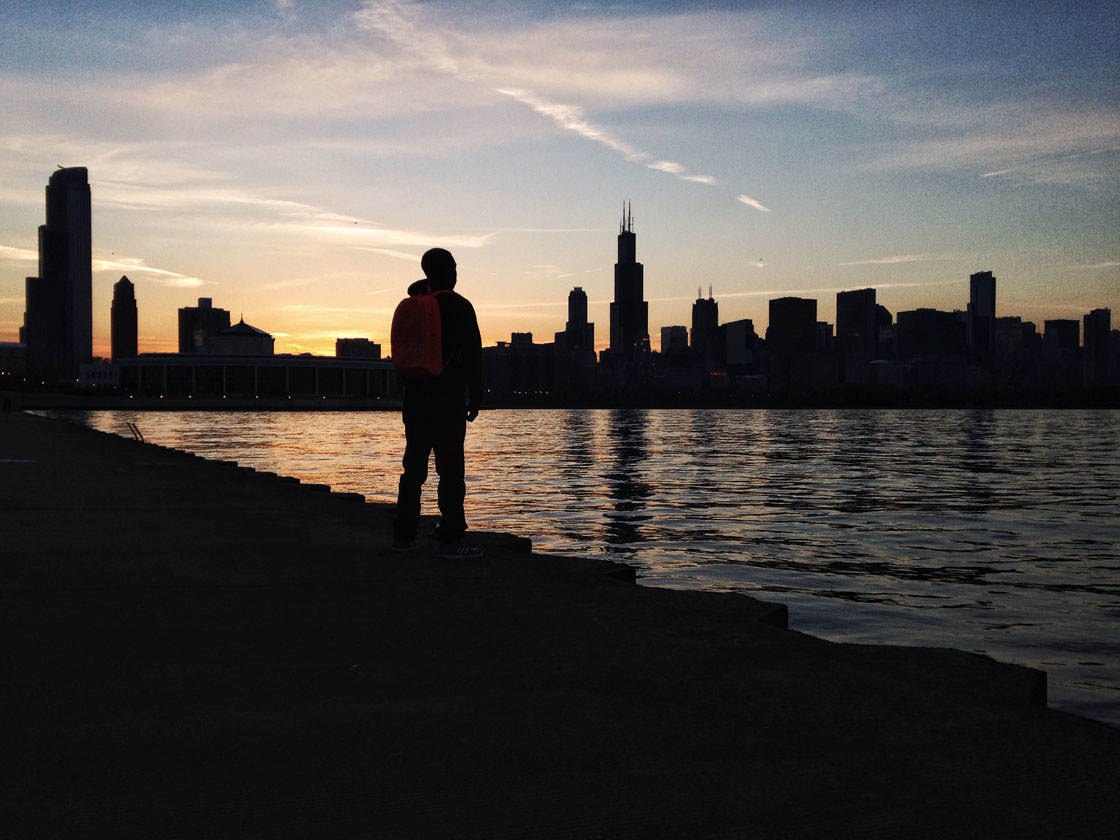
In this second photo the man appears much smaller and becomes easily lost amongst the taller buildings in the background.
By shooting from a much lower perspective, you’re able to keep the viewer’s eyes immediately focused on the larger subject since it stands out much better.
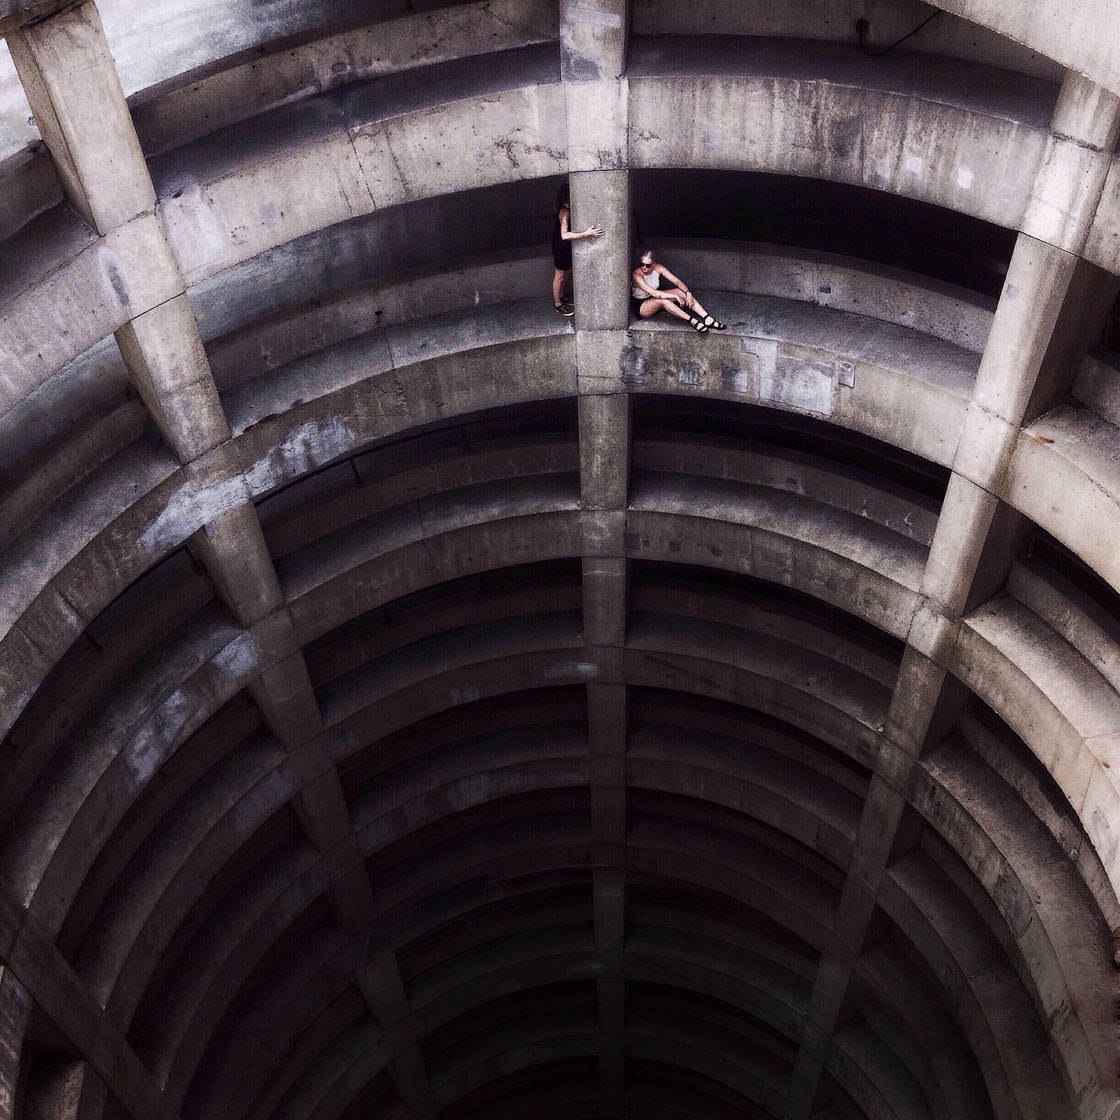
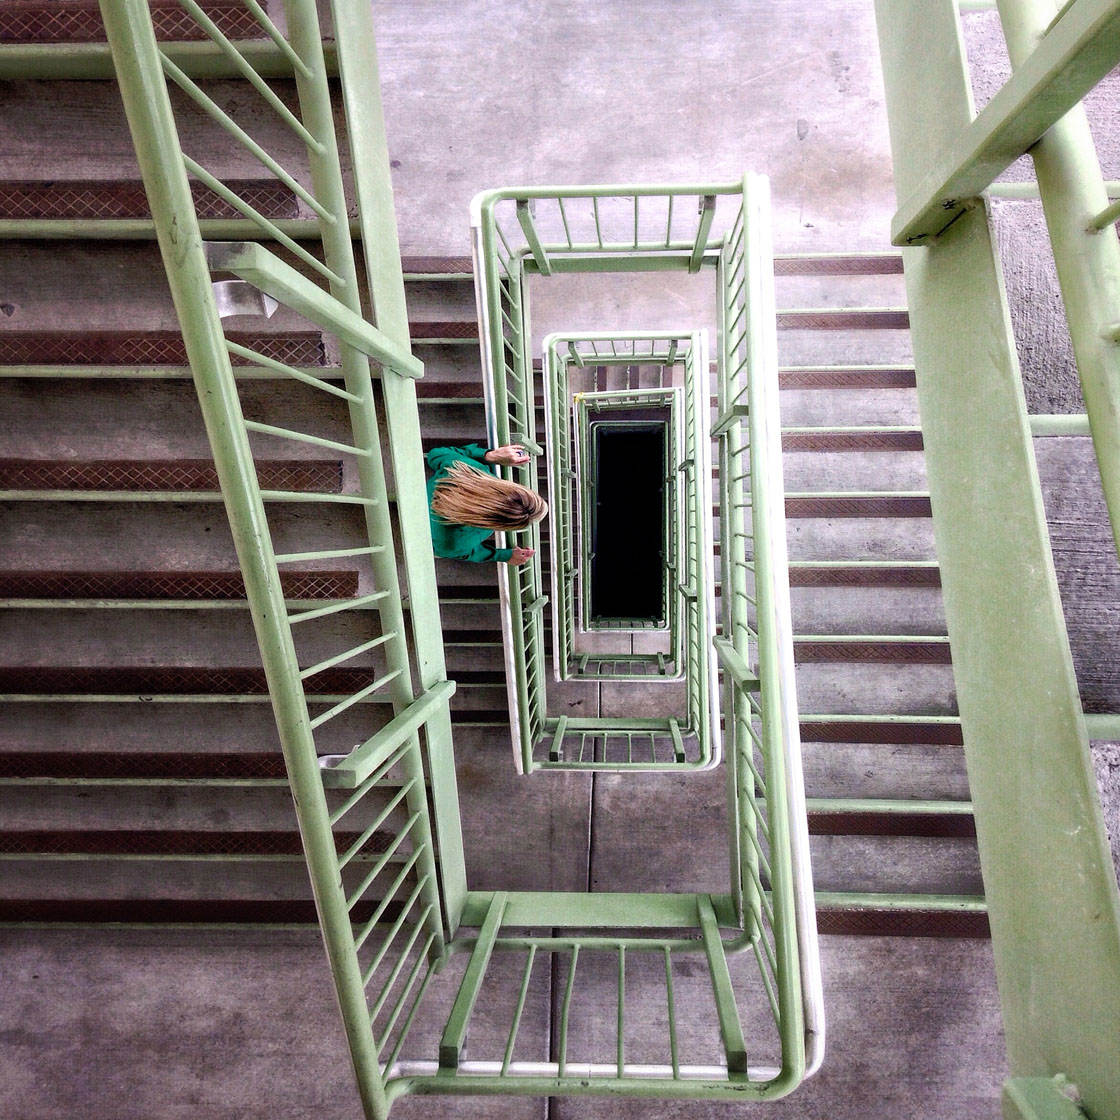
5. Shoot From High Up To Make Everything Look Tiny
If you want to make your subjects look smaller and more vulnerable, you’ll need to find a high vantage point to shoot from.
An aerial view of a city will make everything look tiny, as if it’s a miniature toy model.
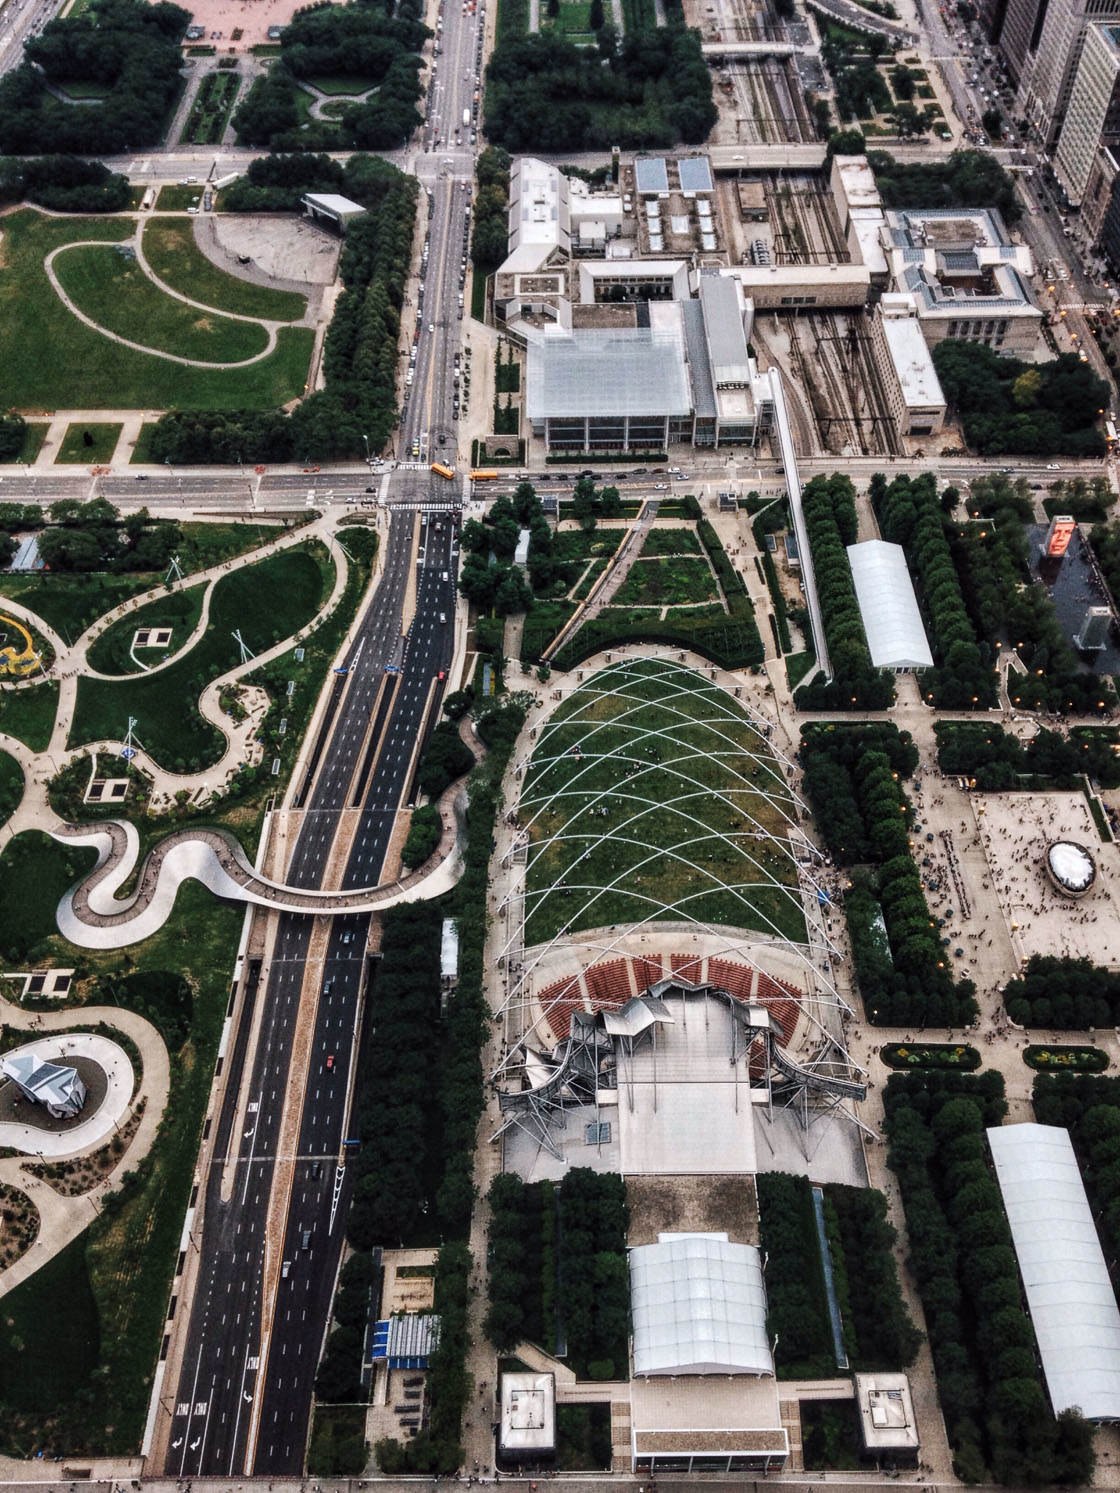
This is a great example of creating a unique perspective that most people never see. It’s especially useful when familiar landmarks at ground level are seen from a different perspective.
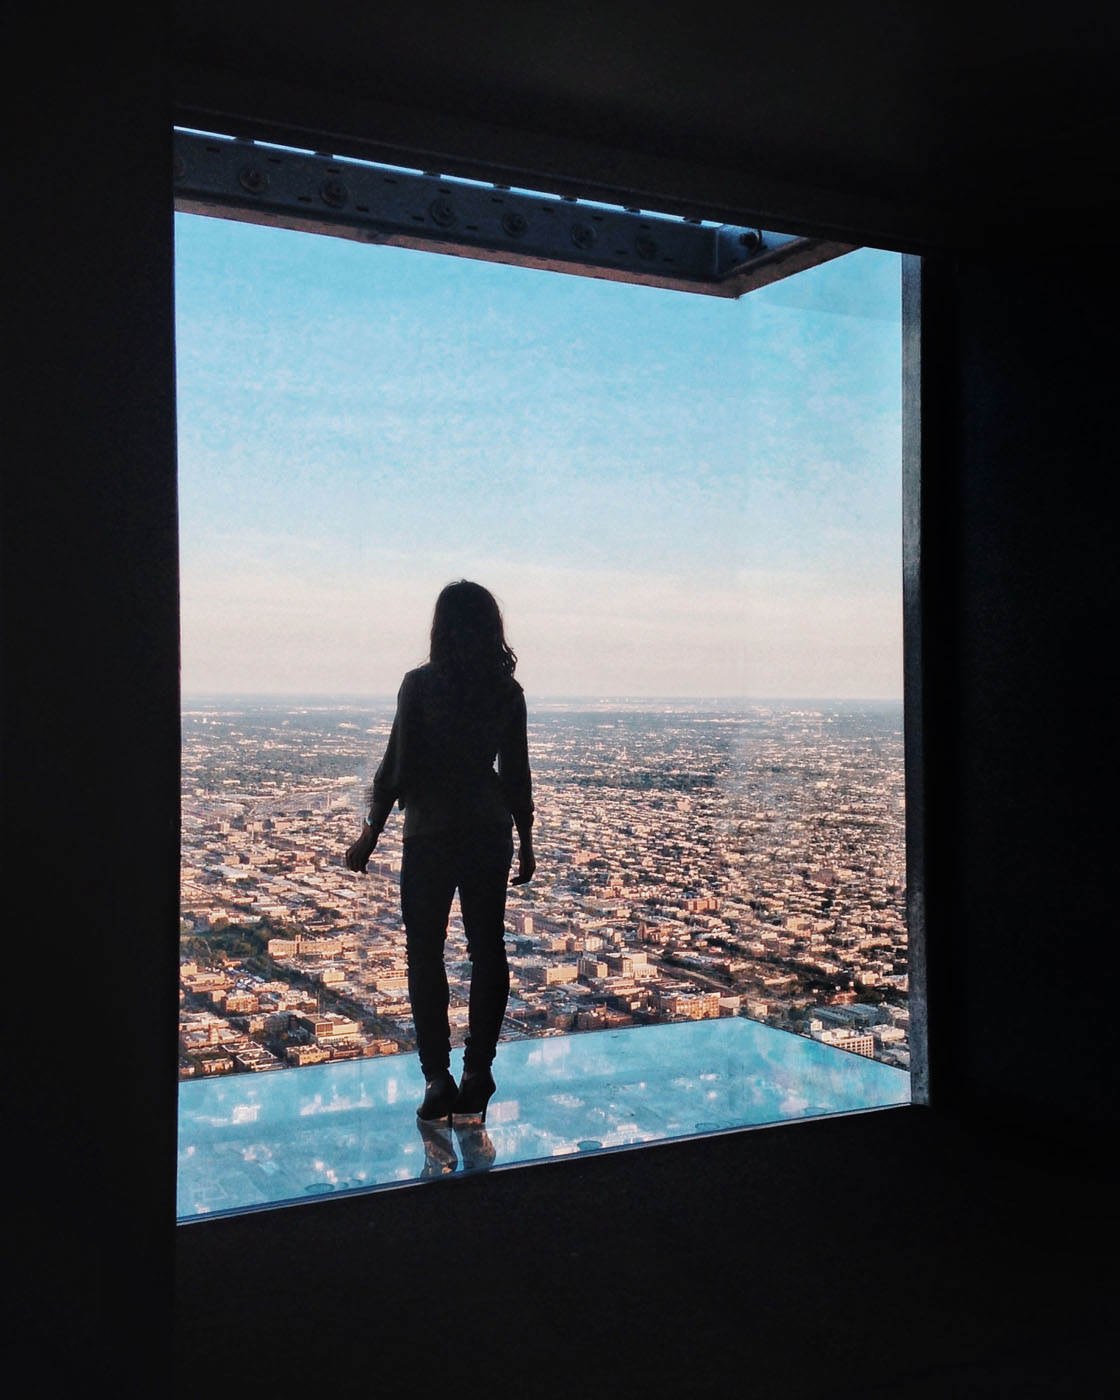
Normally we only see buildings and other landmarks from ground level where they tower above us, but shooting from high up creates a completely different sense of size and scale.
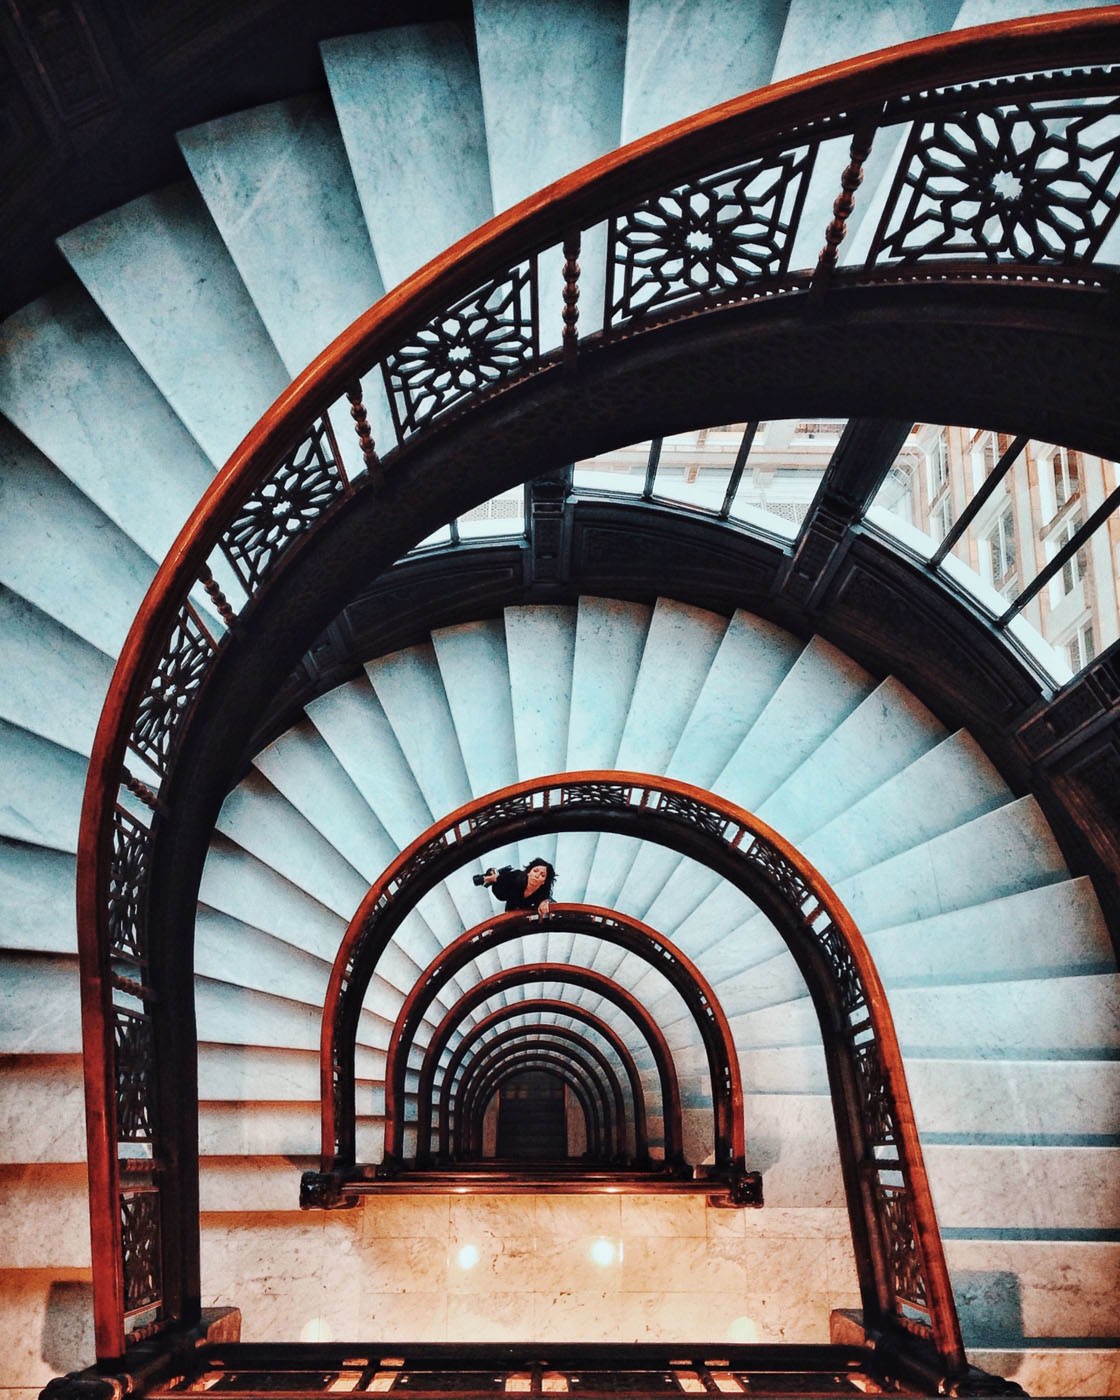
You can also use this technique inside large buildings. Try shooting from high up on a balcony or from the top of a stairwell.
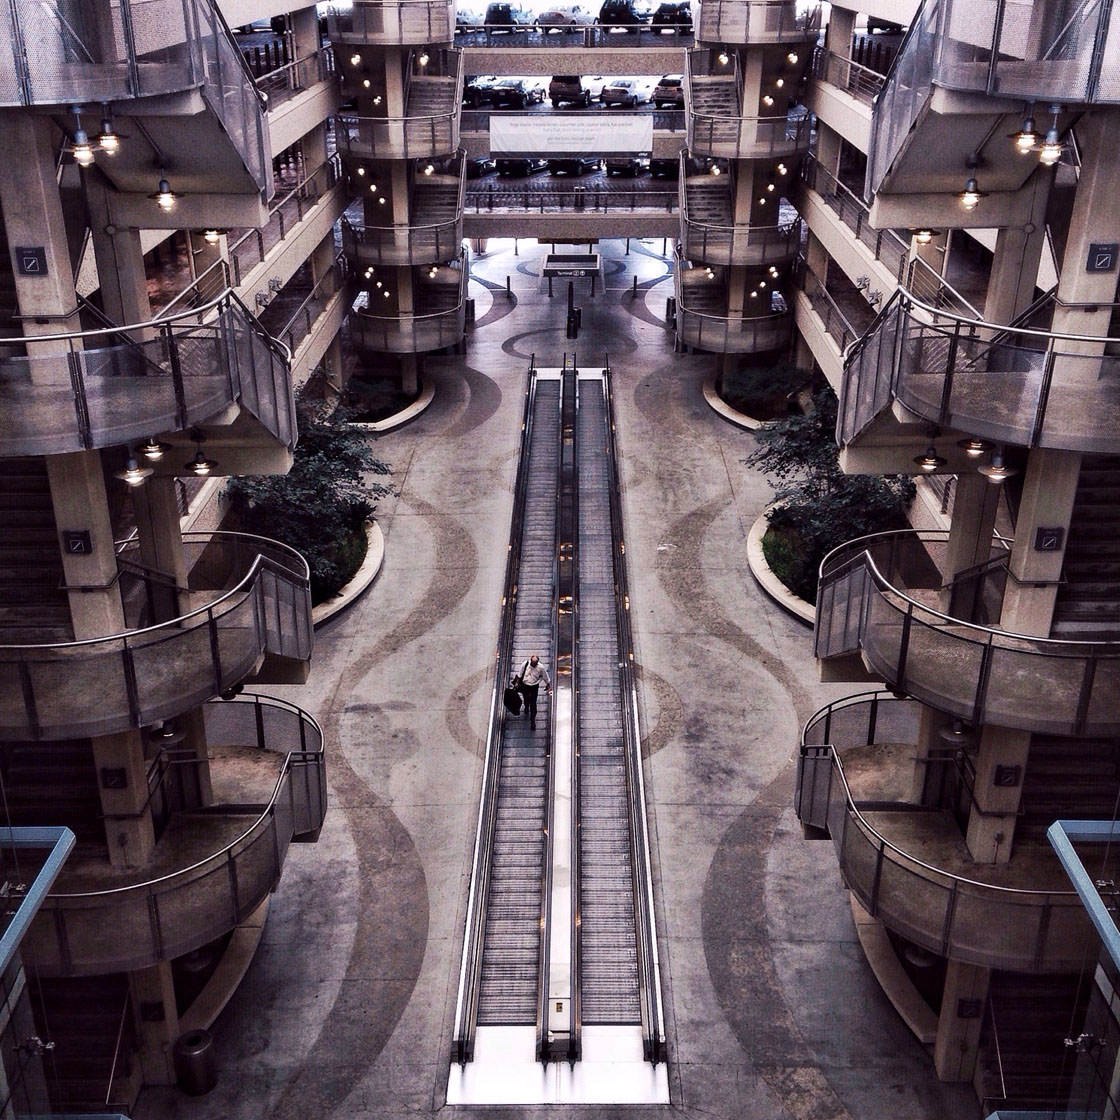
I particularly like taking photos from the top of a spiral staircase. The concentric lines help to draw the viewer right into the focal point.

Having a person at the bottom of the stairwell allows you to create a really strong sense of depth and scale, giving the photo a very strong visual impact.
6. Shoot From A Distance
Another easy way to make your subject look tiny against its surroundings is to shoot from a distance.
This works particularly well when photographing people in both landscapes and urban environments.
When you shoot from a distance you’re able to include lots of negative space or tall buildings within the frame.
This has the effect of making the subject look even smaller in comparison to their surroundings, adding to the sense of size and scale in the photo.

Shooting from a distance also allows you to include foreground objects, such as the road markings in the photo above.
Because these foreground objects are closer to the camera, they appear much larger in comparison to the person who’s further away. Again, this allows you to play around with the sense of scale in your photo.
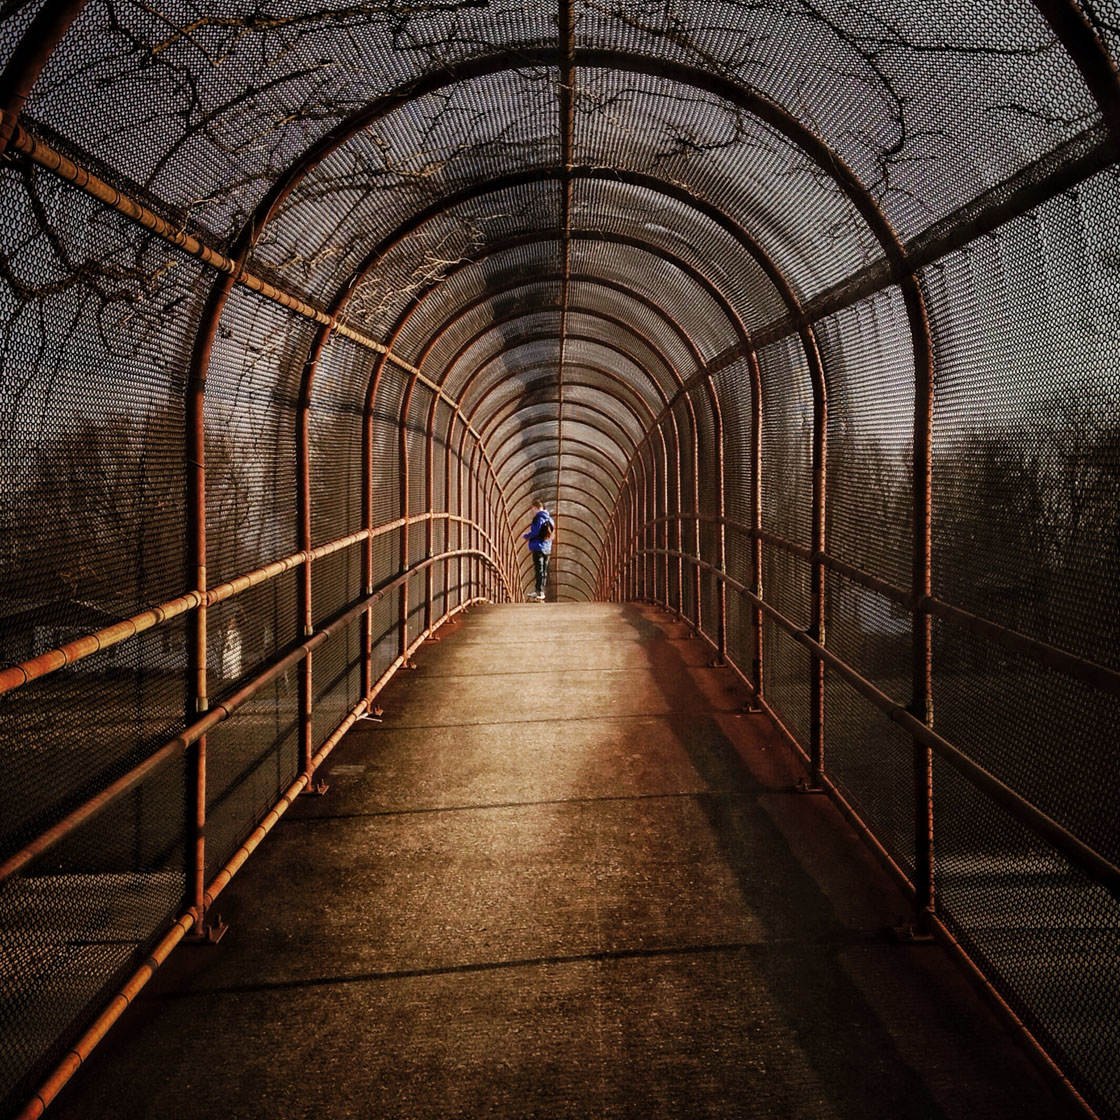
If you’re shooting a scene that has leading lines converging from the foreground into the distance, try placing a person in the distance where the lines meet.
Even if the person isn’t actually that far away from you, the lines will create a strong sense of depth, making the person appear further away than they actually are.

7. Shoot Through A Frame
Using an object in the foreground to act as a frame around your scene is a great way of drawing attention to your focal point. But it can also help to create a sense of scale to your photos.
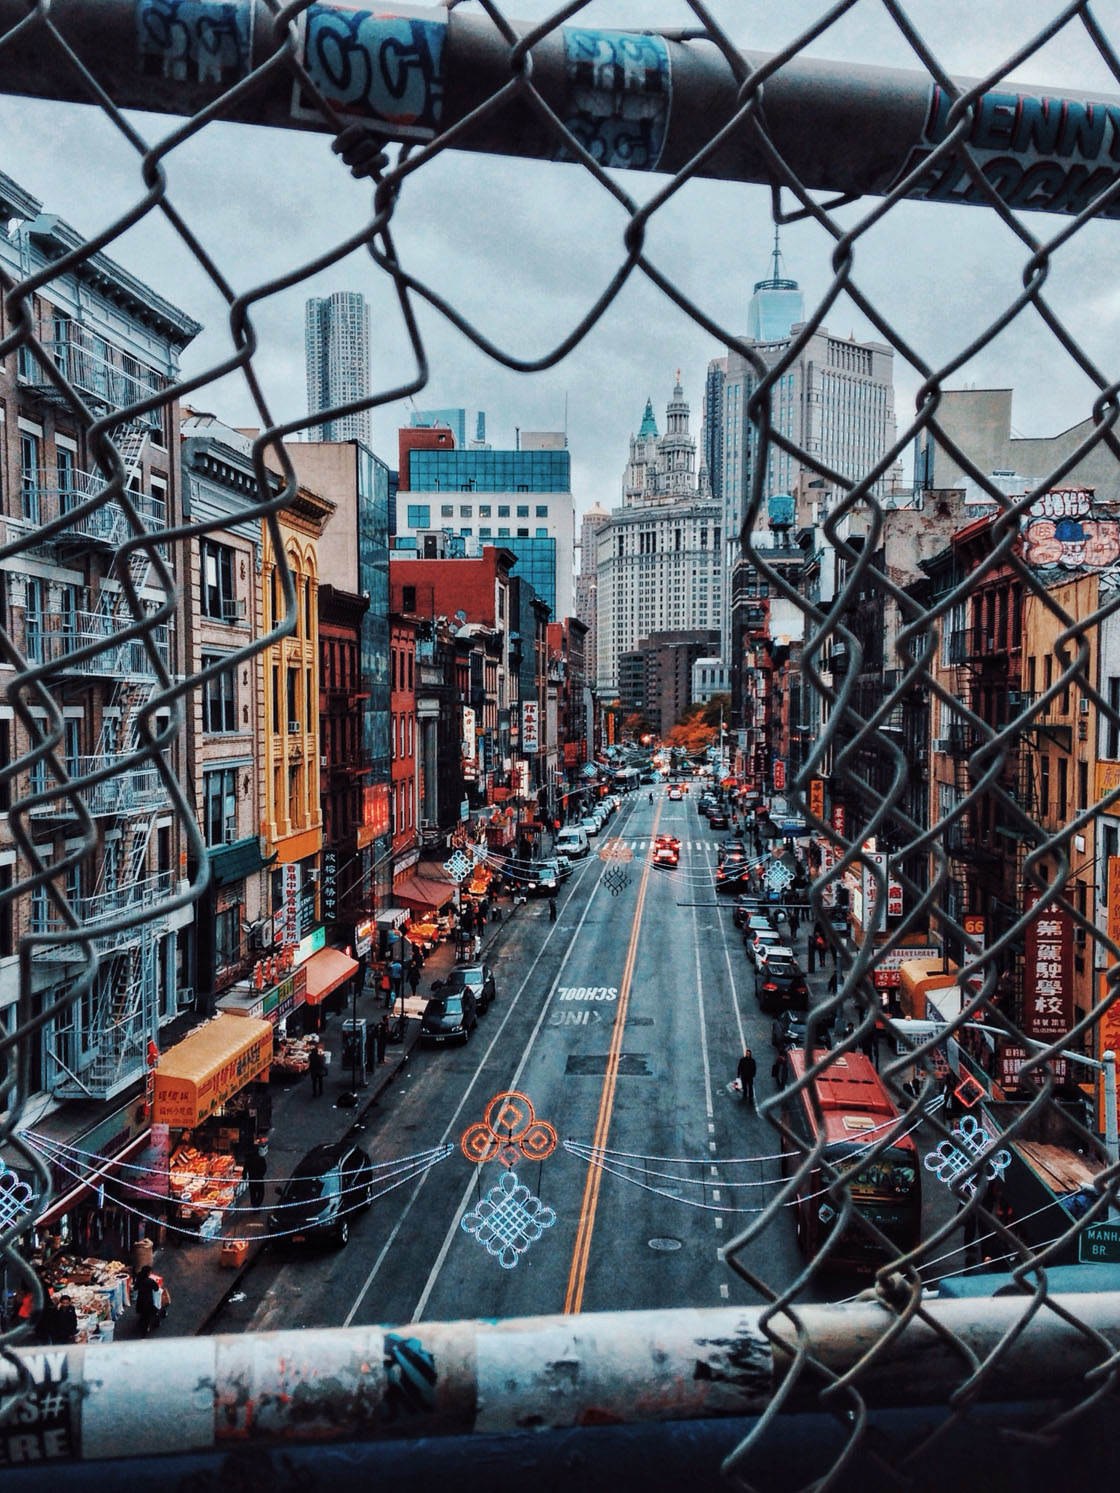
This is because you’re making the scene beyond appear smaller and more distant by including a close-up framing object in the foreground. The viewer is able to appreciate the foreground as well as distant elements.

Typical framing elements that you could use in your photographs include constructed objects like a fence, door frame, window frame or peephole.
But a good frame doesn’t necessarily have to go around all four edges of the image.
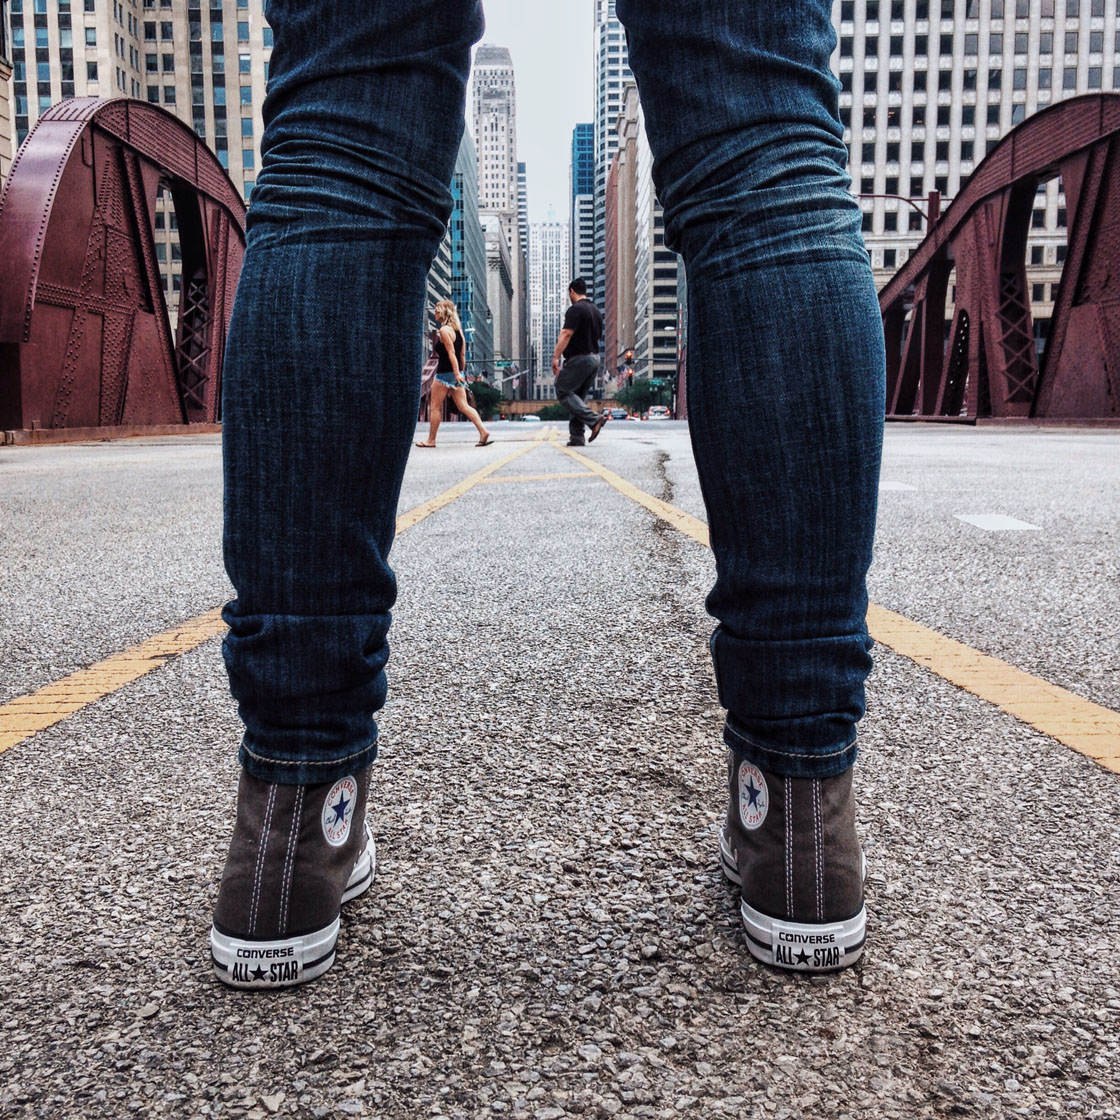
Shooting from a low angle through this person’s legs allowed me to create an interesting frame in the foreground. Catching people walking in the distance within the frame adds to the sense of scale.
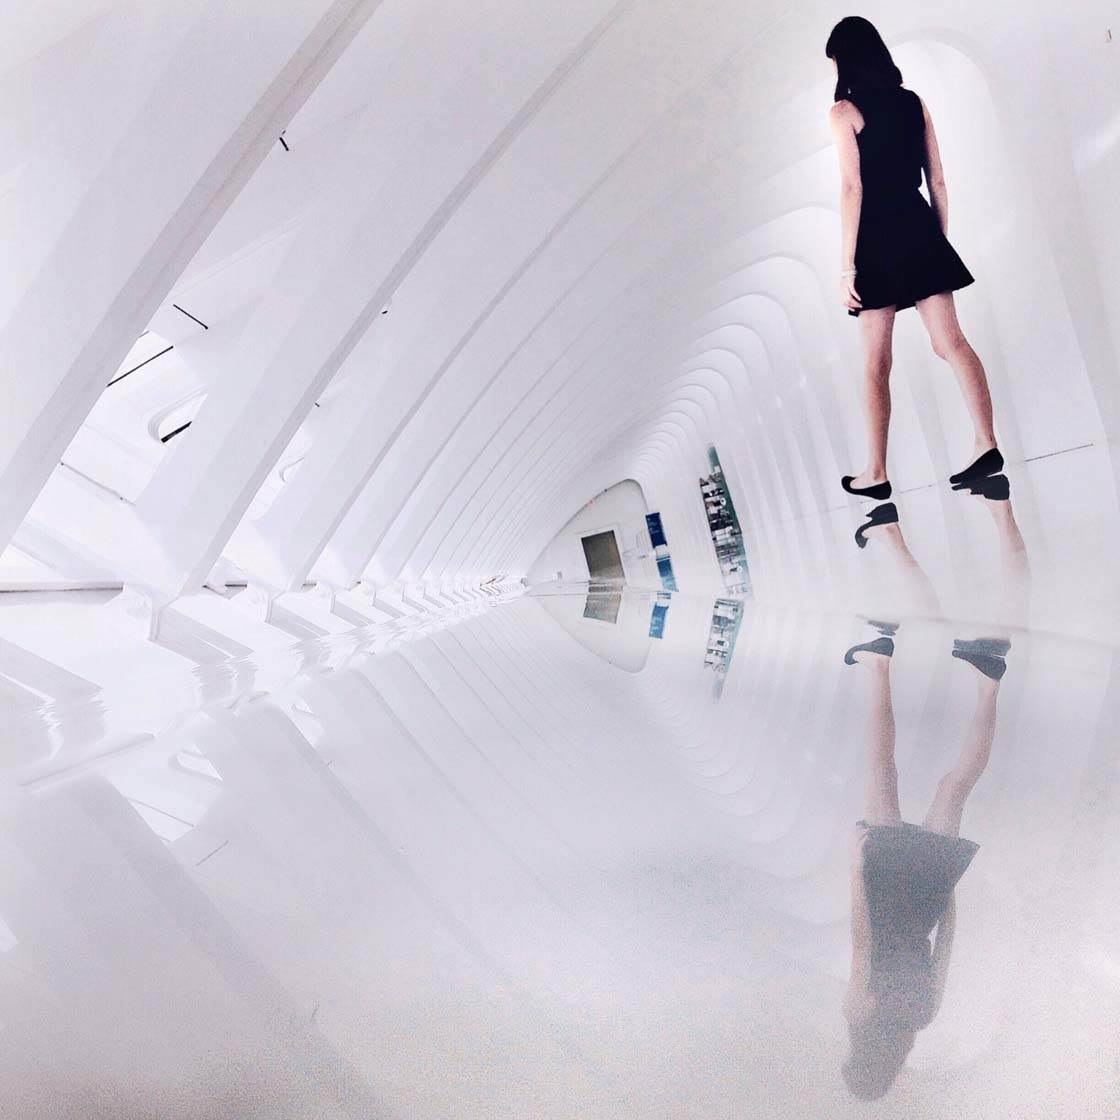
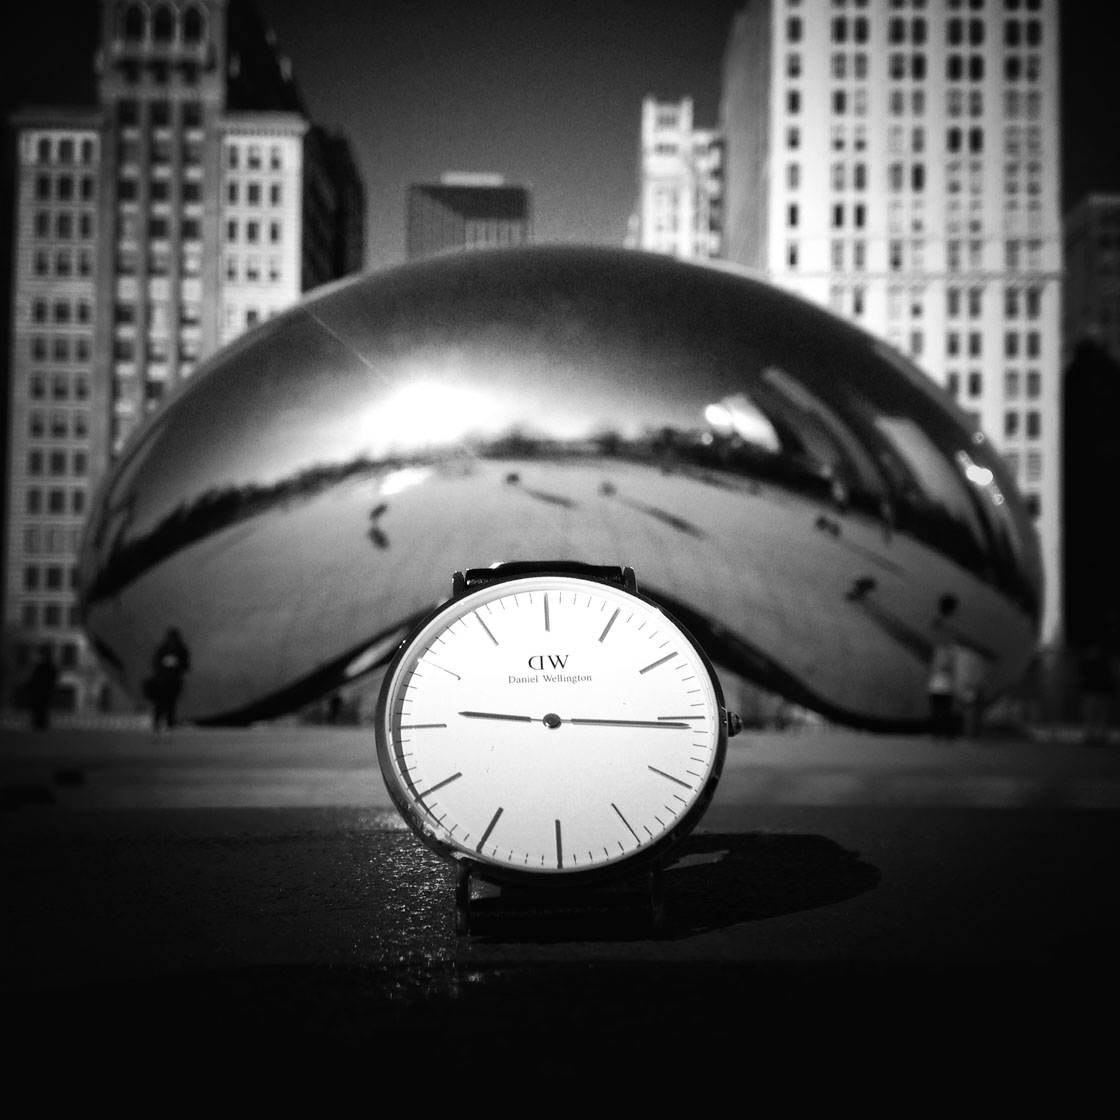
8. Use Forced Perspective
You’ve probably seen photos of the Leaning Tower of Pisa where it appears that a person is pushing against the tower. Of course, this is an optical illusion called “forced perspective.”
Forced perspective is a fun way of playing around with how the eye perceives size, scale and depth within a photo.
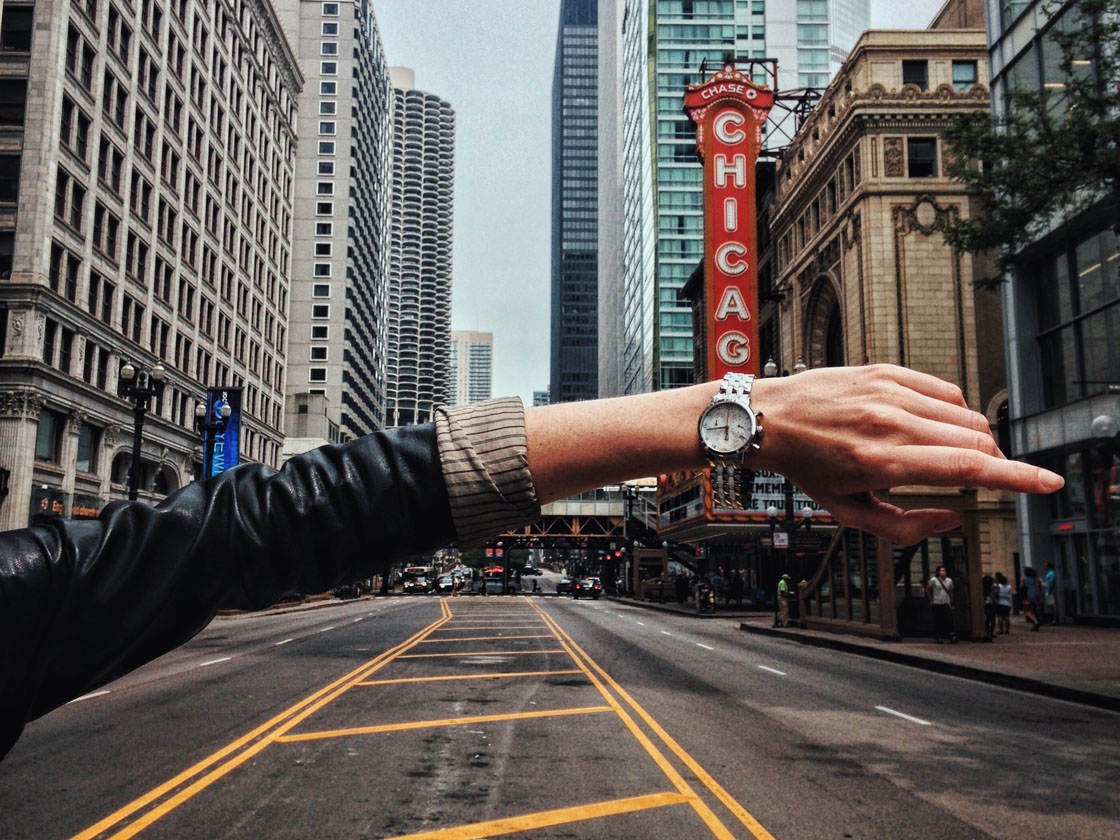
Here I’ve used a wristwatch in the foreground to appear as if it’s replacing the letter “O” on the sign in the background.
These optical illusions are achieved by making a subject appear larger, smaller, closer, or much further away than its original appearance.
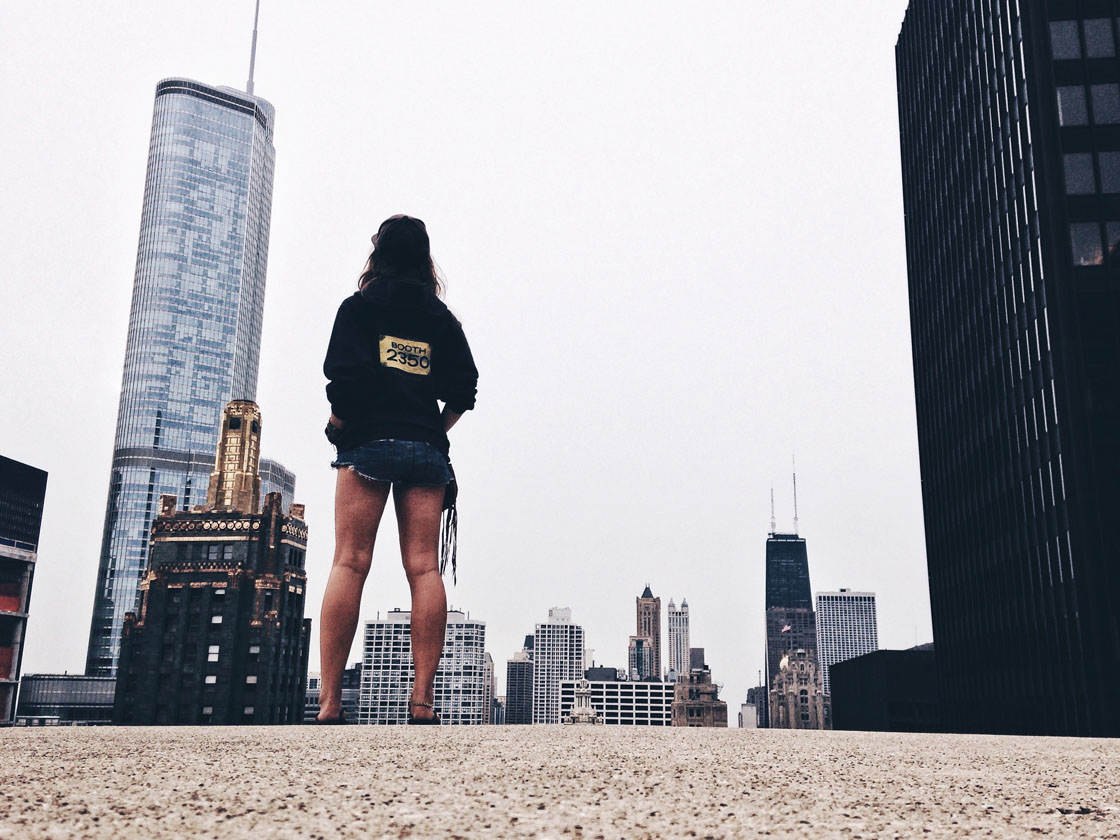
By shooting from a very low angle and positioning my subject in just the right place, I was able to make it appear as if she was taller than some of the buildings in front of her.
Playing around with forced perspective is a great way to add a fun element to your iPhone photography, and it’s bound to grab the viewer’s attention.
Conclusion
Conveying a sense of size and scale in your iPhone photos is important for creating strong images that people can relate to.
Creating a relationship between the elements in the scene is the key adding a sense of scale to your images. It helps the viewer to get a better idea of the size of the objects that you’re photographing.
You can use people or other objects of a known size to create a reference point in your images.
To convey the vastness of a scene try including lots of negative space in your composition.
Shooting from different angles will change the viewer’s perception of the size of your subjects.
For example, shooting from a low angle will make your subject look larger and more powerful, whereas shooting from high up or far away will make them appear smaller and more vulnerable.
Try using framing elements and other objects in the foreground to create depth and scale in your photos.
And don’t forget to have fun playing around with forced perspective to create wonderful optical illusions involving size and scale.

Great post!
I’m happy to hear that you enjoyed the article, Joanna! 🙂
Hi Jhon! I’d suggest to search through the eBay, maybe there you can find some good options. 🙂
So amazing and funny photos . I am searching this kind’s of post and at last got nice one here .
Glad you like the photos, Soniya! Hope this article inspired you to take some great iPhone photos yourself. 🙂