Are you a fan of live music concerts? If so, you’ve probably experienced the frustration of trying to capture tblackhe wonderful atmosphere with your iPhone, only to end up with photos that are completely underwhelming. Photographing live gigs can be challenging due to the low light conditions, ever-changing stage lights and moving subjects. But with a few simple techniques you can overcome these problems. In this article you’ll discover eleven tips for capturing exciting iPhone photos of musicians and live music events.
1. Get Close To The Stage
One of the main problems you’ll face with concert photography is getting decent photos of the musicians on stage. If you’re not close enough they’ll just appear as a tiny unrecognizable dot in the distance.
While the iPhone does have a zoom function, it’s not very good. It’s a digital zoom rather than an optical zoom, which basically means that as you zoom in the photo is enlarged and cropped, thus reducing the image quality.
I would recommend that you don’t use the zoom feature on your iPhone. It will only result in poor quality photos

Zooming with your feet is always the better option. If you want to capture close-up shots of your favorite band or singer in action, you’ll need to get as close as possible to the stage.
The closer you get, the more detail you’ll be able to capture, such as expressions on the faces of band members and detailed shots of the instruments.
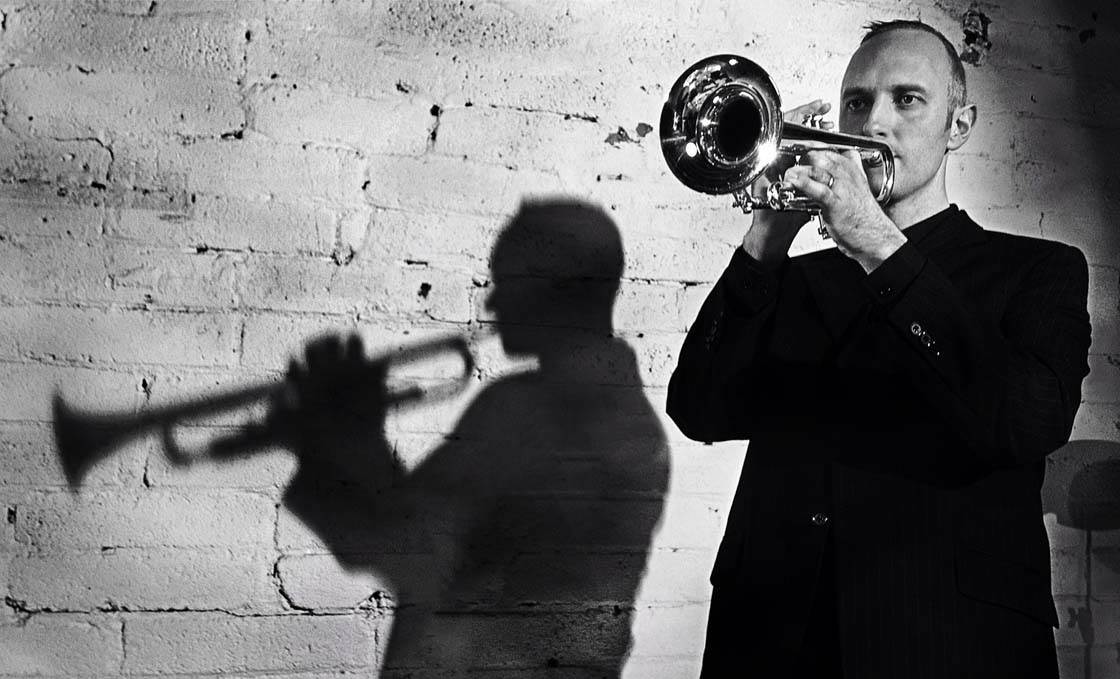
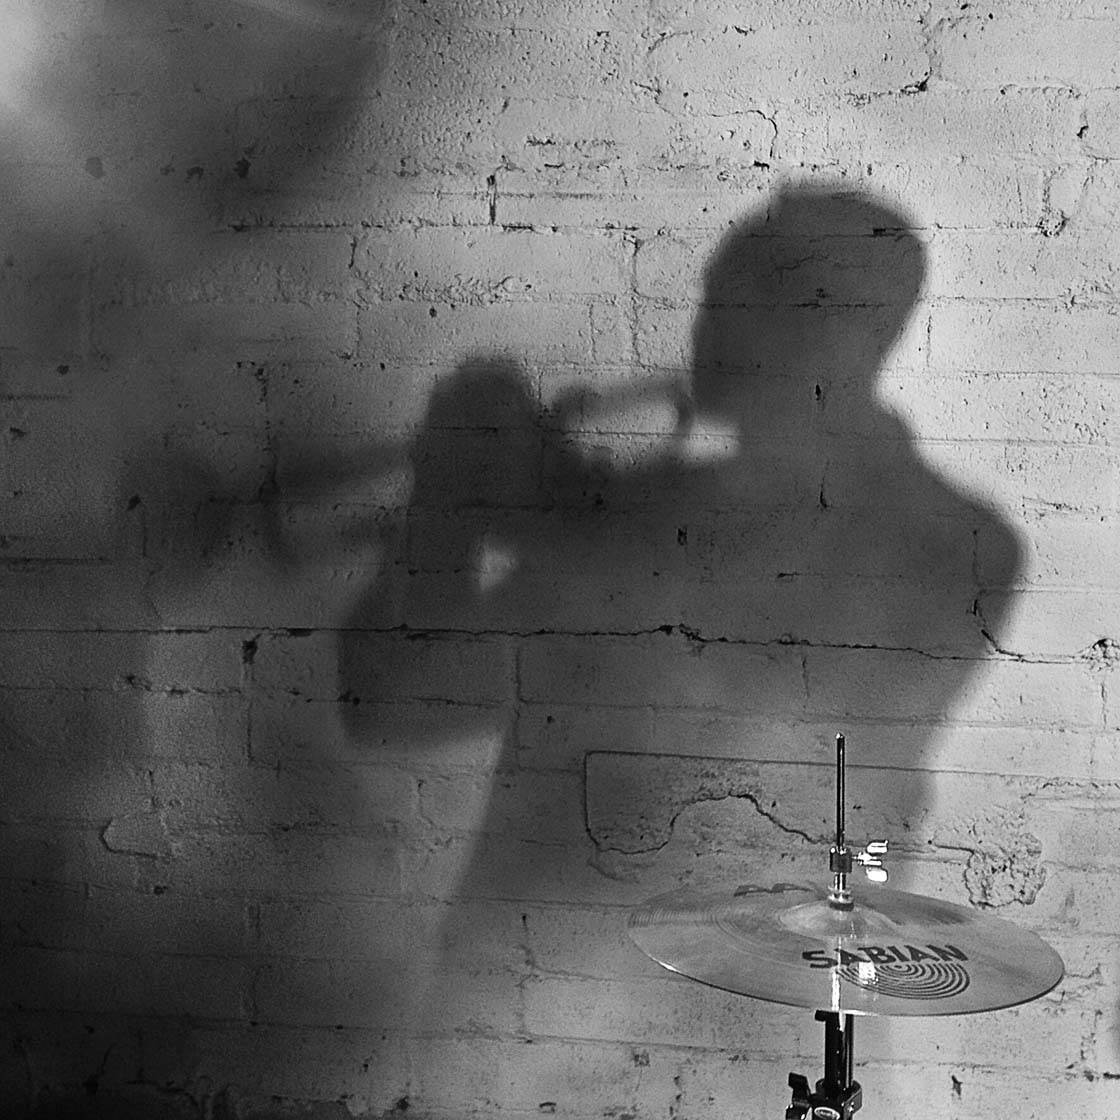
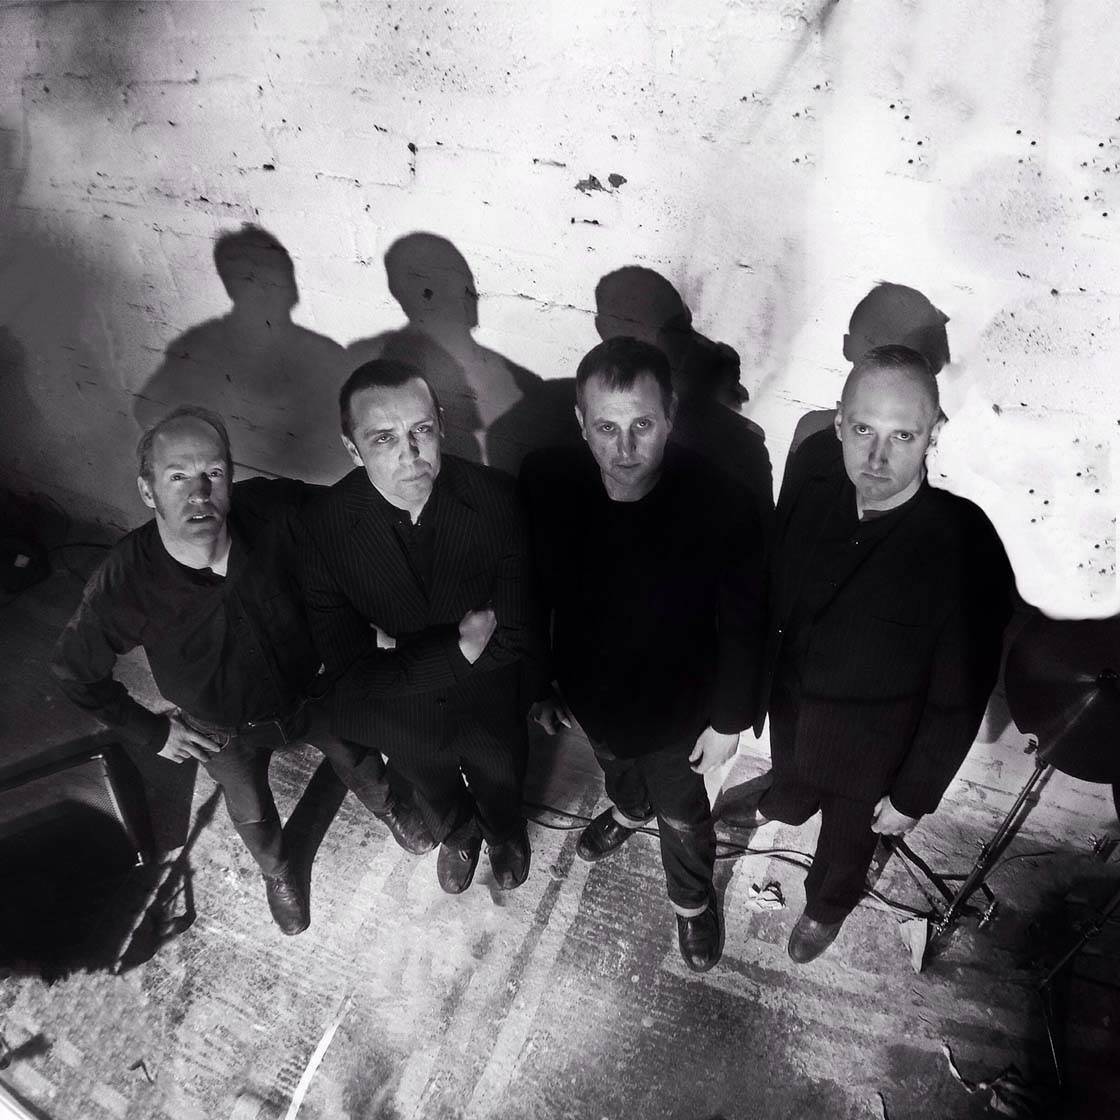
You should also look out for interesting shadows cast on the walls behind the musicians as these can add an intriguing and dramatic element to your photos.
If you still can’t get close enough to the stage to capture decent photos of the band, you might want to invest in a telephoto lens such as the olloclip 2x Telephoto Lens or Moment 2x Tele Lens.
Telephoto lenses attach to your iPhone’s lens, allowing you to effectively zoom in optically to get closer to your subject without having to move.
2. Capture The Overall Mood Of The Concert
Depending on the type of concert you’re attending, you might not be able to get close to the stage due to seating restrictions or crowds. If you’re too far away from the stage, it will be difficult to get any decent shots of the musicians.
But that doesn’t mean you can’t get good shots of the gig. Rather than trying to take photos of the band from a distance, focus on capturing the feeling of being at the concert.
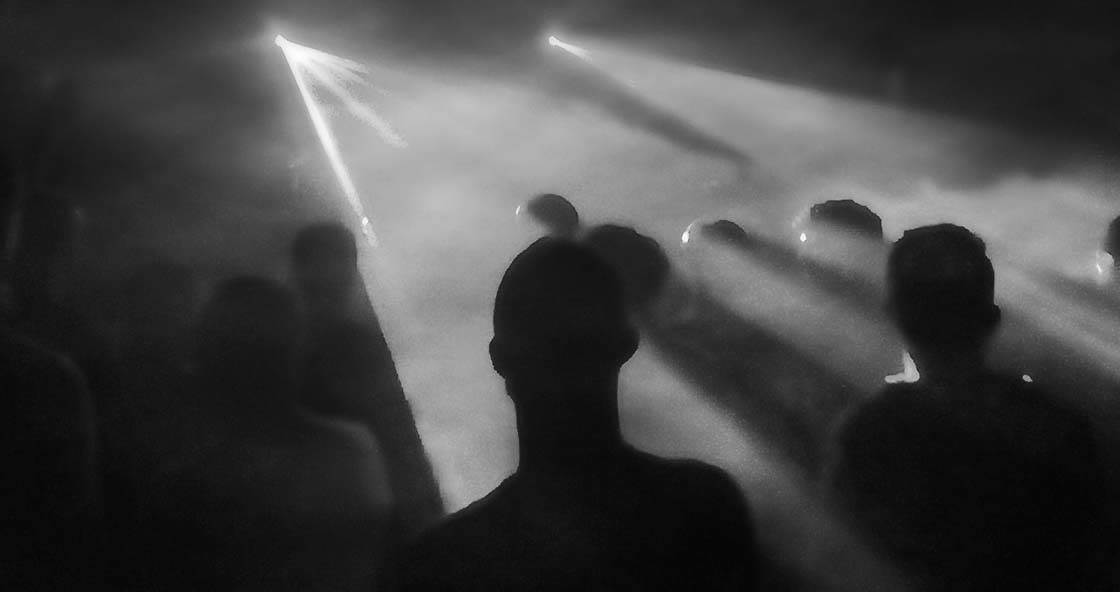
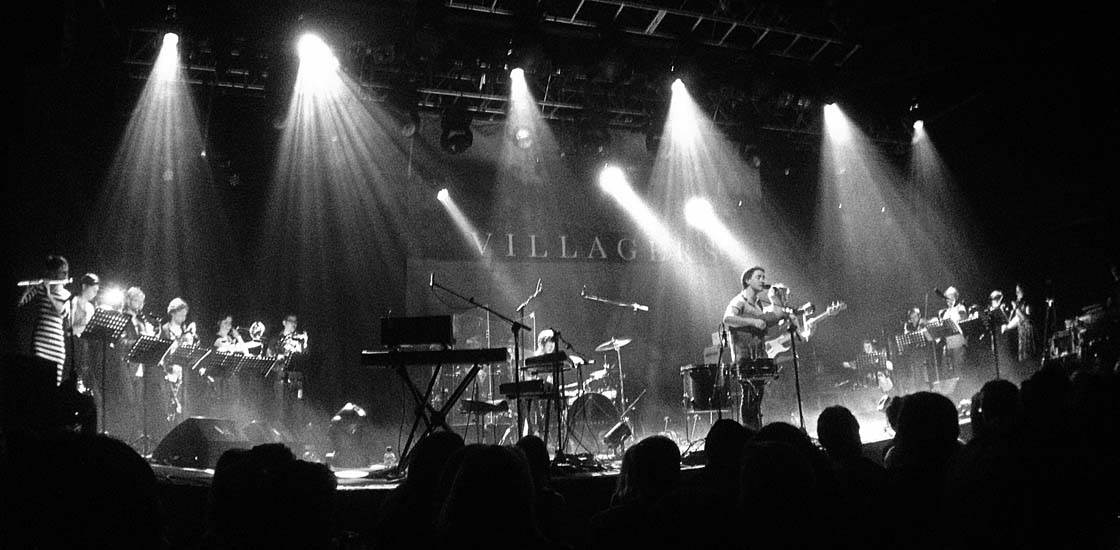
Many bands will have elaborate lighting rigs that they use to try and create a unique look for their live shows. You can create very dramatic and atmospheric shots by concentrating on these light shows.
To ensure the lights don’t appear over-exposed (too bright) you’ll need to reduce the exposure in the Camera app. After tapping to set focus, simply swipe down on the screen to reduce the exposure.
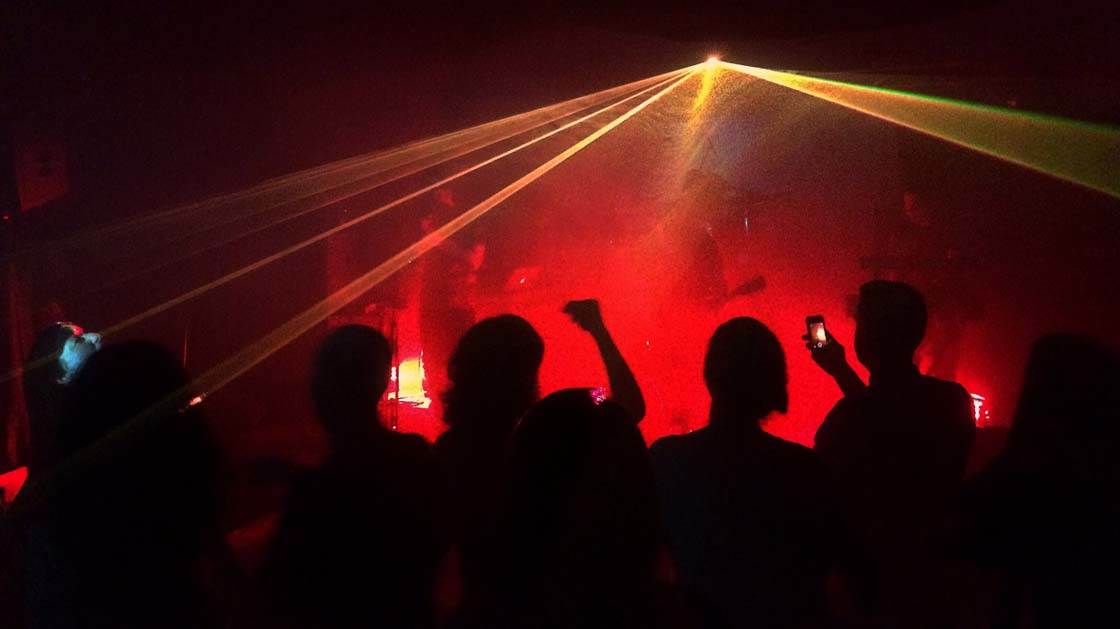
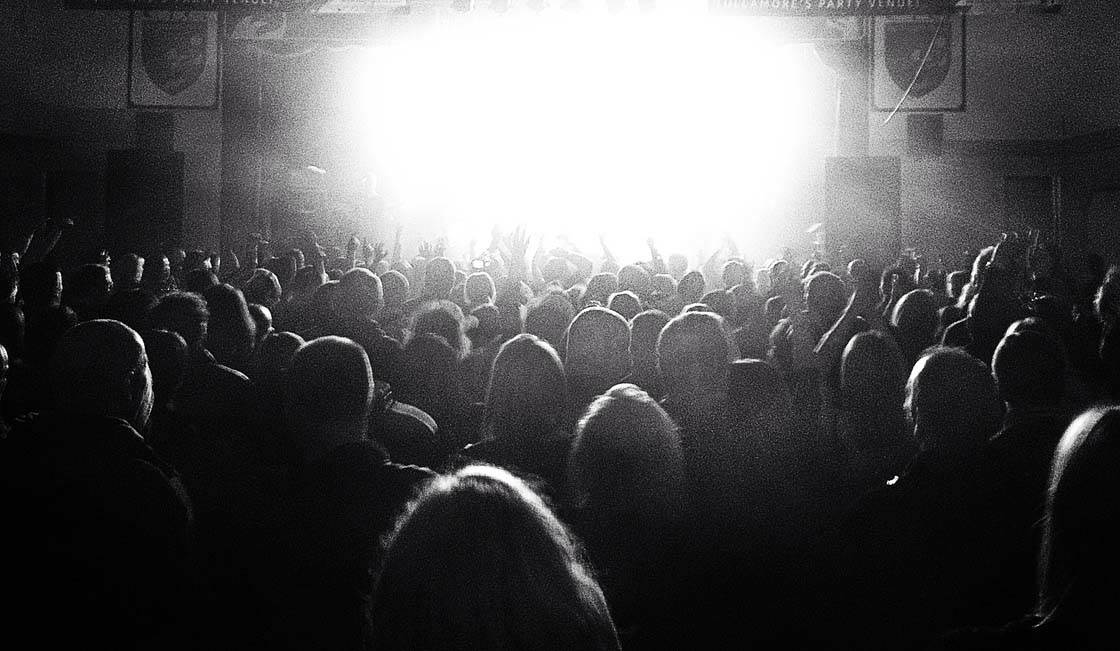
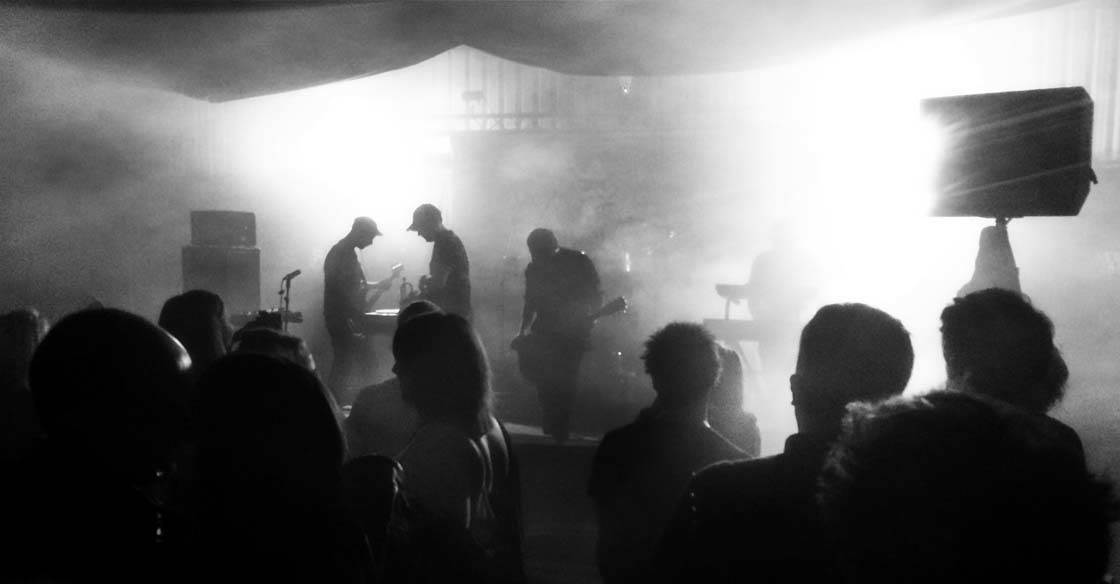
If the audience is standing or dancing, you can add extra interest to your photo by capturing them as dark silhouettes with the stage lights behind them. Again, you’ll need to reduce the exposure so that the people appear as black outlines against the brighter background.
3. Use Burst Mode To Take Lots Of Shots
Concerts are very dynamic environments. The band, lights and audience are constantly moving which makes it difficult to predict the best time to press the shutter button and take the shot.
Luck can play a huge part in getting a good shot at a live gig, and there will be lots of unrepeatable moments. The best way to improve your luck and capture unique shots is to take more photos.
Using the burst mode feature is the most effective option. Simply hold the shutter button down to fire off a series of shots in quick succession. Later on you can look through the sequence of photos, keep the best ones and delete the rest.
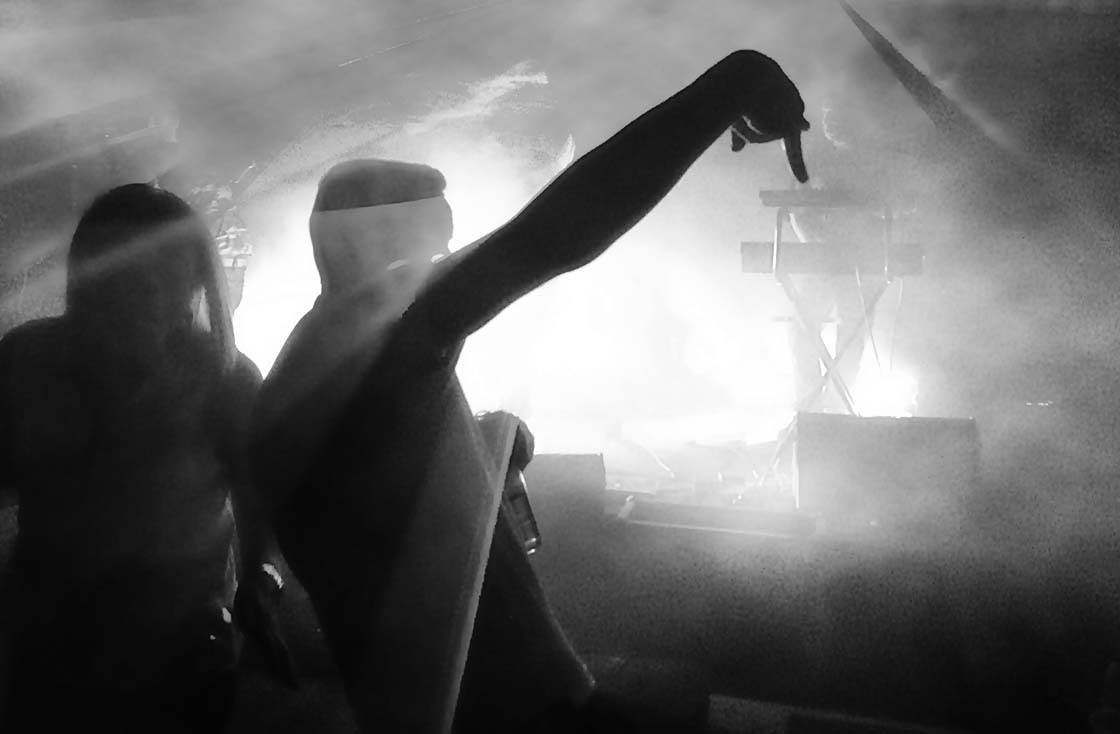
I captured this shot by pure luck. Suddenly one of the audience members reached out his arm, making it look as if he was reaching on stage to play the keyboard.
If you position yourself correctly and take enough photos, you should capture unique moments like this. Using burst mode will definitely give you more chance of getting the perfect shot when people are moving unpredictably.
4. Don’t Use The Flash
While the flash on later iPhone models is actually quite good in certain situations, it’s definitely not suited to shooting concerts.
Many people make the mistake of thinking they must use the flash when taking photos at concerts due to the general low light conditions at these events.
But consider that the effective range of the flash on an iPhone is only a few meters, and the stage is going to be a lot further away.
Using the flash will only light up the back of the heads of the audience members in front of you, and will also adversely affect the exposure settings when taking these photos.
There’s no chance that the flash will illuminate the stage, so make sure it’s switched off in the Camera app.
5. Use Stage Lights To Illuminate The Scene
Instead of using the iPhone’s flash to illuminate the scene, make use of the very powerful lighting that the band has provided exactly for the purpose you require.
There are likely to be spotlights to highlight band members as well as more general lighting for the overall stage. These lights should provide enough illumination for you to get perfectly good shots at a concert.
Just remember that the lights will be very bright, so you’ll probably need to reduce the camera’s exposure by swiping down on the screen. Reducing exposure will ensure you don’t end up with large over-exposed areas of light in your photo.
Also, bear in mind that stage lights will be constantly changing – they’ll flash, change direction and alternate in color. This makes it difficult to predict what they’ll do next. To give yourself a better chance of getting good photos, take lots of shots using burst mode.
6. Capture The Audience’s Reaction
The main reason that people like to take photos of a concert is to have a memento of the night. But don’t just concentrate on taking photos of the band.
A big part of the success of any live show is the reaction and participation of those attending the concert, so try to capture the excitement of the crowd in your photos.
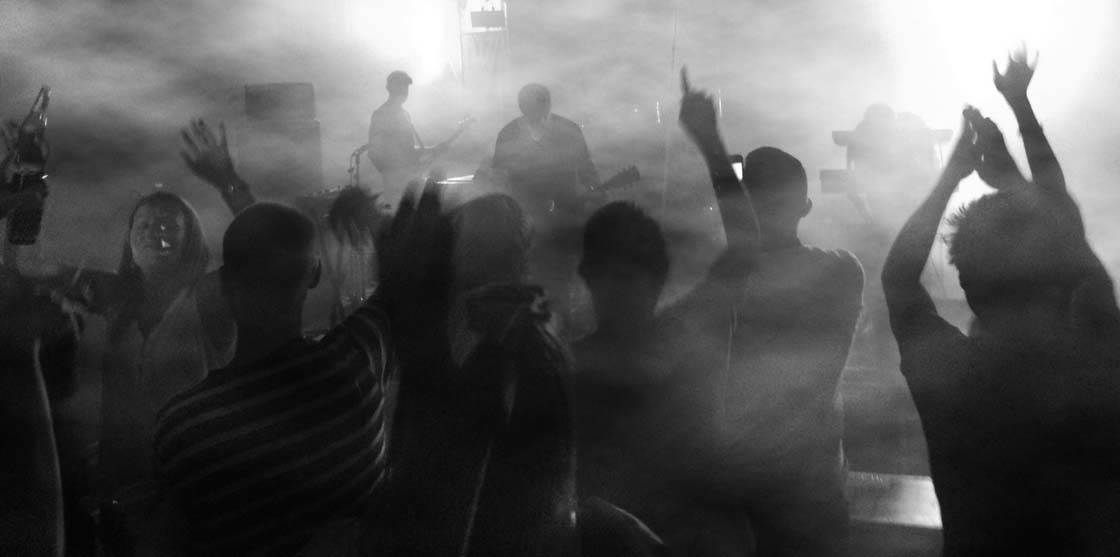
Photograph the audience dancing or applauding. Try to capture the atmosphere and emotions around you. The best place for shots like the one above is close to the stage as this is where the liveliest fans are likely to be!
As the crowd will be constantly moving, you may end up with some motion blur in your photos but this can actually add to the shot, giving it a more dynamic feel.
Whenever you’re photographing moving subjects, use burst mode to give you the best chance of getting the perfect shot.
7. Use A Wide Angle Lens Attachment
A lot of music festivals and concerts take place in unique venues that add to the overall mood and atmosphere. Being able to capture the surroundings as well as the stage and audience will make your shots more interesting.
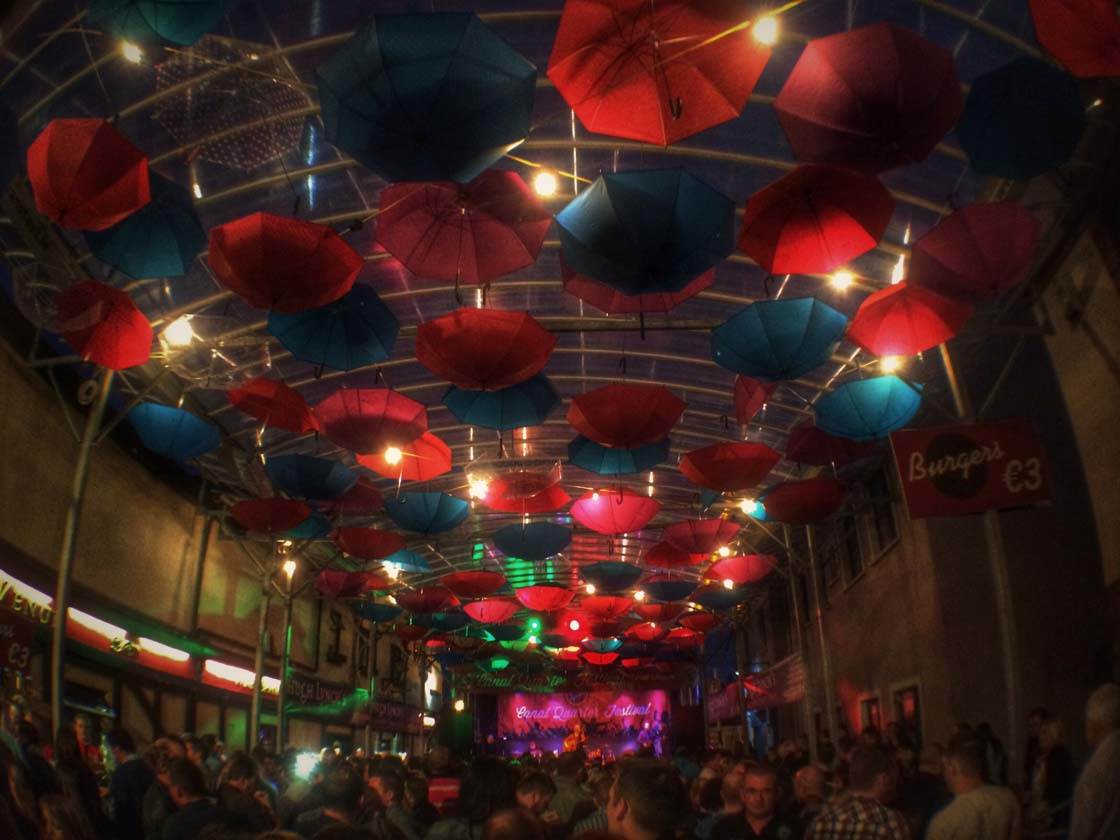
Using a wide angle lens attachment, such as the olloclip Wide Angle Lens or Inmacus Wide Lens, means that you can get more of the surroundings into the frame.
The photo below was taken at a festival called Castlepalooza in my home town. The festival takes place in the grounds of a castle with one of the stages in a courtyard area.
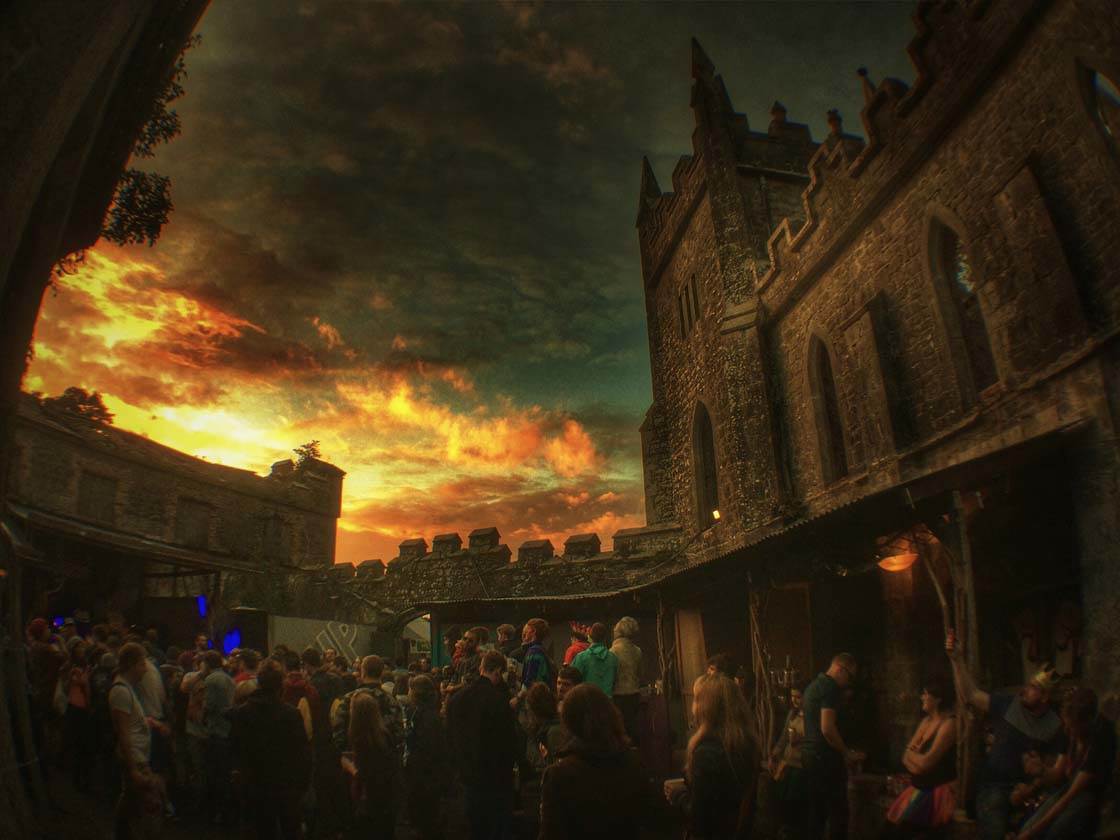
I wanted to capture the uniqueness of this concert location by including the battlements and the setting sun in the frame. This was only possible using my olloclip wide angle lens.
For more information on iPhone lenses, check out our in-depth reviews of olloclip and Inmacus lenses.
8. Convert Your Photos To Black & White
As mentioned already, most live shows will have elaborate lighting setups. These lights offer great photo opportunities and provide ample illumination in low light situations.
However, one of the downsides to using the band’s lights for your shots is that you can end up with clashing colors and unrealistic skin tones as a result of the different colored lights.
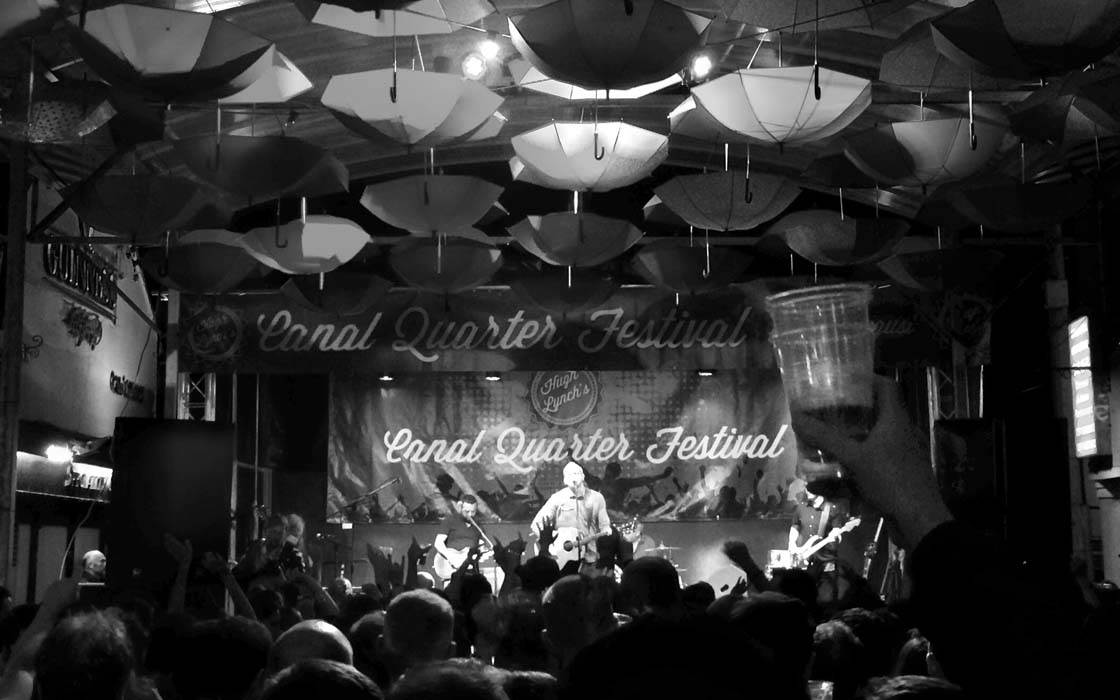
The best way to counteract this is to remove the color in post-processing by converting the image to black and white. Almost every photo editing app will let you create black and white photos.
Snapseed, VSCO Cam and Filterstorm Neue are all popular editing apps that include a black and white option. However there are also dedicated black and white apps such as Dramatic Black & White, Ansel, and BLACK.
Whichever app you use, bear in mind that black and white photos usually look better if you increase the contrast a bit. This makes the dark areas darker and the bright areas brighter, creating better definition in the photo.
Black and white is also useful for rescuing photos with blown out (completely over-exposed) highlights. This is particularly common when photographing bright stage lights.
While you can’t bring back any detail in the pure white blown out areas, converting the photo to black and white will make the problem less obvious.
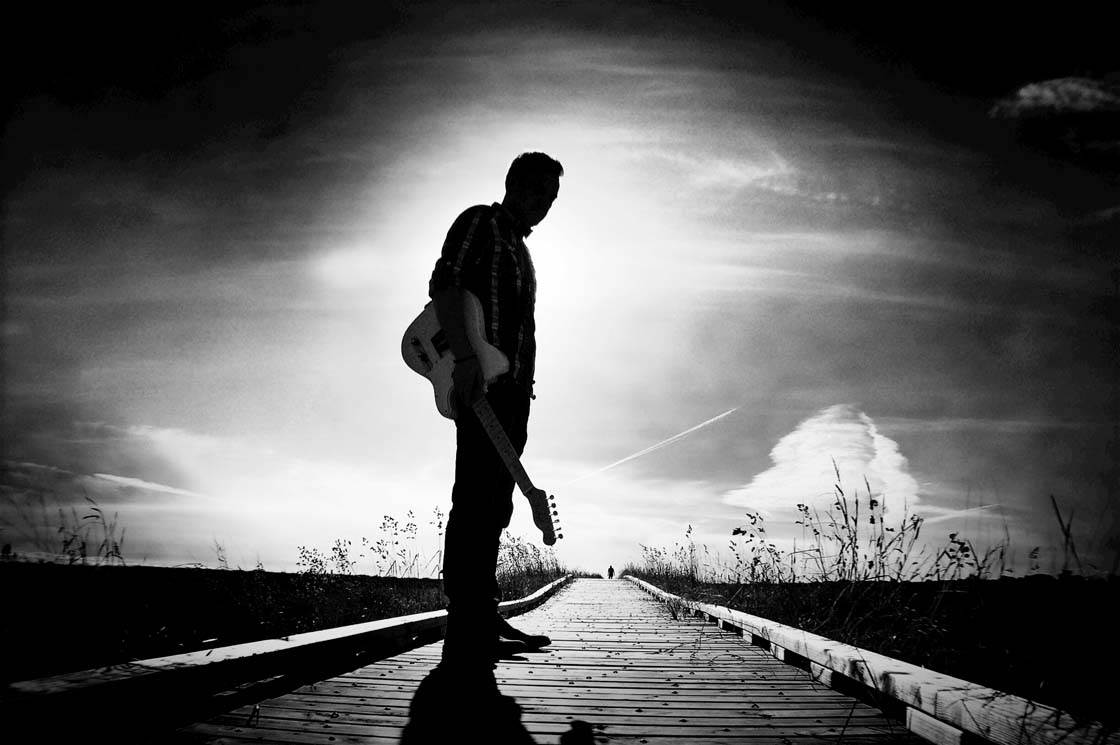
Silhouette photos also look great in black and white as it emphasizes the dark outlines of your subjects, making the pictures look even more dramatic.
9. Photograph Musicians On The Streets
Live music photography doesn’t just have to involve shooting in indoor locations with low light. You can often find musicians performing in towns and cities during the day.
Whether it’s a street festival, carnival, or a lone street performer, keep your eyes peeled for interesting photo opportunities. Always be on the lookout for something a bit different that will make your photos more unique.
The beauty of photographing musicians who aren’t performing on a stage is that you can usually stand anywhere you want, which offers you more options for different shooting angles.
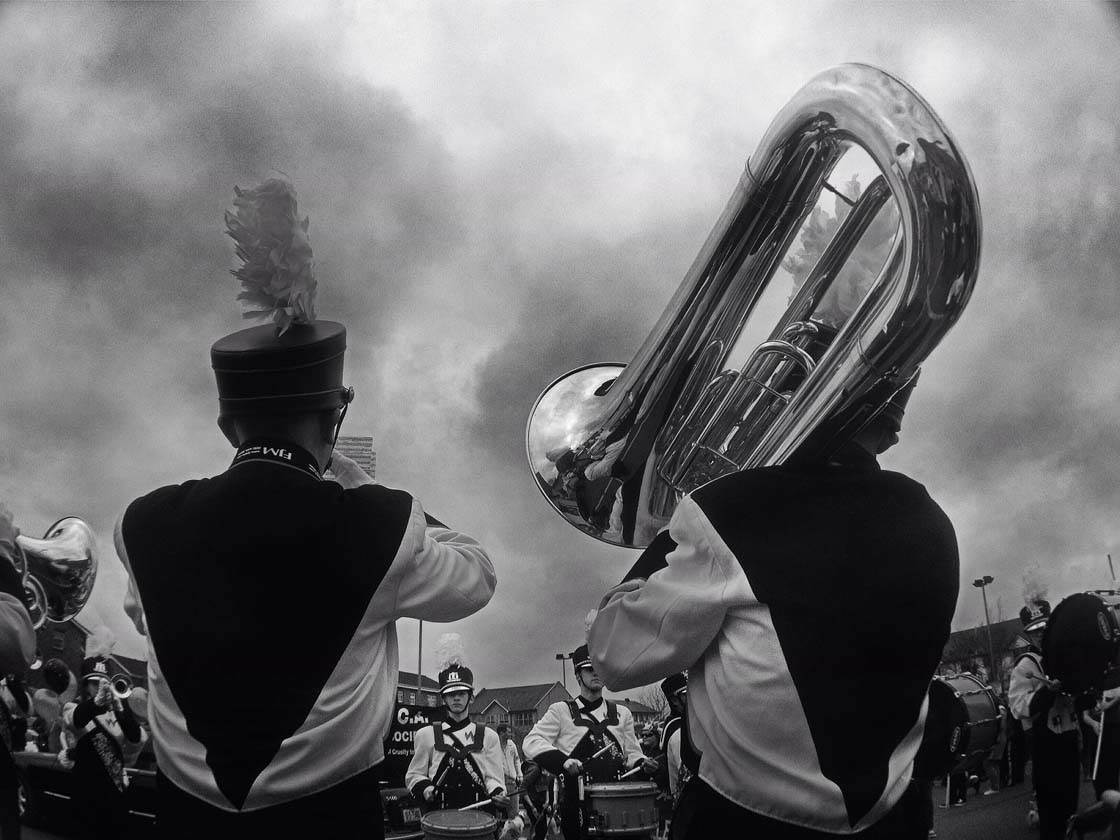
In the photo above of a brass band warming up for a St. Patrick’s Day parade, I took the picture from behind the musicians. This creates a more unique and interesting picture than if I’d captured them from the usual front angle.
In busy scenes like this it’s often best to shoot from a low angle. This allows you to use the sky as your background, eliminating distractions on the ground and making your subjects stand out more clearly.
The other obvious benefits of photographing outdoors are that the light conditions will be brighter and you don’t have to deal with flashing or colored stage lights.
10. Organize A Band Photo Shoot
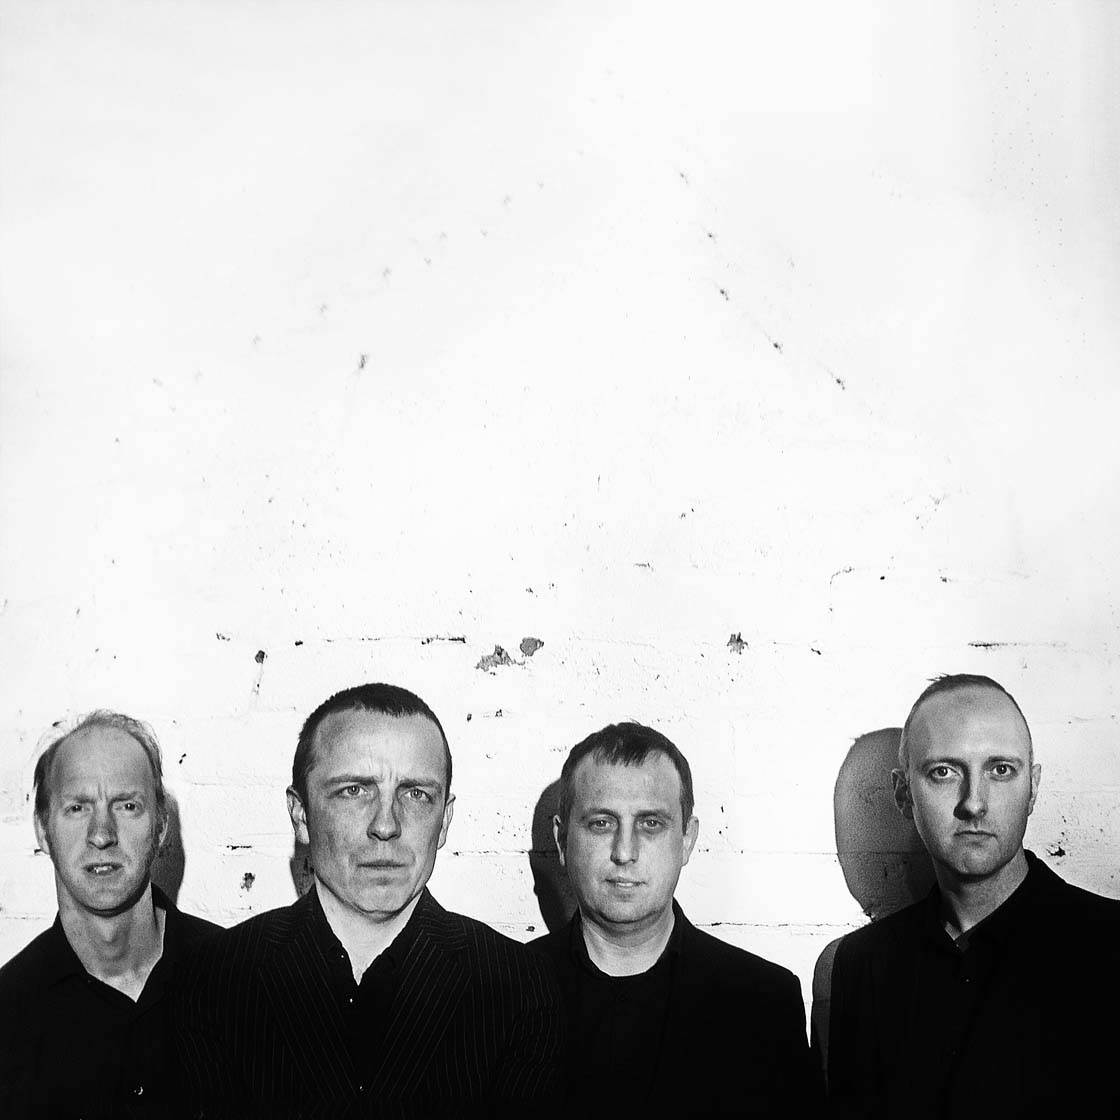
If you’re interested in delving into music photography a bit further, you should consider organizing some photo shoots with local bands and musicians.

Taking the musicians out of a live setting will give you far more control over the type of shots that you get.
You can pick an interesting location, pose the band however you want, and shoot in the best kind of light to achieve the look that you want.
Every town has up-and-coming musicians who would be only too happy to have their photos taken. So when you next go to a gig, stick around afterwards and approach the band to see if they’re interested in a photo shoot.
This is your chance to put your iPhone photography skills to the test, and maybe even get some exposure for your photos!
11. Put Away The Phone
Finally, the most important bit of advice that I would give is to keep the photography to a minimum when you’re at a concert. This might seem counterintuitive because I’ve just been advising you that you need to take lots of photos for the best chance of getting great shots!
But you don’t want to watch the entire concert through your iPhone screen. This is pointless and you might as well not be there as you won’t be able to soak up the atmosphere and concentrate on the music. Plus it can be annoying for everyone around you.
So take your iPhone out for short bursts and fire off as many shots as you can. Then put it away and enjoy the gig!
Hopefully these tips will help you to improve your music photography, whether you’re shooting a live concert, street musicians or an organized band photo shoot. Just remember that photography shouldn’t get in the way of your enjoyment of the music!

Thank you so much for mentioning 2 things. No Flash, and put the phone away! I’m a musician, and I can’t tell you how many times people have come up to the stage flashing about with their phones and it totally ruins the vibe instantly. (especially when they use the light to take video, then it’s just shining in your face and you’re somehow not supposed to notice it) Also, yes, please put the phone away and take shots once in a while. We as musicians want to interact with the audience just as much as our band, so don’t constantly put screens between us. Anyway, as an amateur learning iphone photographer and professional musician, this article was great to read, thank you!
Glad you enjoyed the article Dillon – and great to hear about it from a musician’s point of view 🙂