Adding a textured background or overlay to an iPhone photo is a great way to enhance its visual appeal. You can use textures to replace an unwanted backdrop, make an over-exposed sky more compelling, or add a tactile appeal to the image. It’s easy to make your own unique textures using apps, but how do you apply them to an image? In this tutorial you’ll learn two techniques for adding your own background textures to your iPhone photos.
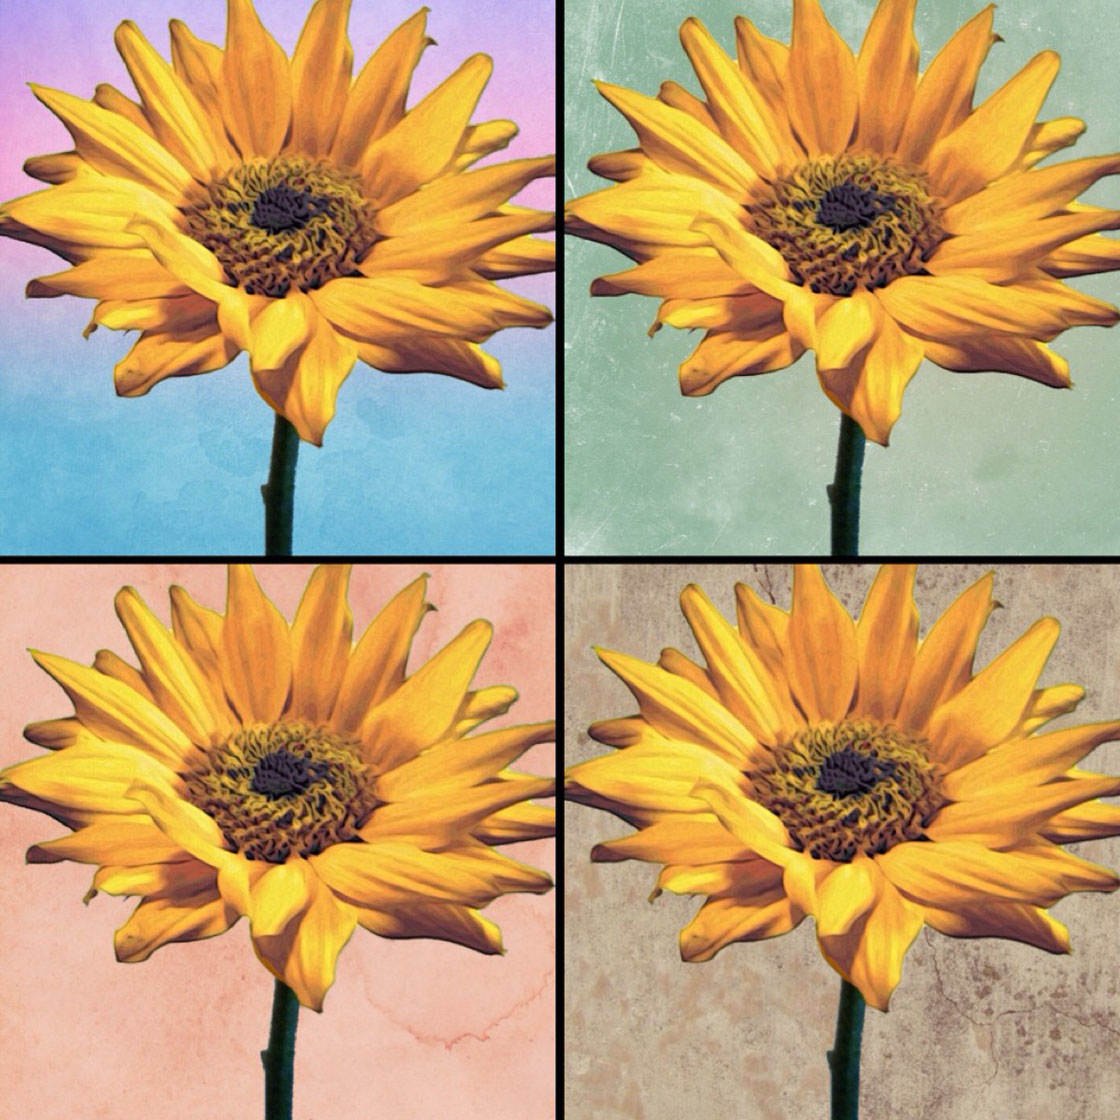
We’ll be using the Superimpose app for this tutorial. This is a versatile photo editing app that allows you to create double-exposures, mask parts of a photo, and blend two photos together. Click here for an in-depth tutorial on how to use Superimpose.
The techniques in this article involve combining an ordinary photo with a textured background or overlay. If you haven’t yet created any textured backgrounds, click here to learn how to create your own textures.
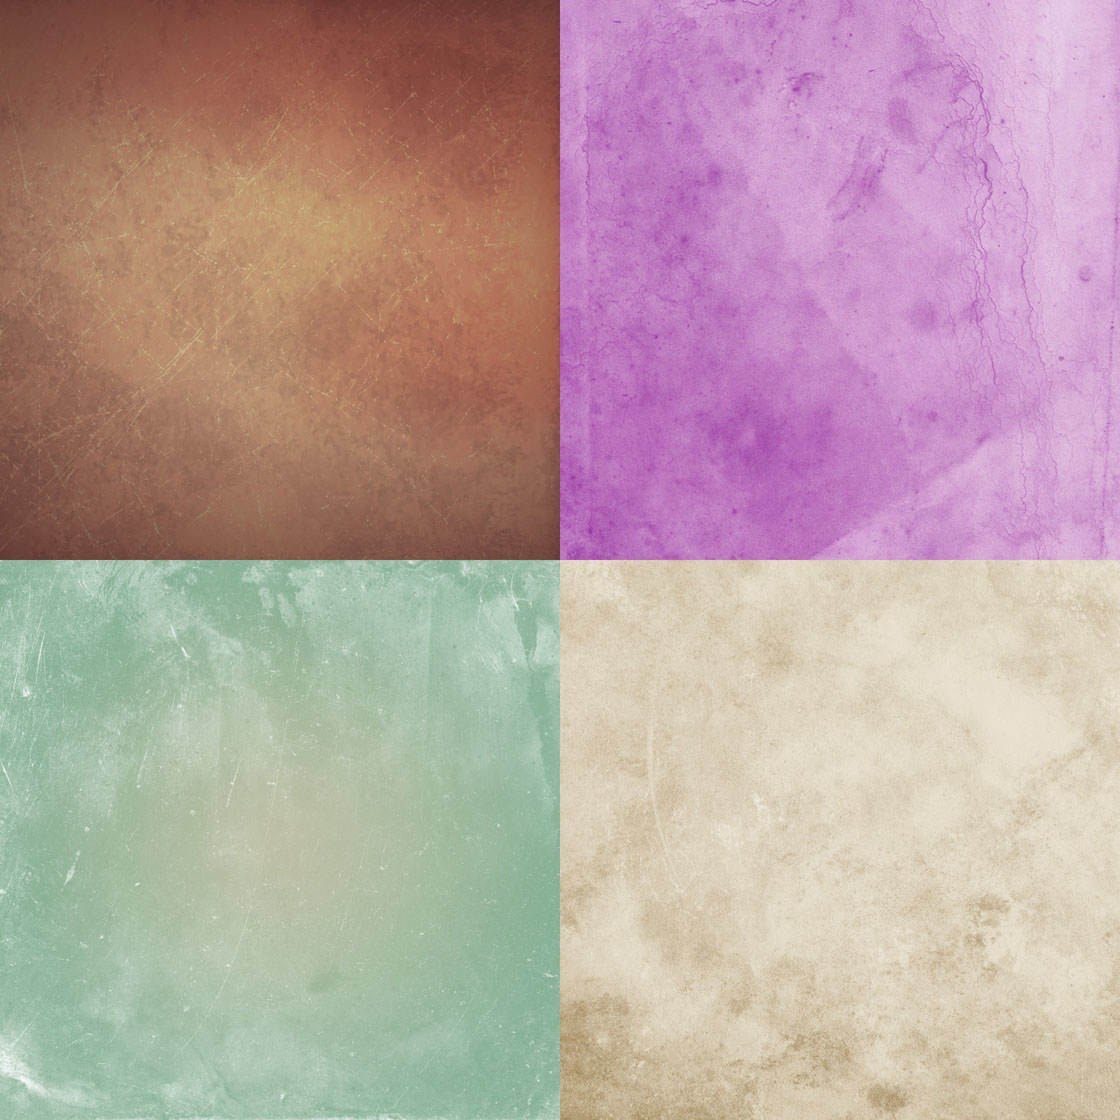
Once you’ve created some textures, you can now start adding them to your photos using the following two techniques.
The first method involves replacing part of the photo, such as the background around the subject, with a texture. The second method is used for applying an overall texture effect to the entire image.
Technique 1: Masking To Add A Textured Background
The first technique involves a process called “masking.” Masking allows you to control the transparency of different parts of an image, so that you can see through parts of the photo to another image beneath.
We’ll use masking to replace a blank background with a texture. This technique is simple if your subject and the background are in sharp contrast, such as a flower photographed against a plain white wall.
If you want to use this flower photo so that you can follow along, click here to download it. Alternatively, you can use your own photo of a subject photographed against a plain background.
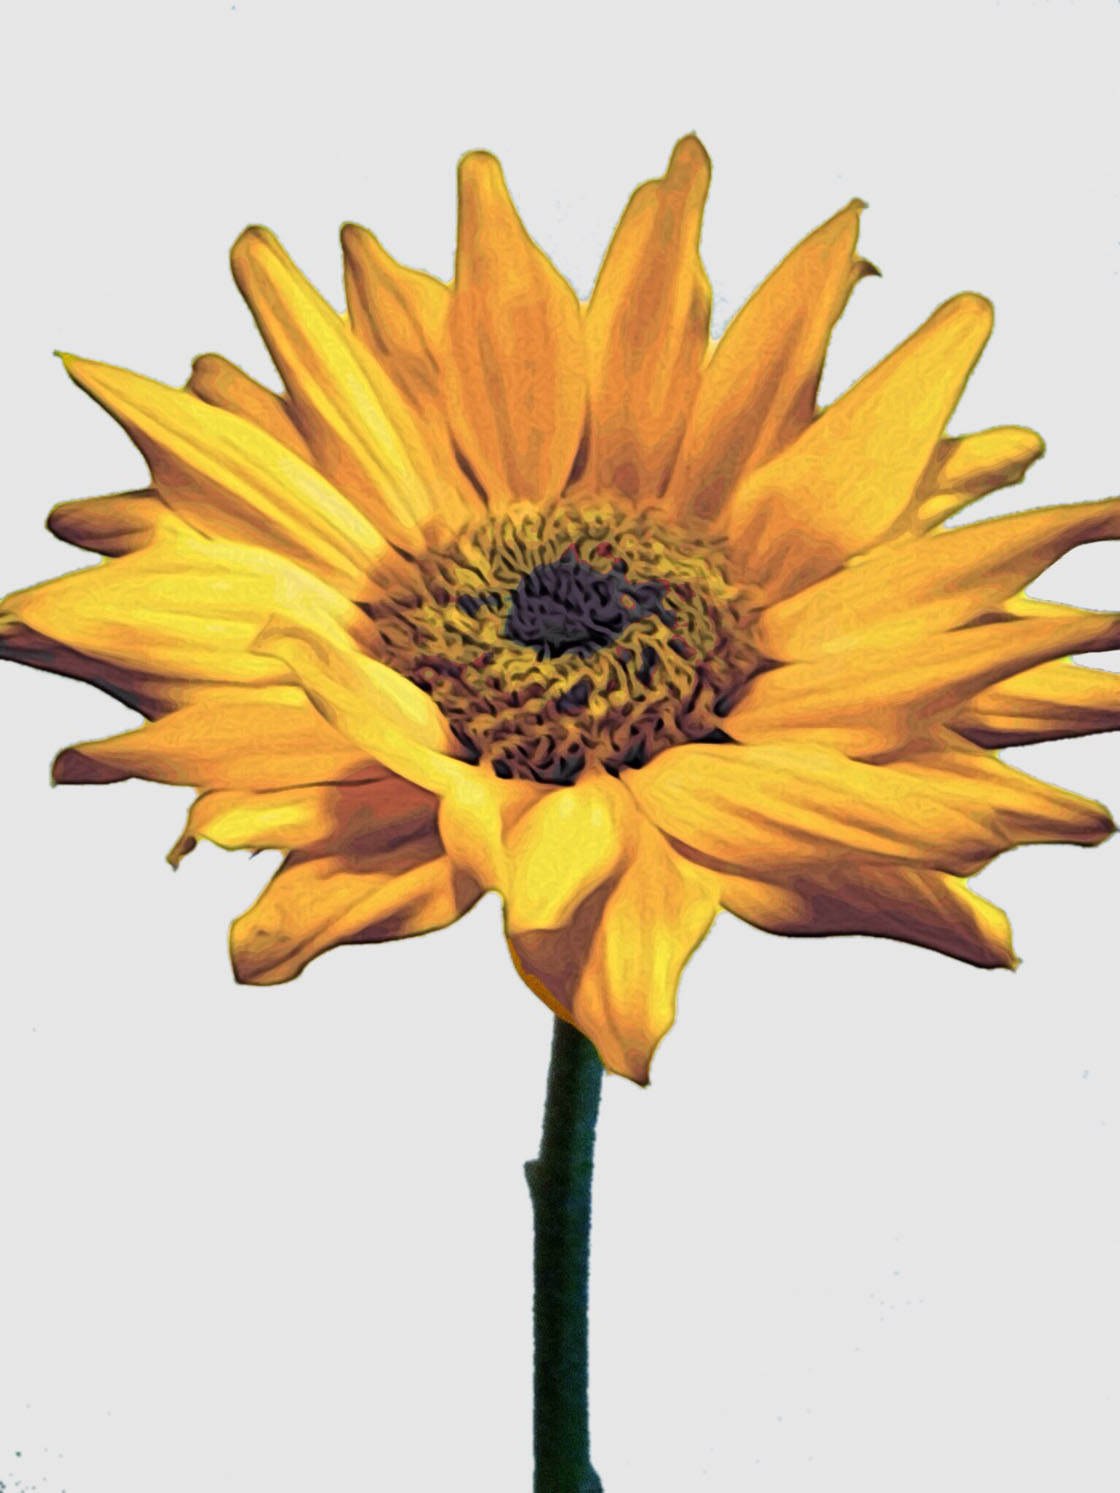
To create the final picture in Superimpose, you’ll need to combine a background image (the texture) and a foreground image (the photo that you want the textured to be applied to).
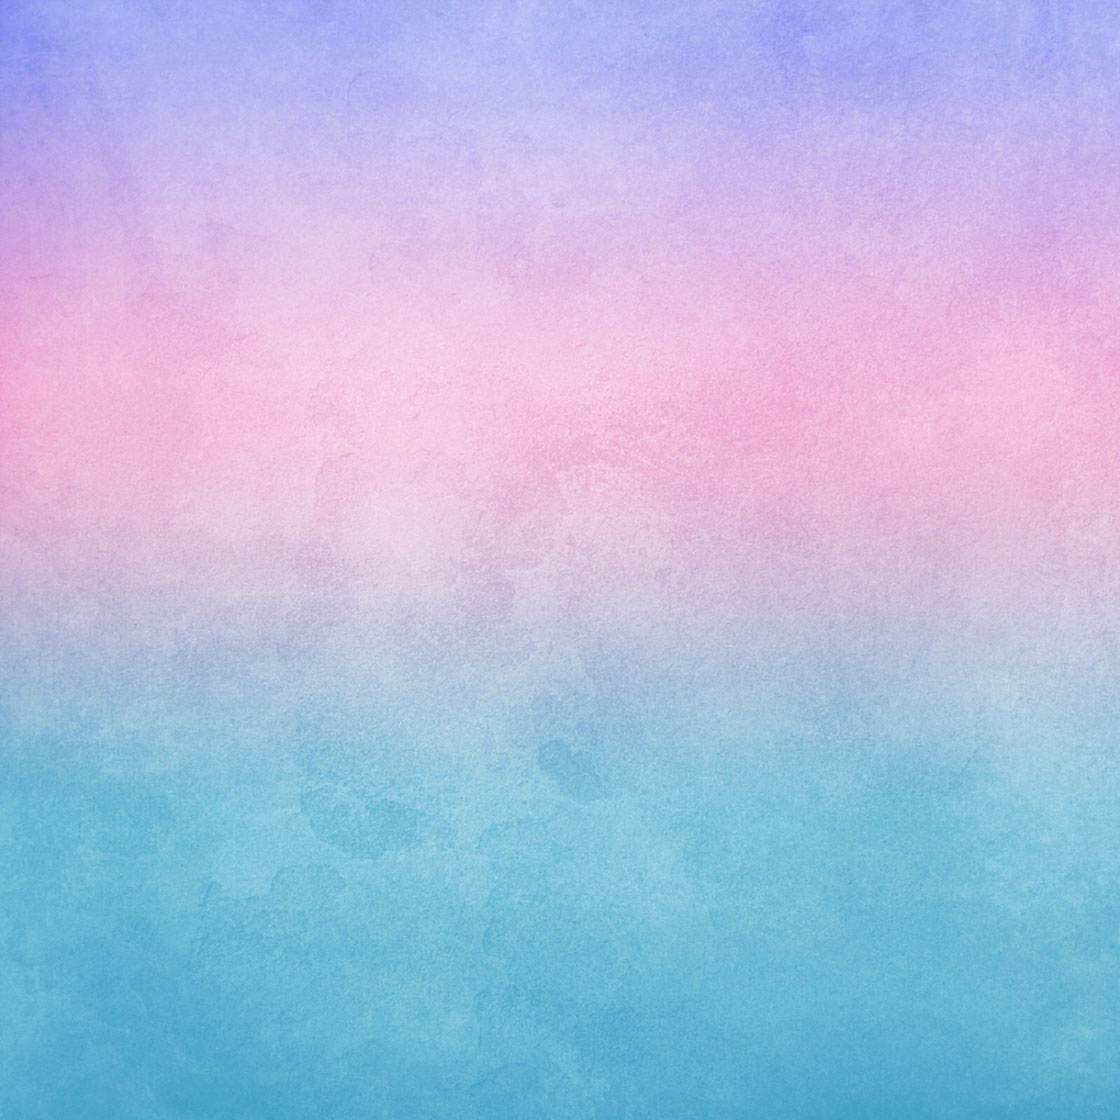
In this example I’m going to combine the sunflower photo shown above with the colored texture that you see below.
You can either use your own textured background that you’ve already created, or you can download this one here.
Once you have the photo and texture you want to use in your iPhone’s Photo Library, open the Superimpose app, then tap the first icon at the top left of the screen:
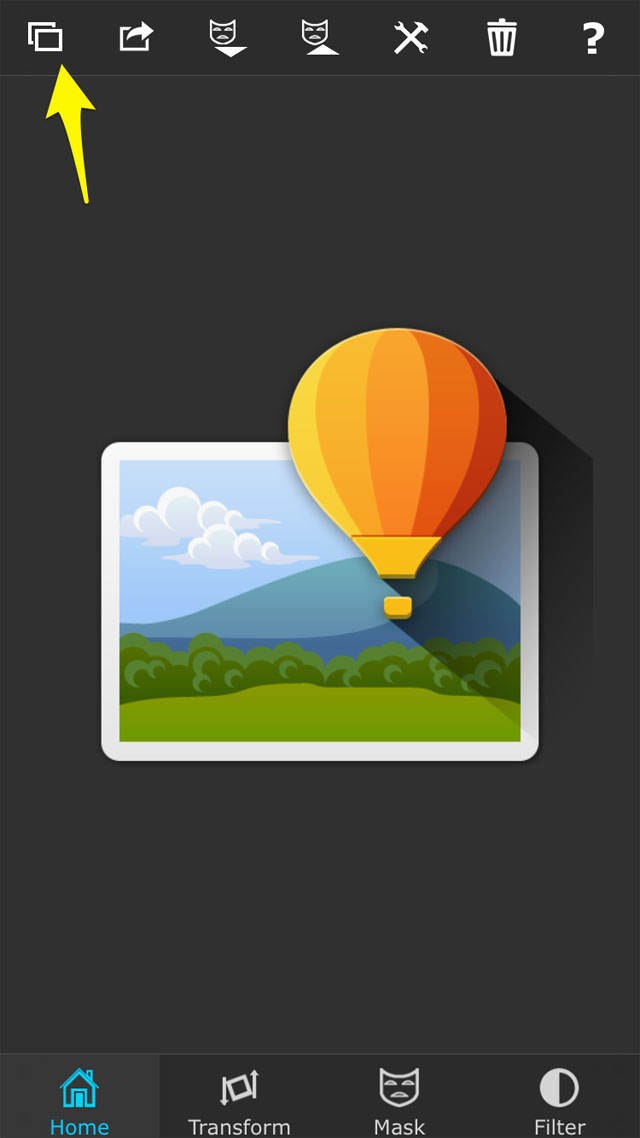
This icon allows you to import your background and foreground images. Select Photos to import the background image, find the texture in your Photo Library, then tap on it to import it:
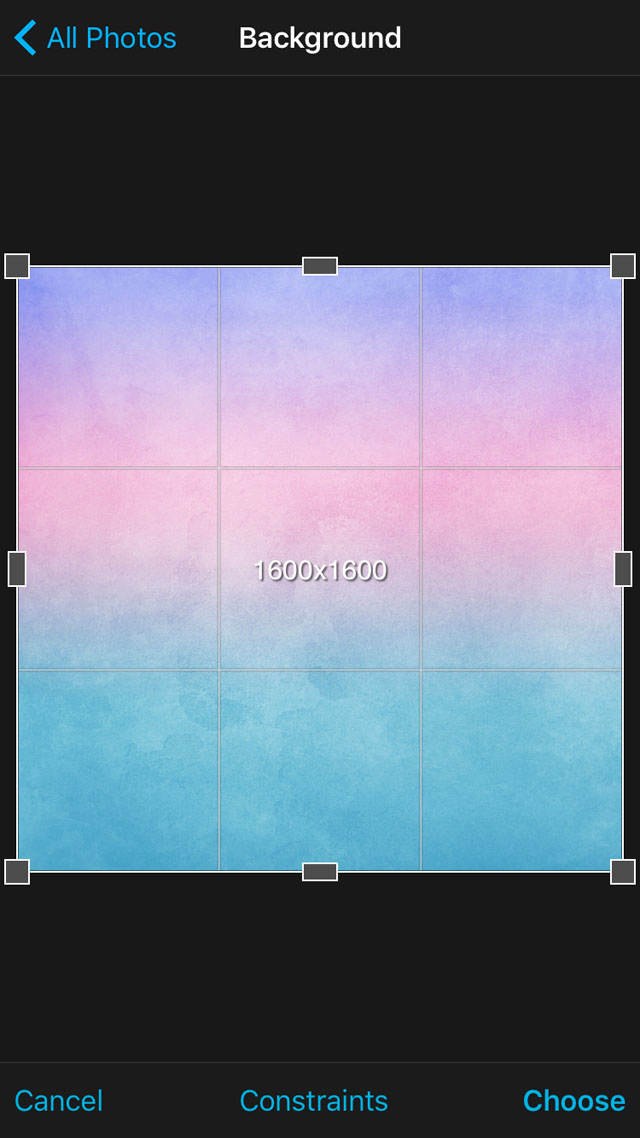
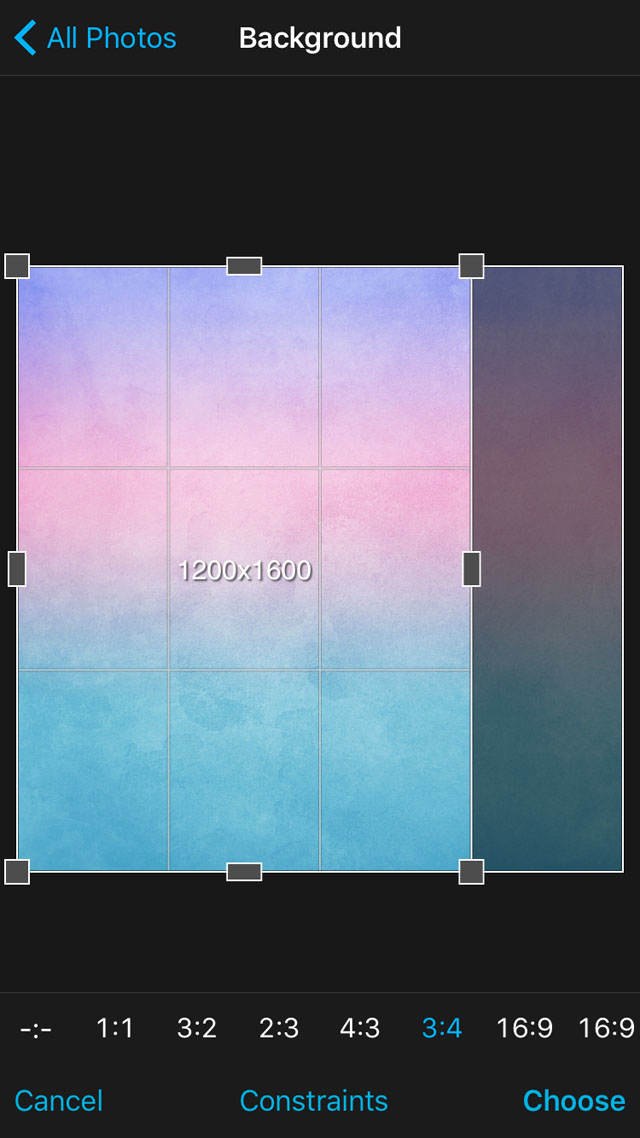
Since this texture is a square format but our foreground image is not, we need to change the constraints of the background so that it will conform to the shape of the foreground image.
Tap Constraints and you’ll see a list of ratios along the bottom of the screen. The first number of the ratio represents the width of the image and the second number represents the height.
For this image I’m using the 3:4 ratio. Tap Choose to select the ratio and you’ll now see the texture in that ratio on the screen:
Next, you need to pull in the foreground image. Tap on the top left icon again, then select Photos under Import Foreground:
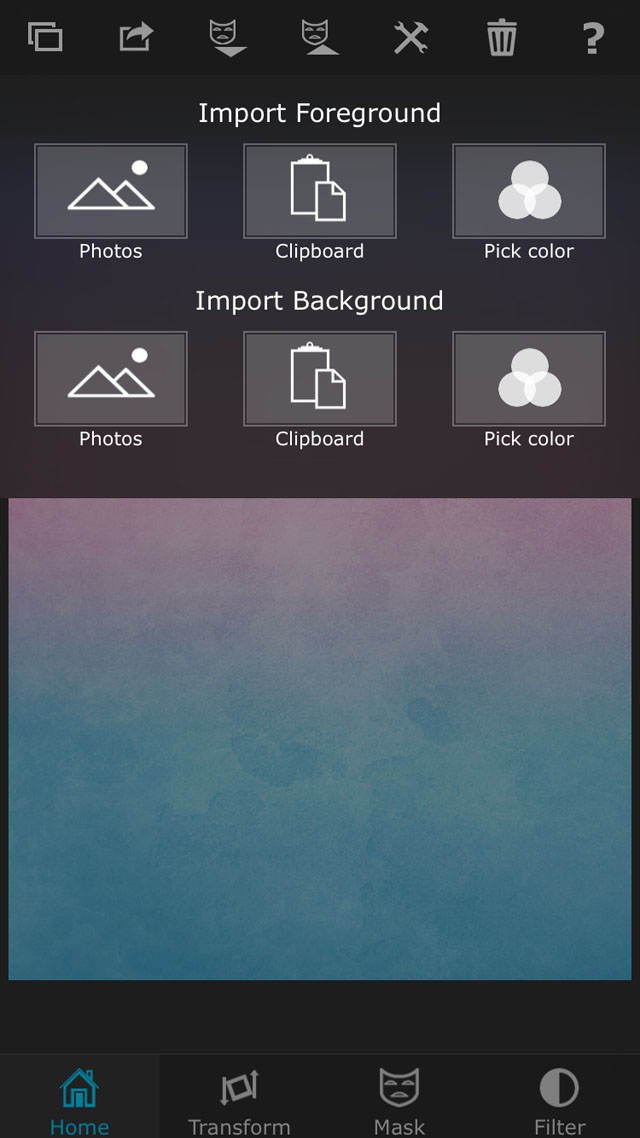
Find your main image to pull it into the app. We don’t need to change the constraints here, so just tap Choose:
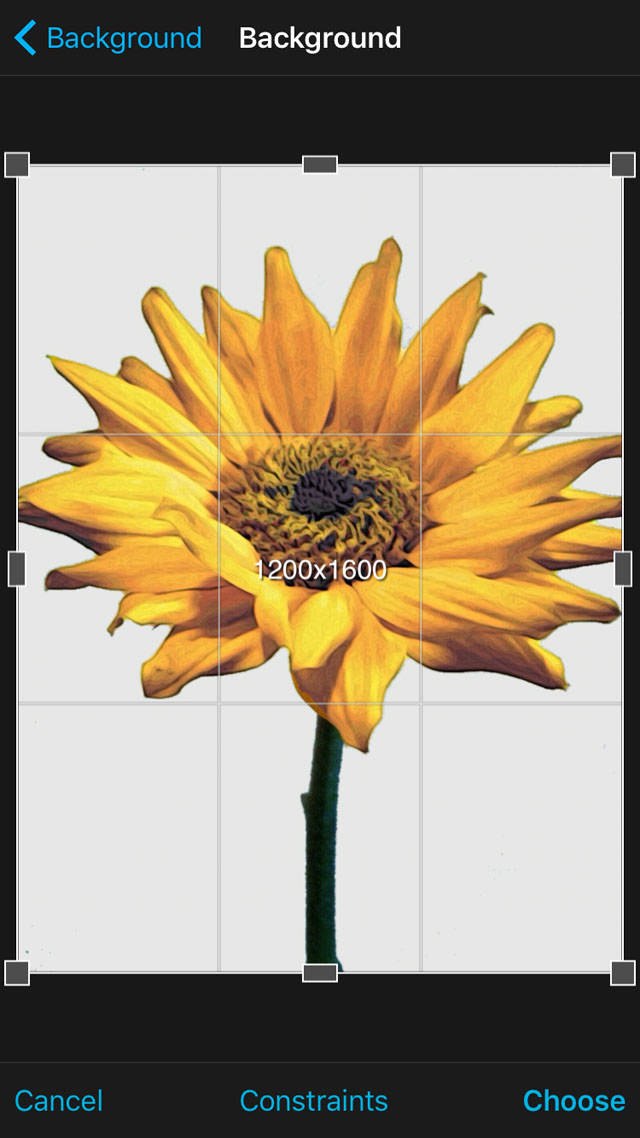
You’ll notice that the foreground image is now superimposed over the background image:
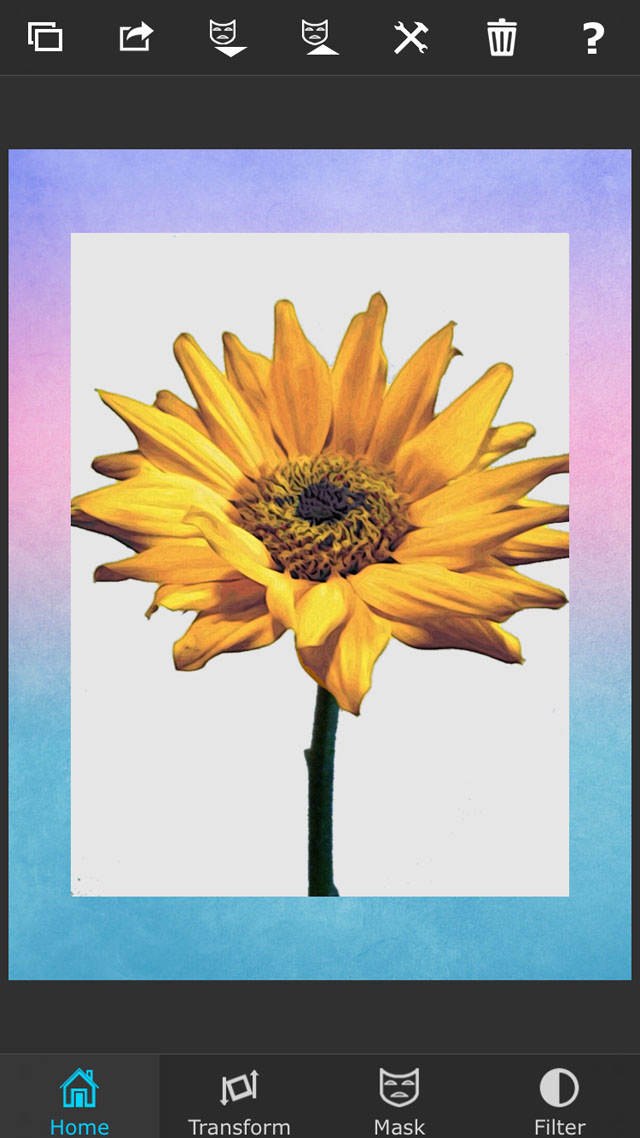
However, the images don’t line up. We want to expand the foreground image to cover the same area as the background. To do this, tap Transform at the bottom of the screen:
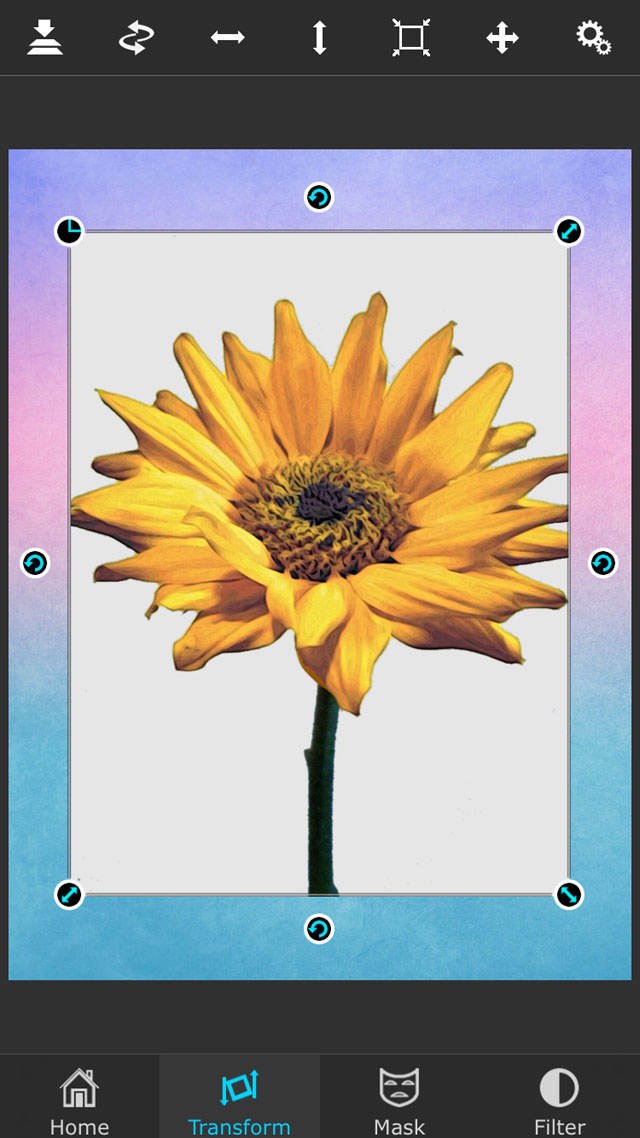
Next, tap the Fit To Background icon at the top of the screen to expand the foreground image:
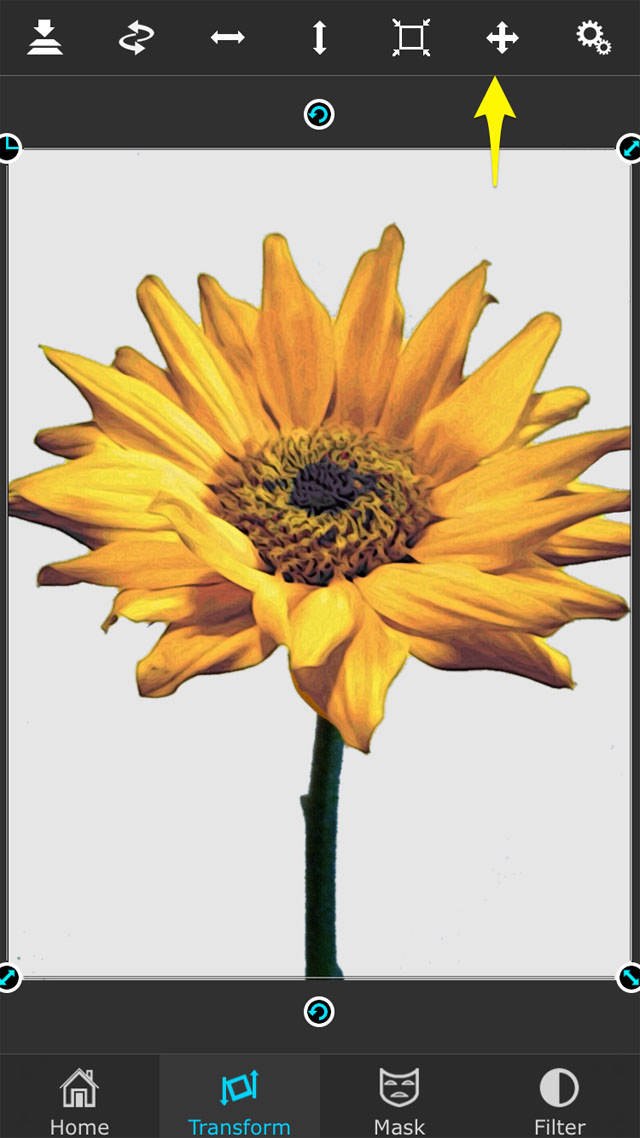
Now, we’re ready to mask. The aim is to make the white background around the flower transparent, so that we can see the texture beneath it. Select Mask at the bottom of the screen:
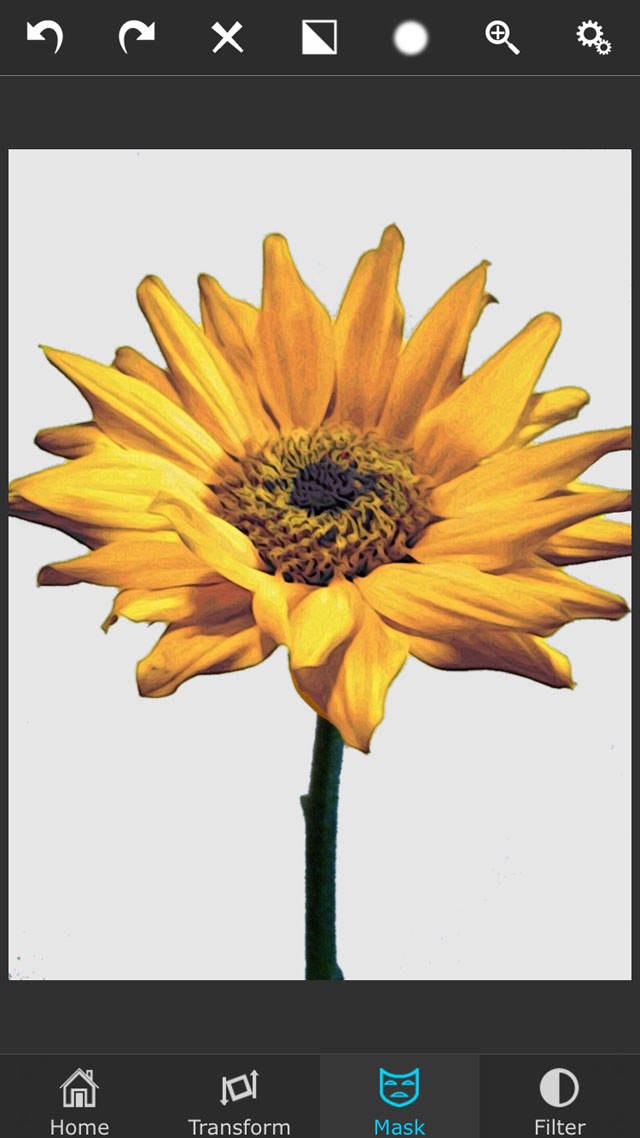
Tap the Settings icon at the top right. A pop-up window will appear with several masking tools:
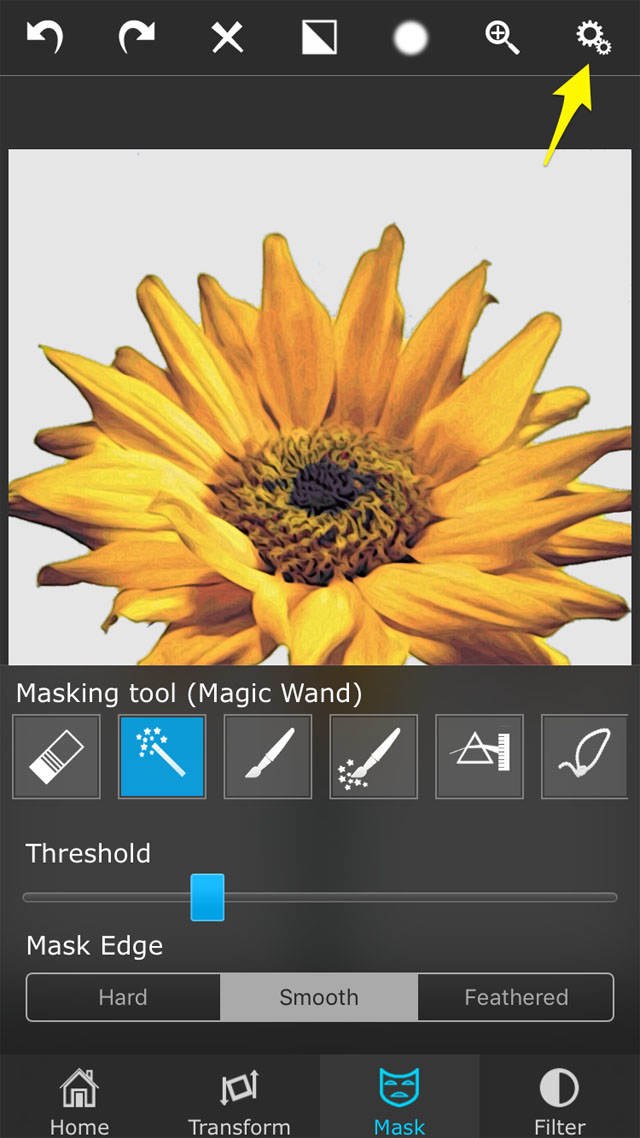
There are six masking tools as shown above. For this photo, we only need the Magic Wand. This tool (second from the left, highlighted in blue above) automatically applies transparency to the color you select in the photo.
You can determine how you wish to apply the mask by adjusting the Threshold and the Mask Edge. Threshold determines the strength of the mask, and Mask Edge allows you to select a sharp or smooth edge.
To apply the mask, tap anywhere in the white area around the flower. Wherever you tap, the background texture will show through. In the screenshot below, I’ve tapped the white area at the top of the photo:
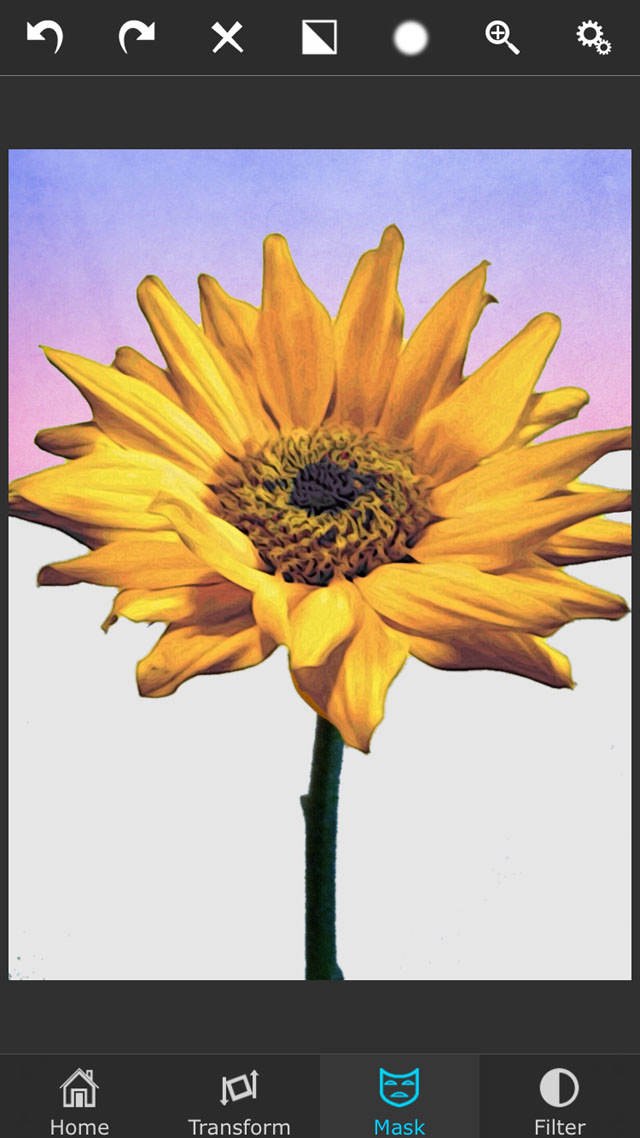
Now you need to tap the other white areas around the flower. For small areas, pinch out to zoom in so you can get a closer view and fill in the area with more accuracy:
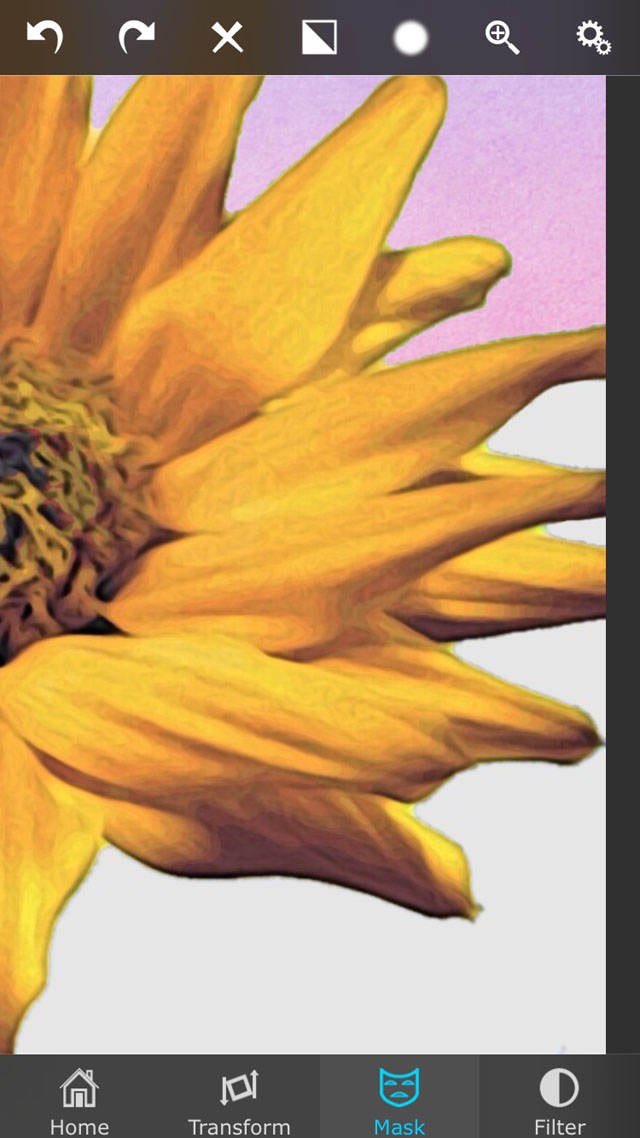
Continue tapping in this manner until the background texture covers all areas around the flower:
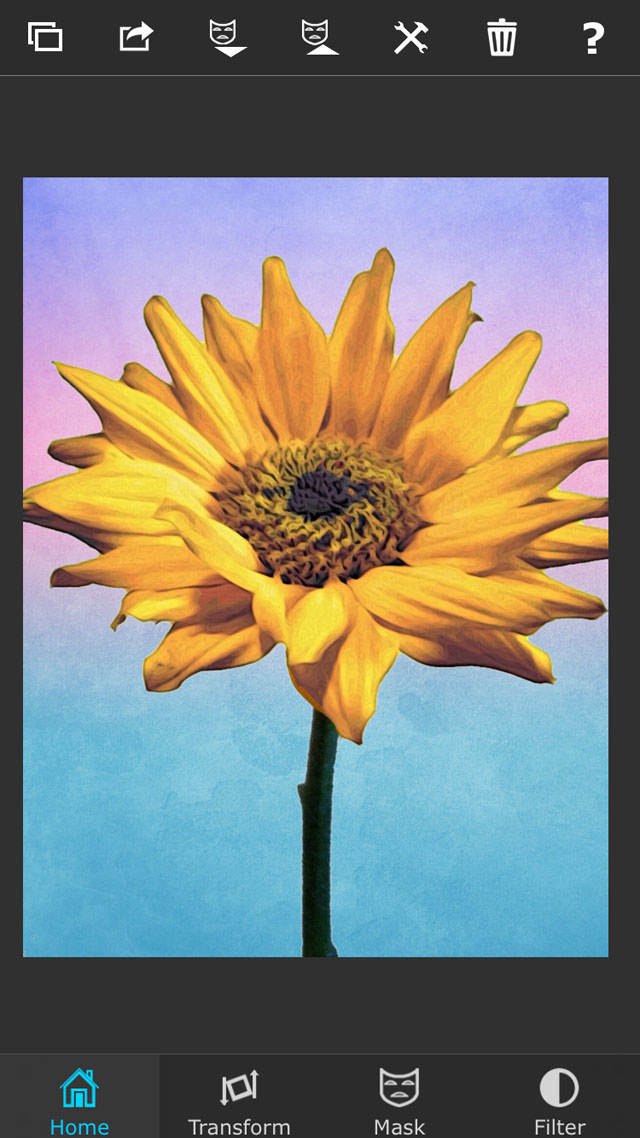
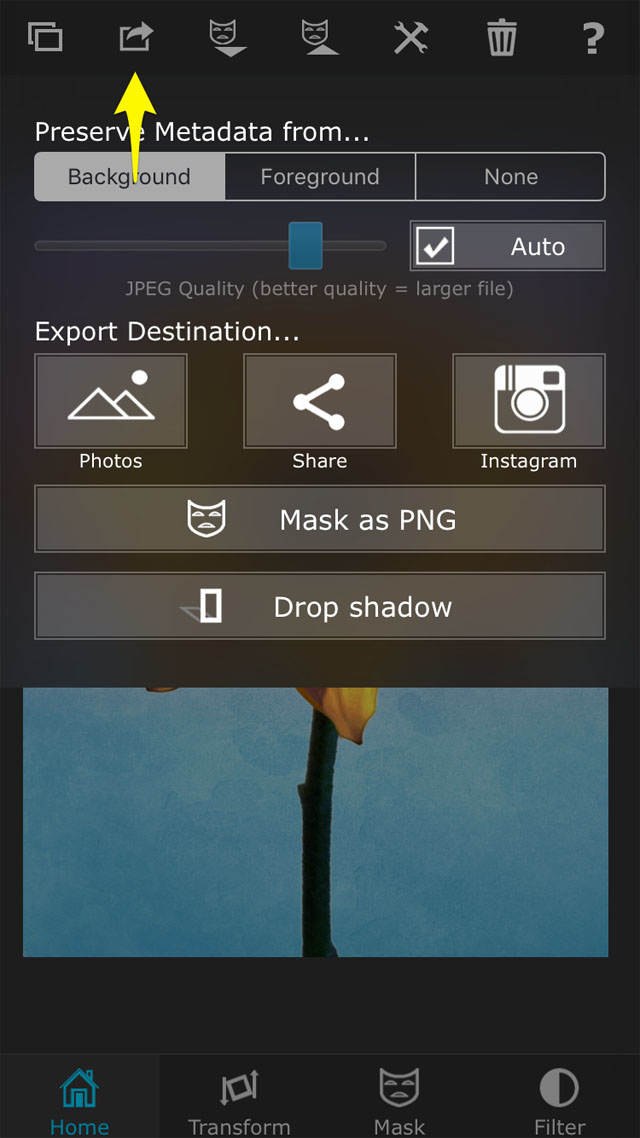
Now, you’re ready to save, so tap the Save icon at the top of the screen. Under Export Destination, select Photos to save to your Photo Library.
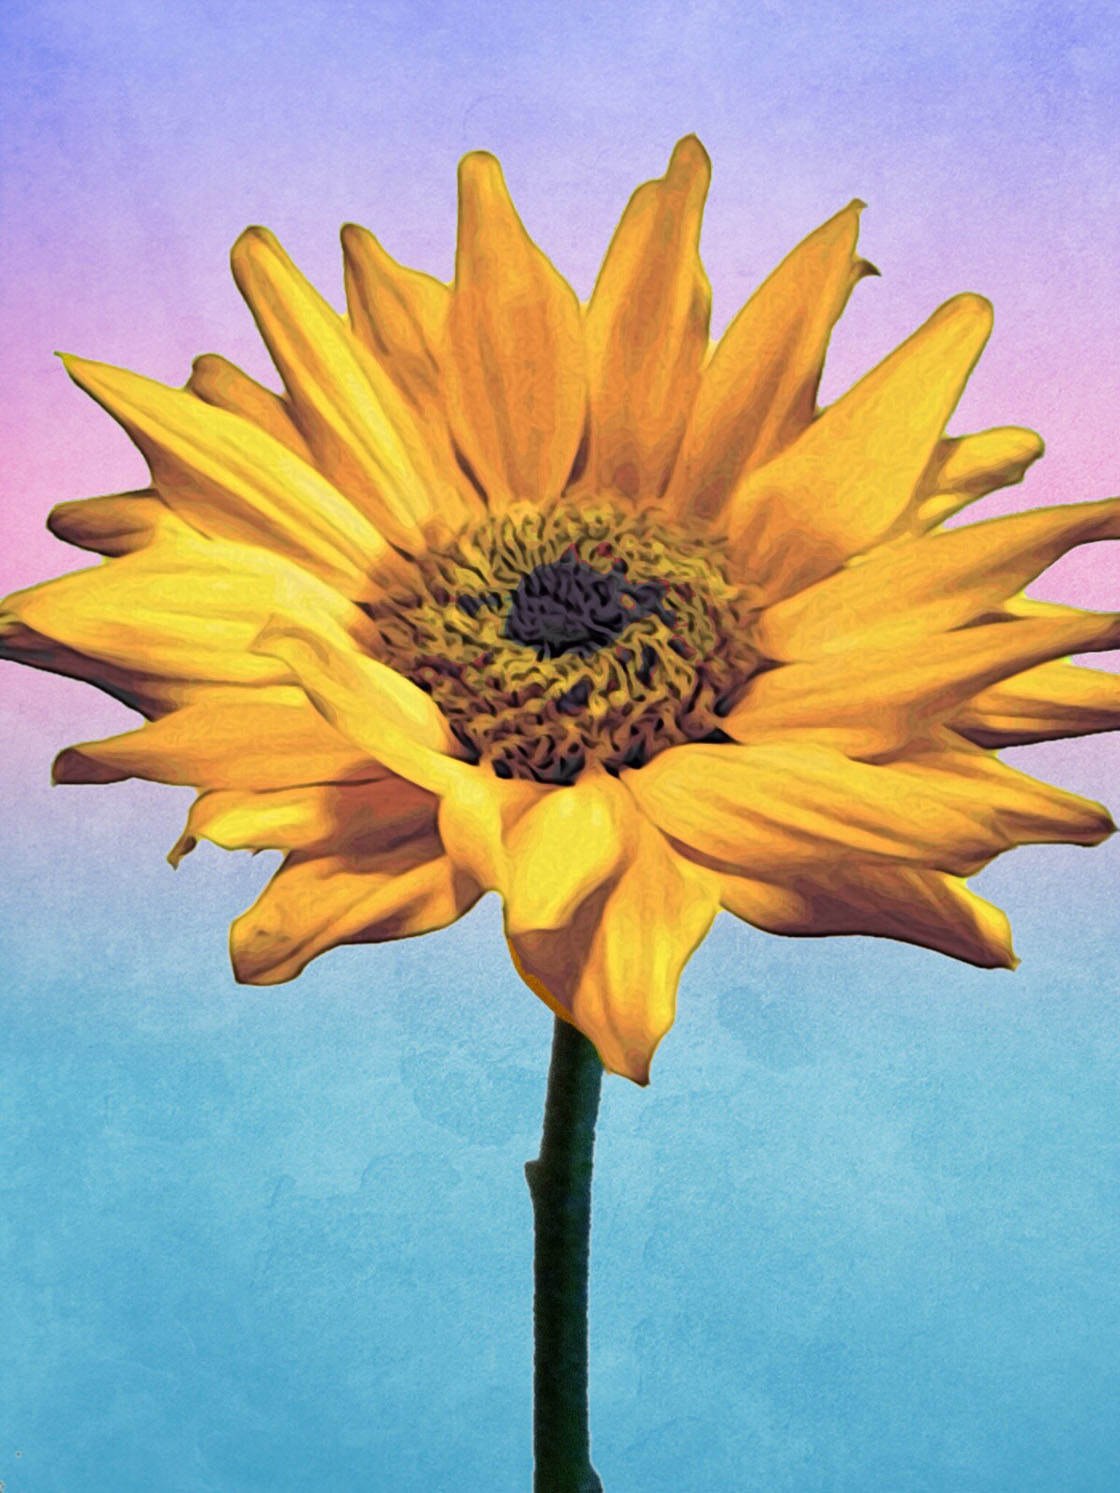
This is how the final photo should look:
If you’re editing a photo that has a lot more detail than the photo we just worked with, the Brush and Smart Brush tools come in handy for masking areas of the photo.
The Brush tool allows you to manually mask different areas. Manual masking is sometimes required because the Magic Wand masks any color similar to the one you tap on, even the areas you might not want transparent.
Many times, it’s just easier to apply the mask manually so you don’t make everything transparent by mistake.
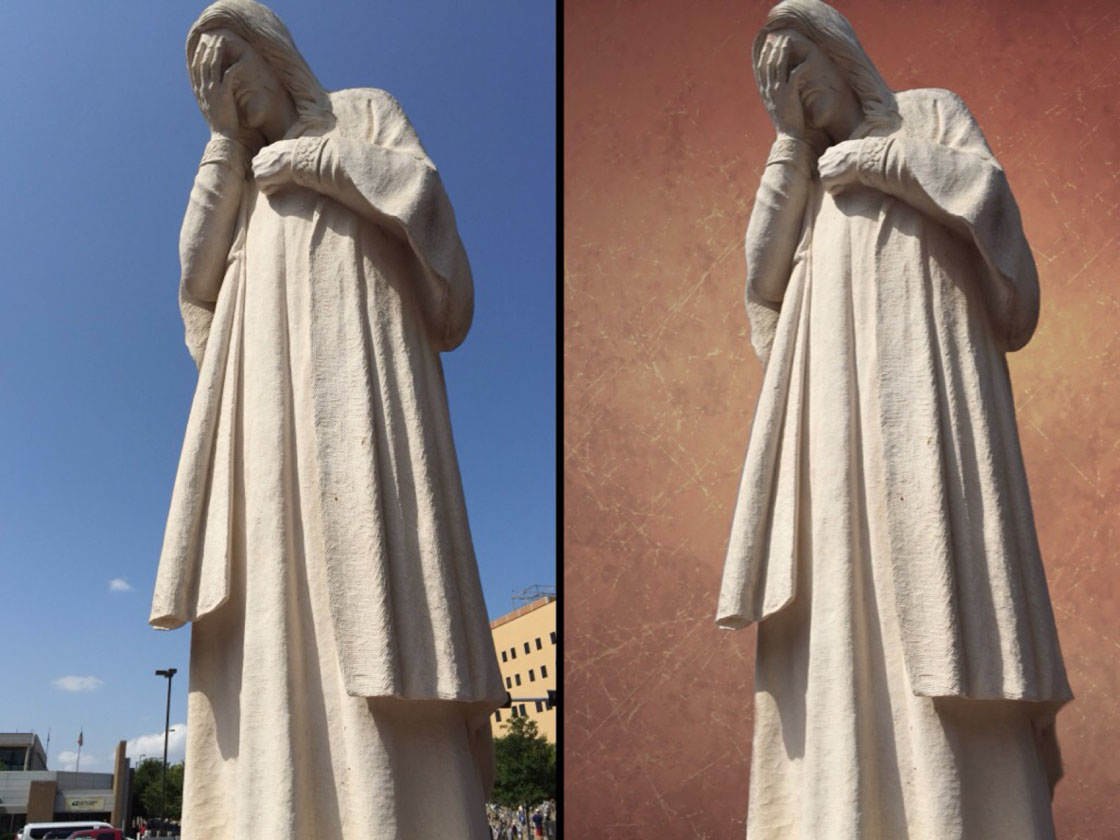
Let’s take a look at using the Brush and Smart Brush tools on this photo of a statue in order to replace the background with a texture:
Start by selecting the Brush tool in the Masking Tool section:
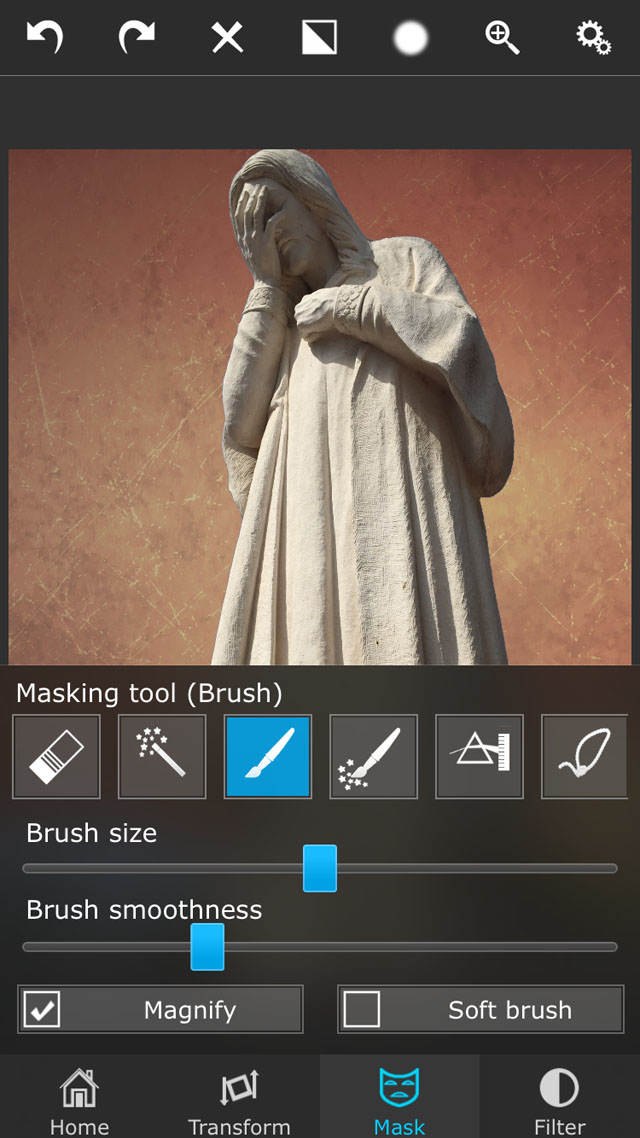
In the screenshot below, I used the Brush to manually mask out the buildings and people – basically any areas that were more difficult to mask using the Magic Wand tool:
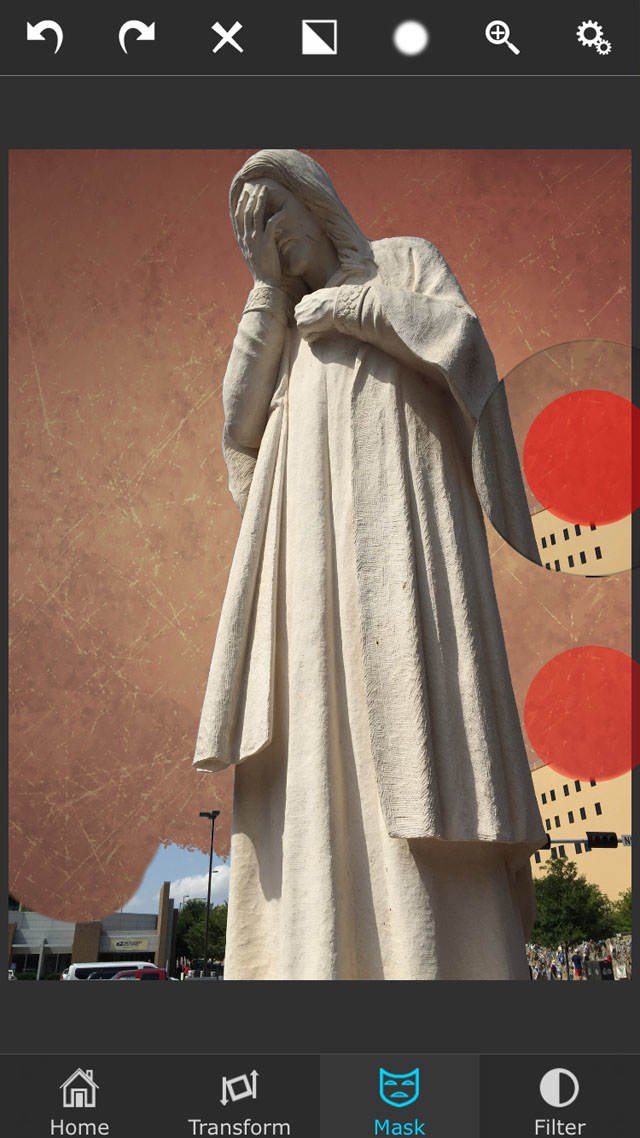
To apply the Brush tool, simply rub your finger around the areas to be masked. The red circle shows the area where the Brush is being applied.
You’ll also notice a second red circle that magnifies the area where you’re working. This allows you to apply the Brush accurately.
But to get around the edge of the statue, the Smart Brush is a more effective tool. The Smart Brush is an edge detector which allows for greater accuracy and fine tuning:
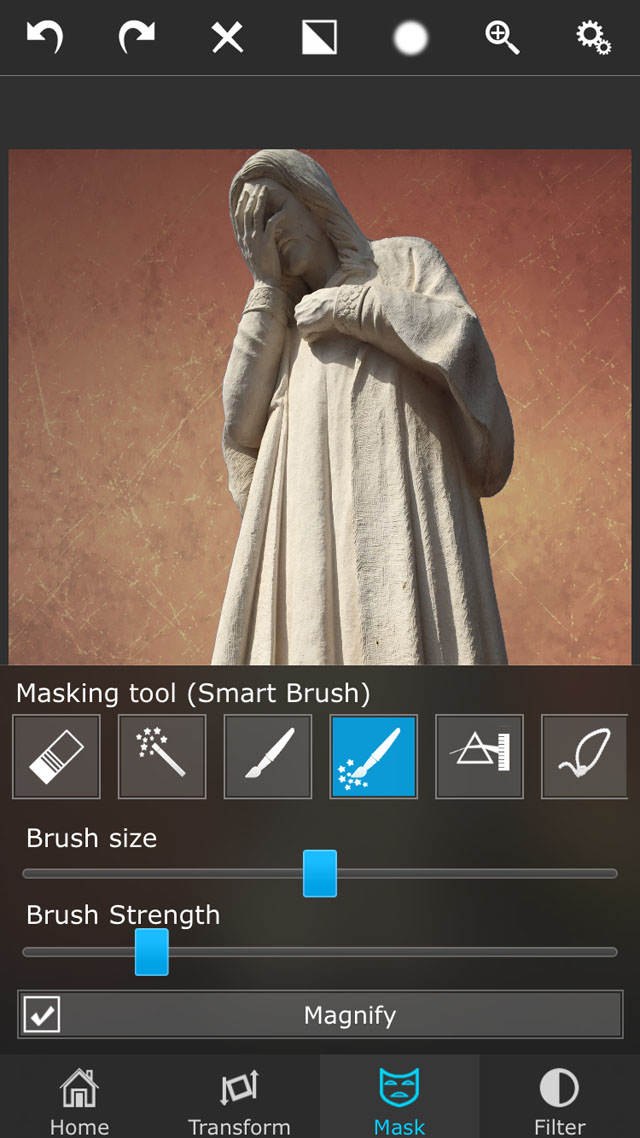
When you slide your finger around the edge of the subject, the Smart Brush determines where the edge is and masks out the unwanted areas. You can adjust the Smart Brush size and strength using the sliders.
After using the Brush to apply the mask to the larger areas, and using the Smart Brush around the edge of the statue, here’s the resulting image:
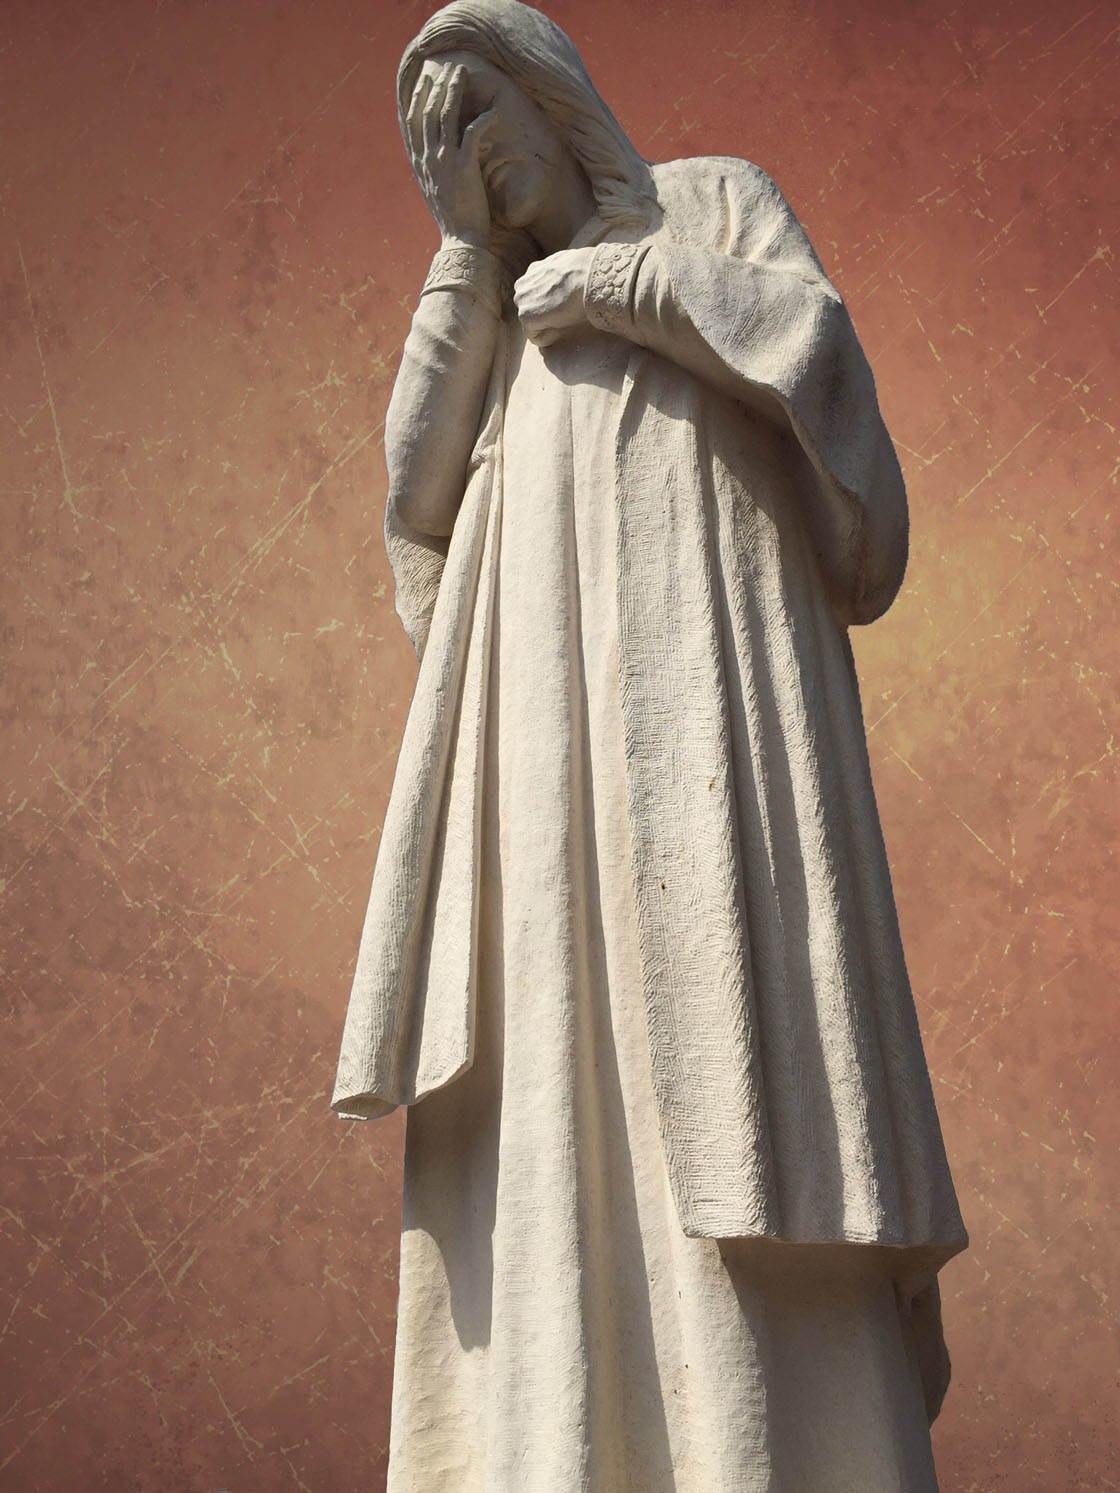
As you can see, this eliminates all of the background elements and allows the viewer to totally focus on the subject of the photo.
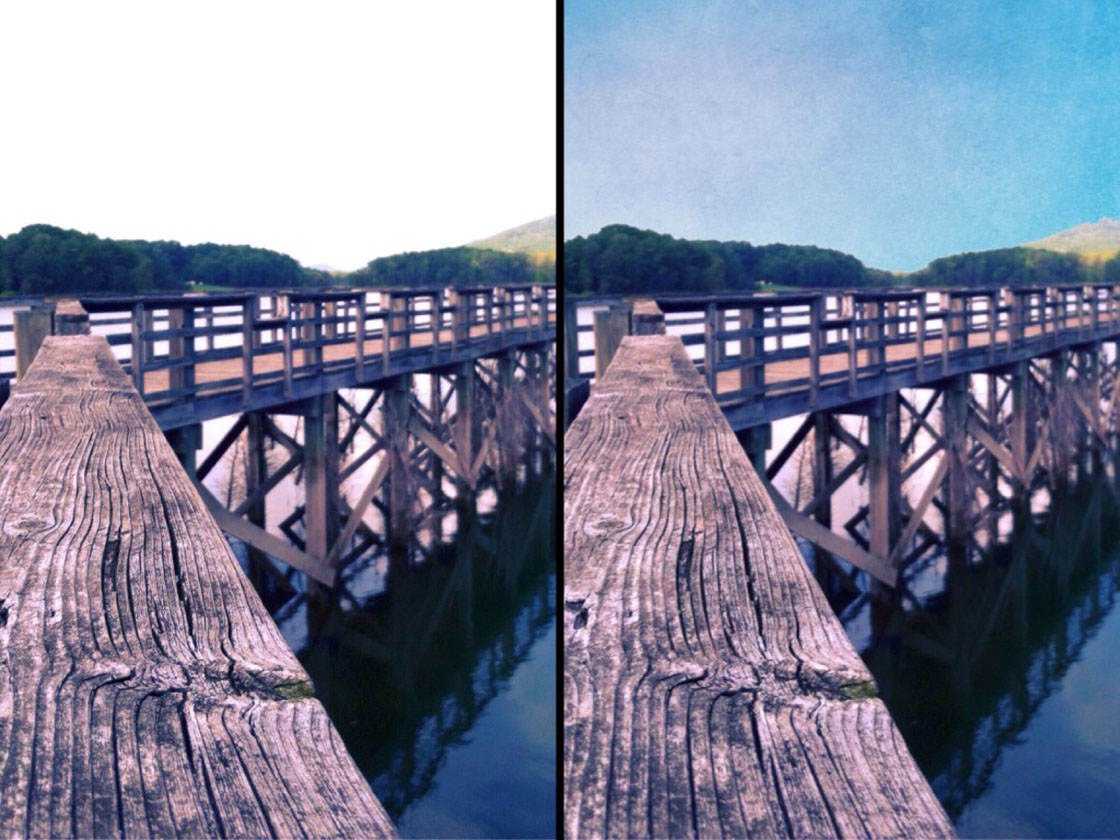
Below is another example of a photo where I used a textured background. I simply masked out the over-exposed sky in the original photo, using a blue textured background to replace it.
Technique 2: Blending To Create An Overall Texture Effect
This second technique doesn’t involve masking – instead you’re going to be blending your texture with the entire foreground image.
Start by importing your texture as the background image, and your photo as the foreground image – just like you did with the first technique above. Use the Transform setting to fit the foreground to the background:
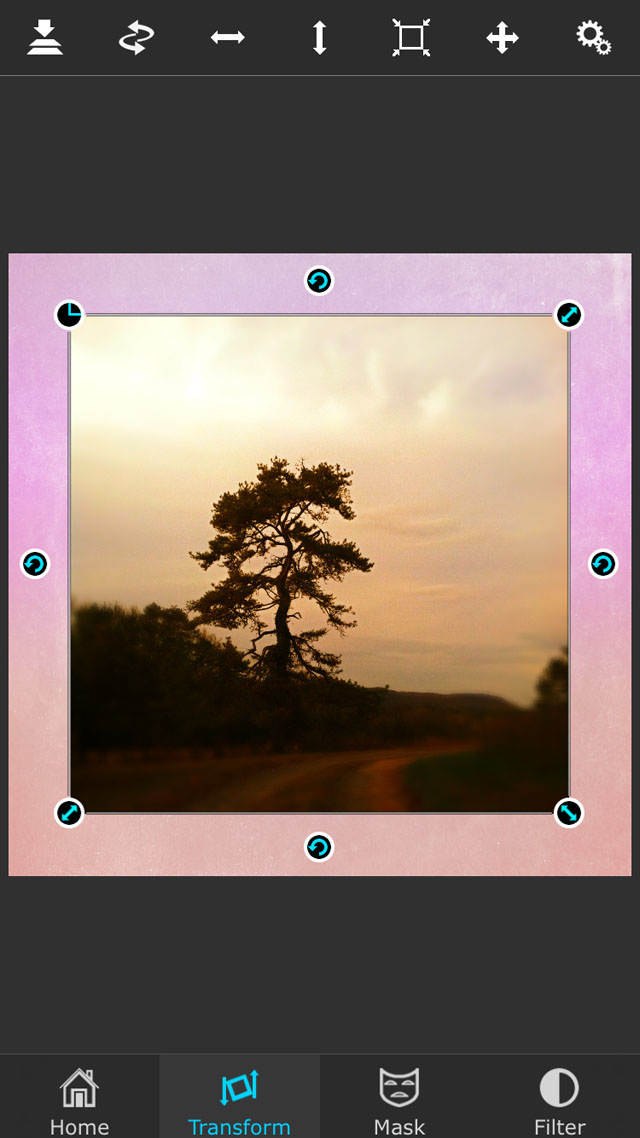
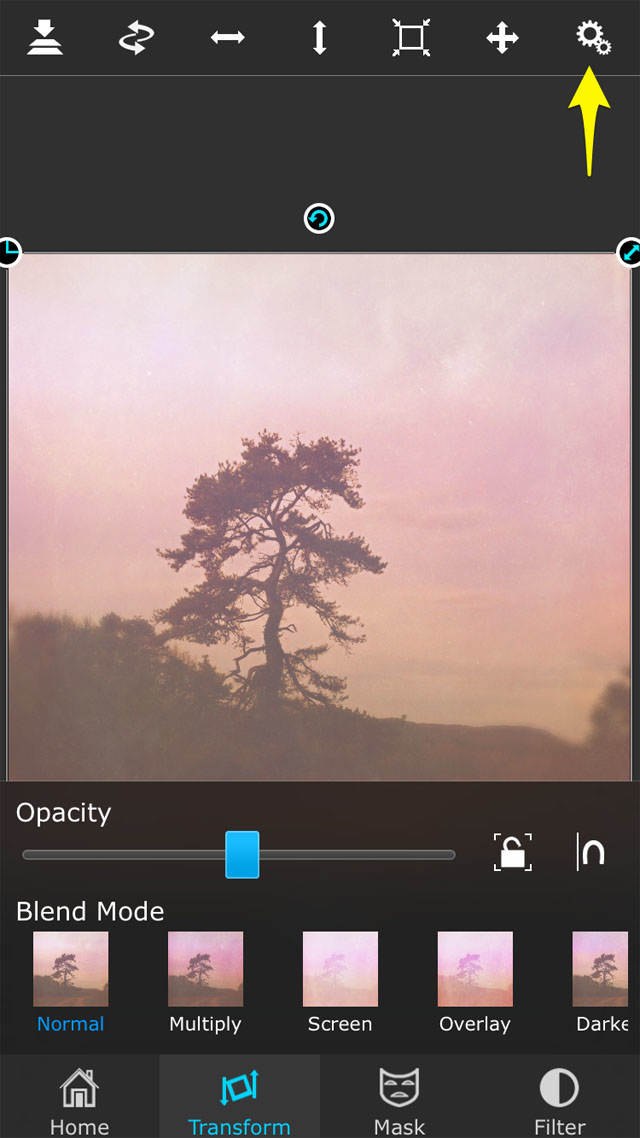
Stay under the Transform setting, then tap the Settings icon in the top right corner. This brings up a list of blend modes.
The blend mode is currently on Normal. You can keep it on that blend mode and simply use the Opacity slider to find the perfect blend of the two photos.
For example, in this screenshot I’ve set the slider halfway to get a 50% blend of both photos:
However, instead of keeping this option, let’s bring the opacity back to 100% and select a new blend mode.
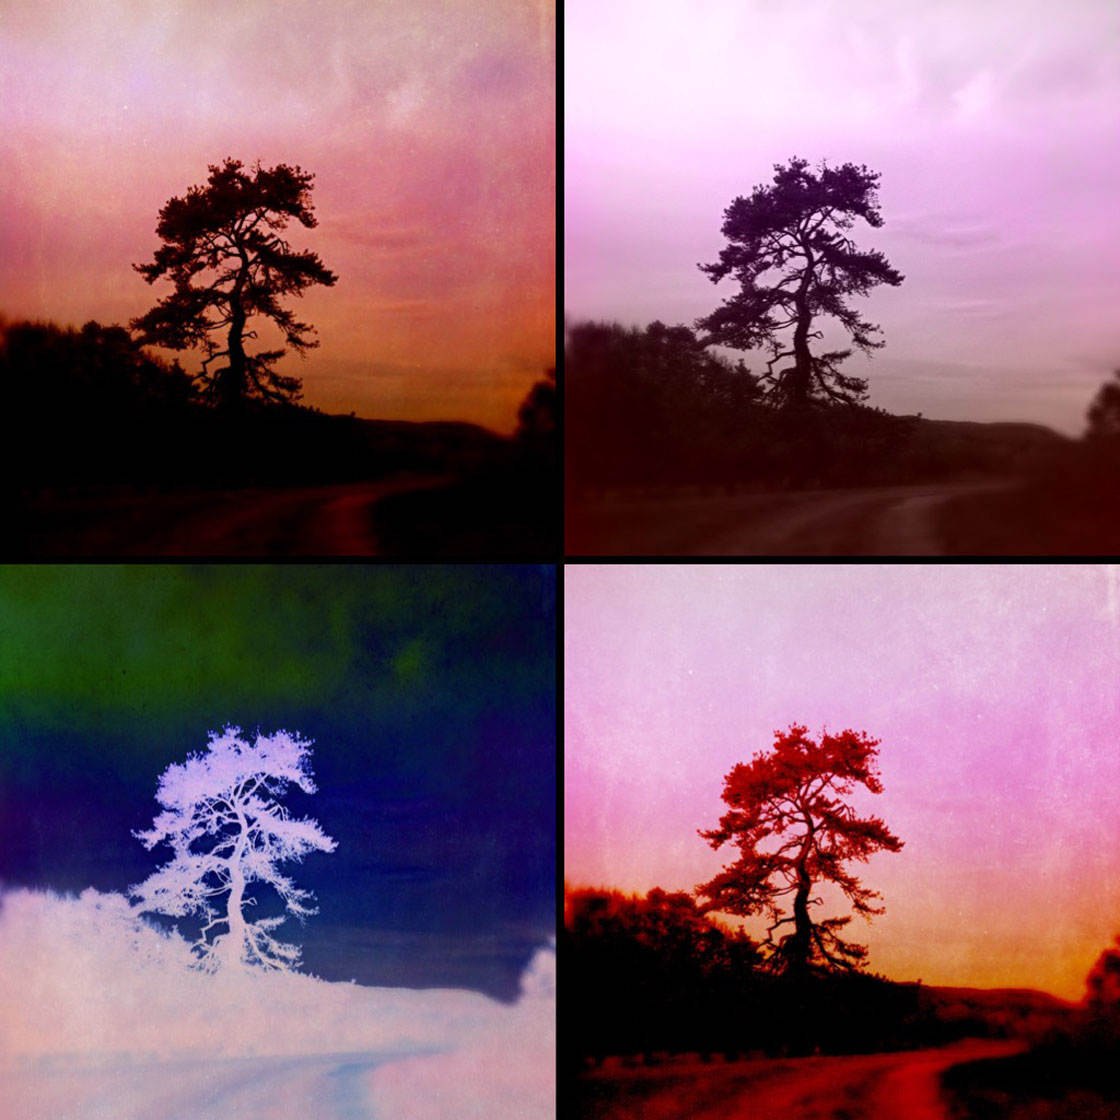
Blend modes present different ways the two photos may combine together through the adjustment of elements like contrast and brightness. Here are a few examples of different blend modes applied:
The blend mode I prefer is Multiply. Using the Multiply blend mode at 100% opacity produced this image:
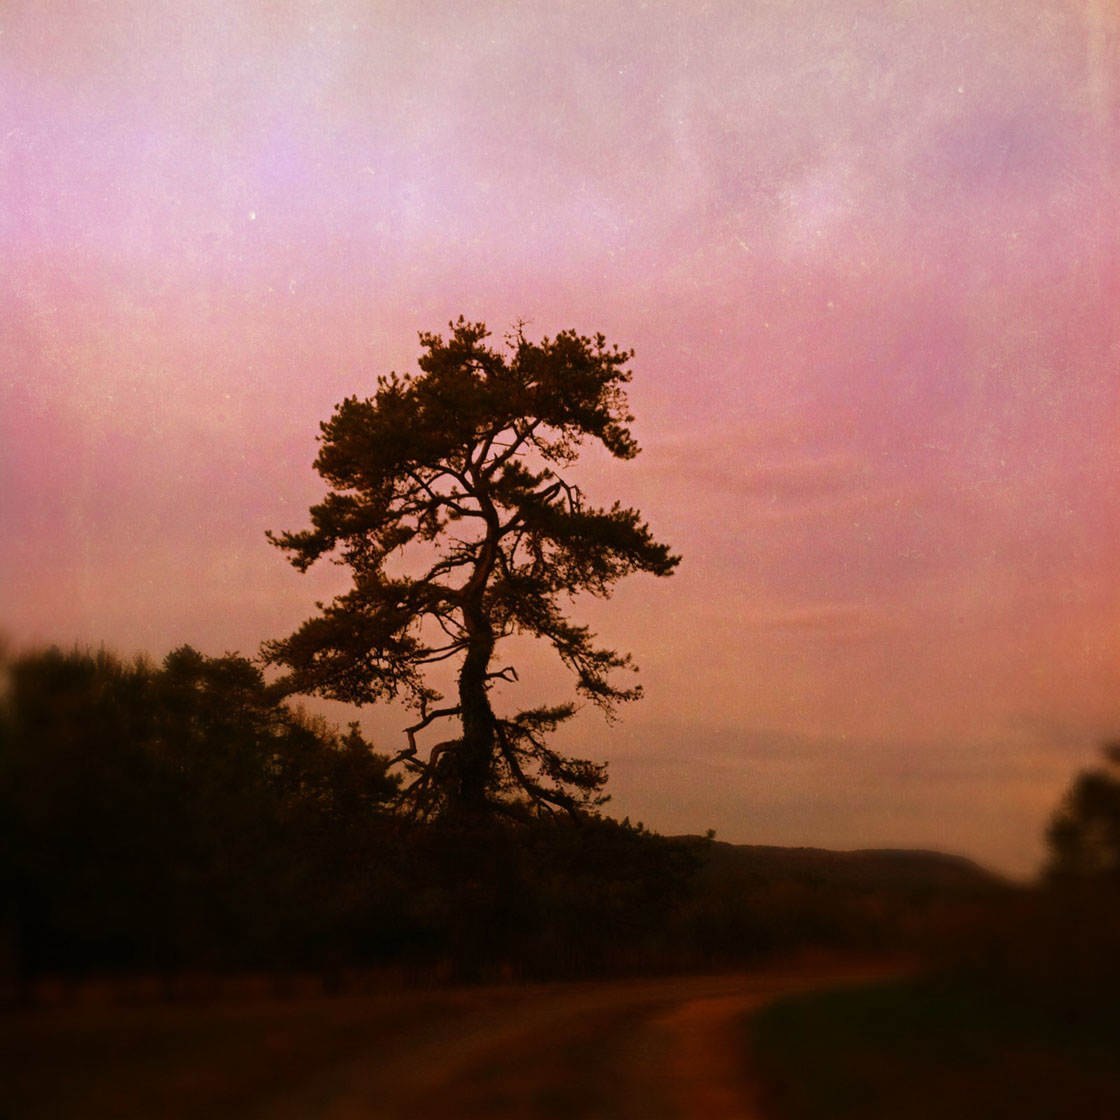
As you can see, this technique provides many options for creating a completely unique blend of a photo and texture.
Whether you use masking or blending to add textures to your images, these techniques will take your creativity to the next level and allow you to produce beautifully artistic pictures with your iPhone.

Thank you Kristen. Another great tutorial 🙂