Adding distressed textures to your iPhone photos can give them a unique and artistic appeal. There are lots of great texture packs that you can purchase and download online, but why pay money when you can make your own unique texture overlays? Creating your own textures from scratch gives you far more control, allowing you to customize the colors and texture effects to suit the photo you’re editing. In this tutorial you’ll learn two simple methods for creating beautiful texture overlays for your iPhone photography.
Why Use Textures?
Before I show you how to create your own textures, let’s take a quick look at why you might want to use them. There are two main ways to use textures.
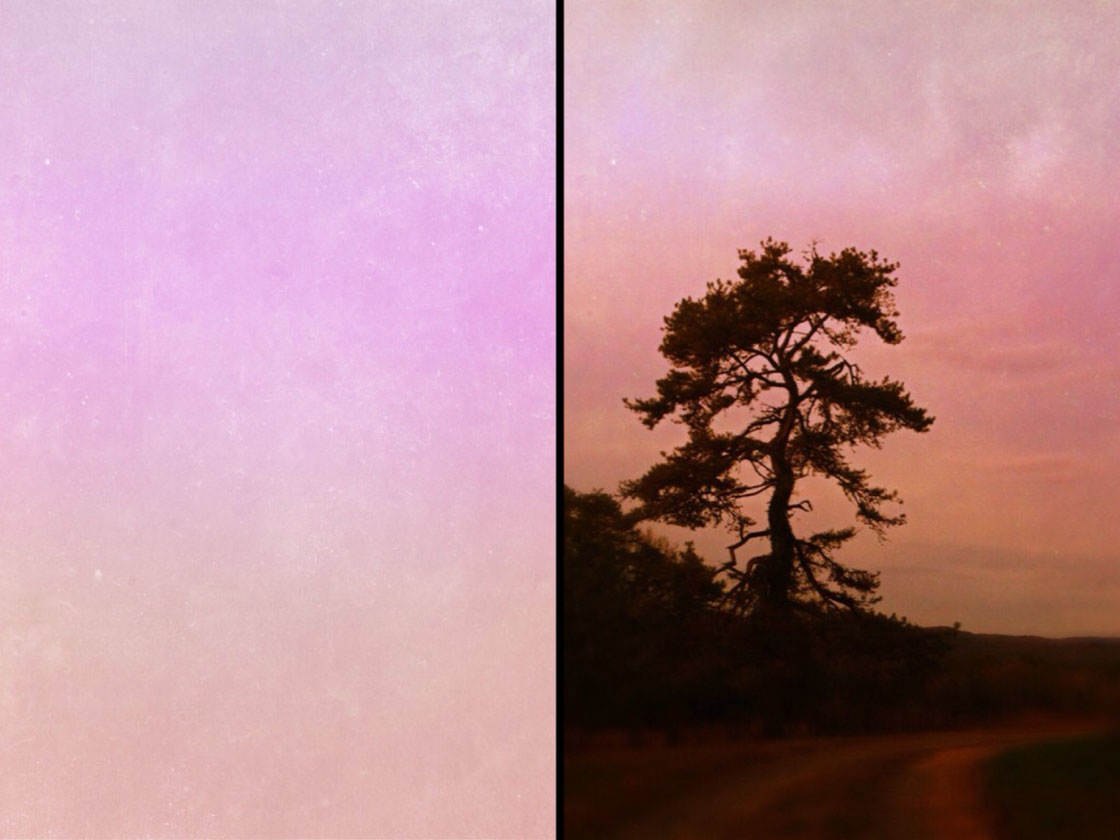
The first method is to overlay and blend the texture with a photo to give it more visual interest and depth.
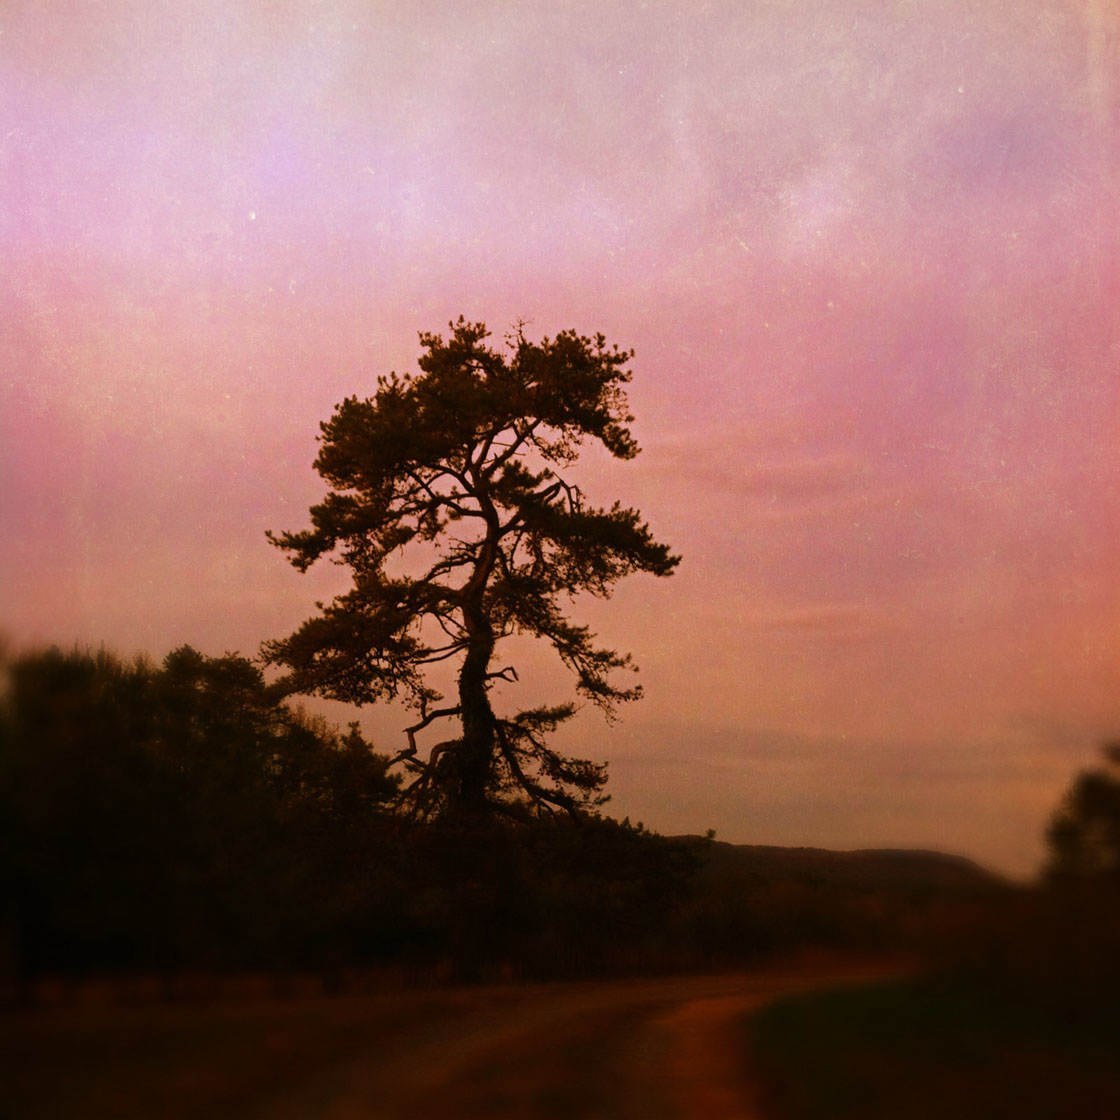
Photographers often use texture apps to create a vintage or antiqued quality, but blending a texture with a photo can lead to other surprising and delightful results.
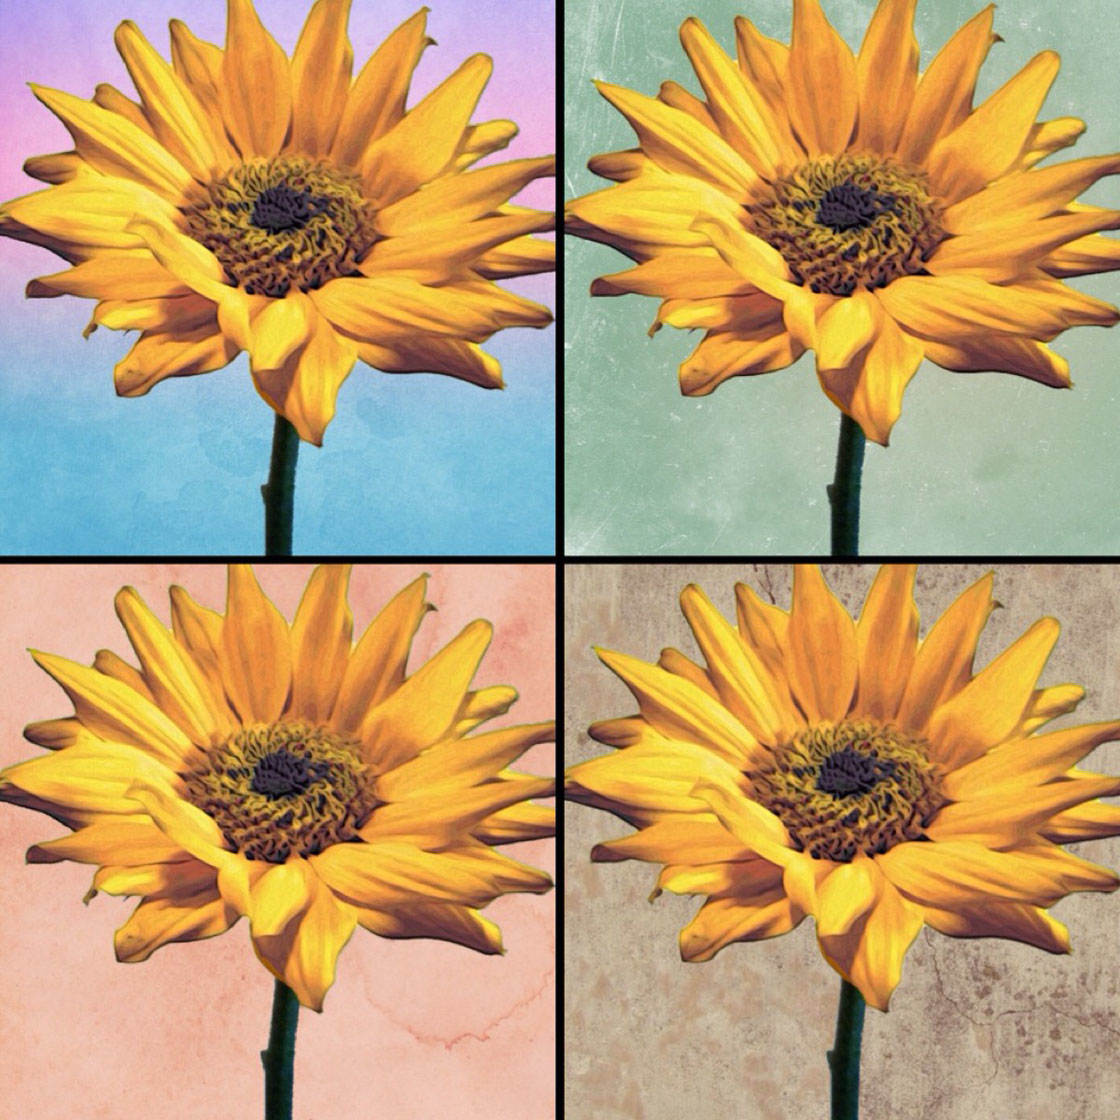
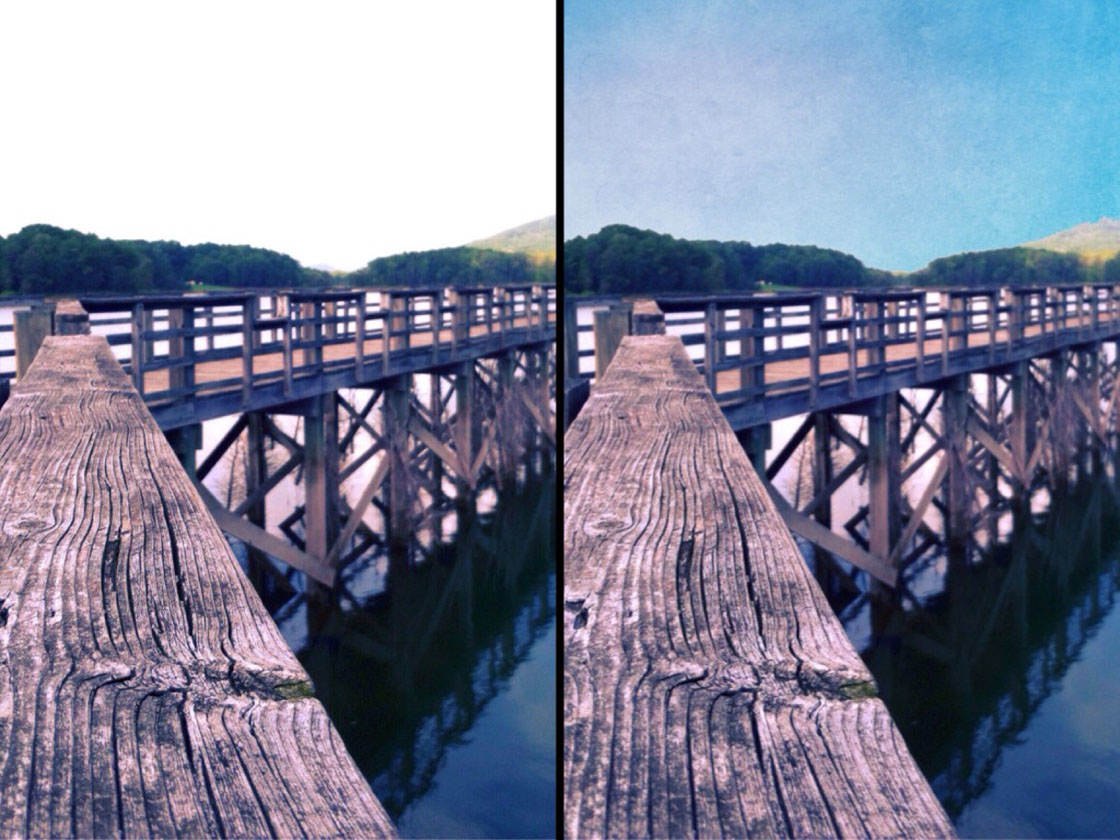
Below you can see how this pink texture overlay gave the sunset photo an extra boost of color.
The second way to use textures is to replace the background in a photo to allow the subject to stand out better. This is great for photos that have a busy or distracting background.
In the photo below, I’ve highlighted the statue by replacing the entire background with a texture.
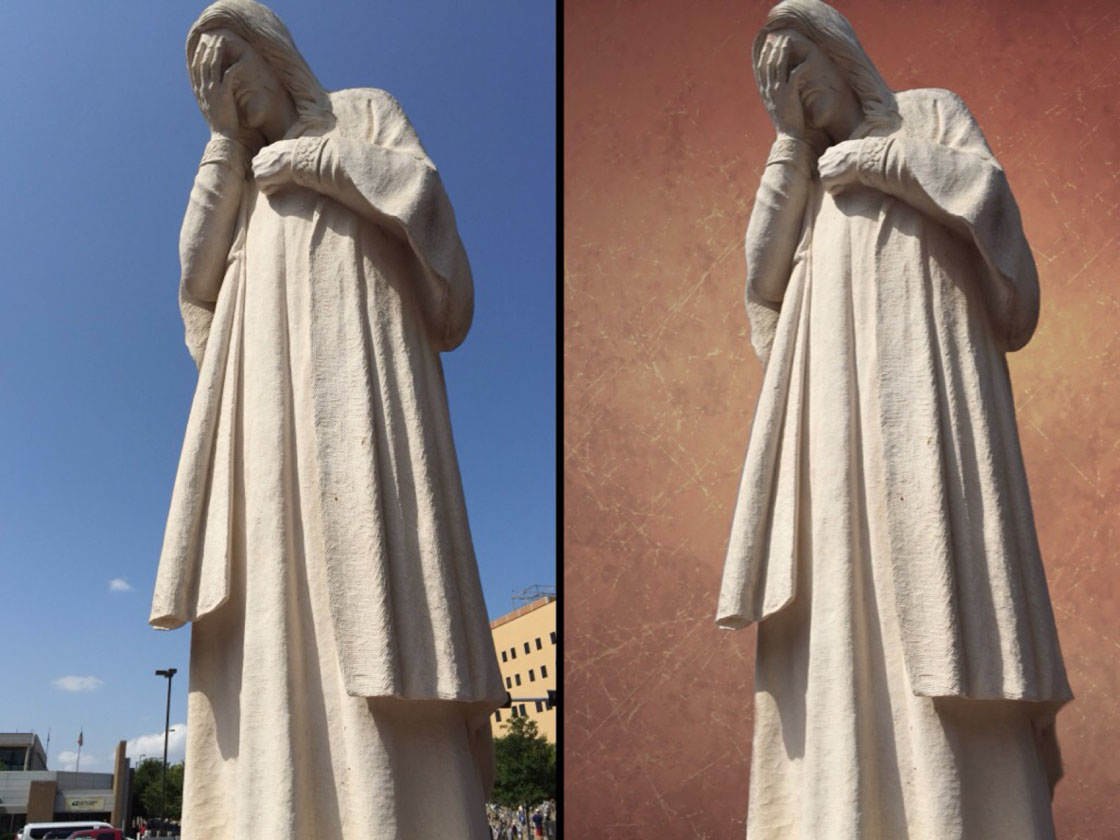
It’s even useful for photos where the background is too plain, such as a white wall. A texture will add beautiful color and detail to the background.
Instead of blending the texture with the photo, you have to erase the background and then superimpose the subject onto the textured backdrop.

Of course, you can use apps that offer preset texture packs, but when you create your own texture overlay you can choose a specific color base and combine different textures together to create your own unique look.
You can also customize an original texture template that you can apply to different photos. It’s super easy to make these textures, so you can create several to see which one highlights your subject the best.
So, how do you create your own texture overlays? Here are two methods using three different apps: PhotoViva, PhotoToaster and Mextures.
Method 1: PhotoViva & PhotoToaster
Step 1: Create A Solid Background In PhotoViva
The first step is to create a solid background in the PhotoViva app. PhotoViva is a painting app that allows you to draw and paint on your photos.
But for our purposes, we’re using it to create a solid colored background. This step allows you to choose the exact base color for your texture.
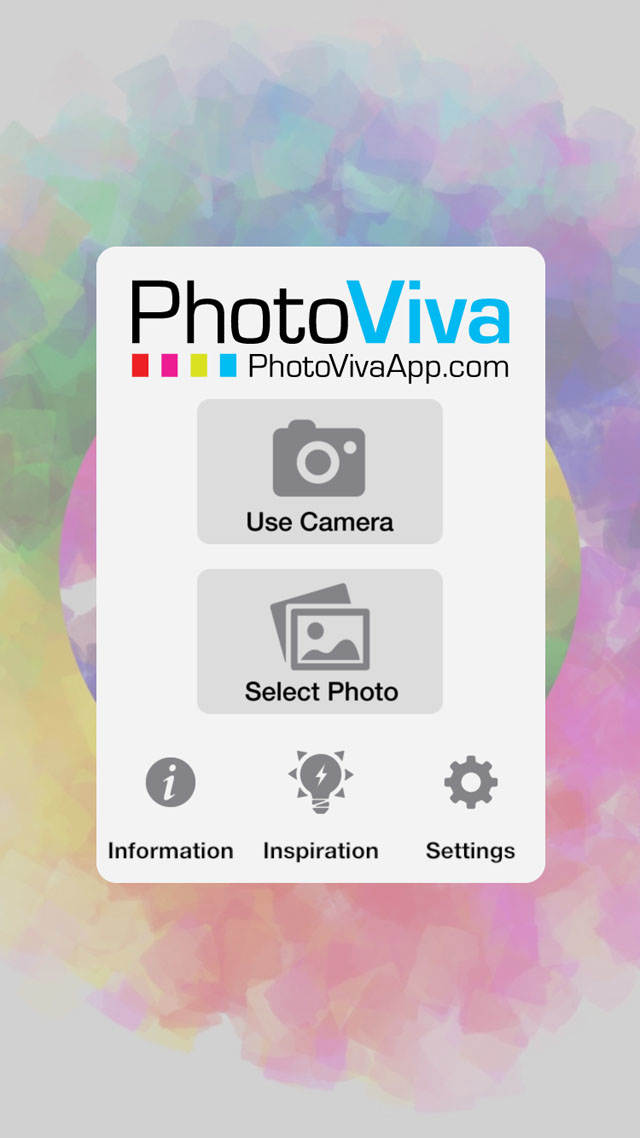
When the app opens, go to Settings:
Here you can set your painting resolution and determine whether you wish to begin with a photo or a solid background when the app opens.
For this tutorial, we’ll be setting On open start with to White. This means that each time you open the app it will automatically default to a solid white background:
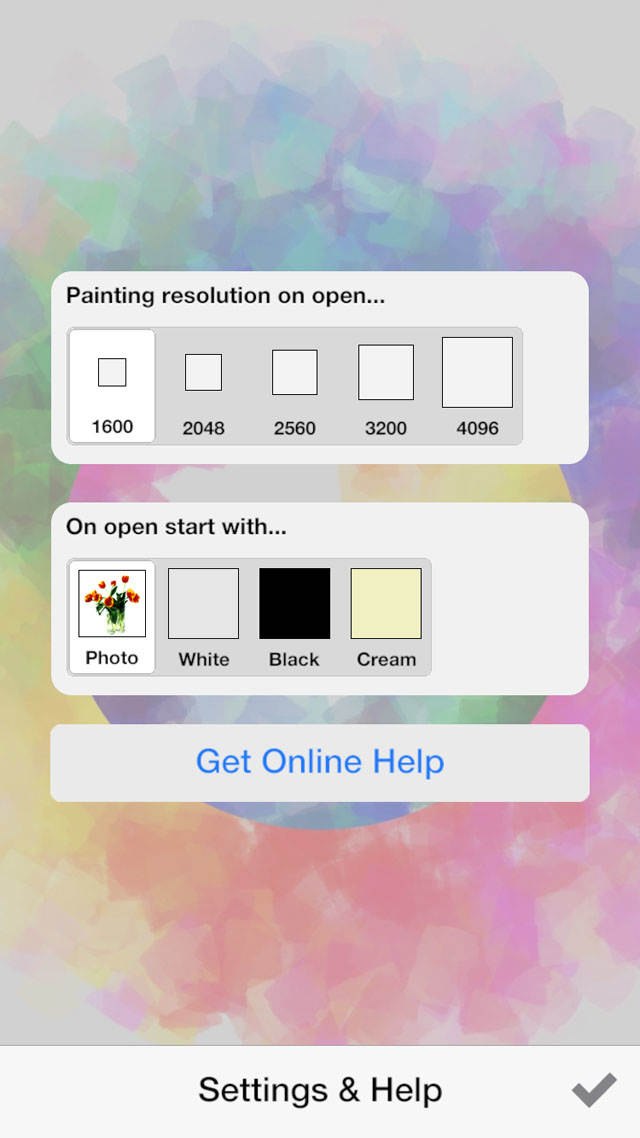
You can set the painting resolution here as well. Tap the check mark to save your settings.
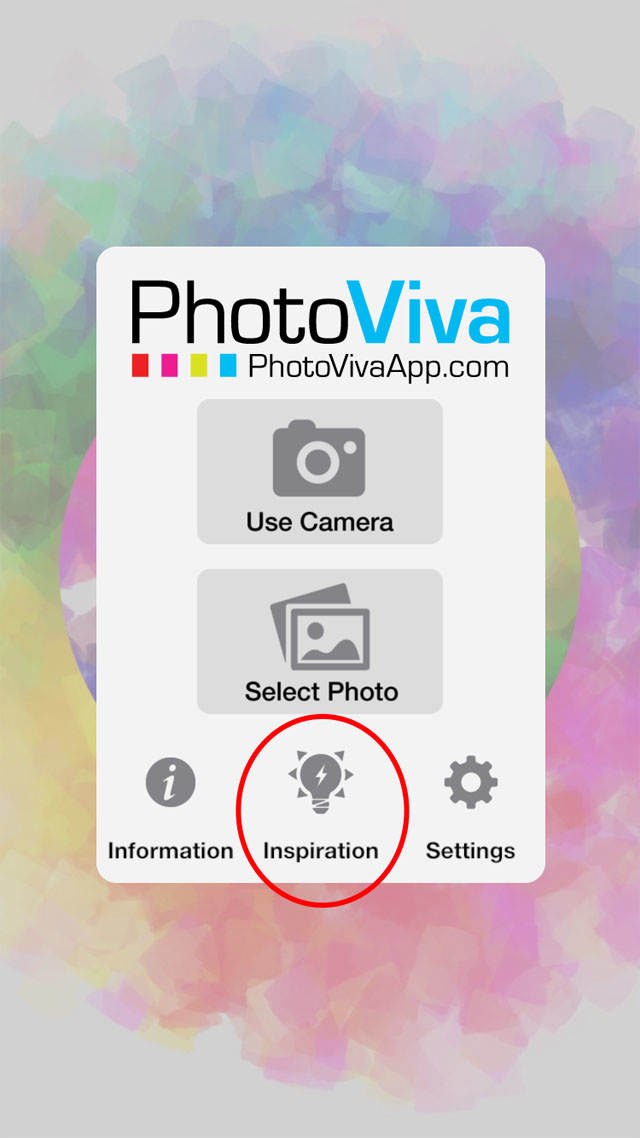
Back on the home screen, tap Inspiration. This is where you’ll tap each time you wish to create a solid background, since we’re not importing a photo to edit:
On the next screen, you’ll see Paint this Picture:

Tap the check mark and your white background will appear:

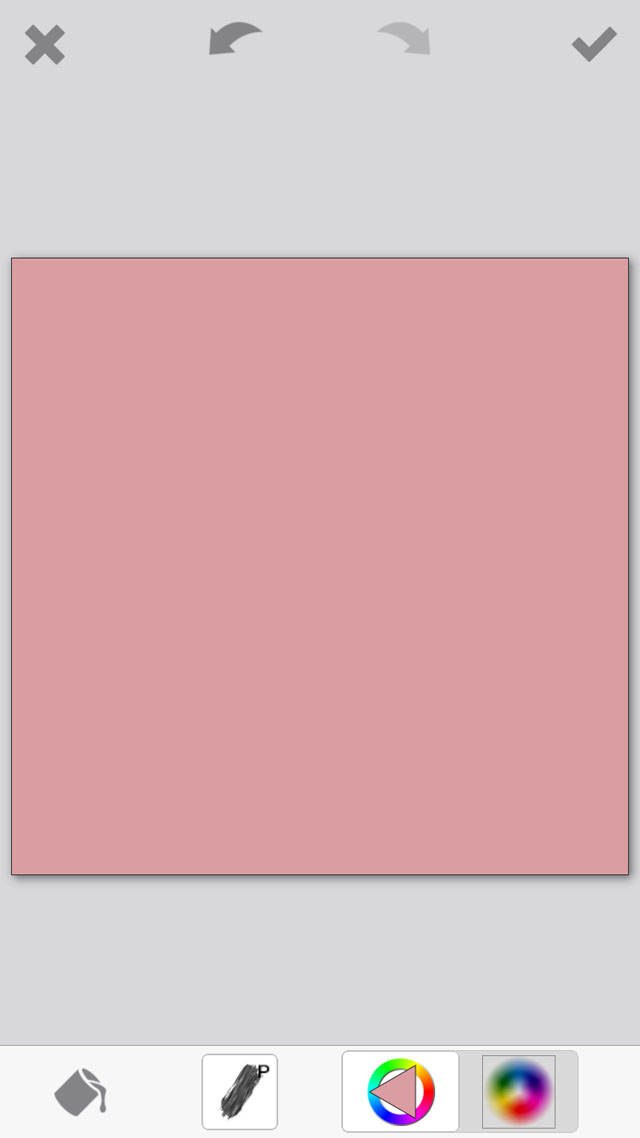
Now you can change the color of this background. To do so, tap on the third icon at the bottom (triangle icon). This brings up a Color Source dialog box where you’ll see a triangle inside a circle:
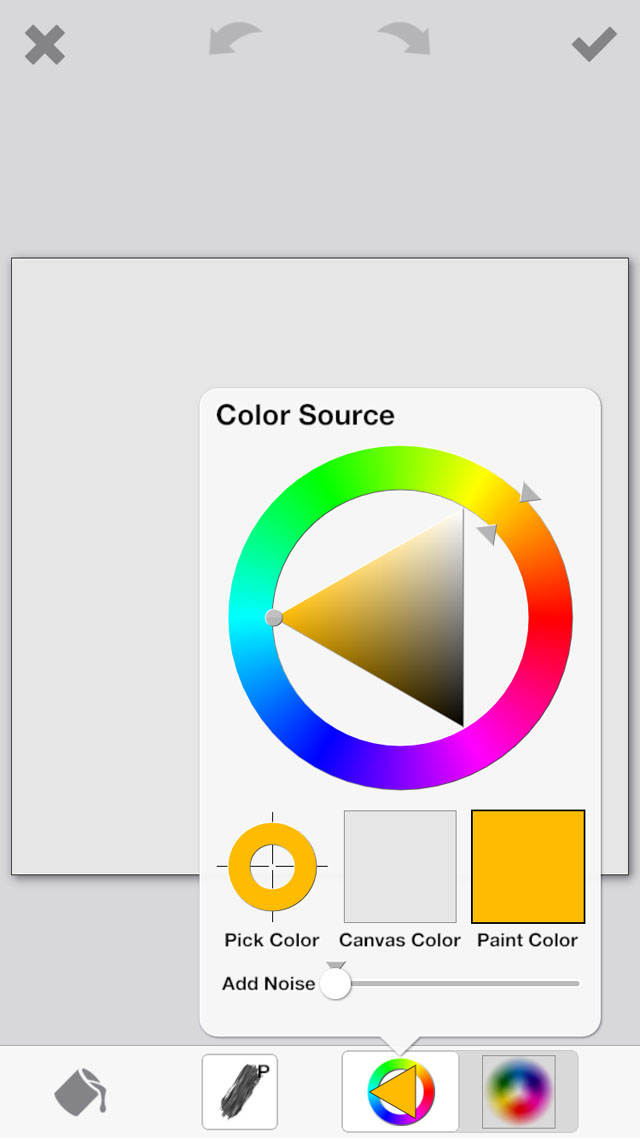
To select your color, first slide your finger around the circle until you find the color palette you wish to use. Then tap inside the triangle to select the appropriate gradient of that color:
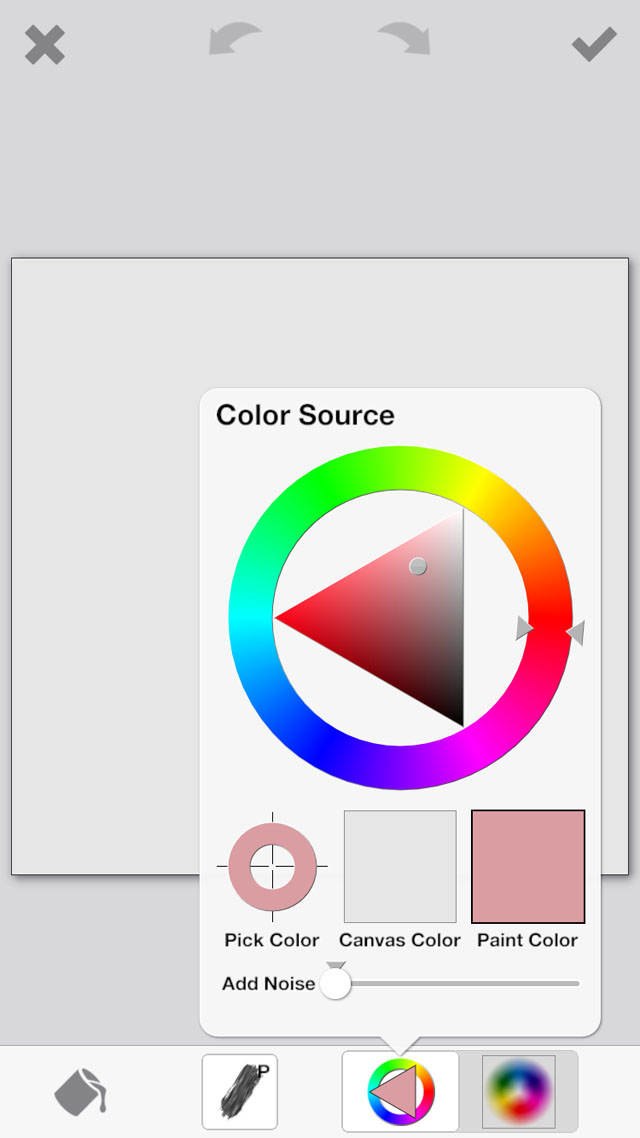
When you’ve found the color you want, tap the check mark in the top right of the screen.
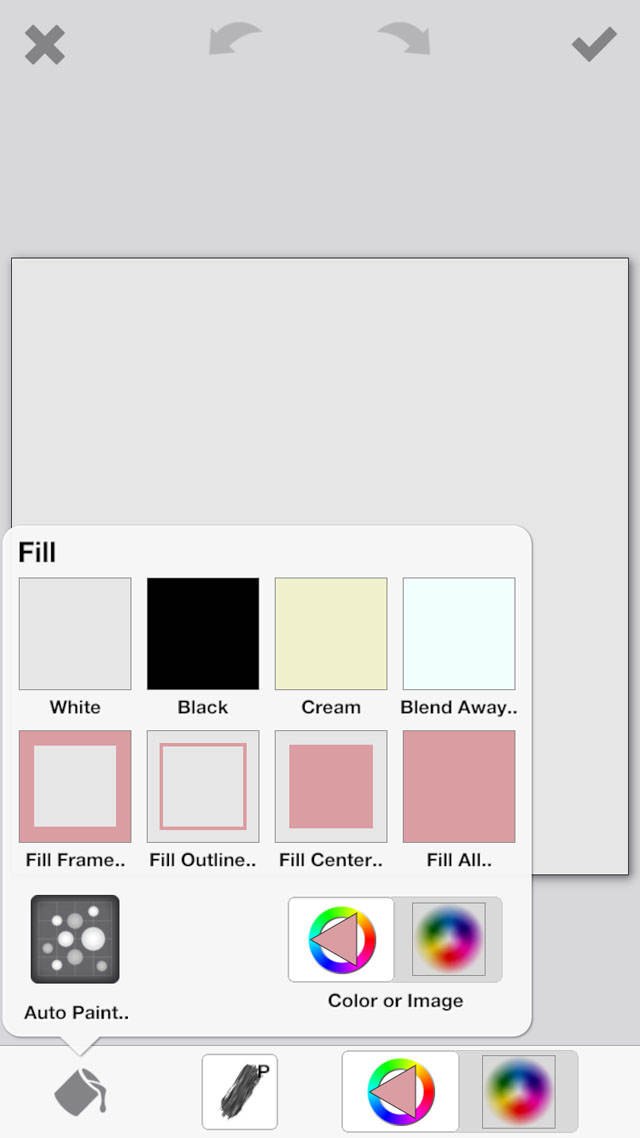
To replace the white background with the color you’ve chosen, tap on the paint can icon at the bottom left.
You’ll see many choices here for where to apply the color. Select Fill All so that the entire space is filled with your chosen color:
If you wish to decrease the tint of the color, you can do it on the next screen by using the slider:
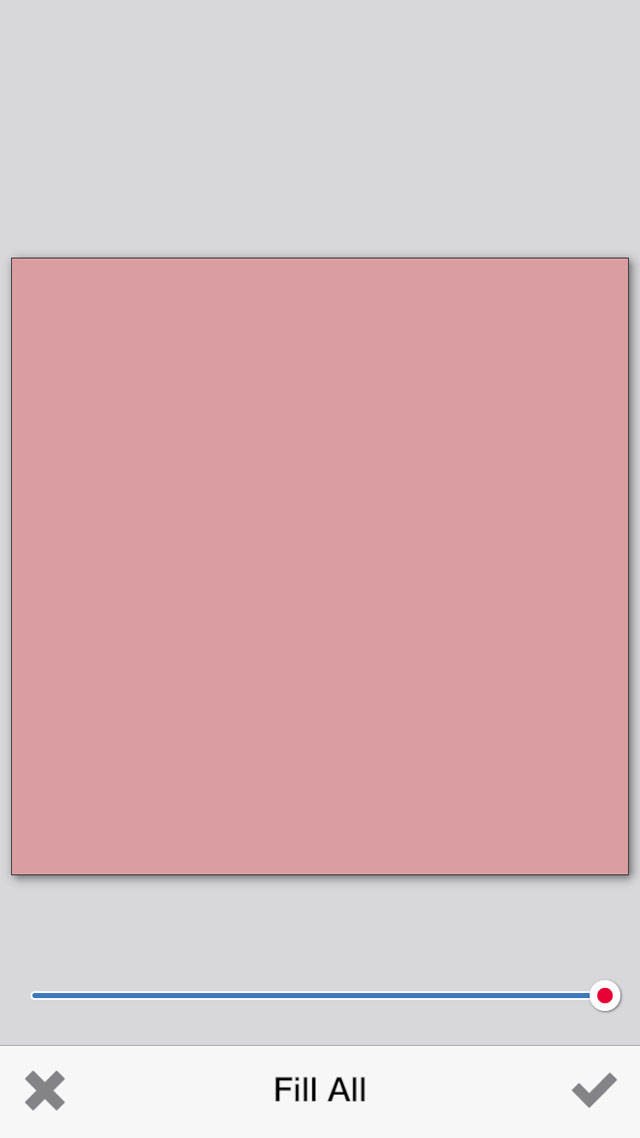
If you don’t need to change the tint, tap the check mark, then tap another check mark on the next screen (top right):
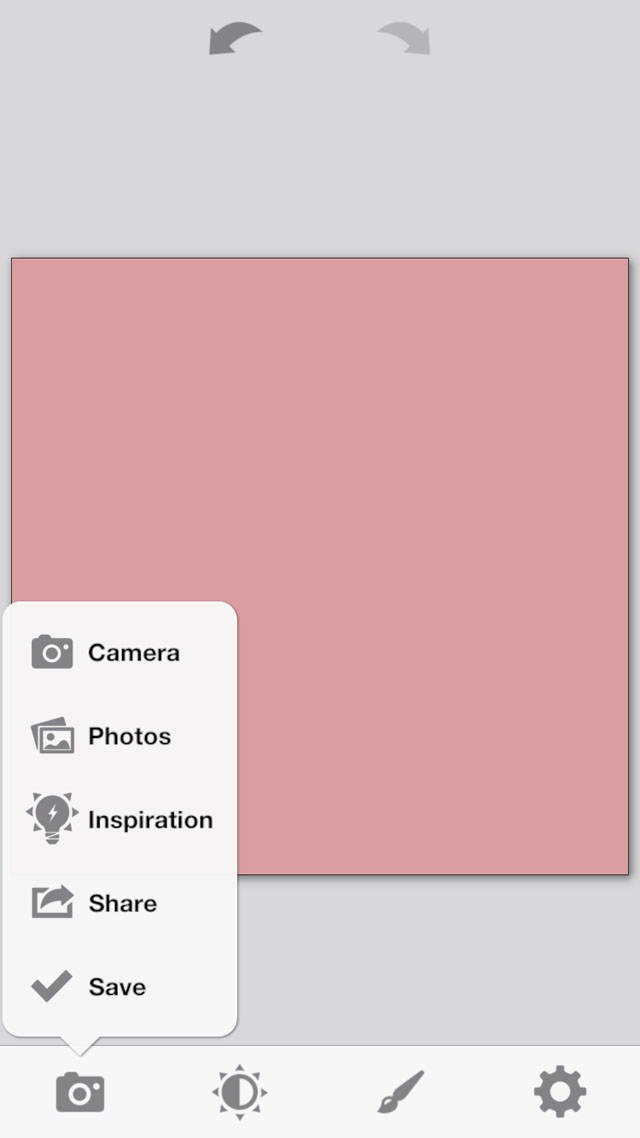
To save the colored background, select the camera icon at the bottom, then tap Save:
Your image should look like this:

Step 2: Add Texture In PhotoToaster
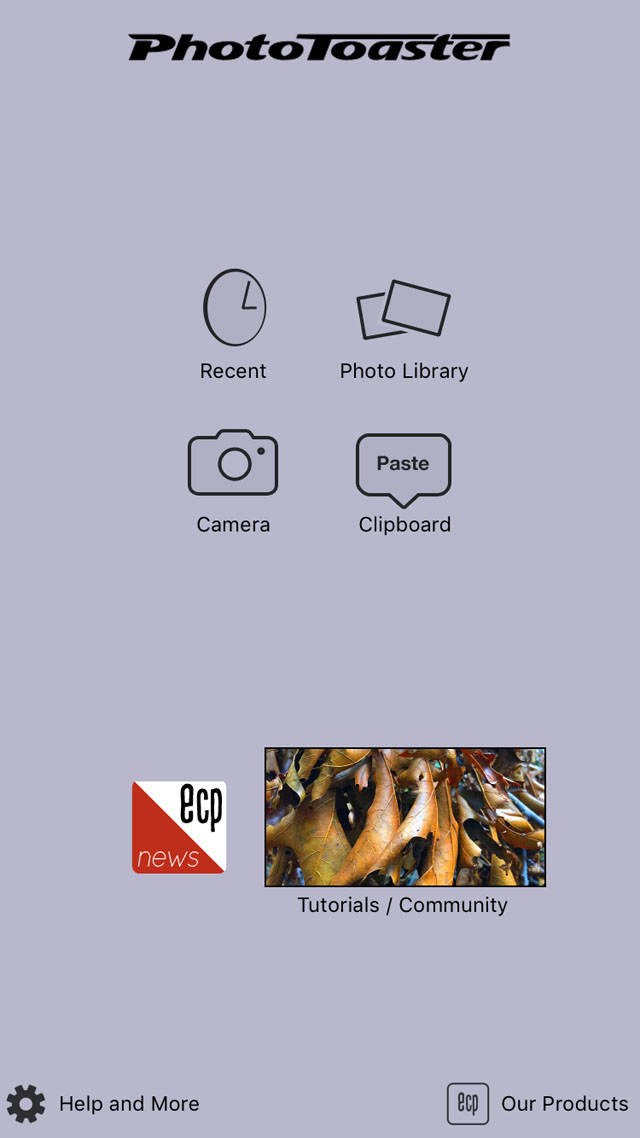
Now you can apply texture to this solid color in the PhotoToaster app. When you open the app, tap Photo Library to find your solid colored background image, then tap on the image to import it into the app:
To apply a texture, tap the Texture icon at the bottom of the screen – it’s the 5th icon from the left (highlighted in blue below):
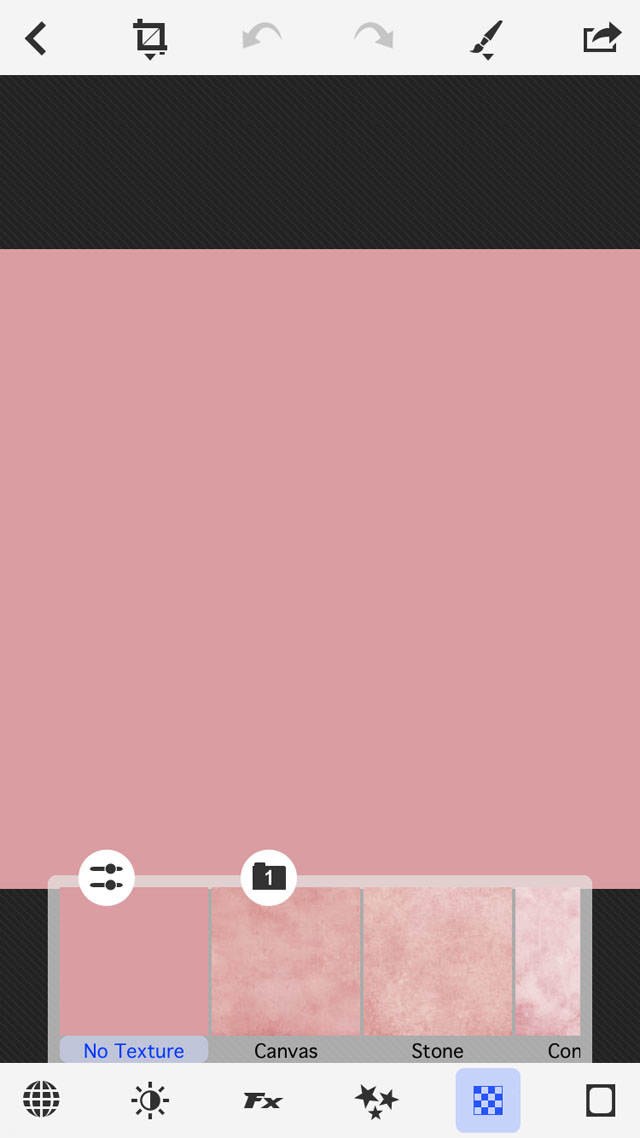
You’ll see a pop-up of textures. You’ll also notice that this is just one of two texture folders.
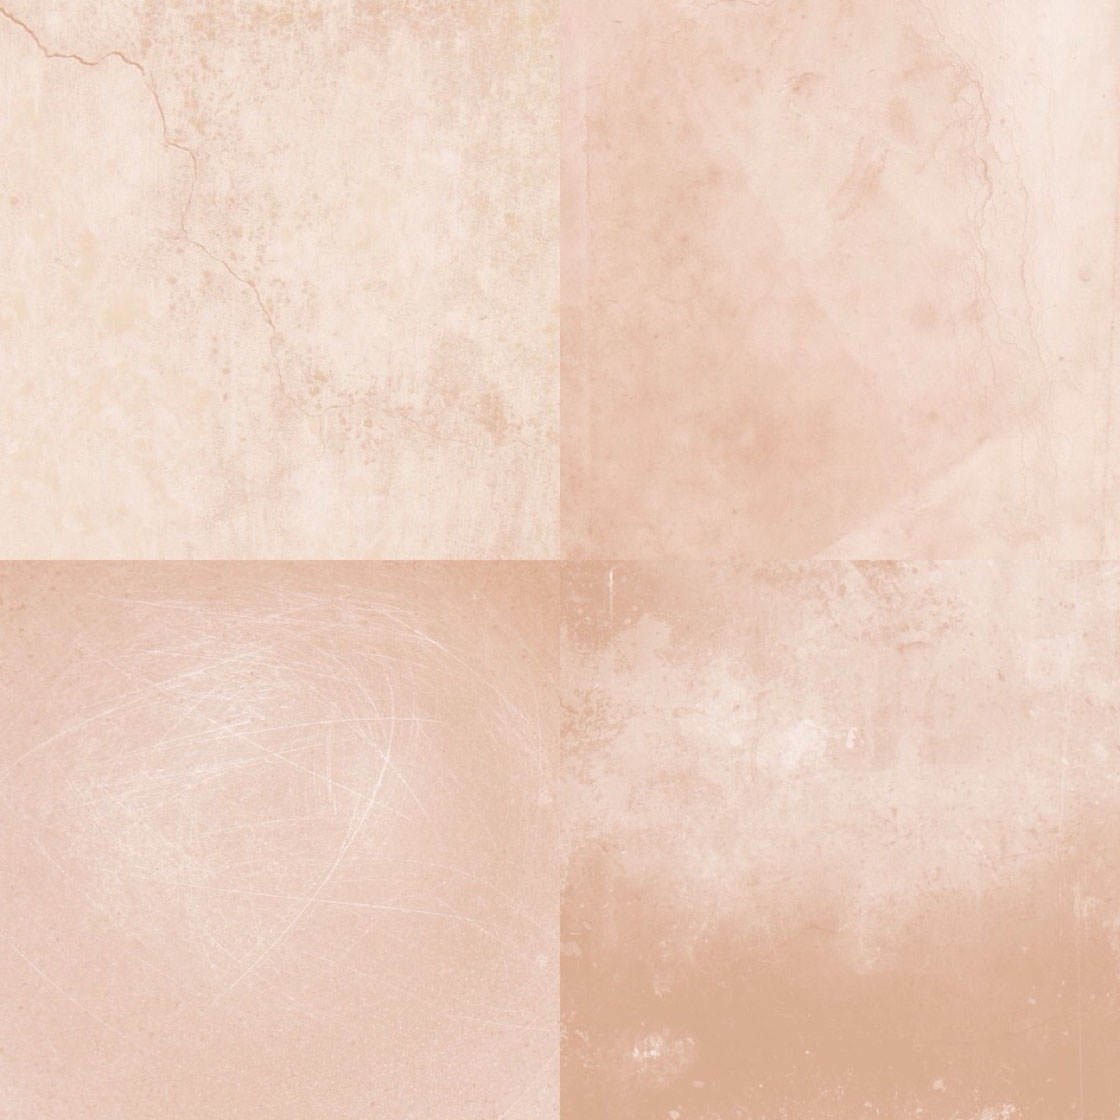
Some of the textures in the first folder include Canvas, Stone, Concrete, Paper, Slate and Old Paper. Here are some examples:
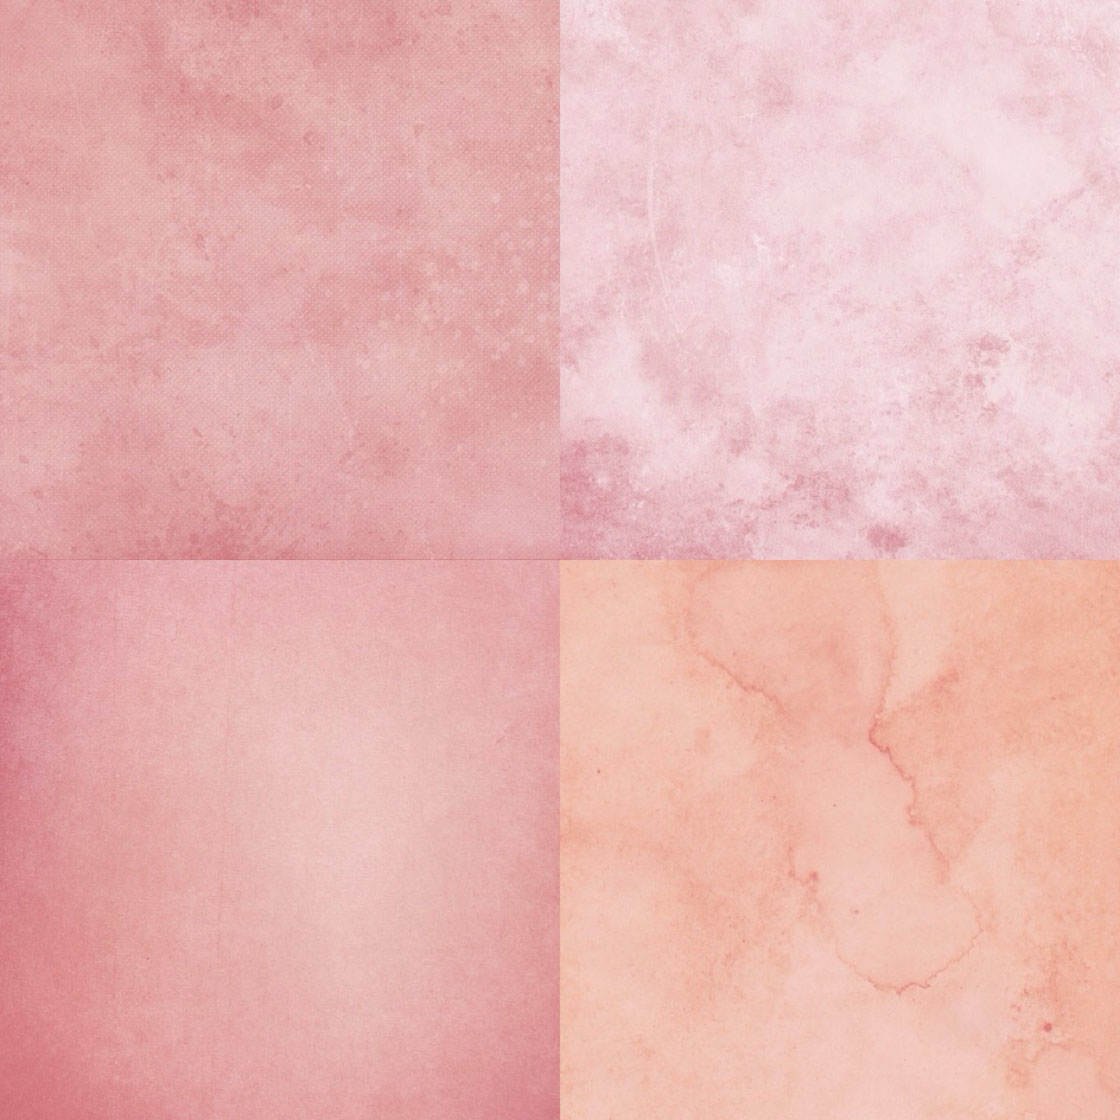
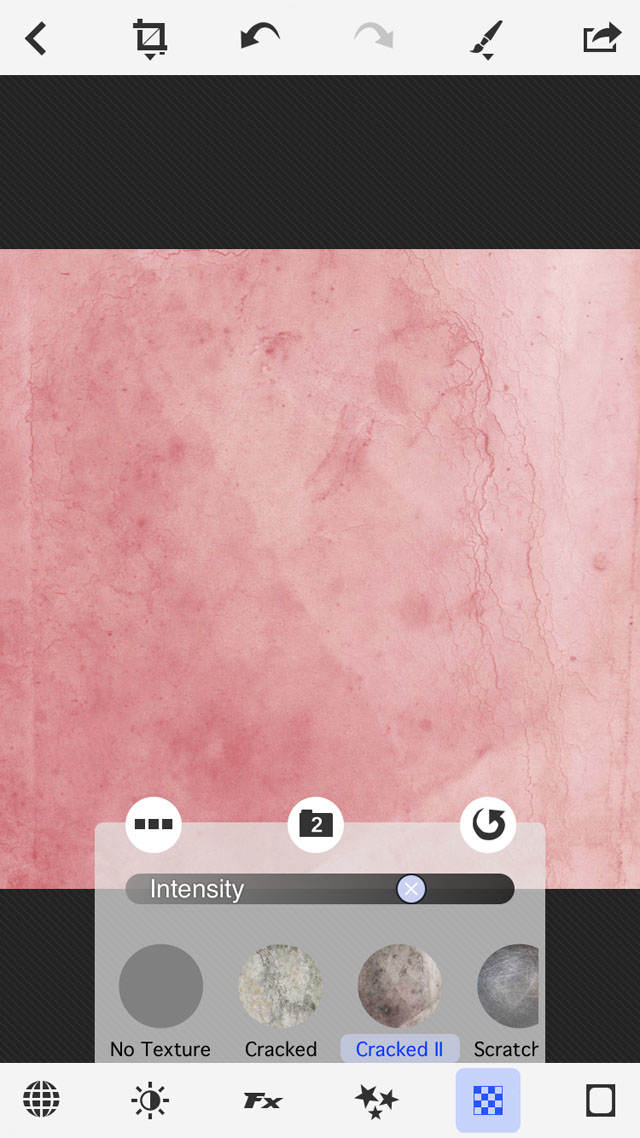
To switch to the second folder, tap the 1 folder. Textures in the second folder include Cracked, Cracked II, Scratched and Dirty (see examples below):
You can also adjust the intensity of any of the textures. Simply tap the edit icon (to the left of the folder icon) and use the slider to change the intensity:
To save your textured background, tap the Save icon at the top right corner and save to your Photo Library:

Method 2: PhotoViva & Mextures
The second approach begins in PhotoViva again, but this time we’ll use the Mextures app instead of PhotoToaster to add the texture.
Mextures does what PhotoToaster doesn’t… it can layer multiple textures, one on top of the other.
This allows you to customize your overlay in a more complex way by adding gradients and using different types of distressed textures.
Let’s begin with another solid background created in PhotoViva:

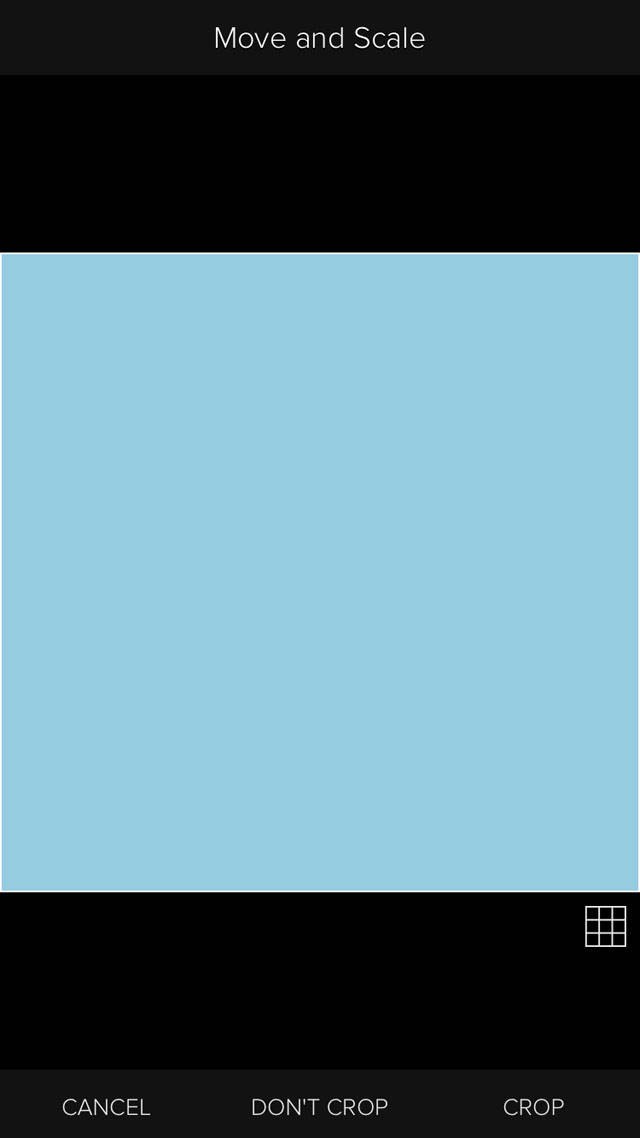
Now open the Mextures app, and tap Library to import the solid colored background image from your Photo Library:
You’ll have to decide if you wish to crop the image or not. I typically leave all of my textures in square shape because the orientation can be changed later:
Next, you’ll see a wide range of categories. The categories we’ll be using for this project are Grit and Grain, Emulsion, and Landscape Enhance:
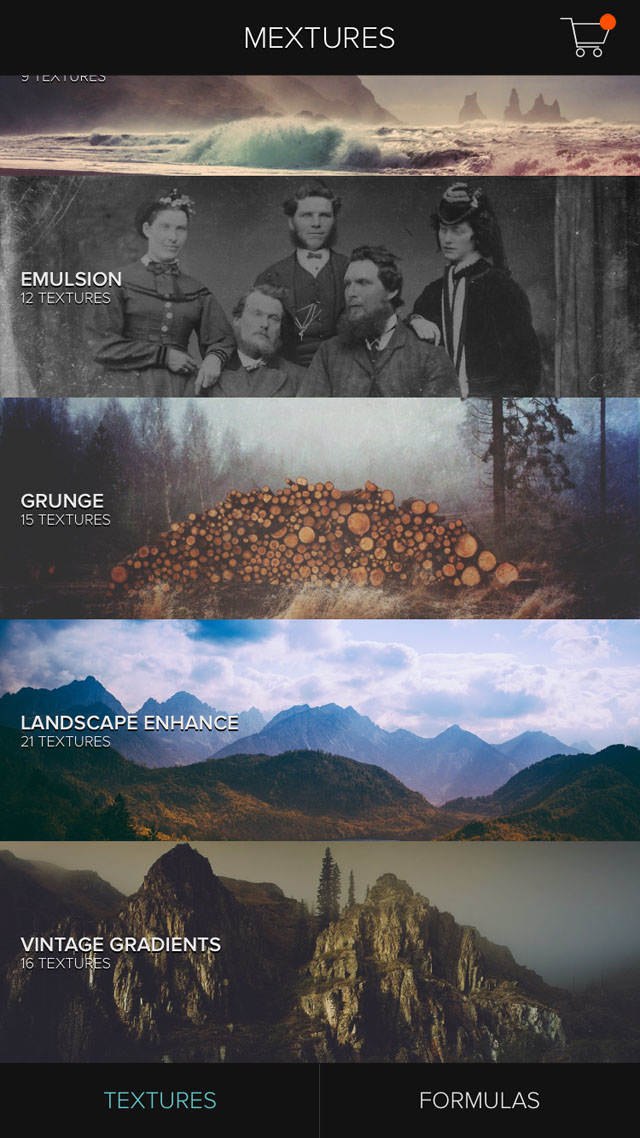
The first two categories add distressed and grunge overlays like scratches and scuff marks. The last one provides gradients so that you may alter the color of your background.
Let’s apply Emulsion first, so tap this category to see the filters at the bottom of the screen. In the middle of the screen you’ll see the solid background and a slider to the right:
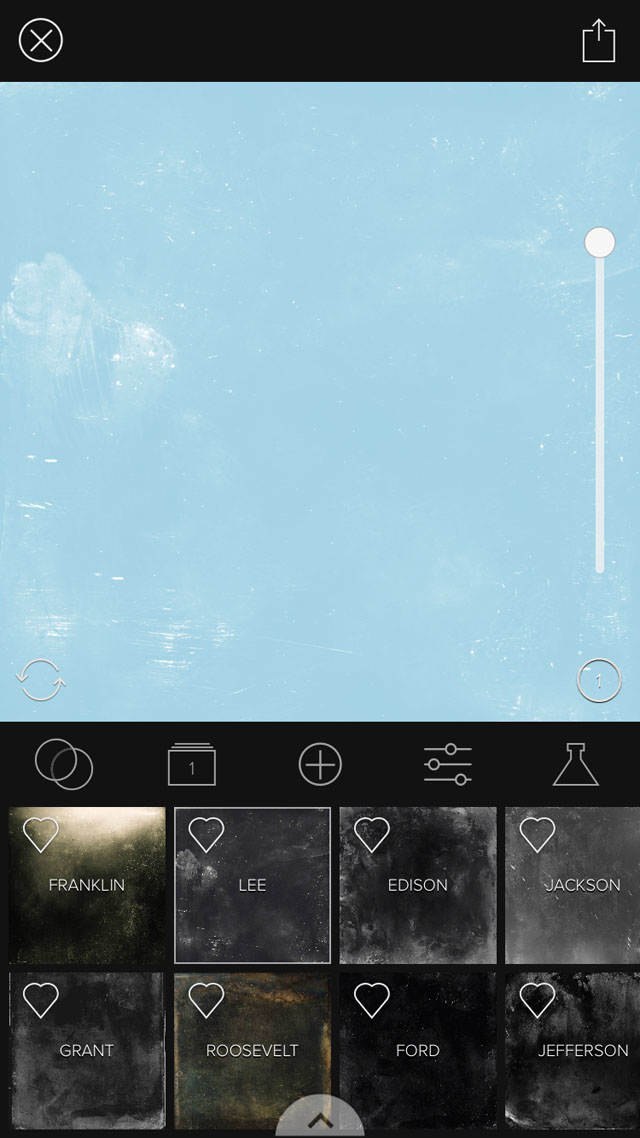
This slider sets the intensity of the texture. Sliding it all the way up to 100% gives you the strongest texture. The filters in this category apply a splotchy coating to your solid background – tap a filter to apply it.
The next layer we’ll add is from the Grit and Grain category. To add this new layer, tap the plus icon (+) and select the Grit and Grain category:
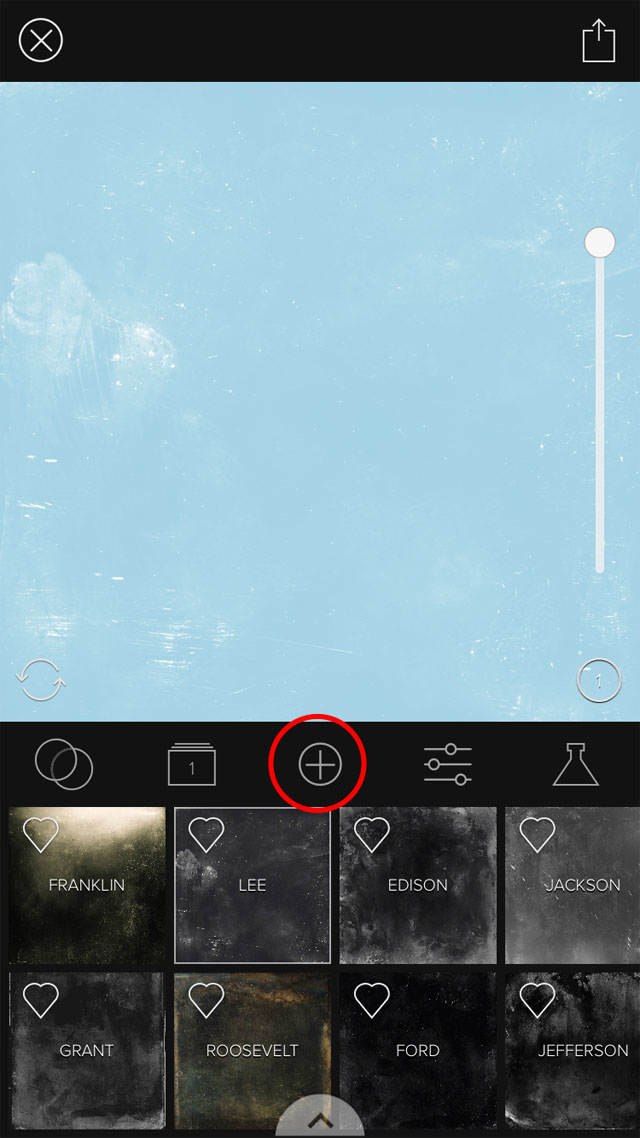
Once you’re in Grit and Grain, move the slider up to 100% and select a filter from the bottom to add tiny bits of grit and grain to your texture:
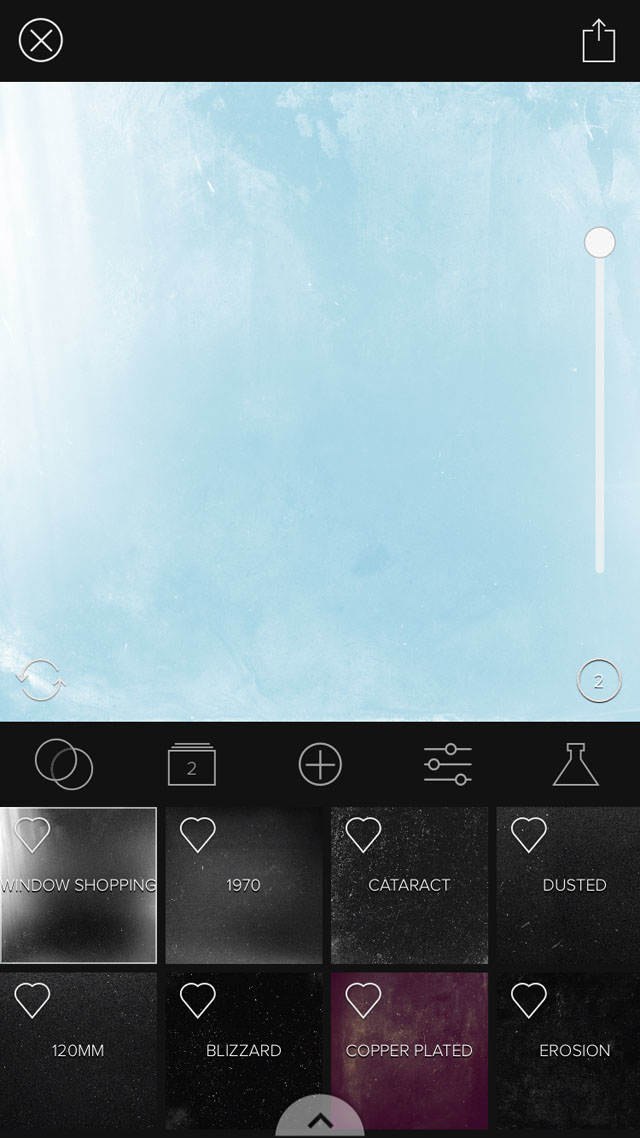
For the final layer, tap the plus icon again and choose the Landscape Enhance category.
With this category, you can change the color gradient of the background and simulate different landscape effects like dusk, sunrise and autumn skies. Move the slider all the way up to 100% so you can see the different variations:
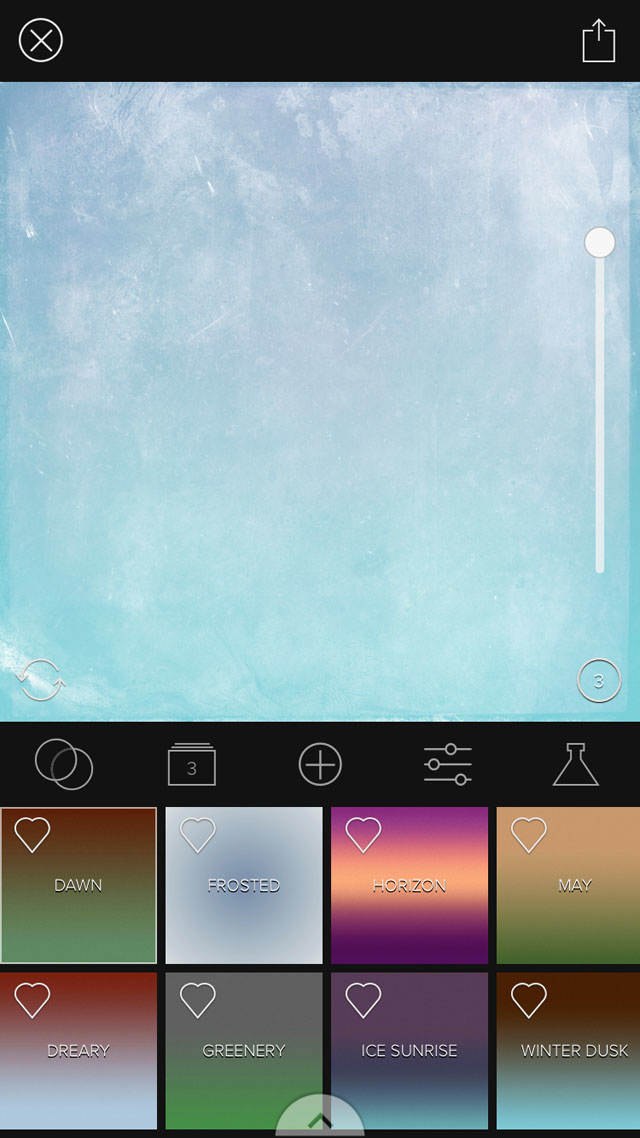
After selecting filters from each category, tap the icon at the top right corner of the screen, then tap Save to Photo Library.
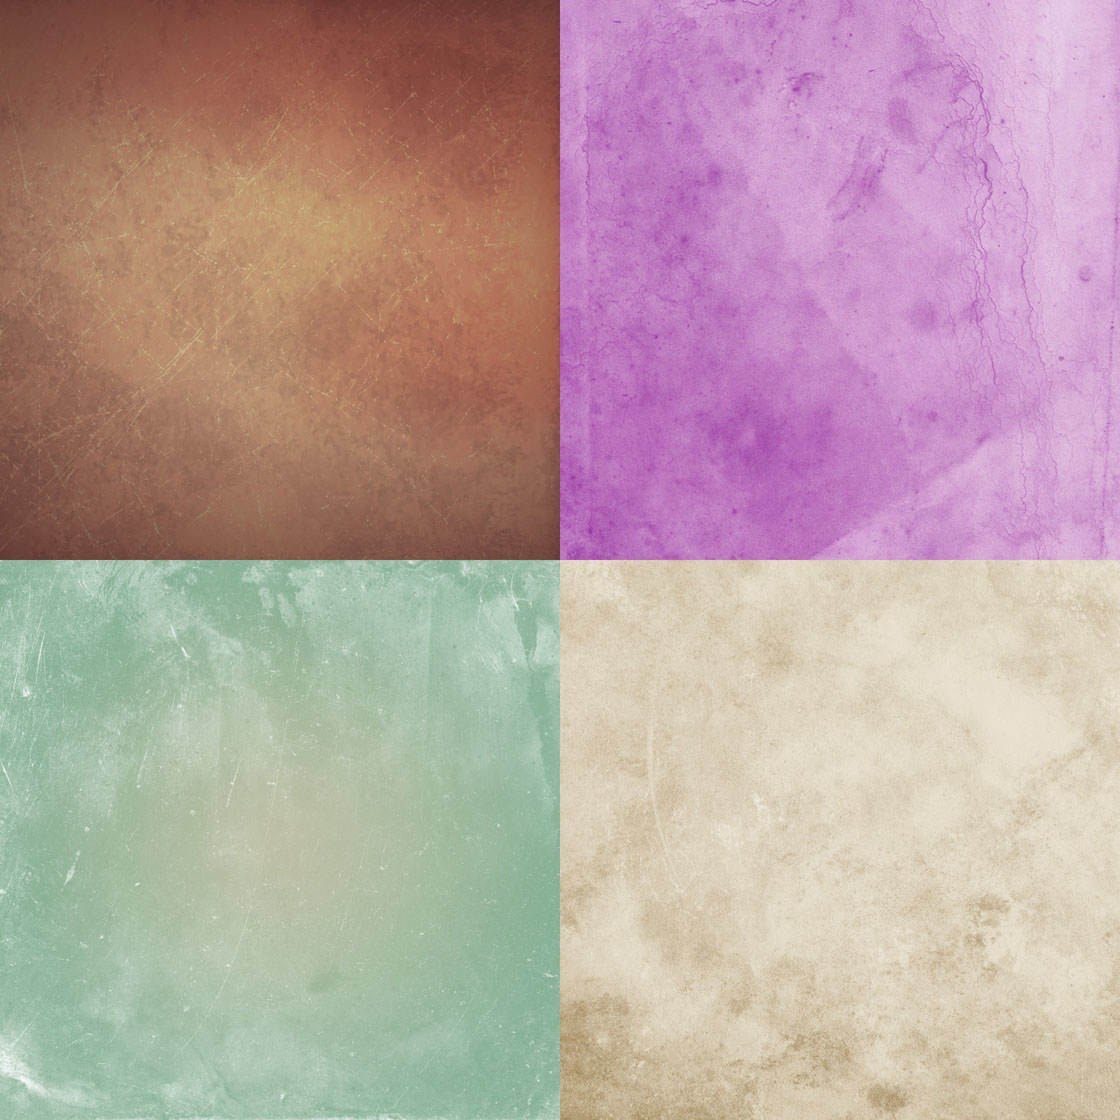
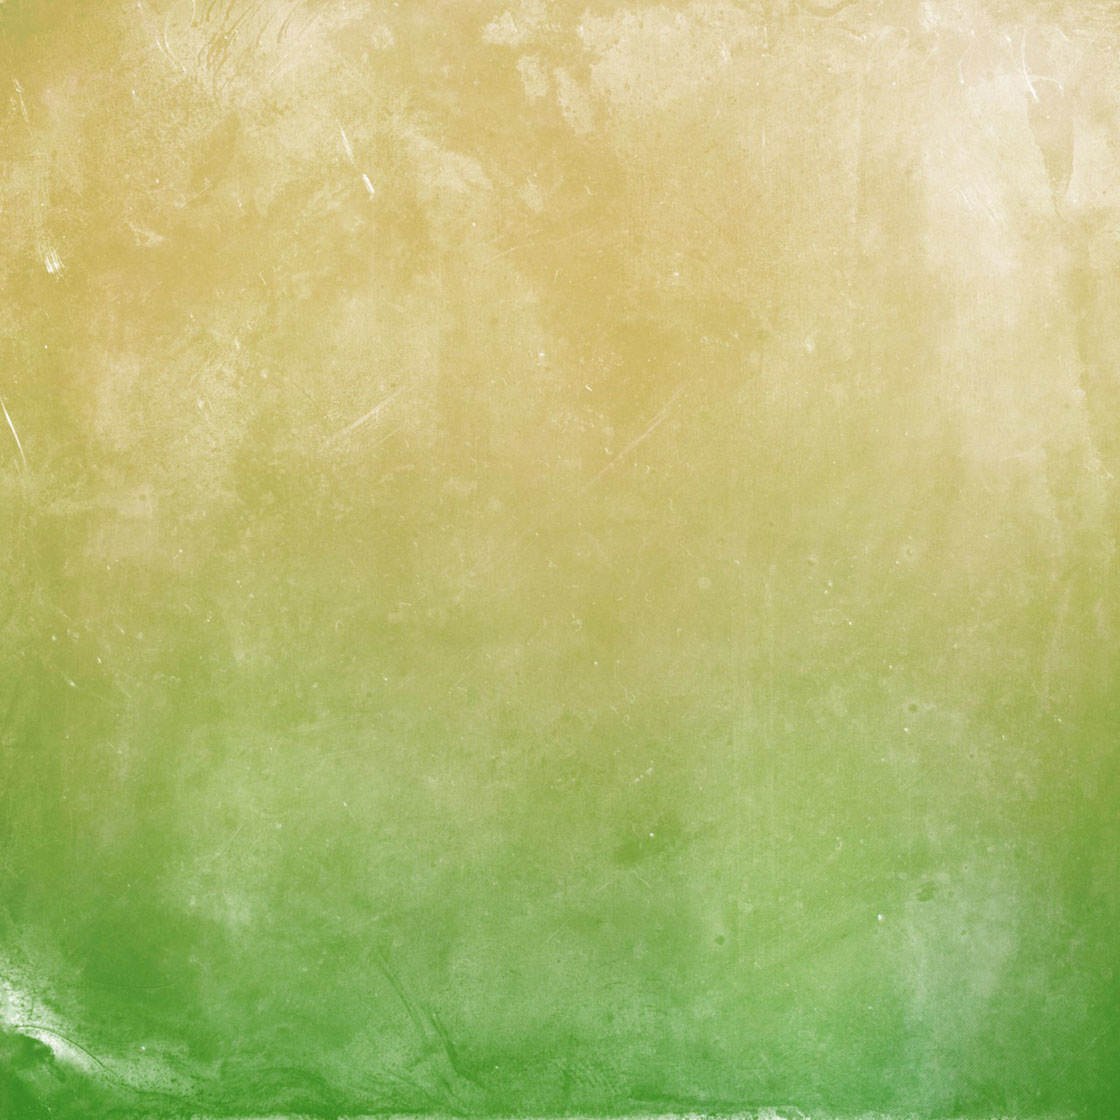
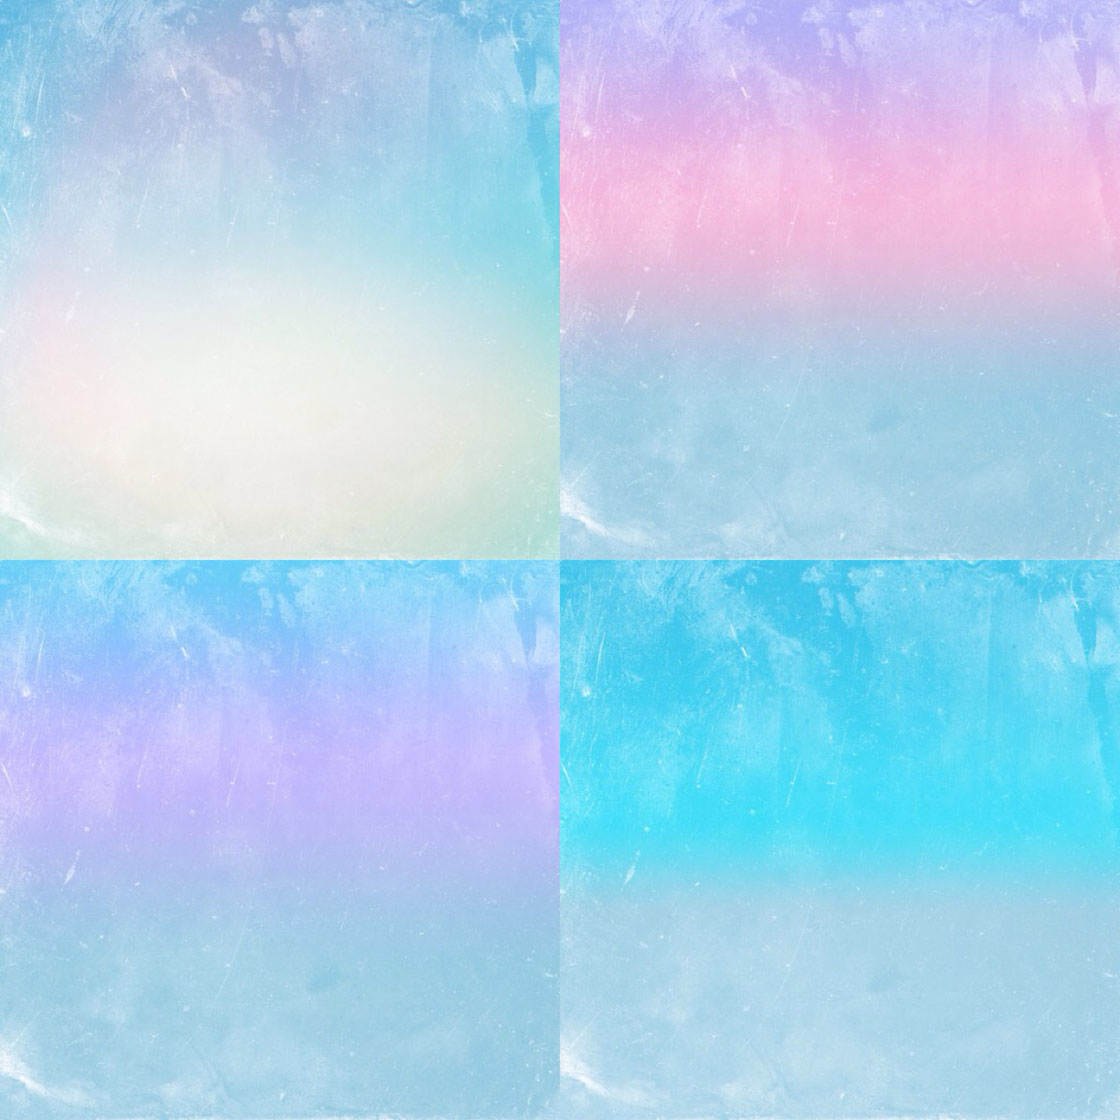
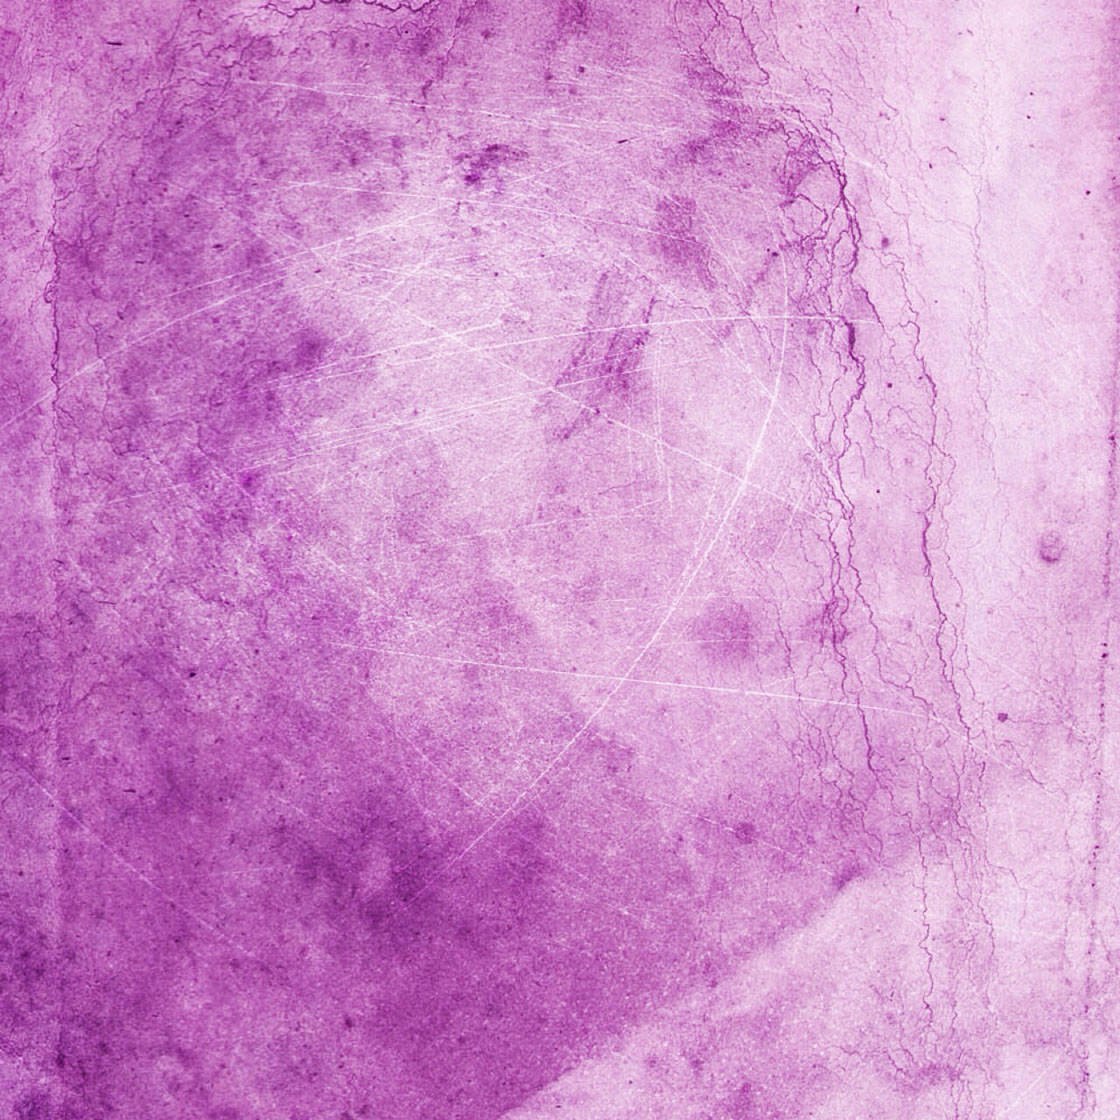
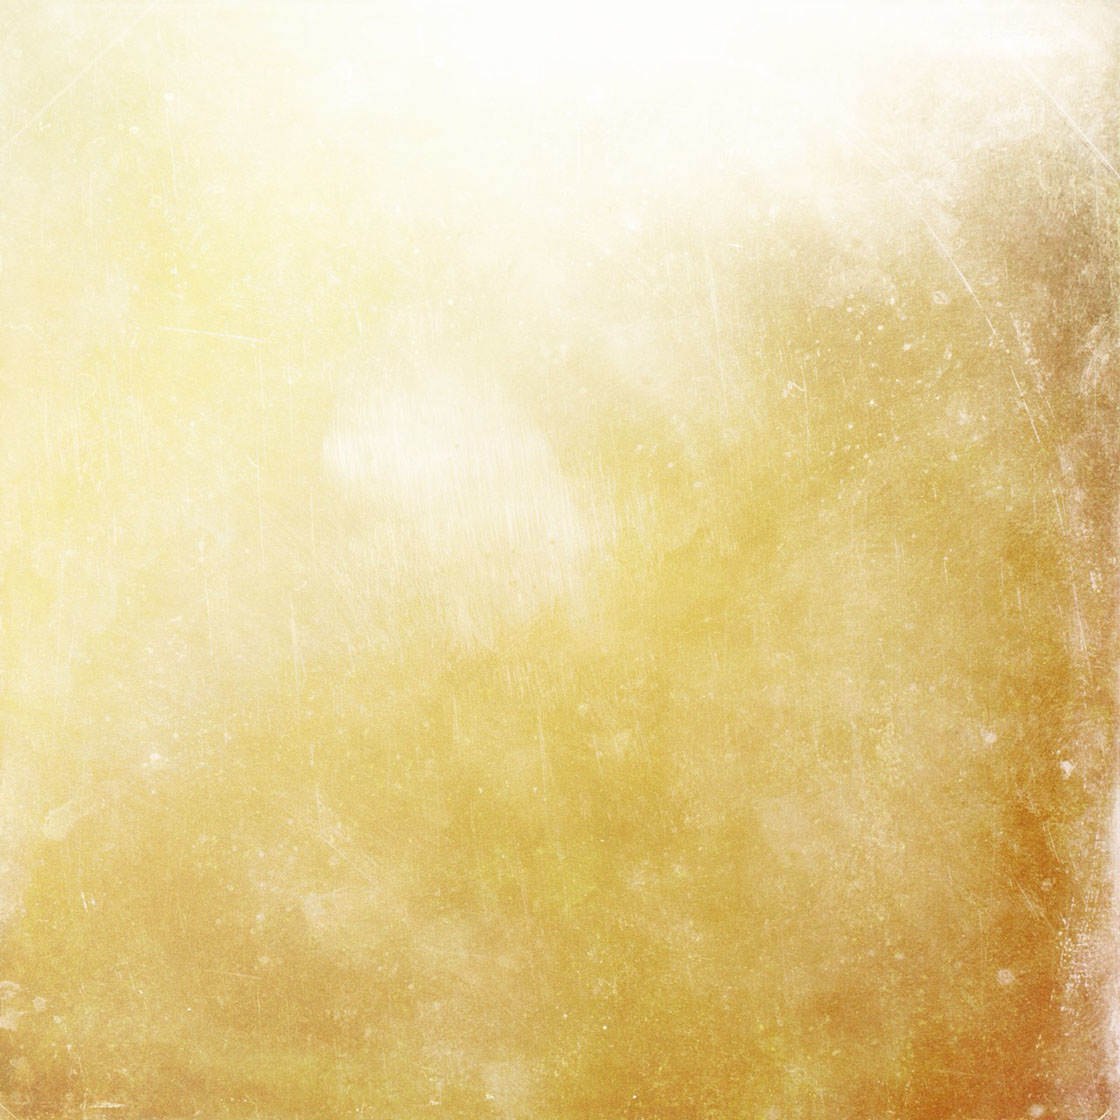
Here are a few textures that I created using these three categories in Mextures:
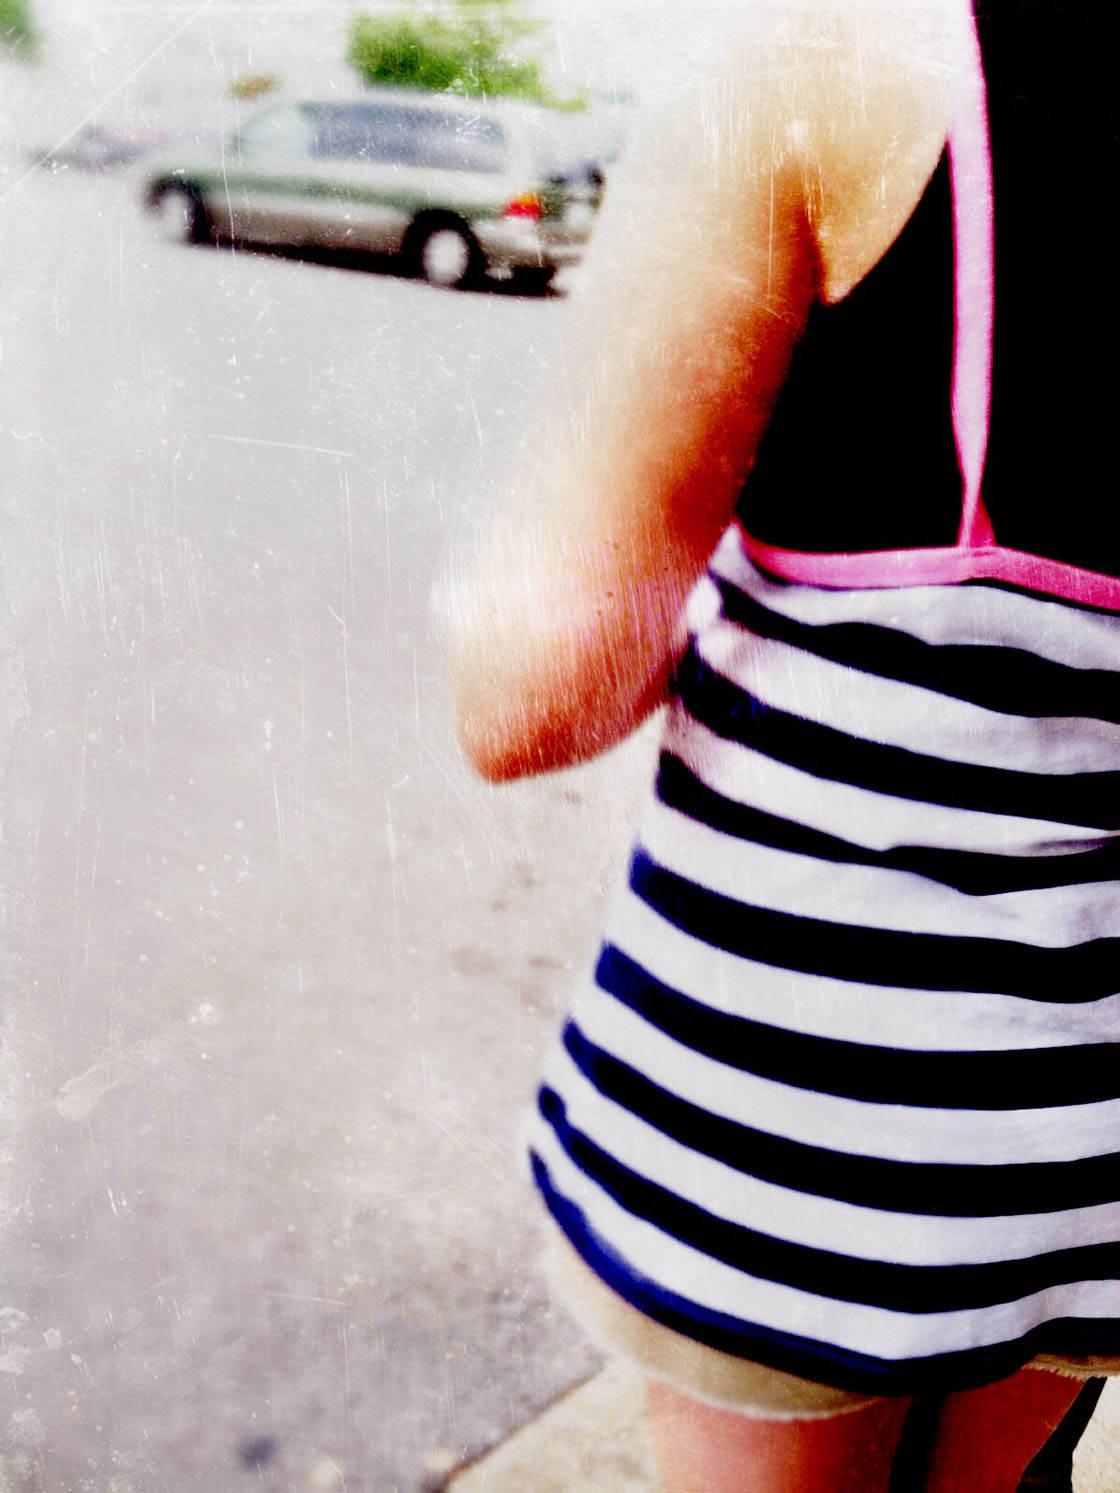
I used one of these textures to replace an overexposed sky in the photo below:
Conclusion
As you can see, there are tons of possibilities for creating texture overlays using just these two approaches and three apps.
Don’t be afraid to experiment with variations on these options. For example, you can add additional textures in PhotoToaster by saving your texture and pulling it into the app again to add another layer.
In the photo below, several layers were added this way:
Another idea is to combine textures from PhotoToaster and Mextures. Add a texture in PhotoToaster and save it, then pull it into Mextures and add additional layers.
You can also try the Grunge category in Mextures to add both grunge and color gradients at the same time, like the image below:
Of course, once you’ve created your own textures using these methods, you’ll want to start applying them to your photos…
Click here to learn how to enhance your iPhone photos with your custom-made textures. In this tutorial you’ll learn how to blend your textures with your photos, as well as replace an ugly background with a beautiful textured backdrop.

Thanks Kristen for explaining this in such an easy-to-understand way 🙂