Reflection photos are fascinating, but how often do you find great reflections to shoot? It’s probably not often that you stumble across a scene with great lighting and interesting subjects, that also happens to have a body of water or other reflective surface to capture that scene in a reflection. But with the Reflect Mirror Camera app, you can create your own unique reflection photos from any image in your camera roll. In this tutorial you’ll learn how to use this app to create stunning and realistic reflection photos with your iPhone.
Introduction To Reflect App
Reflect Mirror Camera (commonly know as Reflect) is a relatively new app by BrainFeverMedia that’s opened the door to many new and creative editing possibilities. Other apps by this developer include the popular LensLight and Alien Sky.
Reflect Mirror Camera can be downloaded from the App Store for $2.99. If you’re searching for the app in the App Store, make sure you search for Reflect Mirror Camera, rather than just Reflect, otherwise you might not find the correct app. The icon for the app is black with 2 purple triangles that resembles an hourglass.
The purpose of this app is simple – it adds a reflection to the lower portion of your photo by mirroring the detail from the top portion of the frame. However, don’t be fooled into thinking this is a basic app!
There are so many creative possibilities to choose from, and it’s incredibly fun and inspiring to use. You can have your subjects reflect in anything from water or ice, to a tiled floor or metal surface. You can even add fog, lens flare, balloons, space objects and more.
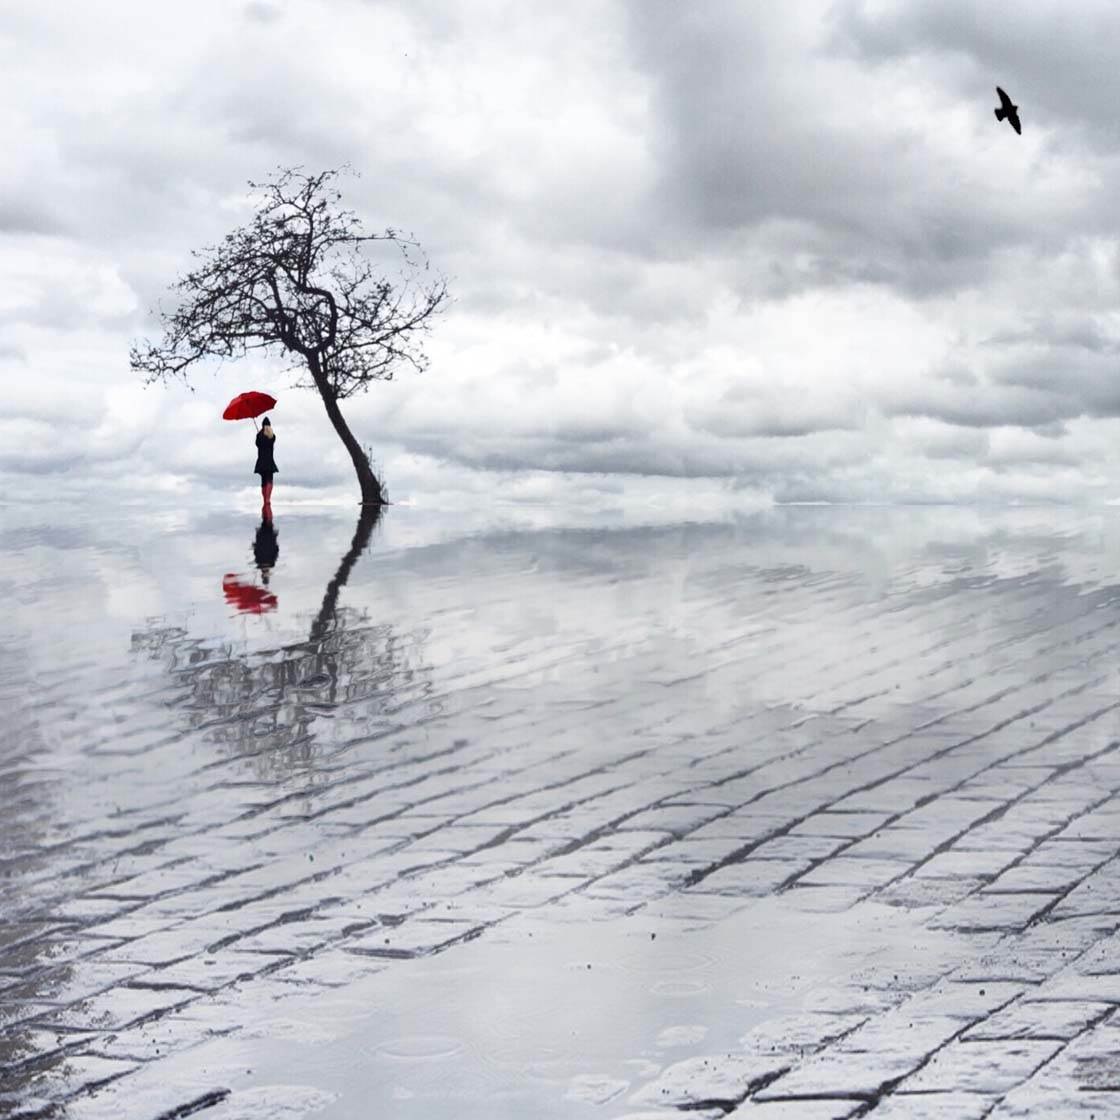
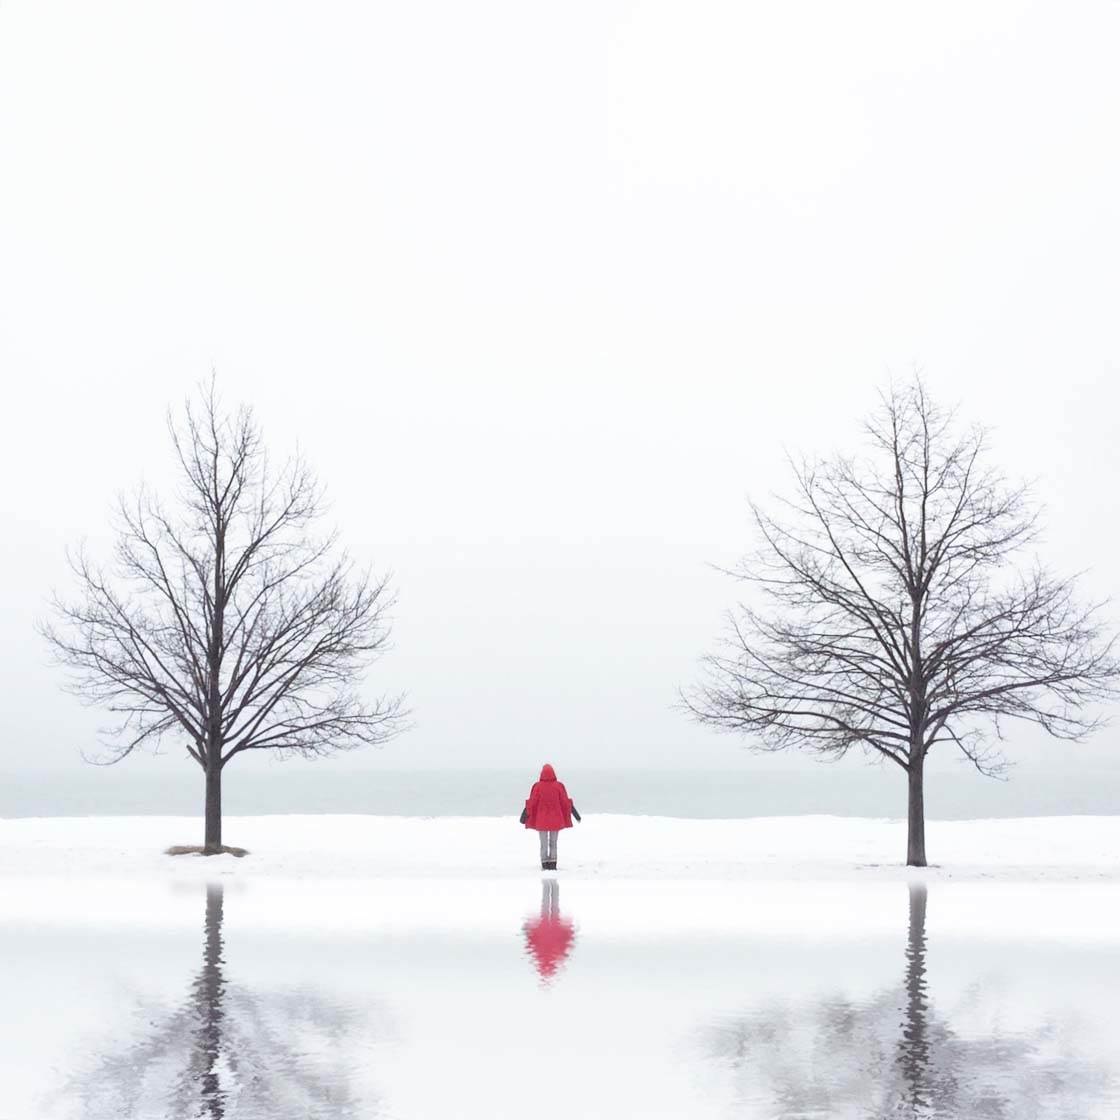
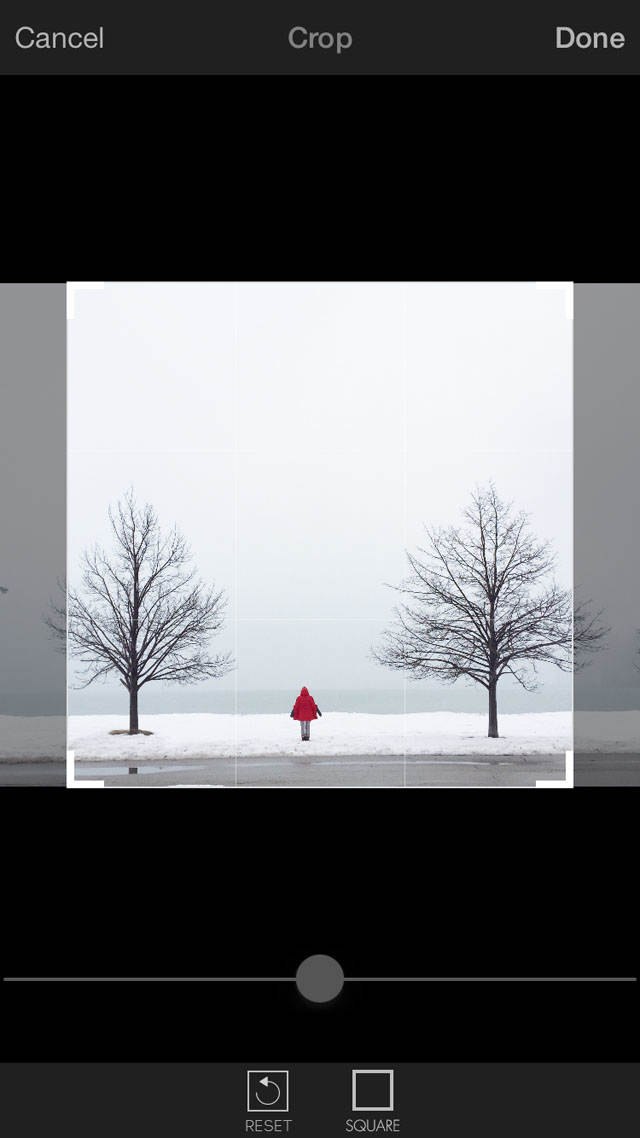
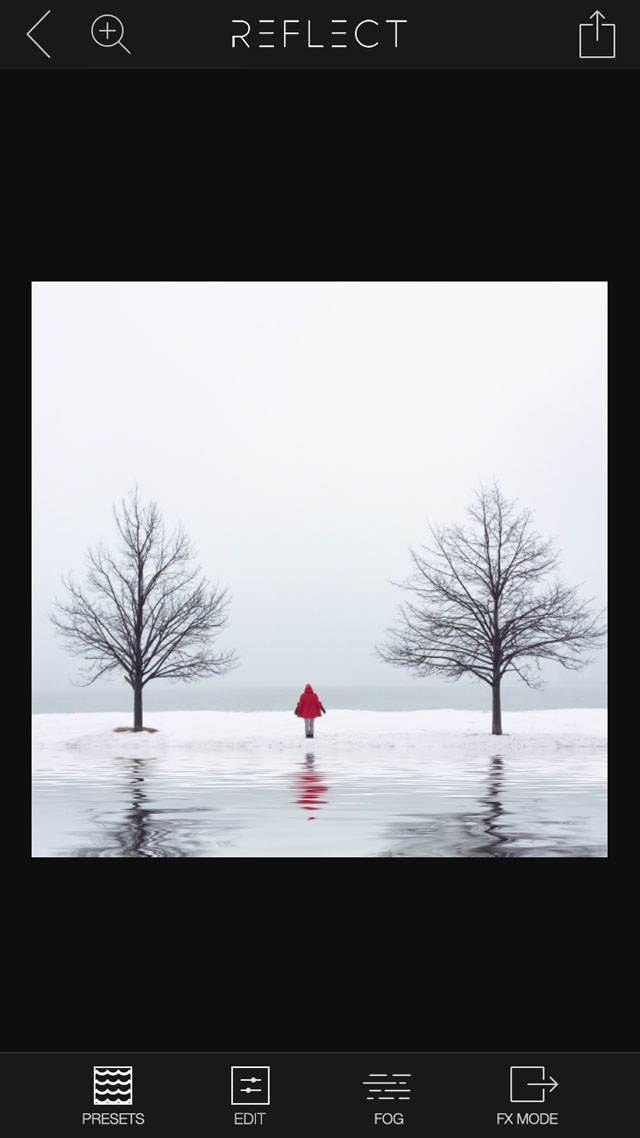
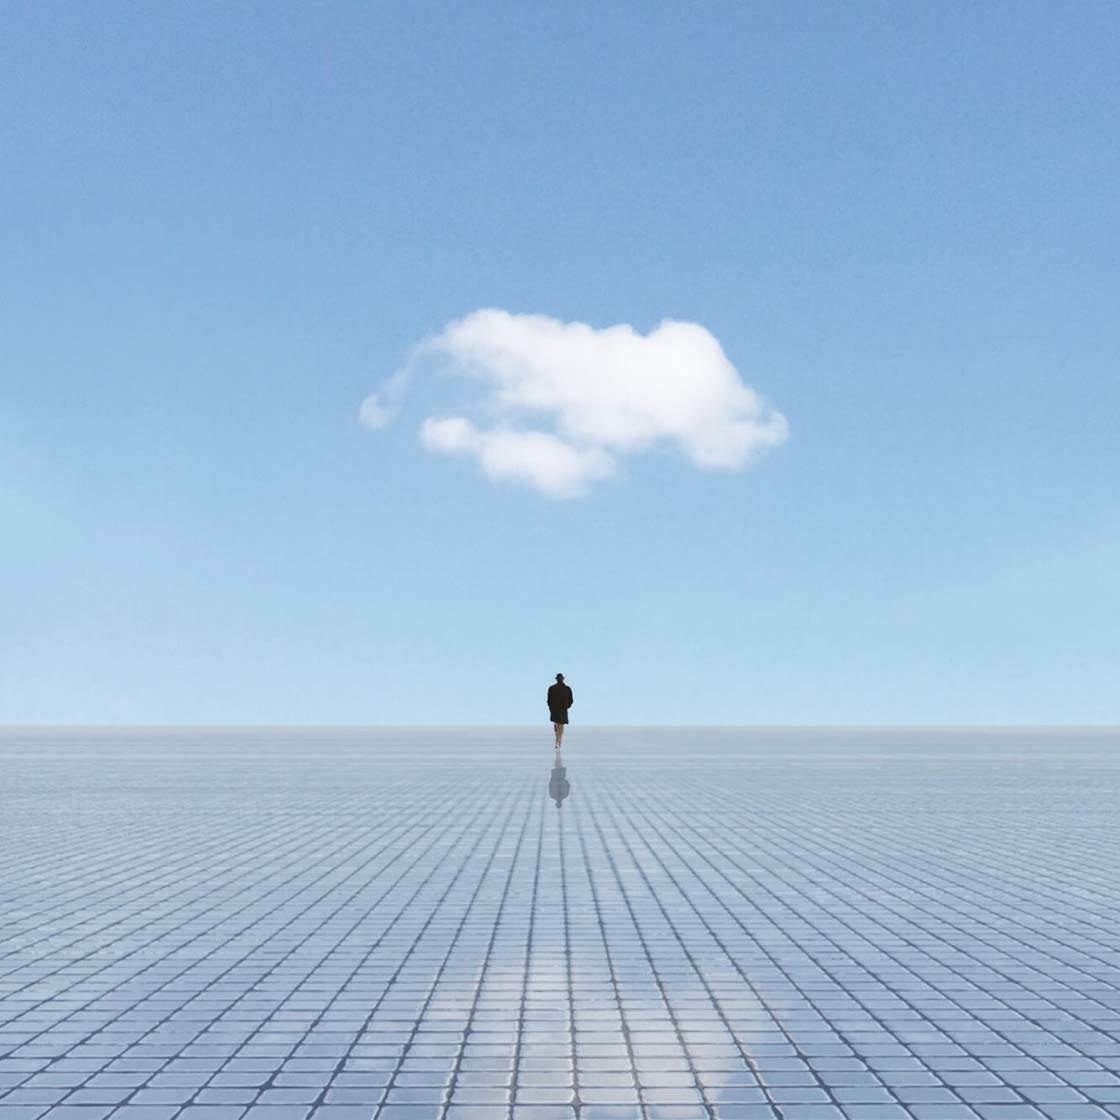
In this tutorial we’ll show you a step by step editing process for creating a unique reflection photo using the Reflect app. Below is a photo that I shot of a friend standing in the snow in Chicago.

I loved the symmetry created by the two trees, and I liked the red jacket of my subject and the clean background created by the fog. However, the foreground is less than desirable and takes attention away from the rest of the beautiful scene.
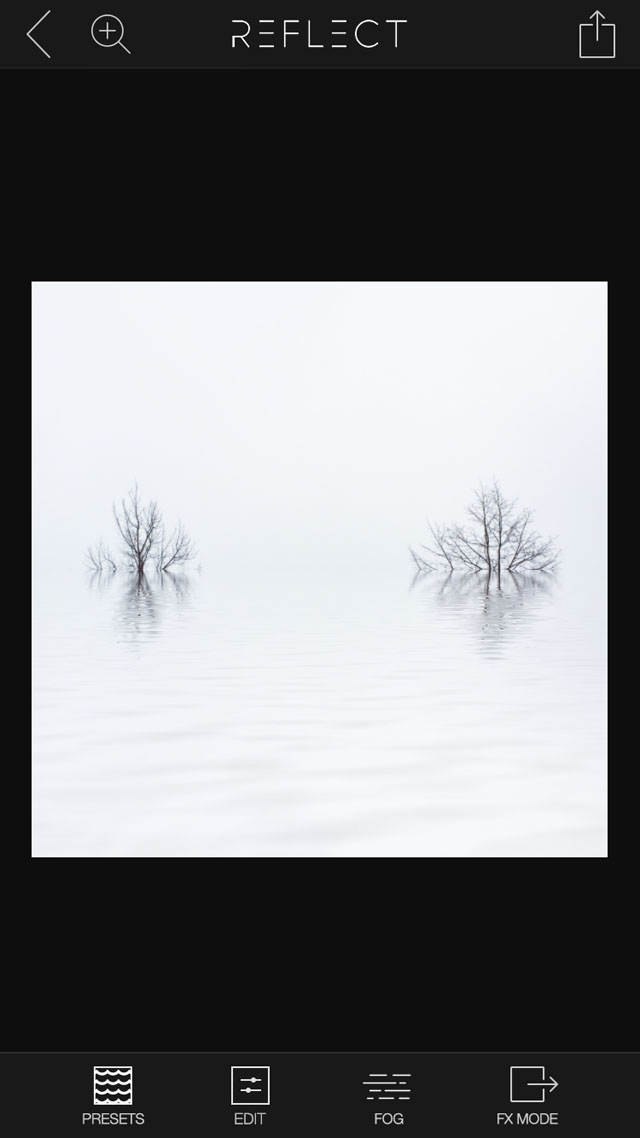
I remember thinking that the photo would have looked much better if there had been water or ice in the foreground to capture the reflections of my subjects. Luckily, it’s possible to easily create reflections using the Reflect app! Below is the final, edited version of this photo that I created using Reflect.
I use the Reflect app fairly often with isolated subjects because I enjoy this kind of minimalist photography. However, there was another reason I decided to use Reflect with this photo.
In the initial stages of the edit, I realized that a square crop wouldn’t allow the trees to entirely fit into the frame. I knew the Reflect app would be the perfect solution to this problem as it would provide me with more space at the bottom of the photo to include within my crop.
How To Create Reflections With Reflect App
So how do you create reflections using the Reflect app? Below I’m going to show you a step by step workflow so that you can create amazing reflection images from any photo on your iPhone.
Start by opening the Reflect app, then access your photo library by tapping the New button (red circle) at the bottom of the screen:
Once you’ve selected the photo, it will appear in the Crop screen. Since I’m typically editing to share a photo on Instagram, I usually select Square on the bottom of the screen:
Once the Square crop option is selected, the app shows a preview of how it would appear as a square. If you tap Done in the upper right, the photo will be cropped as shown in the preview. However, (and here is one of my most favorite parts of the Reflect app!)…
If you use your two fingers to “pinch” your photo in, it will actually move your photo to the upper portion of the square crop, leaving blank, empty space below (this is where your reflection will go later):
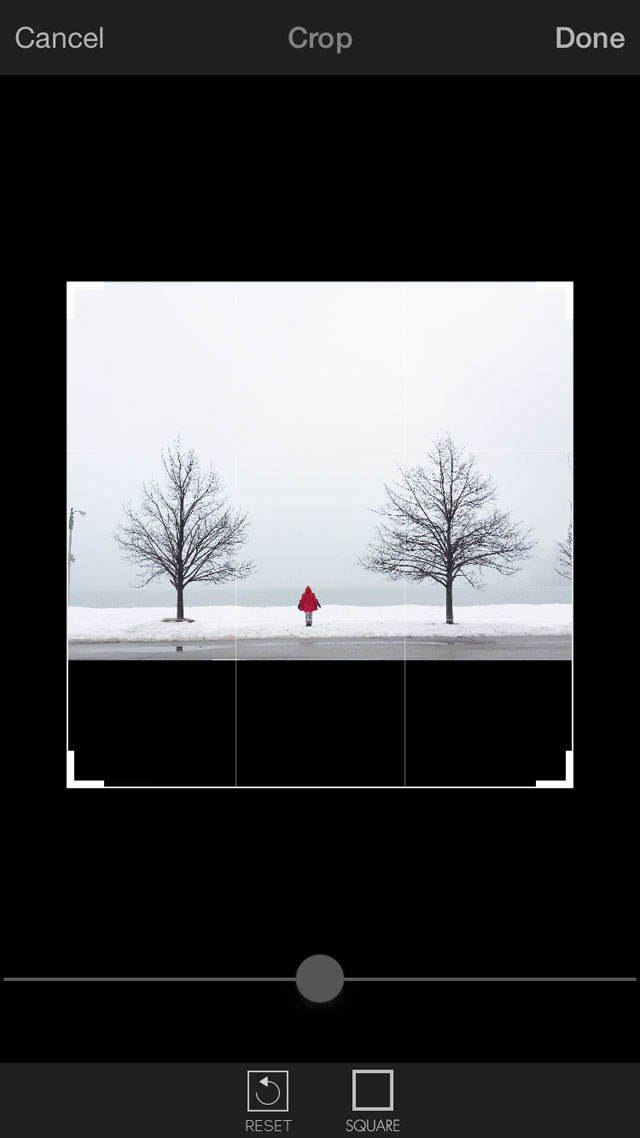
Viola! Reflect app has provided me with the added space I needed to crop my photo without losing any of the trees! You can now pinch or spread your fingers to either shrink the photo into the square, or zoom into the photo until you have the exact crop you desire:

Once you’re happy with the crop, tap Done in the upper right corner of the screen. The app will now bring your photo through its reflection process, and your photo will appear with a 50/50 screen. The top half is your original photo, and the bottom half is the new reflection:
If you touch the screen with one finger, then move your finger up and down, you can move the reflection to the position you want. For this photo I chose to position the reflection at the base of the textured snow to give it a sort of “snow bank” appearance:
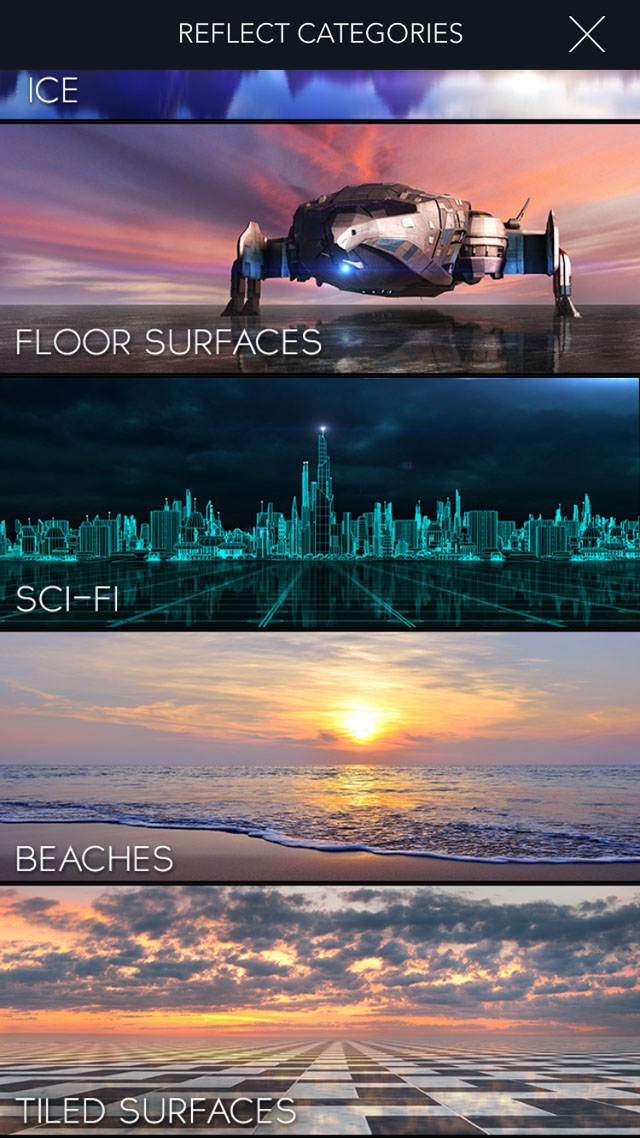
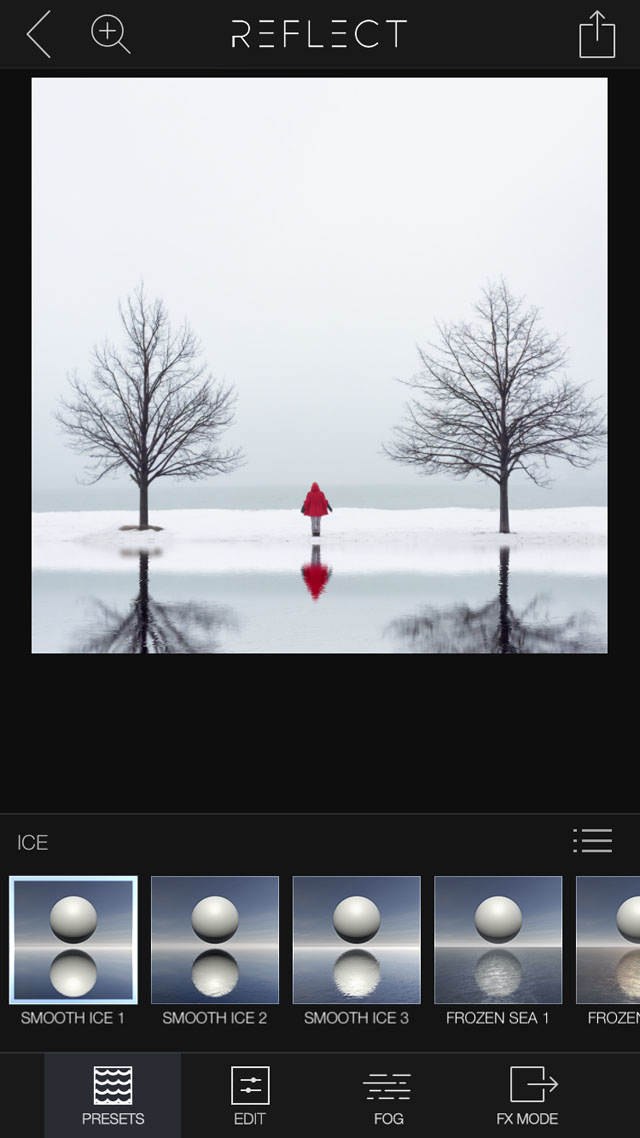
And now for the really fun part! The Presets option at the bottom of the screen has a huge range of elements to choose from. When you tap the Presets button you’ll see many of the available reflection categories, for example, water, oceans, ice and floor surfaces:

By scrolling down, you’ll see even more categories, such as sci-fi, beaches and tiled surfaces:
Below you can see examples of the some of the different kind of reflection surfaces that I tried out on my snow reflection photo:
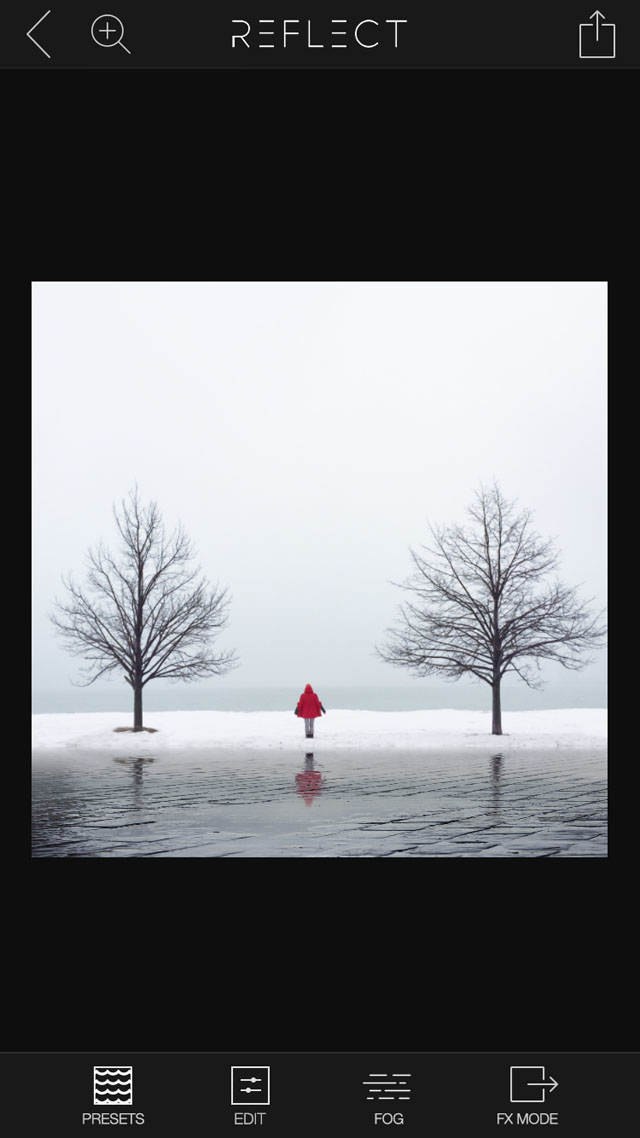
A wet street
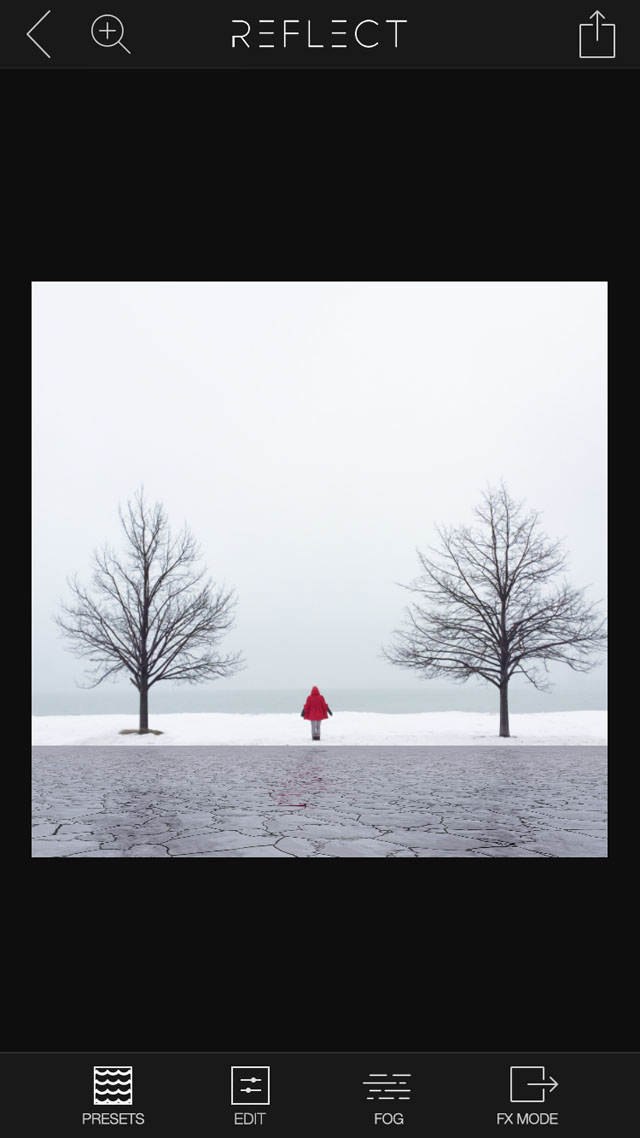
Cracked paint
A mirrored lake
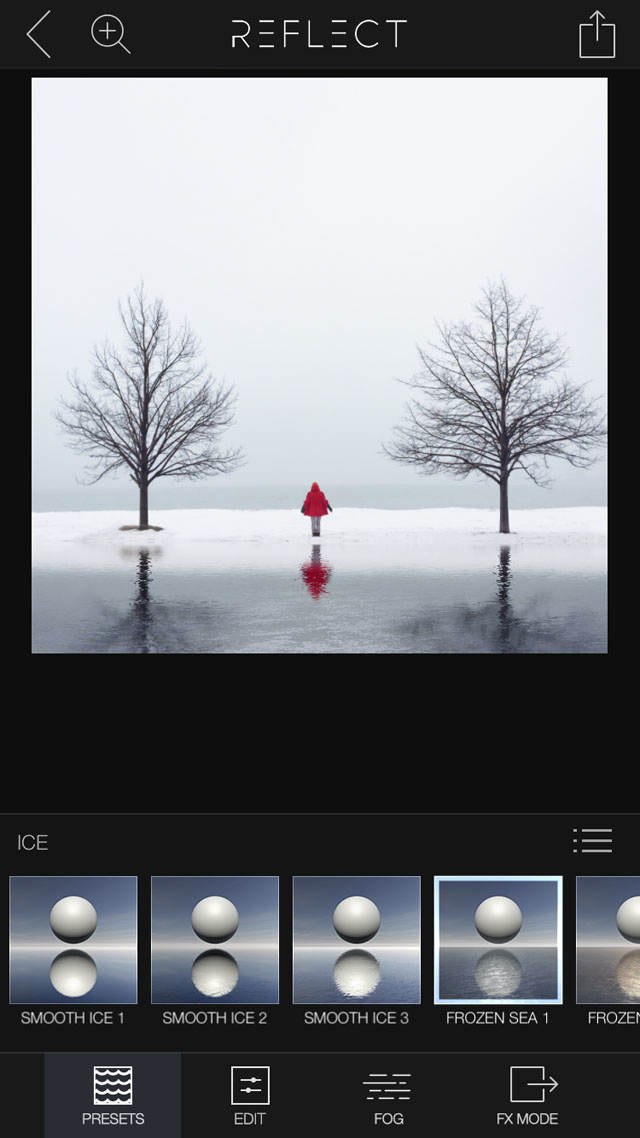
Ice
For this photo I thought that the Ice category was the most appropriate option. Once you open a specific category, you’ll be able to swipe across the presets to view the many different variations of that category.
The Ice category provides all sorts of different icy textures. You can see some examples below:
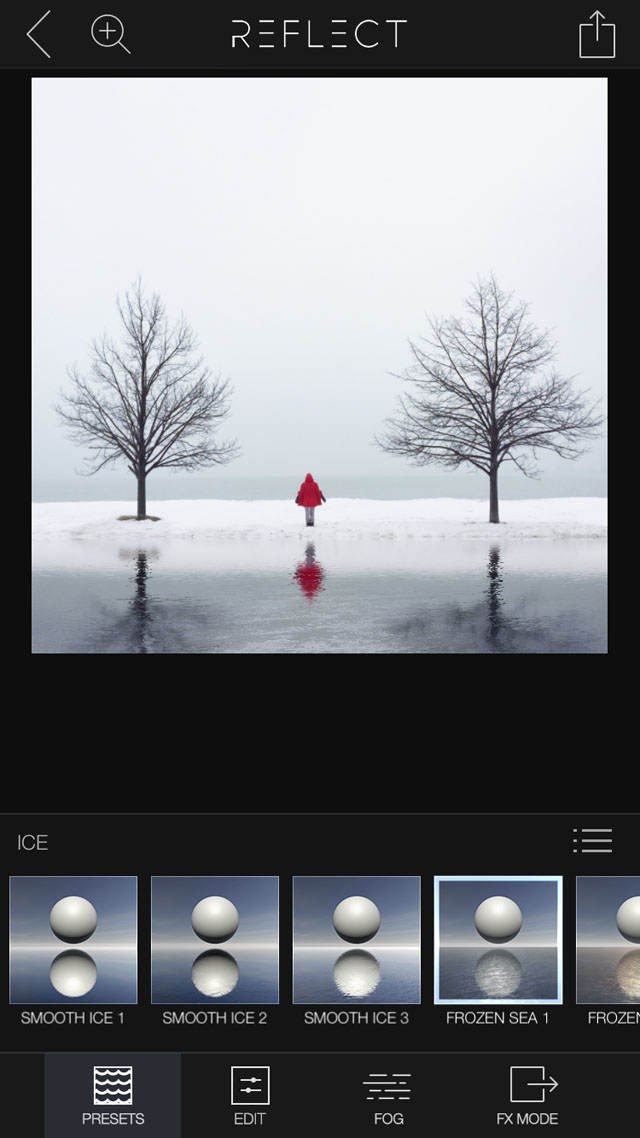
Frozen sea
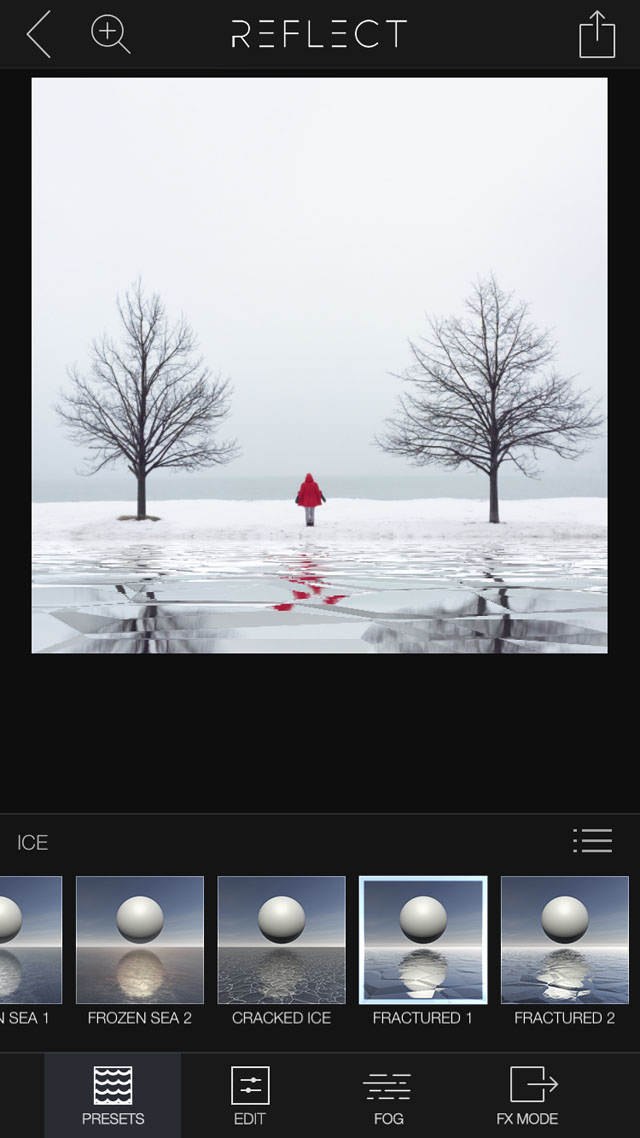
Fractured ice
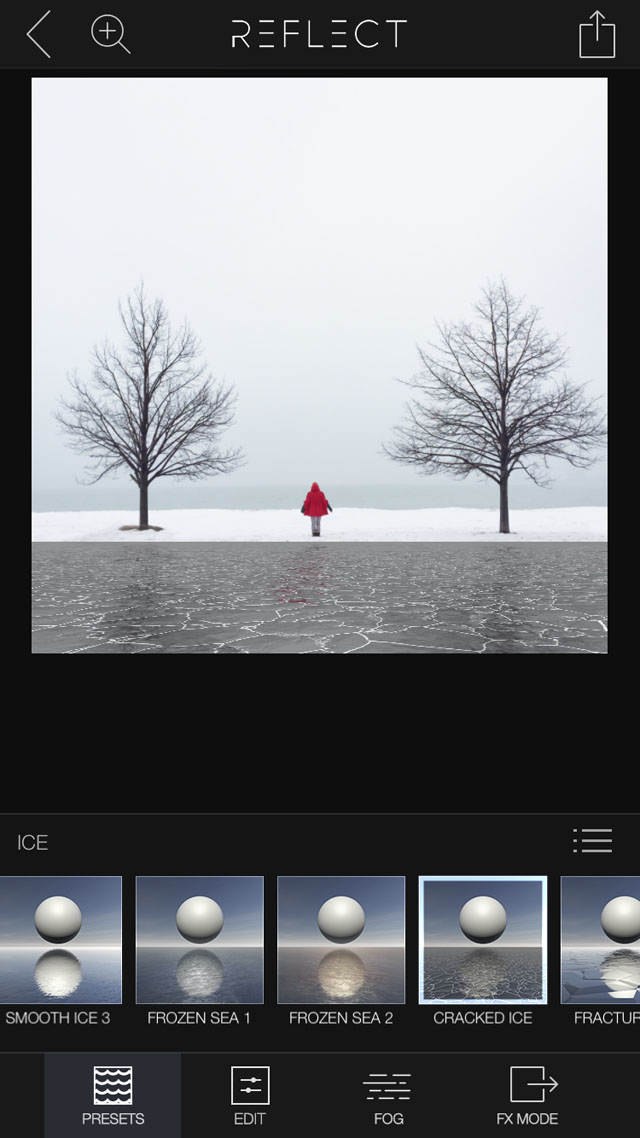
Cracked ice
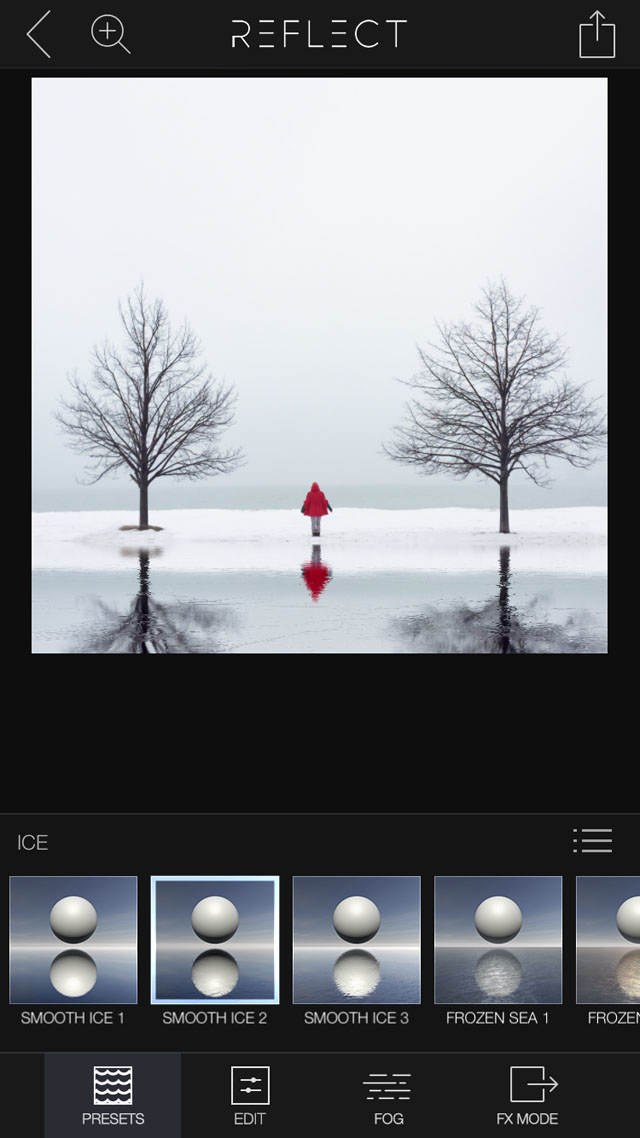
Smooth ice
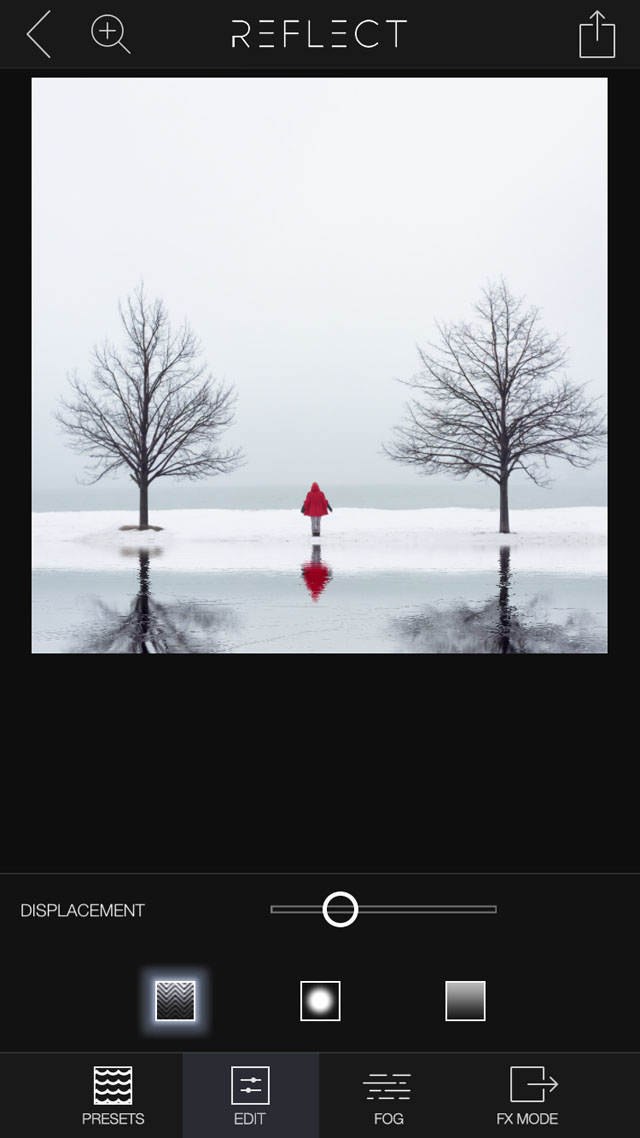
And if that wasn’t enough, you can customize each preset to your exact liking. Just tap Edit at the bottom of the screen to access the editing options.
The first square icon on the left (with chevrons on it) allows you to adjust the texture of the reflection. Simply move the Displacement slider to increase or decrease the amount of visible texture:
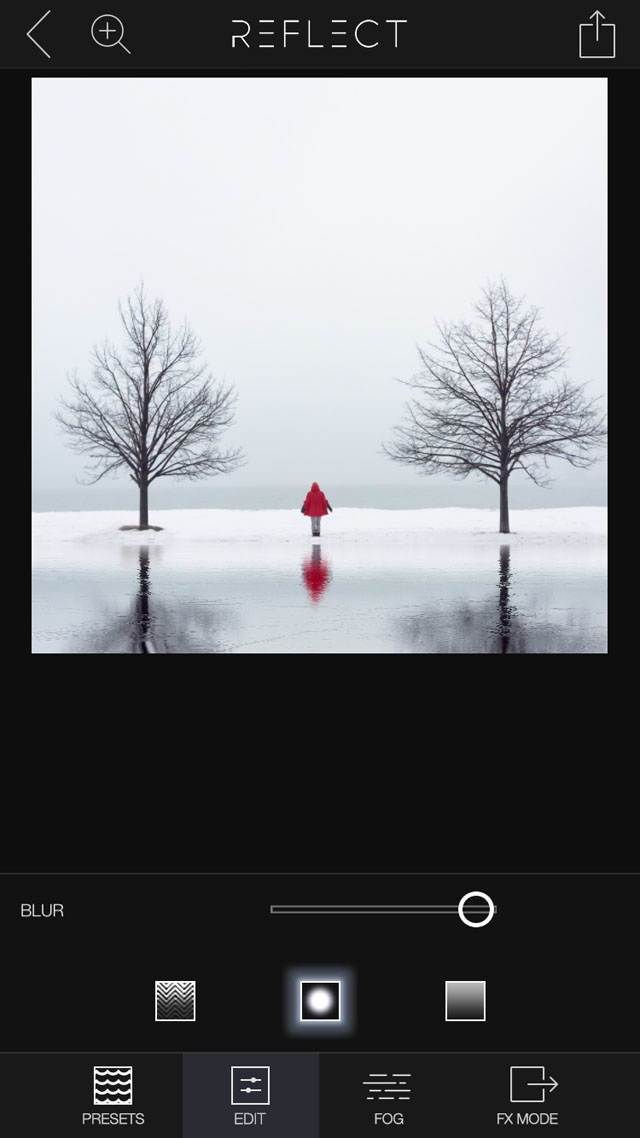
The center square icon (with a circle in the center) allows you to adjust the amount of blur in the reflection. Move the Blur slider to control the strength and sharpness of the reflection:
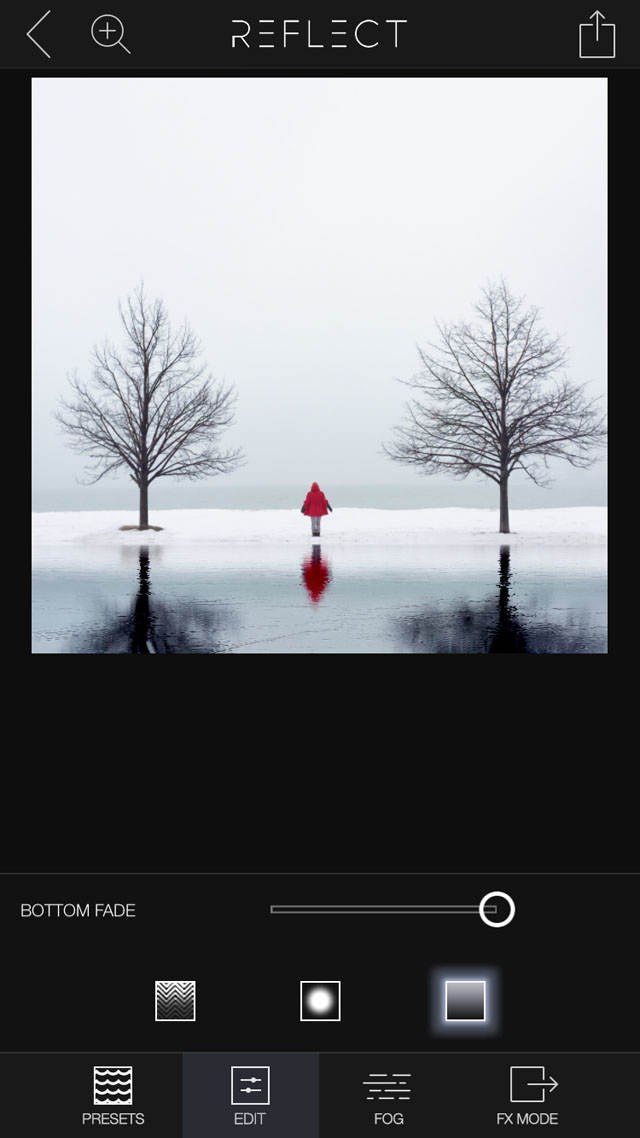
The final square icon on the right controls how dark or light the reflection appears. Move the the Bottom Fade slider to adjust the brightness of the reflection in your image:
Once you’re done editing the reflection, simply tap the icon in the upper right corner of the screen to save your photo.
Please note that there are several more advanced editing options available in the Reflect app that we haven’t explored. The Fog and FX Mode options at the bottom of the screen allow you to add fog, light effects such as lens flares and stars, space objects like moons and galaxies, and even things like balloons and fireworks!

In addition to all of this, the app has a wide variety of filters and general editing tools available. The app is very user friendly, so you should have no problem exploring these extra features and applying them to your photos if you wish.
More Reflect App Photo Examples
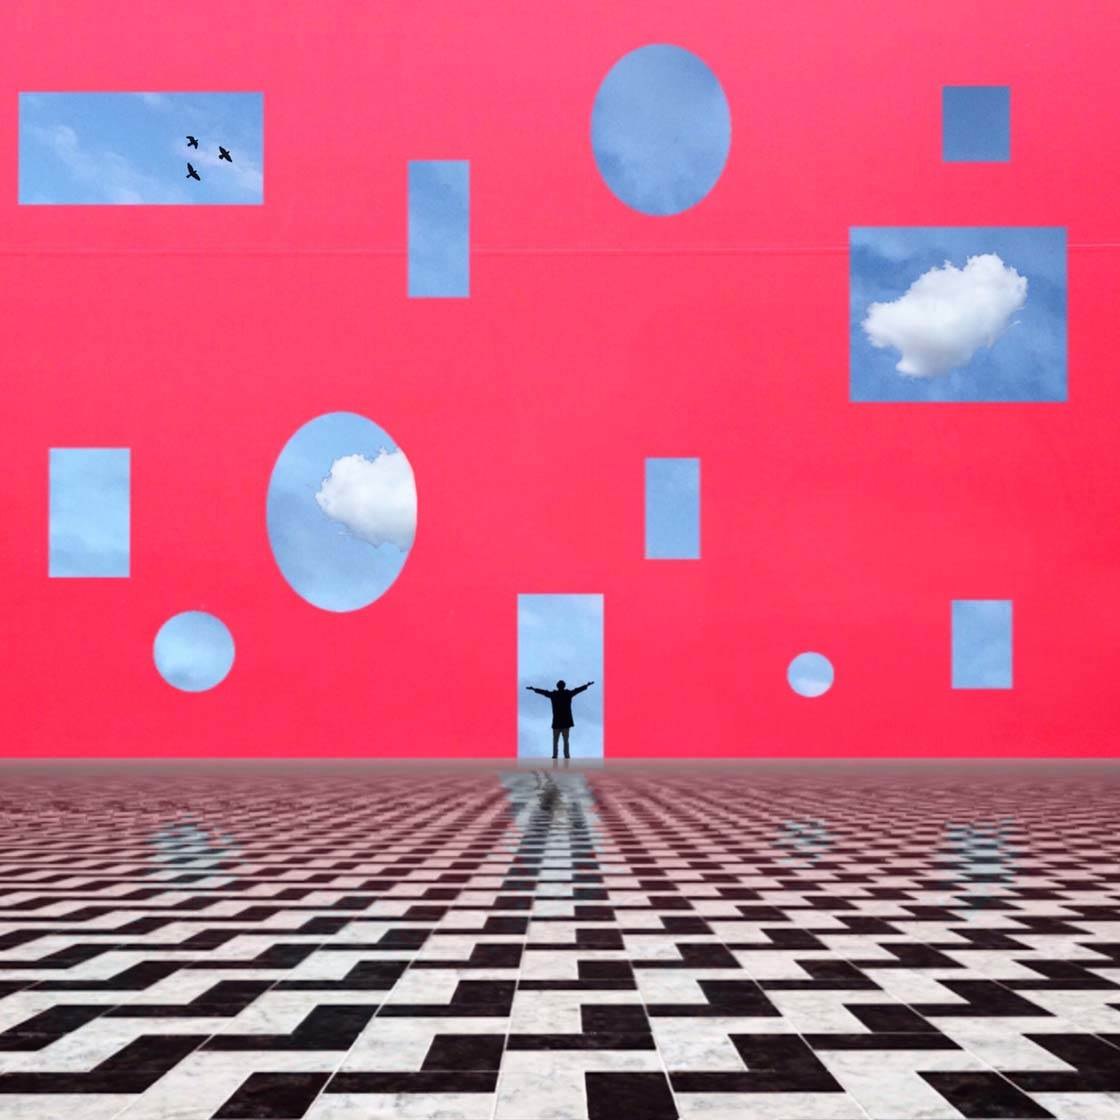
To give you some more ideas of what you can create with Reflect, check out some of my other reflection photos below.
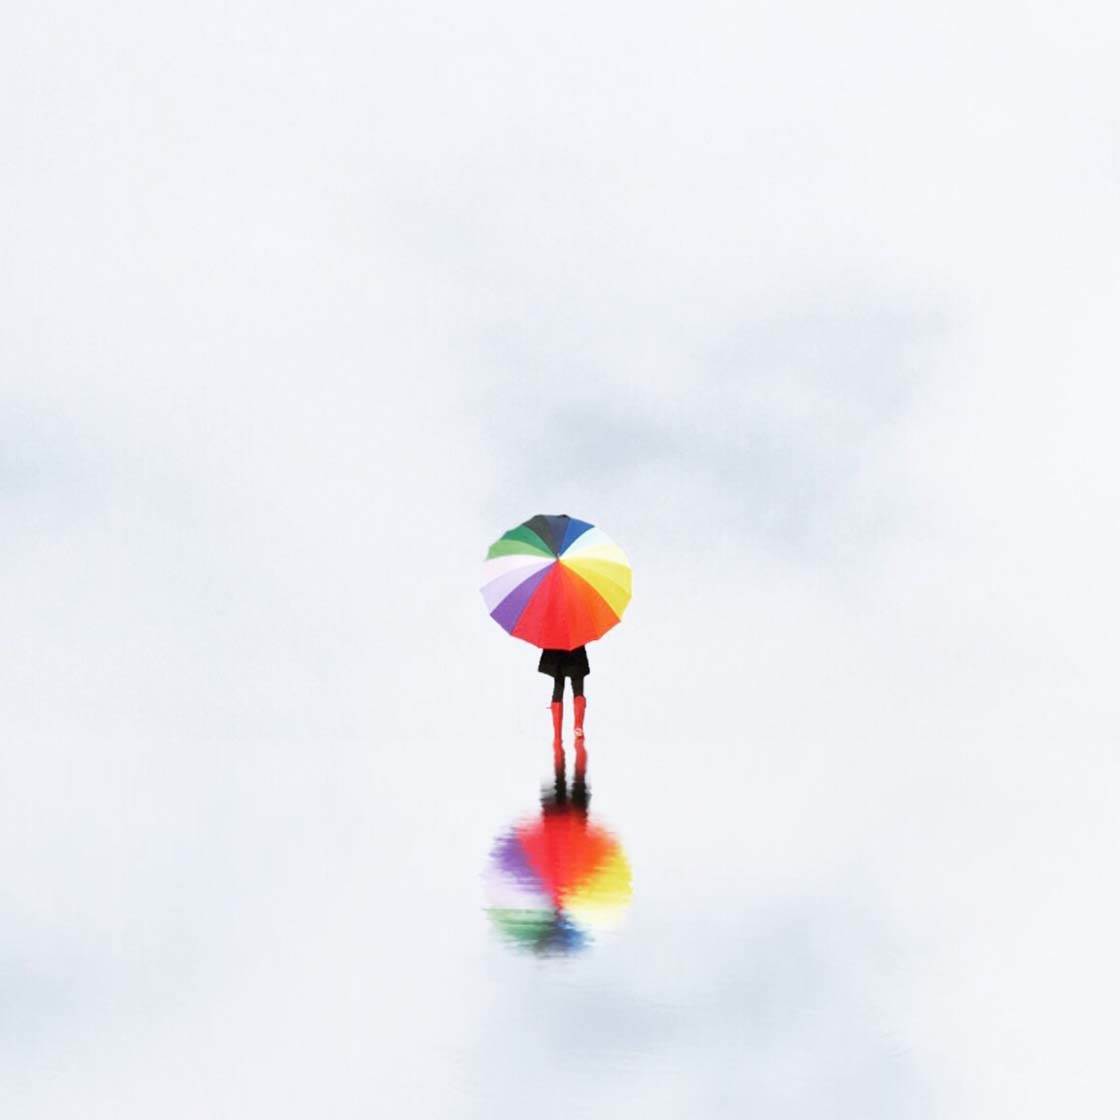
These simple reflection photos are some of my favorite types of image to create. I start by isolating the subject using the Superimpose app – this involves erasing the entire photo except for the person.
Click here to learn how to use Superimpose to cut out a subject from a photo and place them on a different background.
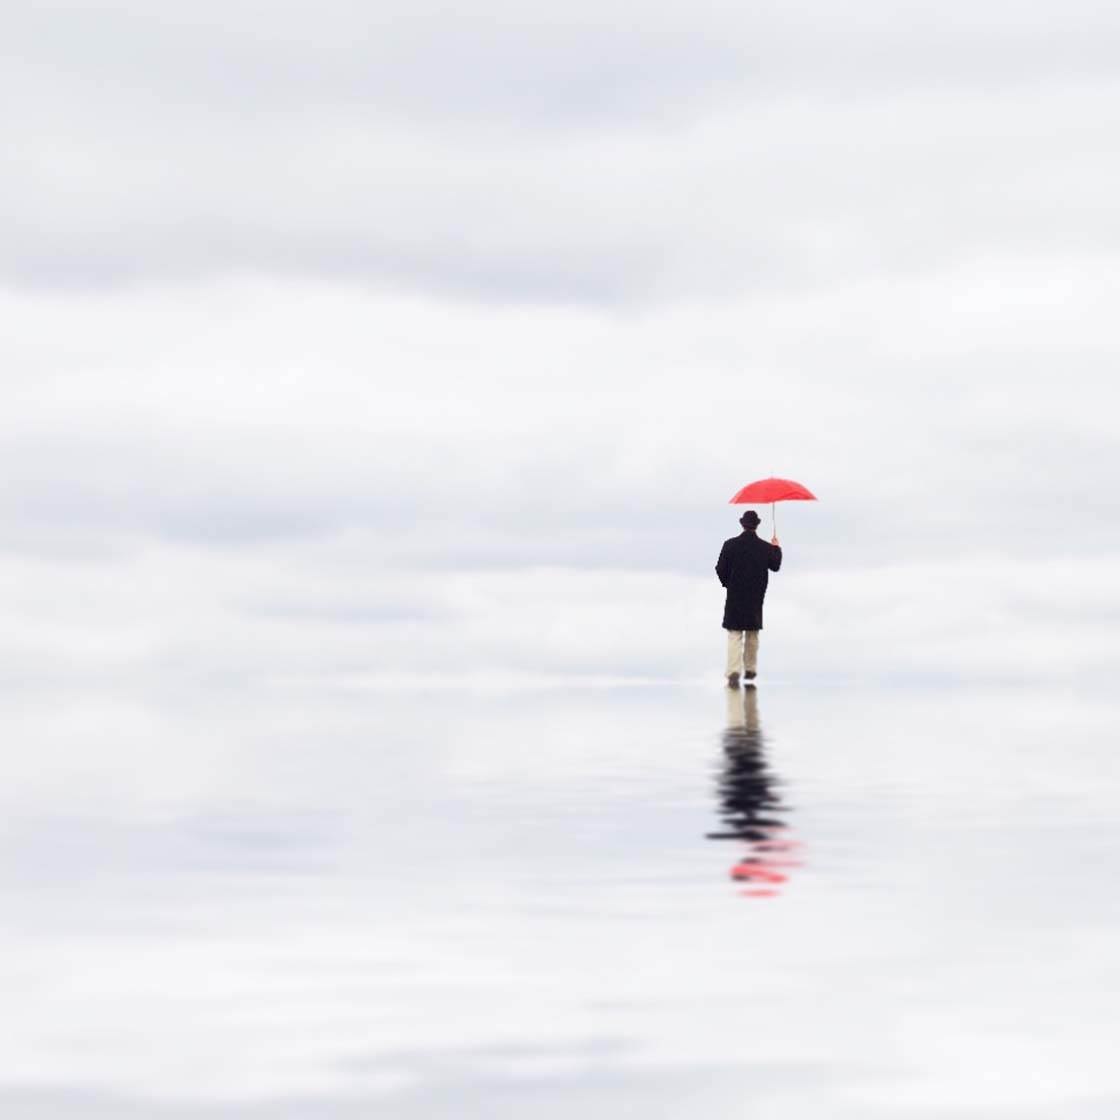
I then use Superimpose to add my subject onto a simple photo of a sky. Finally, I use the Reflect app to give the photo a horizon and a reflection. It’s such a simple and minimal composition, but so effective!

Sunset photos make amazing reflections, as you can see in the photos above and below. Both of these pictures started as sunsets without any subjects.
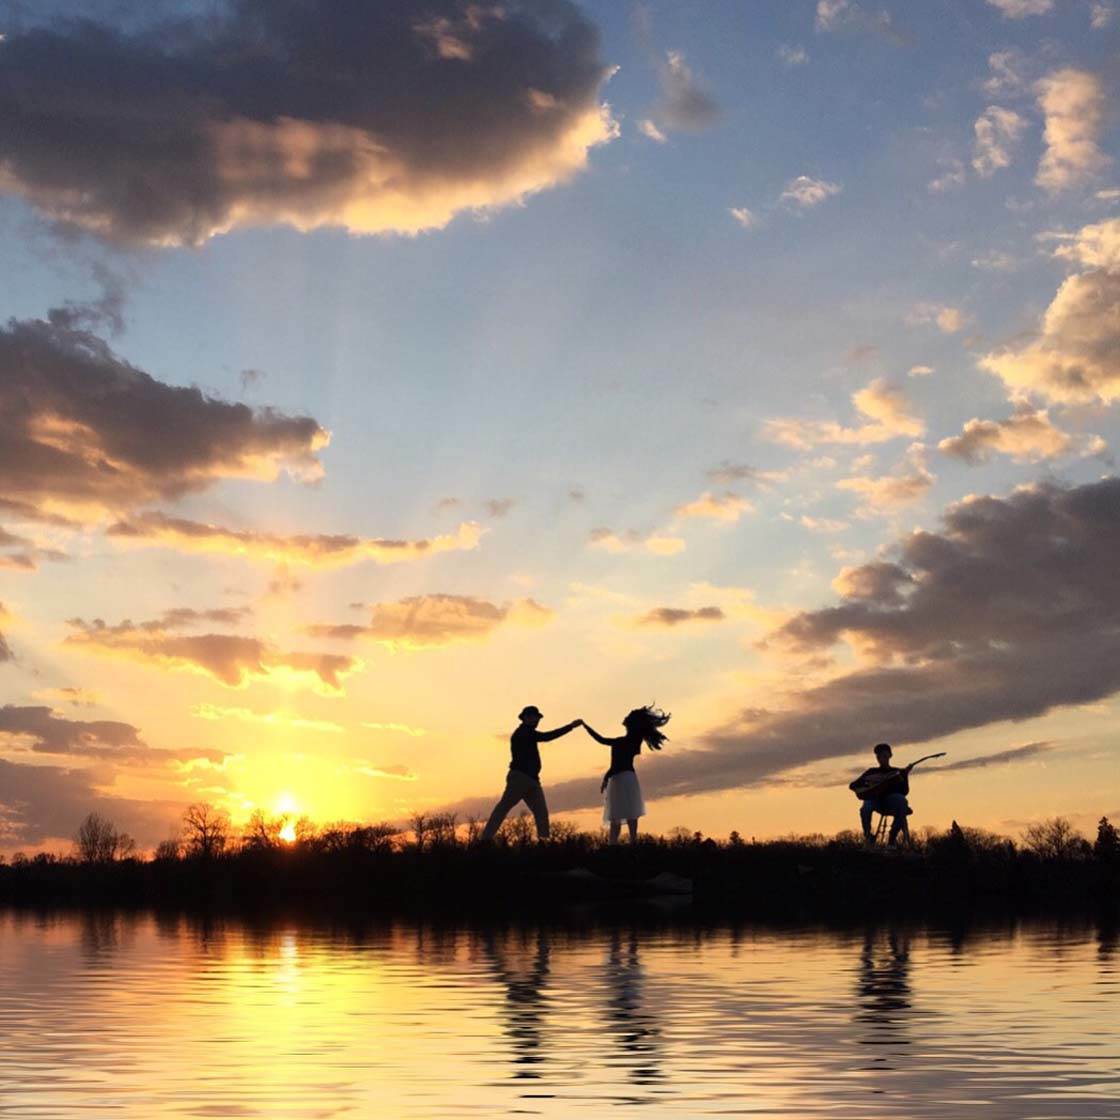
I used the Superimpose app to add the people onto the landscape, and then I used Reflect to add in a reflection. Notice how the reflection increases the amount of color in each photo.
I also enjoy using Reflect to add textured floors and surfaces to some of my photos. These floors look complicated, but they’re just simple options within the Reflect app.
The ice in the final example below photo was completely manufactured using Reflect. I started with a sunset shot that stopped at the horizon with the tall grass.

I then added the entire bottom layer of ice using the Reflect app. Finally, I used Superimpose to add a photo of my son skating on top of the ice.
As you can see, most of my photos have a very common theme of a single person in nature. But there’s a lot of other styles of reflection photography that you can create using Reflect.
Here are some more photos from Craig Hensel’s Instagram account (@thecraighensel) that might inspire you to create other types of reflection photos with the Reflect app.

Thanks so much for sharing your workflow Jill. I absolutely love your reflection images! 🙂
Thanks Kate!! It was a lot of fun to write about!
Nice tutorial–great images! Thanks.
Thanks so much!! I am honored you think so!
Amazing app! Thanks for all the info.
So happy you think so!! Thank you!
Going to be practicing this with some shots of mine 🙂
Jill, do you sometimes set up to compose your shots with the eye of using the reflect app for editing?
Rarely! I usually decide to use it afterwards when I am in the editing process and just playing around! But now that I have been using it more frequently, it does come to mind when I shoot! I thought of it the other day when I was shooting some very choppy water and wondered if I could just switch it out after! Hope that helps
thanks soo much! can’t wait to try it! :]
I have the other apps from this developer – this app reminds me a bit of Color Lake (which I deleted along with over 50 other specialty apps). I don’t normally download new apps or “specialty” apps as I am trying to SIMPLIFY 🙂 but this might be worth a try. Thanks for the lessons.
Great tutorial…..will be FUN to play with some of my “out-take” pics that have great skies but boring foregrounds 🙂
I’m happy to hear that you enjoyed the article, Ishara! 🙂
I cant find the app you are referring to…..the nearest by Brain Fever Media cost £2.99 and has 2 blue outlined triangles upside down on a black background…..is this it…?
this is the only one I see as well…??!!
Yes, that’s it. Unfortunately it’s not free.
I love Reflect..have been using it for more than a year. So many surfaces from which to choose. Tide out and sand becomes big tide with interesting rocky foreground https://uploads.disquscdn.com/images/a1f95b34fdd1b6b0238d82390f27c4a7ba230e9118791911089f3beb1c888ebd.jpg
Great article, thanks for writing it – and the app looks amazing! I can’t wait to play with it.
One teeny tiny comment… where you’re writing about cropping, and it begins, “Viola! Reflect app has provided me with the added space I needed…” – I do hope you know that a “viola” is a stringed instrument in an orchestra. Perhaps you meant “Voila”? 🙂
(Side comment: the word is not pronounced “walla” like so many people mispronounce it nowadays, but rather “vwalla” with a V sound at the beginning. I’m not saying that *you* pronounce it that way, but since we’re talking about “voila” it seemed like a good time to mention it.)
Thanks again!
Excellent article, Emil, on Reflect Mirror Camera. I especially appreciated the thoughtful tutorial on how to use it. You sold me so well, I immediately went to the App Store to buy it (something I rarely do). Unfortunately the only version I could find of Reflect Mirror Camera cost $2.99, not $1.99, as you reported. How do I get the Emil price? Thank you.
This article somehow illustrates how to give your photo “extended life’. I have this app and never used it. I will use it on my next outing.
As always, a delightful tutorial…thanks!