PhotoToaster is one of the best all round iPhone photo editing apps available, but for some reason it’s often overlooked. This app is suitable for both beginners and more experienced iPhone photographers, and has an excellent selection of tools for enhancing your images. From simple preset filters to advanced slider settings and selective adjustment tools, this app has something for everyone. In this tutorial you’ll discover how to edit your iPhone photos using the wide range of tools that PhotoToaster has to offer.
PhotoToaster is a universal app which means it will work on both the iPhone and iPad without having to buy separate versions on the app. It’s constantly being updated and is a very powerful editing app that anyone with an interest in editing photos should try out. Every photo I edit goes through this app at least once during the editing process.

A great feature of this app is that it saves your edits at full resolution which is something not all apps do. I find this very useful as I edit DLSR images on my iPhone and iPad as well as the images I take with my iPhone.
PhotoToaster can be downloaded from the App Store for $2.99. Now let’s take a look at the main features of the app, from applying basic filters to more advanced settings and selective adjustments.
1. The PhotoToaster Home Screen
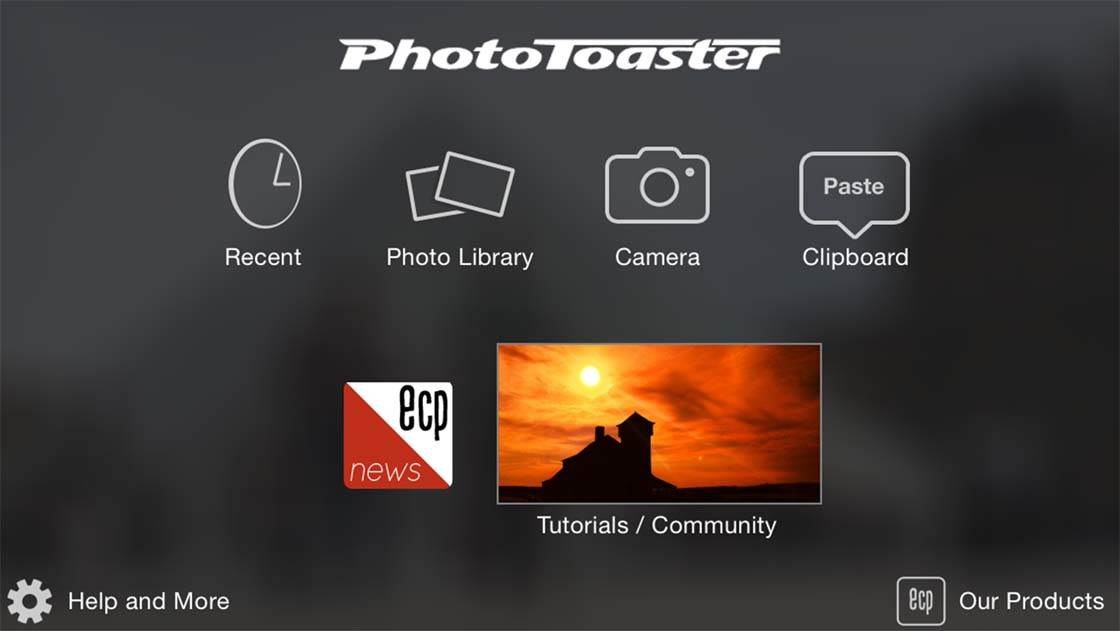
When you first open PhotoToaster you’ll be presented with the home screen which has four main icons: Recent, Photo Library, Camera and Clipboard. There’s also a Help option in the bottom left corner, as well as a link to various tutorials on how to use the app if you ever get stuck… which hopefully you won’t need after reading this tutorial!
The Recent option gives you access to photos that you’ve previously edited with the app. This is useful if you exit the photo you’re editing, then want to go back to editing your photo – simply tap Recent, then tap on the image in the list. You can also open older images that you’ve edited if you want to make further changes to them.
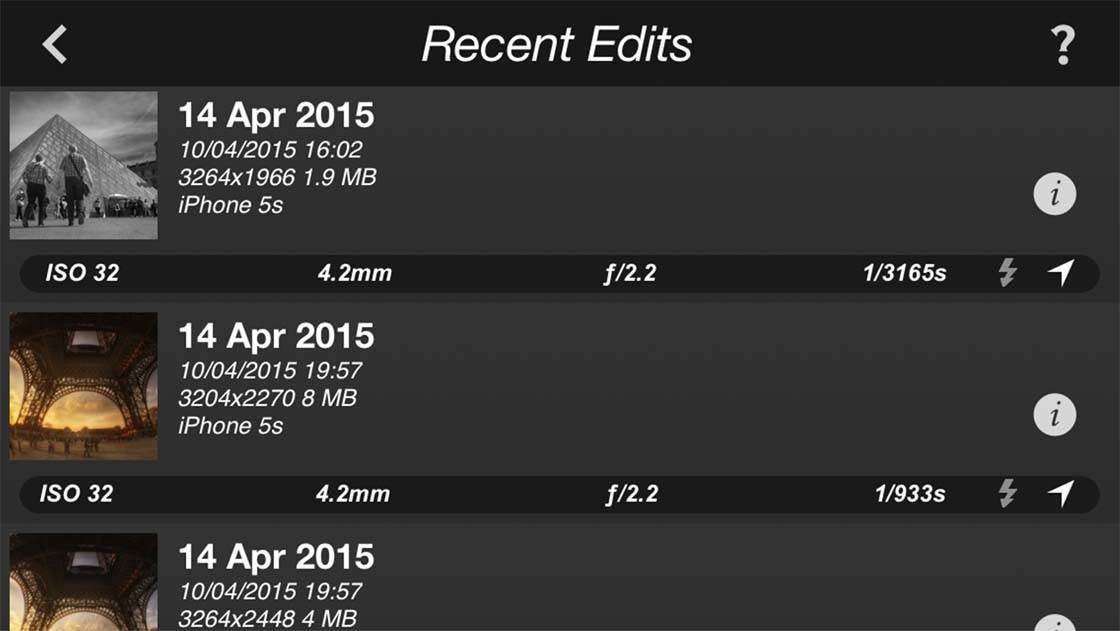
The Recent screen also displays some useful information about the photo, such as the ISO, aperture and shutter speed that the camera used when taking the photo.
You can change the number of images that will be saved in the list of recent edits by tapping Help & More on the home screen of the app, then selecting Settings. You can have up to fifty previous edits saved in the app, but bear in mind the more edited images you have in this Recent section, the more space the app will take up on your device.
The Photo Library option on the home screen lets you access the various albums that you have in your iPhone’s photo library. Here you can select and open the photo you wish to edit. When you open an album, the images in that album are displayed as thumbnails in chronological order starting with your most recent photos.
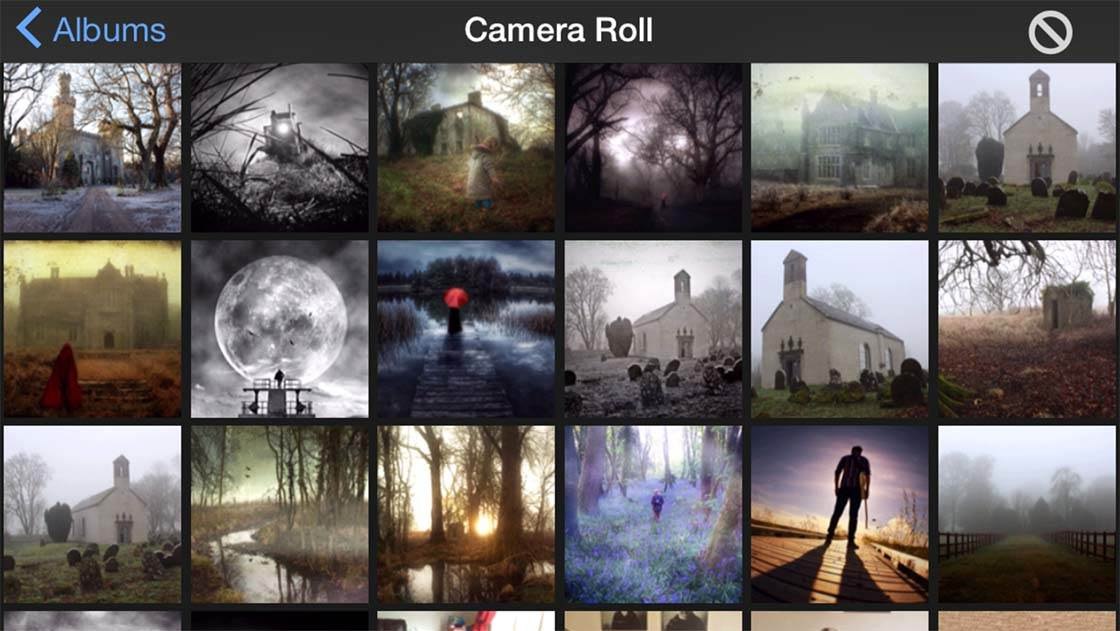
As the thumbnail images are quite small, the app has a handy feature to help you select the correct photo. If you hold your finger on a thumbnail image, the full size photo will open so you can have a closer look at it before opening it for editing.
The Camera option on the home screen opens a camera in the app so that you can take a photo for editing. I never use this feature in any editing app. I always take my photos using the iPhone’s native camera app and then open them through the Photo Library option or copy and paste them into the PhotoToaster app for editing.
The Clipboard option on the home screen allows you to copy and paste photos into the PhotoToaster app. Often I will just flick through the Camera Roll in the native Photos app, and if I see a shot I might like to edit, I hold my finger on it and choose Copy from the options that appear.
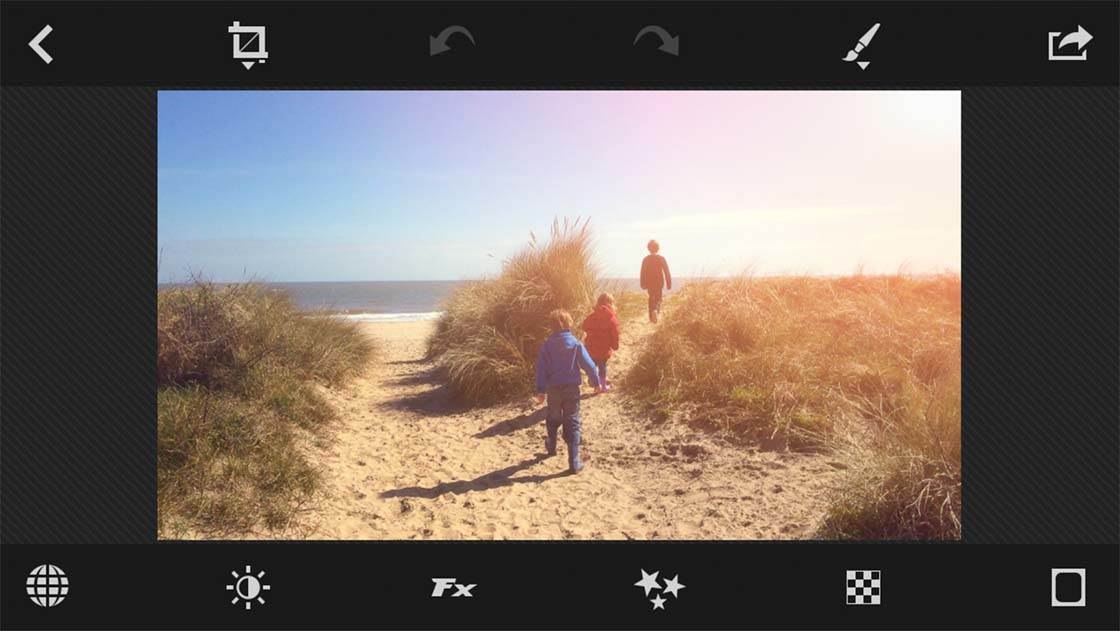
I then open the PhotoToaster app and select Clipboard on the home screen. This pastes the photo directly into the editor screen which is very handy.
Once you’ve opened the photo that you want to work on, all of the editing tools at your disposal are accessed by choosing the relevant icon at the top or bottom of the screen. Below we’ll take a look at how to enhance your iPhone photos using these tools.
2. Global Presets
The Global Presets, accessed by tapping the globe icon at the bottom left corner of the screen, work like filters in other photo editing apps. You simply flick through all the available preset thumbnails at the bottom of the screen, then tap on the one you want to use. The pre-rendered effect will be applied to your photo.
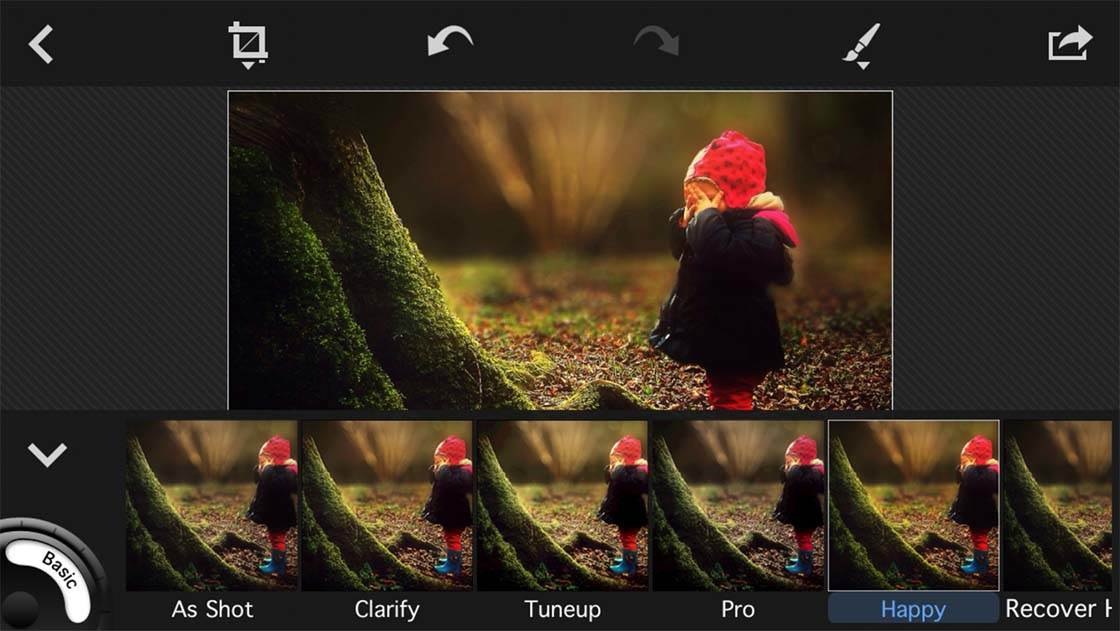
This is ideal for beginners as all you have to do is choose the effect and PhotoToaster does all the work under the hood. All effects that are applied are non-destructive, so as you get more comfortable with the app you can tweak the effect.
An important feature I should mention is that at any time in the editing process you can touch and hold the screen to view your original photo. This is very useful when applying edits as you can revert back to the original at any stage to see what effect the edit is having.
If you don’t like the preset you applied, simply tap the Undo button (curly left arrow). To redo the effect, tap the Redo button (curly right arrow).
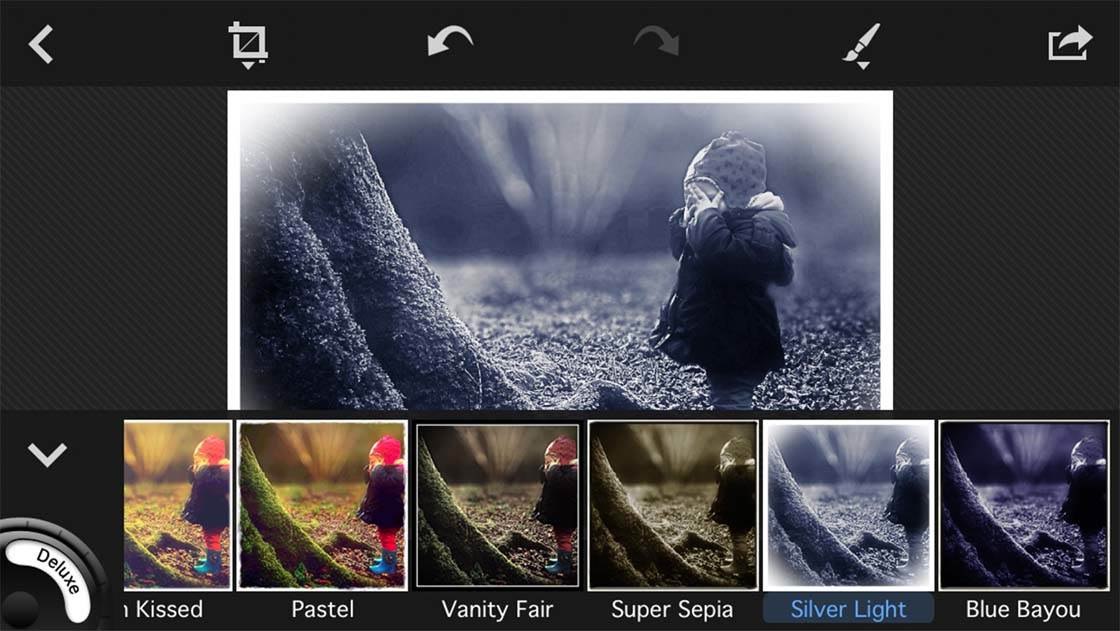
There are three different categories of effects under Global Presets: Basic, Deluxe and Supreme. Each section has progressively stronger and more pronounced effects. You access the different categories by turning the dial in the bottom left corner.
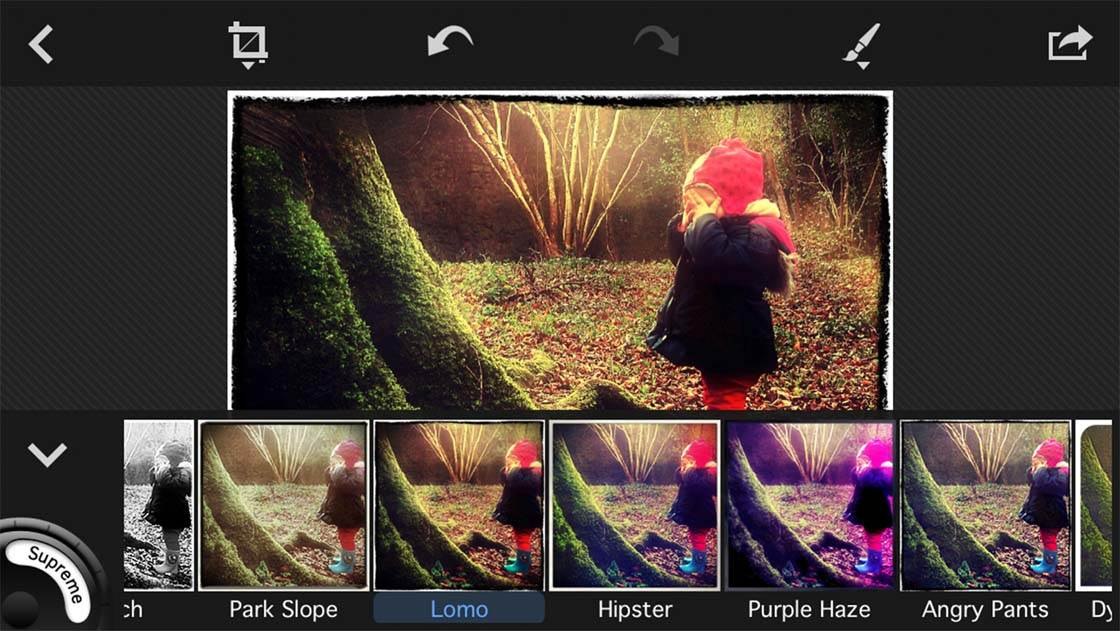
There’s one final section in Global Presets called My Presets. In here you can create your own filters and effects and save them to be used in future.
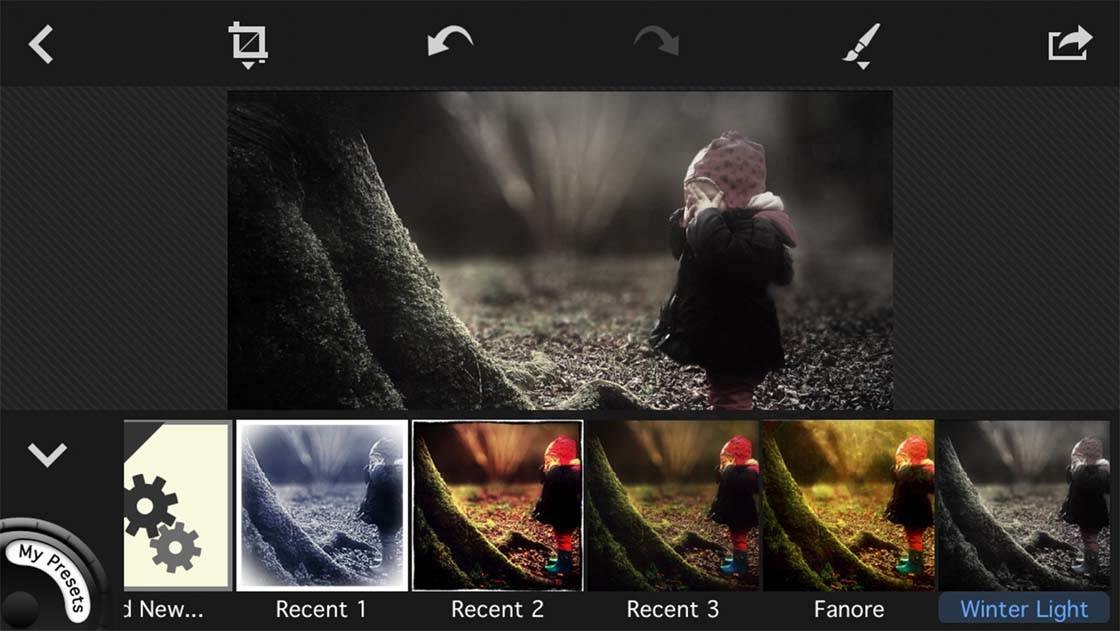
The Global Presets are only a small part of what the PhotoToaster app can do. There’s also a wide range of tools available for more advanced photo editing. In the sections below, I’ll work my way around the screen and give a quick overview of each one.
3. Crop, Rotate & Straighten
When you tap on the second icon from the top left, you’ll access the Crop, Rotate and Straighten options.
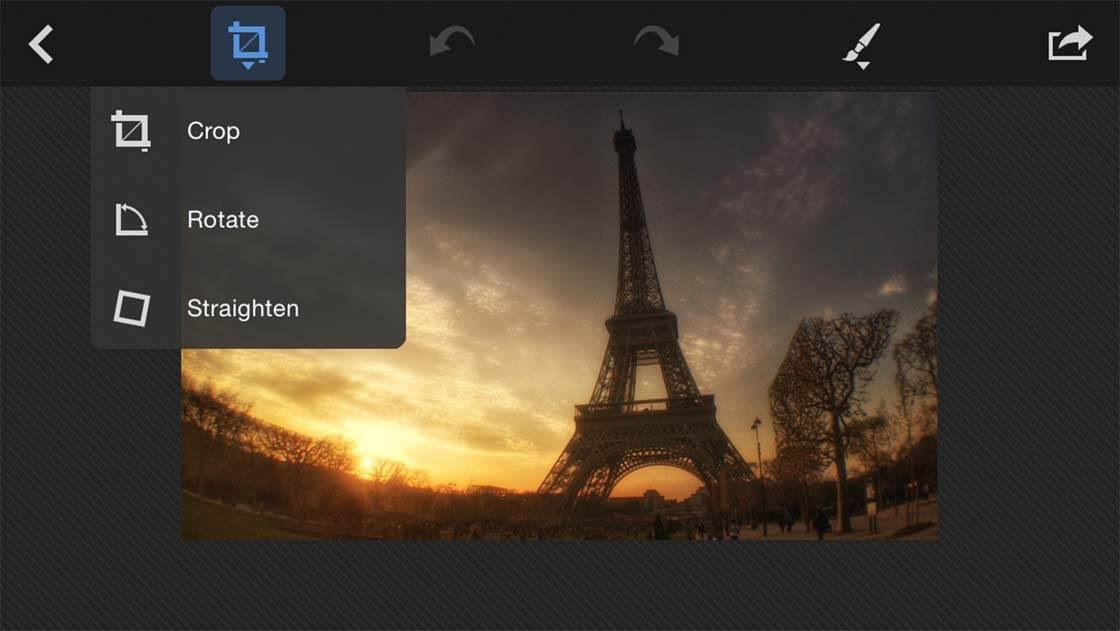
The Rotate tool allows you to rotate or flip the image, and the Straighten tool lets you alter the angle of the image so that you can easily straighten up horizons. Tap the checkmark at the top right to commit the changes, or tap the circle at the top left to cancel.
The Crop tool can be used to trim away the edges of an image, either to remove unwanted objects or to zoom in closer to a particular subject you want to highlight. The icons at the bottom of the crop screen allow you to crop in portrait, landscape or square format. You can select a specific aspect ratio under the portrait and landscape options, or you can free crop to any size using the padlock icon on the left.
4. Brushes
The Brushes are probably the tools that I use most in this app. They’re very useful for applying selective adjustments to your photos. You simply choose the effect you want to use, then “brush” over the image with your finger to apply the effect to specific areas.
The Brush tool is located near the top right of the screen, and there are two main brush otpions under this tool: the FX Brushes and the Lighting Brushes.
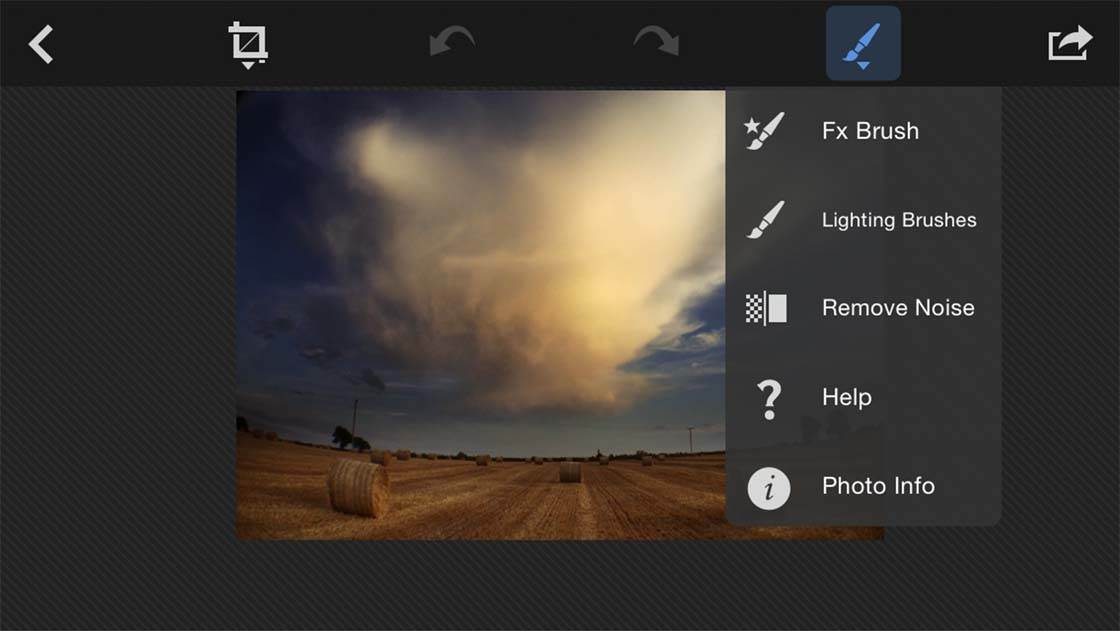
You can use the FX Brushes to desaturate the color and defocus sections of your photo to make them blurred. Simply tap the FX Brush option under the Brushes tool, then tap FX at the top of the screen to select the option you want.
You can also apply a Soft Focus effect which is more subtle than the Defocus effect. I use HDR effects quite a bit to add drama to my photos, but the resulting image can have quite a bit of digital noise or grain in the sky. I use the Soft Focus effect on the sky to make this grain less noticeable.
Once you’ve picked the effect you wish to apply, ensure the Brush icon at the bottom of the screen is selected. To the right of that you can choose the type of brush you wish to use – the choice is either a hard or soft edged brush.
When you start brushing over the image with your finger, you’ll see your chosen effect being applied to the areas that you touch. Sometimes it can be difficult to see where you’ve brushed, so tapping the red dot at the top right will highlight the areas you’ve brushed over.
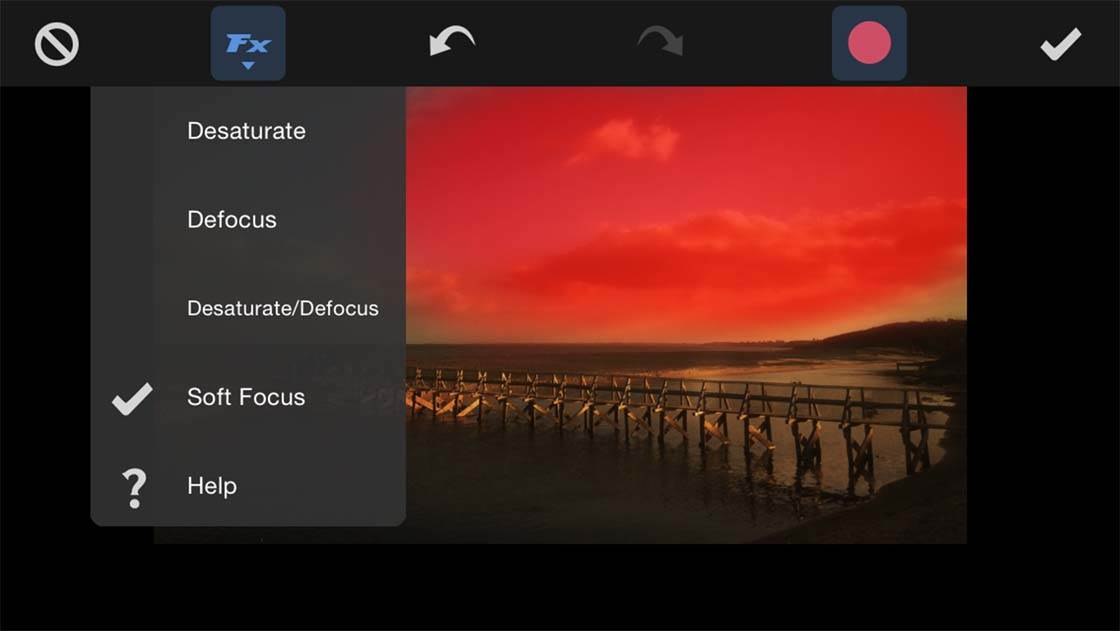
Any areas that appear red are the parts of the image that you’ve applied the effect to. Tapping the red dot again will remove the red highlight but your effects will still remain on the photo.
To remove the effect from an area of the image, tap the Eraser icon at the bottom of the screen, then brush over the area you want to remove the effect from. To reverse the effect and apply it to the opposite area (the area you haven’t brushed over) tap the circle at the bottom left. To completely remove the effect you’ve applied with the brush, tap the trash icon on the right.
Tap the checkmark to commit any changes you’ve made, or tap the circle at the top left to cancel.
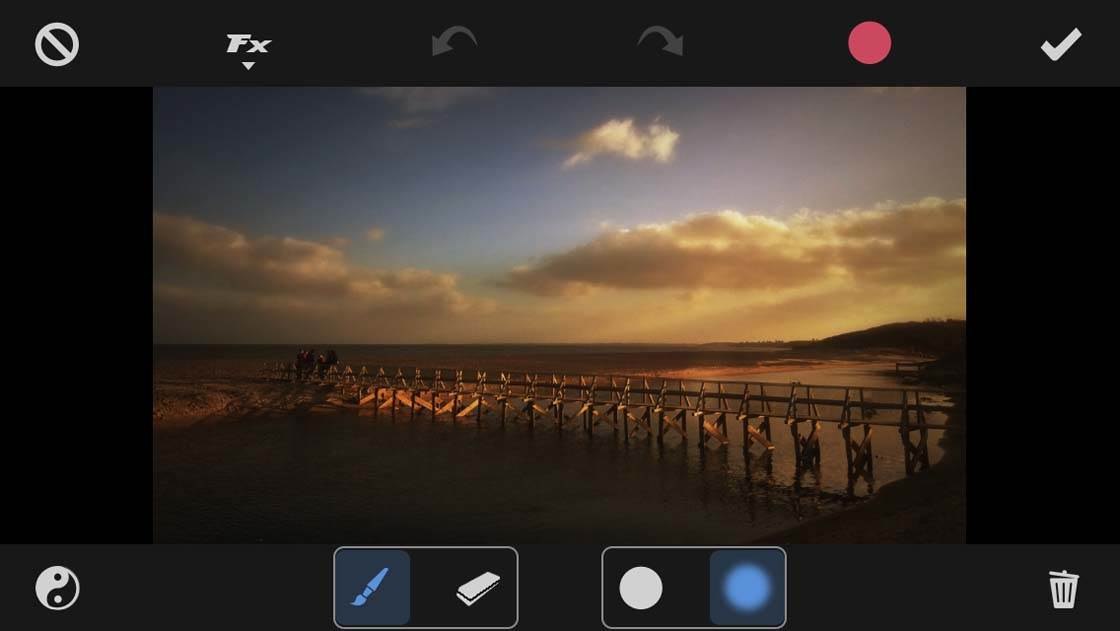
The Lighting Brushes, which can be accessed by tapping the Brush tool at the top right of the screen, can be used to lighten or darken selected areas of the photo. I use this tool on most of my landscape photos. It’s particularly useful for brightening the foreground and darkening the sky which will even out the overall lighting in an image.
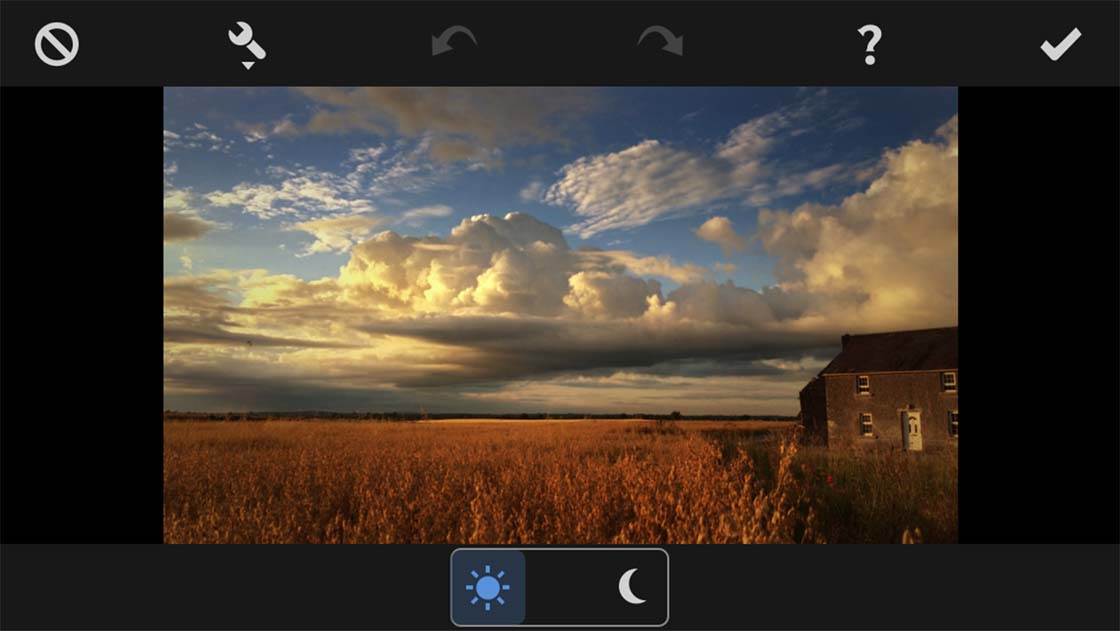
After selecting the Lighting Brushes option, simply tap the Sun icon if you want to lighten an area, or the Moon icon if you want to darken, then brush over the part of the photo you want to make darker or lighter. To remove the effect that you’ve applied, tap the second icon from the top left and click the relevant Clear option.
There are a few other options that can be accessed via the Brush tool at the top right of the screen. There’s the Remove Noise tool which you can use to reduce any noise (grain) in your darker images. This is achieved by smoothing the image, which effectively blends pixels together. If you apply the effect too heavily the result will look very artificial, so use the slider to set the level of noise reduction you wish to apply.
Another option under the Brush tool is the Help section. This gives you a quick overview of what each tool can do, which is useful for anyone starting out with the app.
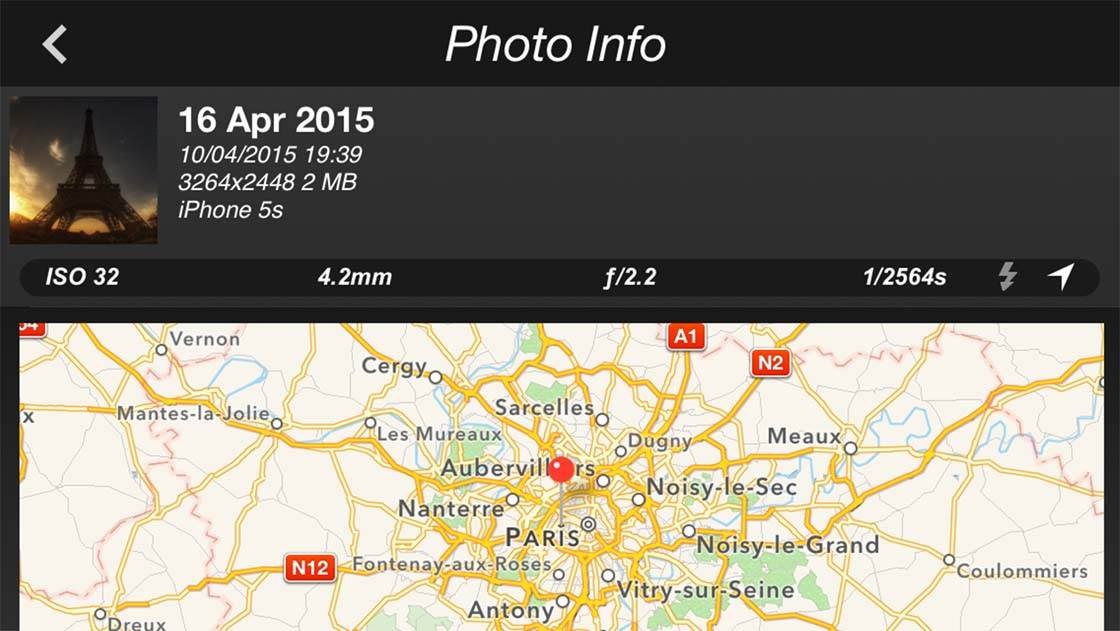
And finally there’s the Photo Info option. This displays useful information about the photo such as resolution, file size and where it was taken.
5. Category Modes
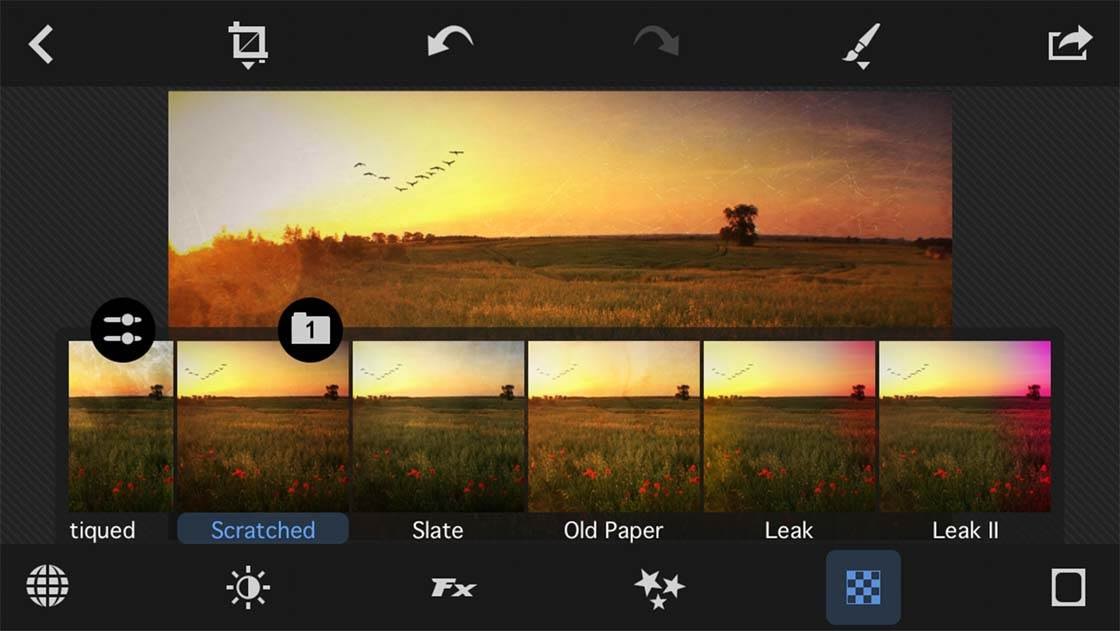
Along the bottom of the screen, to the right of the Global Presets icon, there are five more icons for the different Category Modes. If you can’t see these icons you might have the Global presets open, in which case tap the downwards arrow at the bottom left to hide the presets.
From left to right, after the Global Presets icon, the icons are called Lighting (sun icon), Special Effects (FX icon), Vignette (stars icon), Textures (checkered square icon) and Frames (white square icon).
Within each mode there are a number of preset filters that can be accessed by flicking through the thumbnails at the bottom of the screen. For example in the Lighting mode there are various presets to simulate different lighting conditions such as sunset or cool lighting.
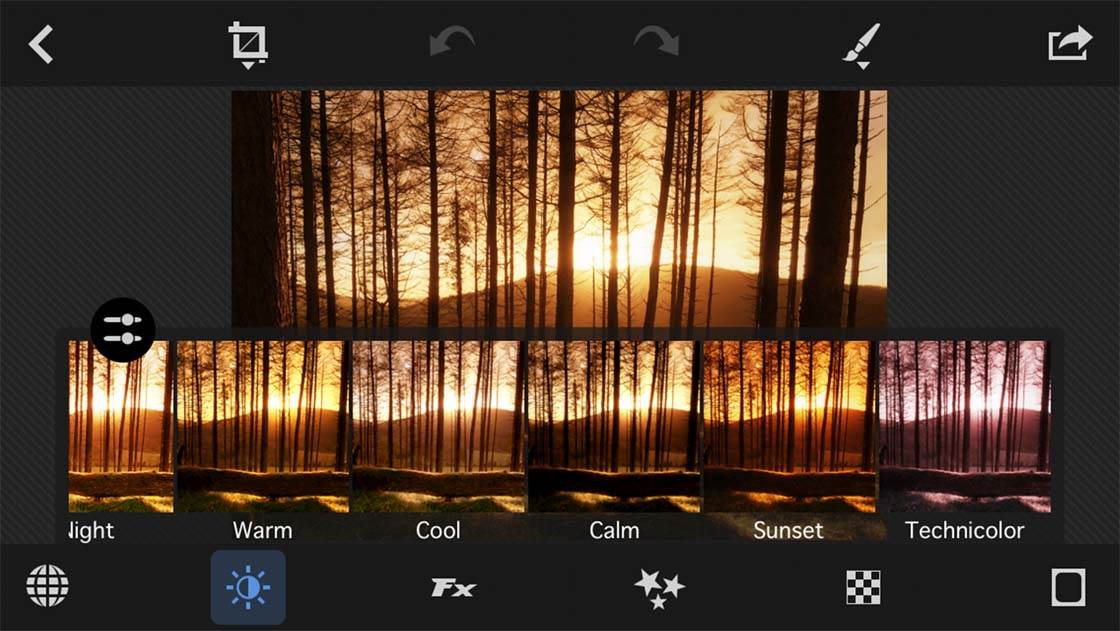
At the top left corner of the preset thumbnails is a slider icon. Tapping this opens up a series of adjustable sliders specific to each mode. You can swipe across to view more sliders if available.
For example under the Lighting mode you have sliders to adjust Exposure, Temperature, Sharpness, Contrast, Shadows, Highlights, Blacks, Tints, Brightness, Warmth and Technicolor effect.
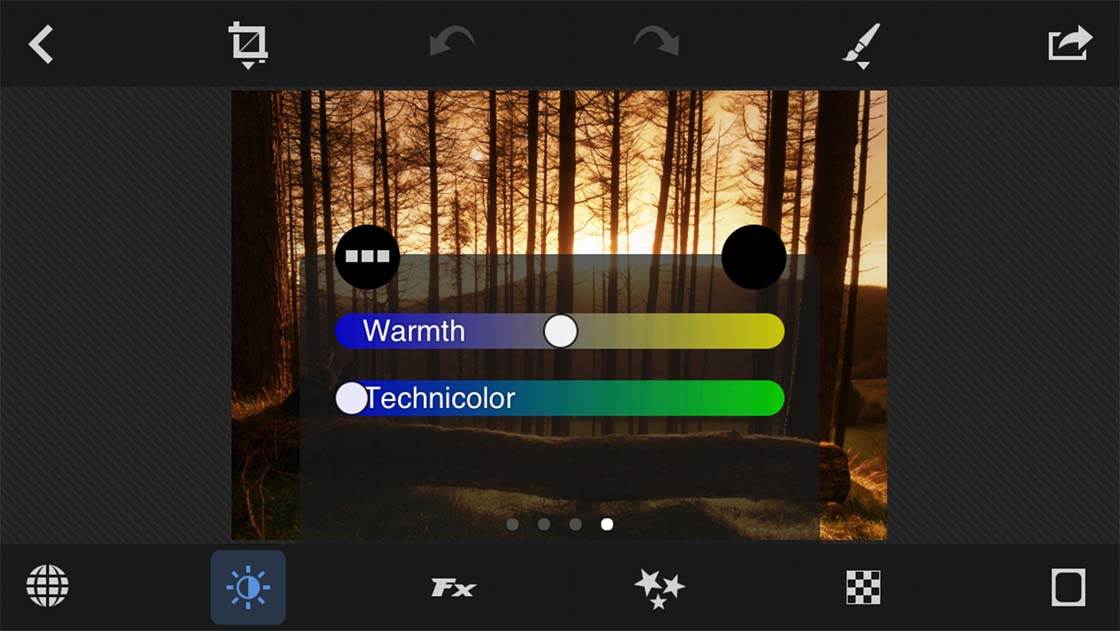
If you wish, you can bypass the presets entirely and go straight to the sliders to edit the lighting exactly as you want. Due to the number of sliders included, this gives you a lot of control over the final look of your photo.
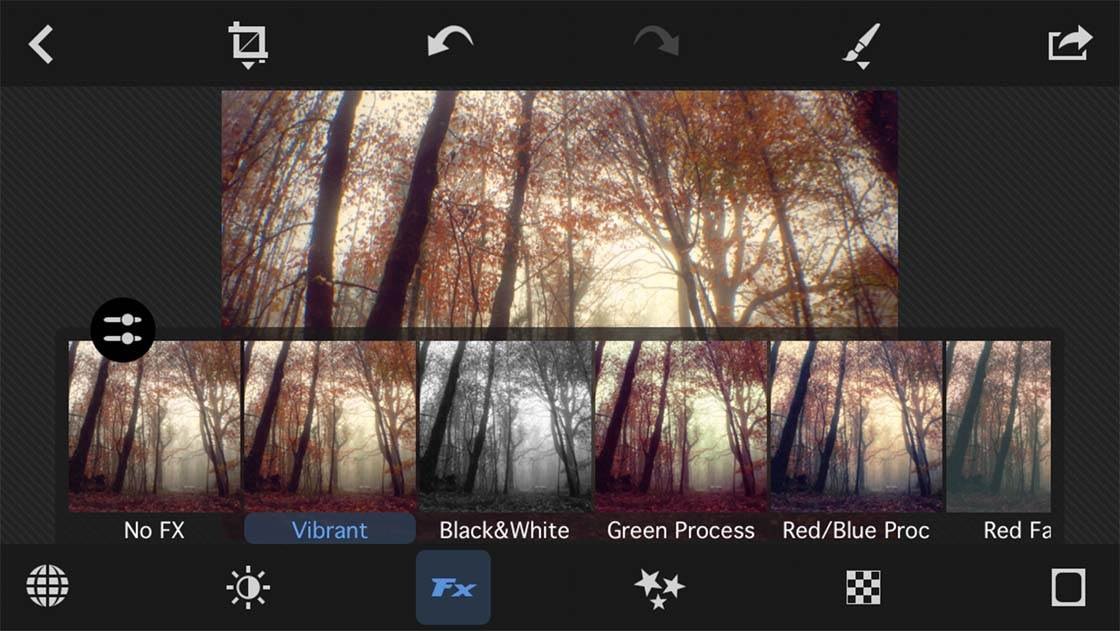
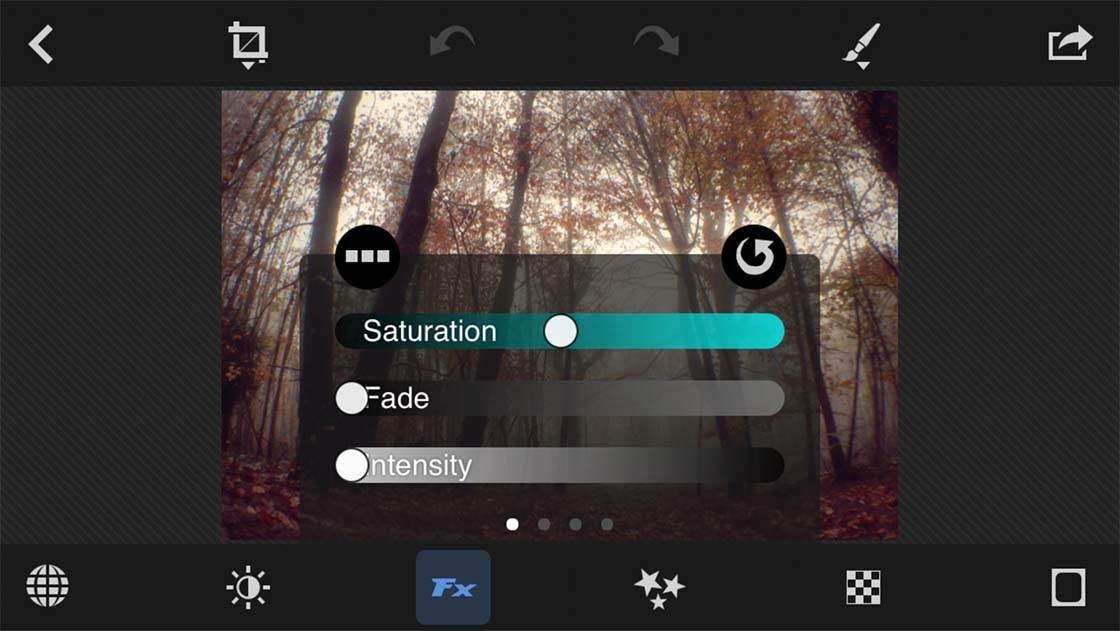
In the Special Effects mode, you can select from a variety of presets to apply various color and fade effects to your image. You can then tap the slider icon to fine tune the effect using the sliders as shown below.
One important feature that’s slightly hidden is the amount of control you have when it comes to black and white editing. In the Special Effects mode you can pick one of the black and white presets, then open the sliders menu and flick to the last set of sliders.
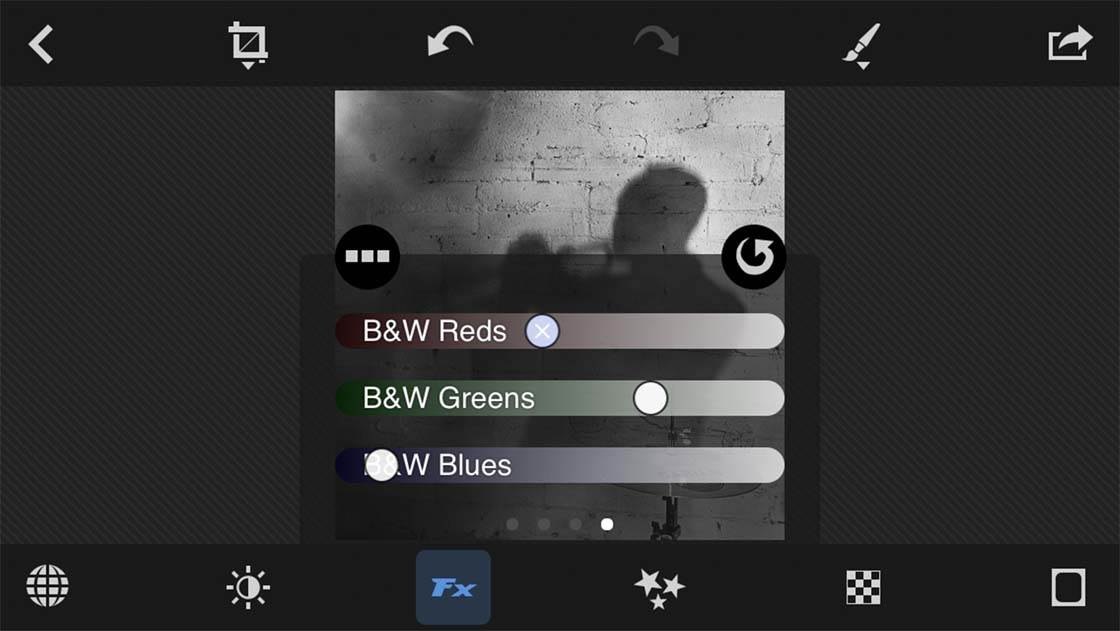
These sliders allow you to adjust the color channels in your black and white edit, helping you to get exactly the look you’re going for. You have to choose a black and white preset for the color channels to become active.
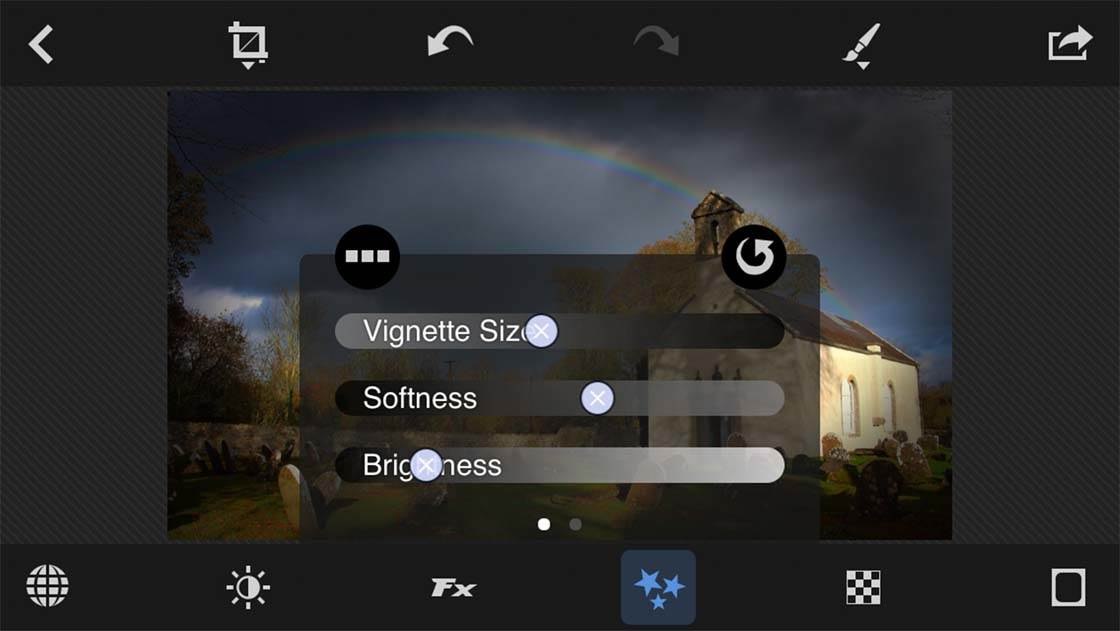
In Vignette mode you can choose a preset vignette effect to go around the edge of your image, and then customize it to your liking using the sliders as shown above.
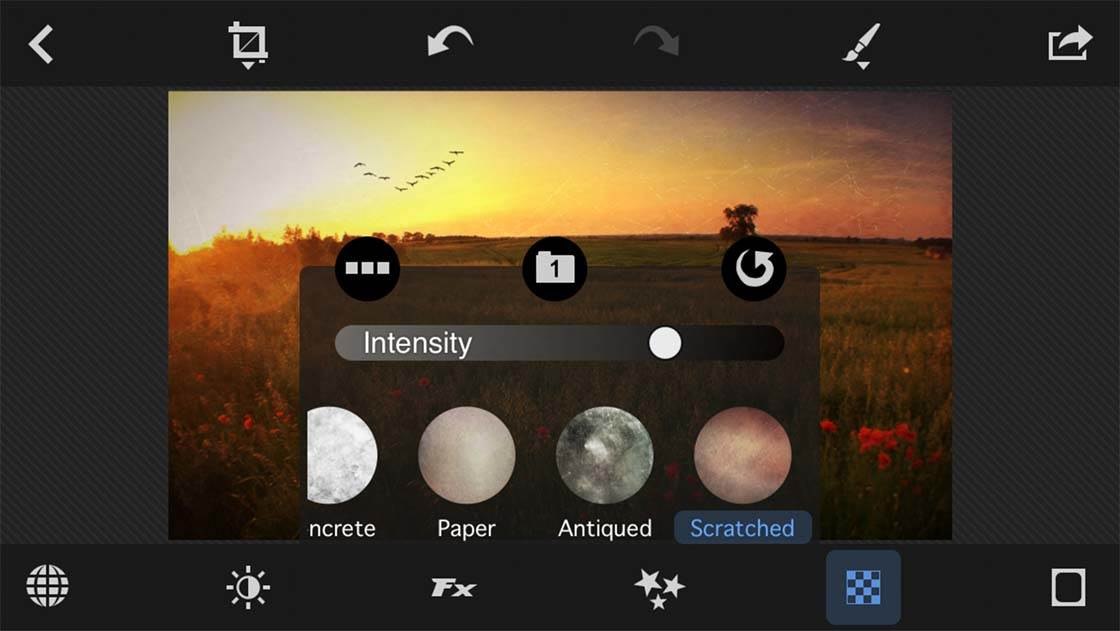
In Texture mode you can select a texture to apply to your photo, and then adjust the strength of it using the Intensity slider as shown above.
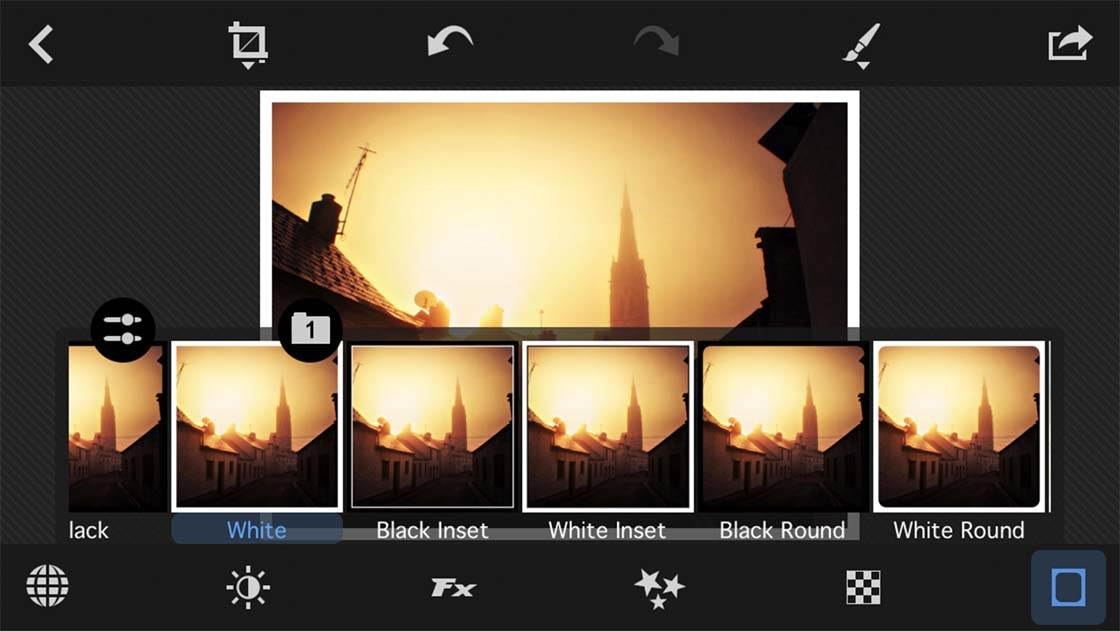
The Frames mode has a selection of borders which you can apply around the edge of your photo, and the slider option allows you to adjust the border width.
6. Save & Share Options
When you’ve finished editing your masterpiece, just tap the arrow icon at the top right of the screen to bring up the saving and sharing options. The Photo Library option allows you to save the final edit to your Camera Roll.
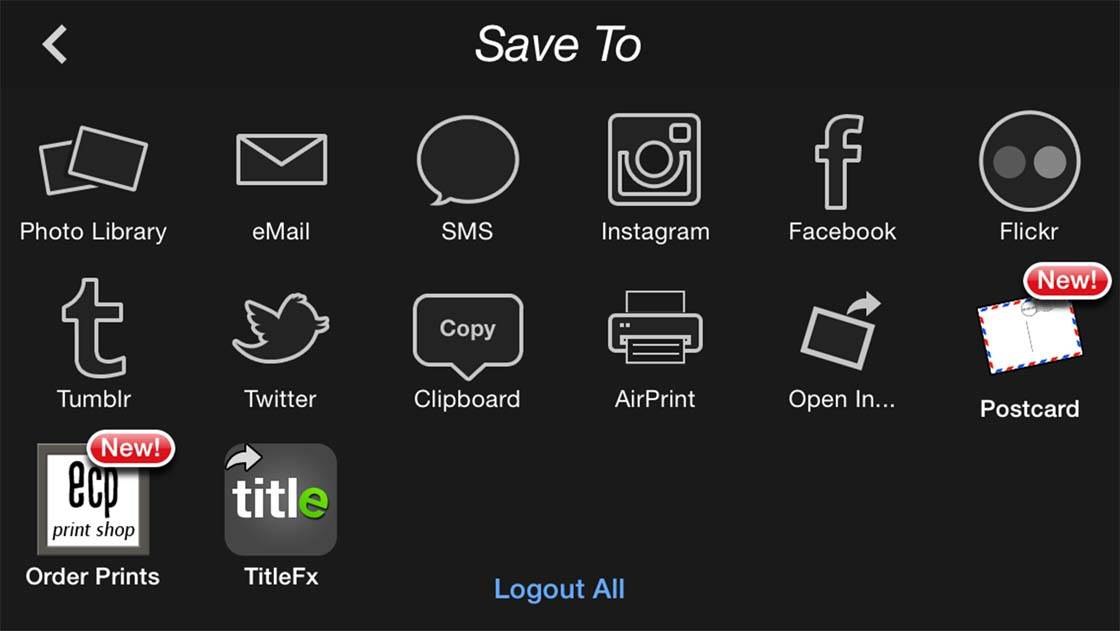
There are lots of options for sharing your photo on social media, as well as being able to print your photo, or open it in another app for further editing. You can also transfer the photo to TitleFX, another app by the same developer. This is a very handy app for adding text to your photo, and I often use it for adding watermarks to my images.
Conclusion
All in all, PhotoToaster is a very powerful photo editing app, and it’s suitable for almost all of your image editing needs. The fact that it saves the final edit in full resolution, and applies non-destructive edits that can be undone at any point, makes it one of the essential photo editors for me.
As I said at the start, every photo I edit goes through this app at least once. The Lighting and FX brushes, combined with the detailed Black and White editing, are worth the price of this app on their own. But add to these the highly adjustable Category Modes and Global Presets, and you have the complete photo editor.

Thanks for this tutorial on Photo Toaster Paul. I do have this app but I really don’t do it justice but after reading this I certainly will use it more.
Thats great to hear Rosa. it’s a far more versatile app than most people realise. If you have any queries. I can be contacted here.
Thank you Paul. I appreciate that.
I’ve had this app for awhile and find myself using it more and more. I haven’t used the brush tools too much so I really appreciate your detailed explanation of those. I will certainly explore them more. Thanks so much!
Thanks Paul! I have used this app a little bit, but I will be using it more after reading this tutorial. Love your work!
Thanks for this in-depth tutorial Paul. It’s great to see all of the tools that this app has to offer.
This was one of the first editing apps I used, and was for a long time my “go to” app. Then I started to use Snapseed and a few others, but after reading this and being reminded of the power of Phototoaster, I’m going to start using it again, and it may replace some of the apps currently on my phone. (Since I have a 16 GB iP4S, space is limited… 🙂 )