Hipstamatic is a stylish iPhone camera app for creating unique images with a retro or vintage look. It has a great selection of analog film, lens and flash effects which allow you to easily turn an ordinary scene into something far more interesting, beautiful or dramatic. It also has a handy editing suite for fine-tuning your images in post-processing. In this in-depth tutorial you’ll discover step-by-step instructions for shooting and editing stunning images using the Hipstamatic app.
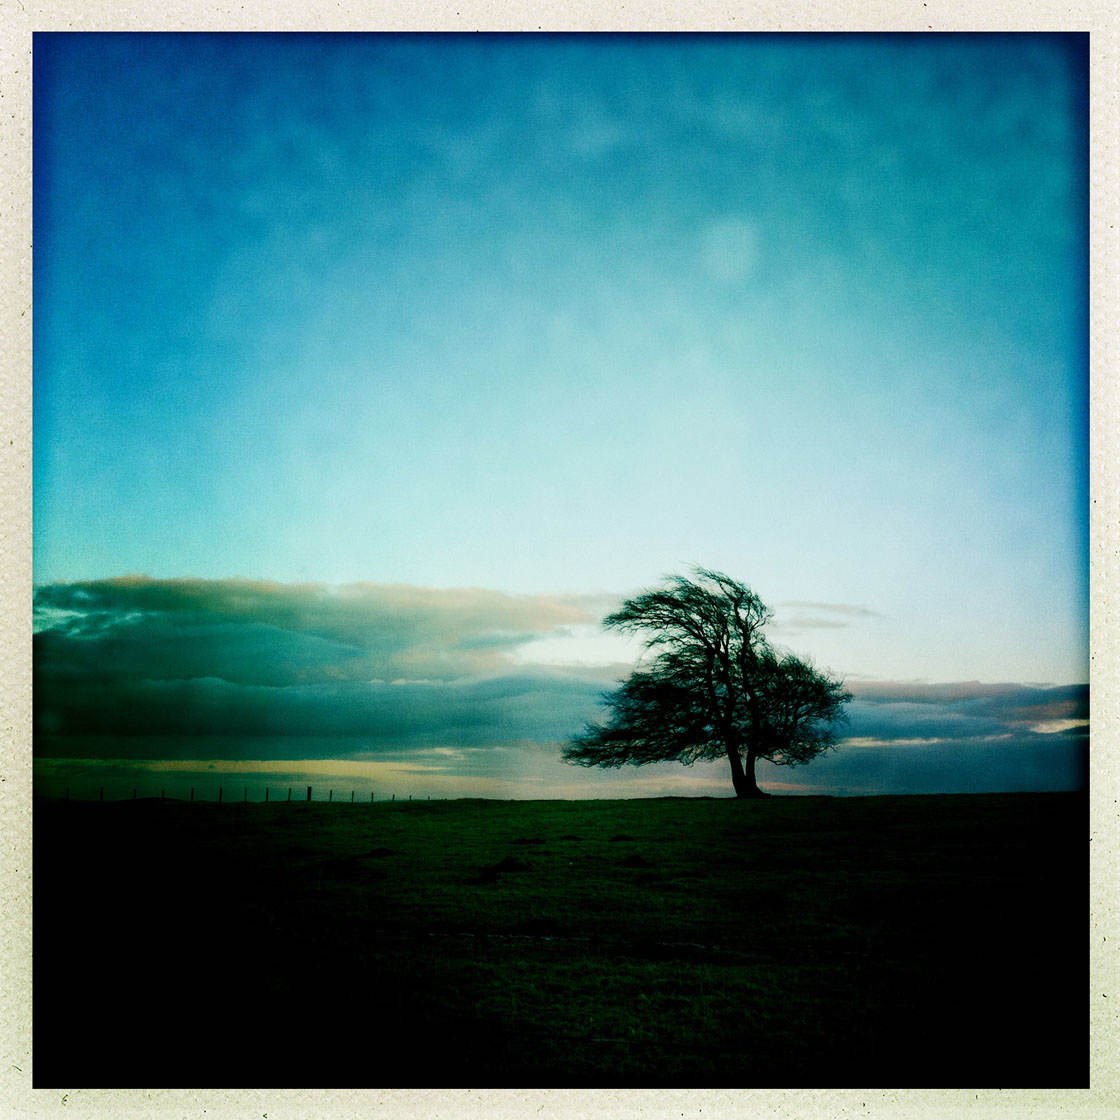
Hipstamatic can be downloaded for $2.99 on the App Store. It comes with a selection of iPhone filters (lenses, films and flashes), and you can purchase more from the Hipstamatic store if you want to expand your collection.
1. Hipstamatic Lens & Film Combos
Hipstamatic is best known for its ability to create a wide range of retro-styled images based on various filters. The filters are applied when you shoot the photo, but you can always change the final result by selecting different filters after you’ve taken the shot.
The Hipstamatic filters fall into three categories: lens type, film type and flash type. Before you take a photo in Hipstamatic you choose which lens, film and flash you want to use.
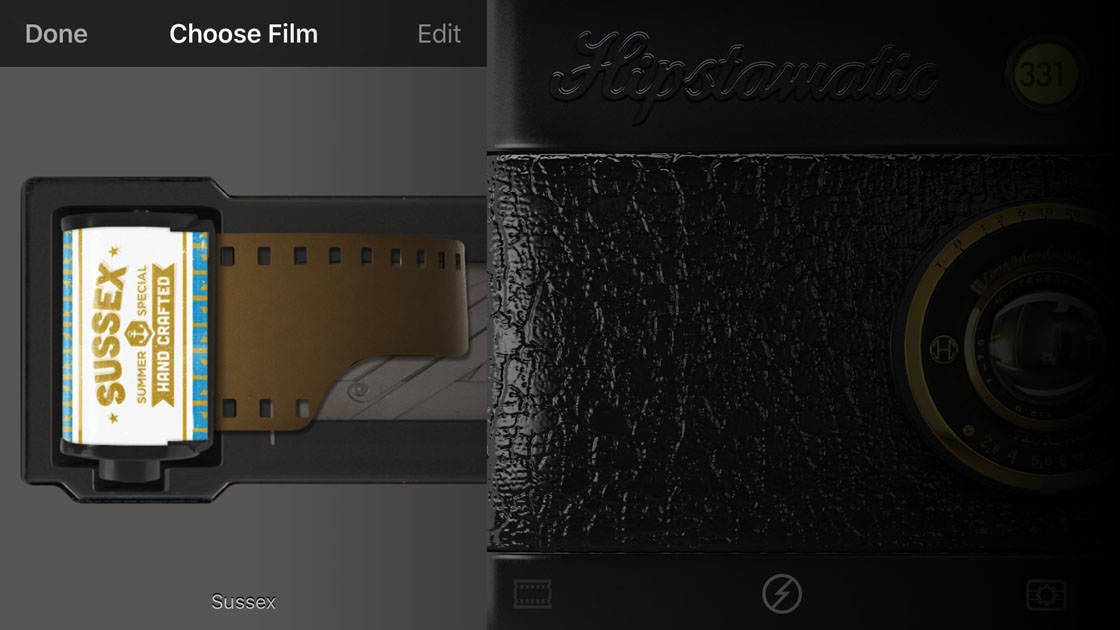
The lens determines the colors and tones in your photo. The film determines the frame or vignette around the edge of the image (and in some cases also changes the colors of the photo). The flash allows you to create different lighting effects.
The lens, film and flash combinations in Hipstamatic are referred to as “combos.” By using different combinations of lens, film and flash, you can create a wide range of image styles – from faded vintage effects to high contrast black and white photos.
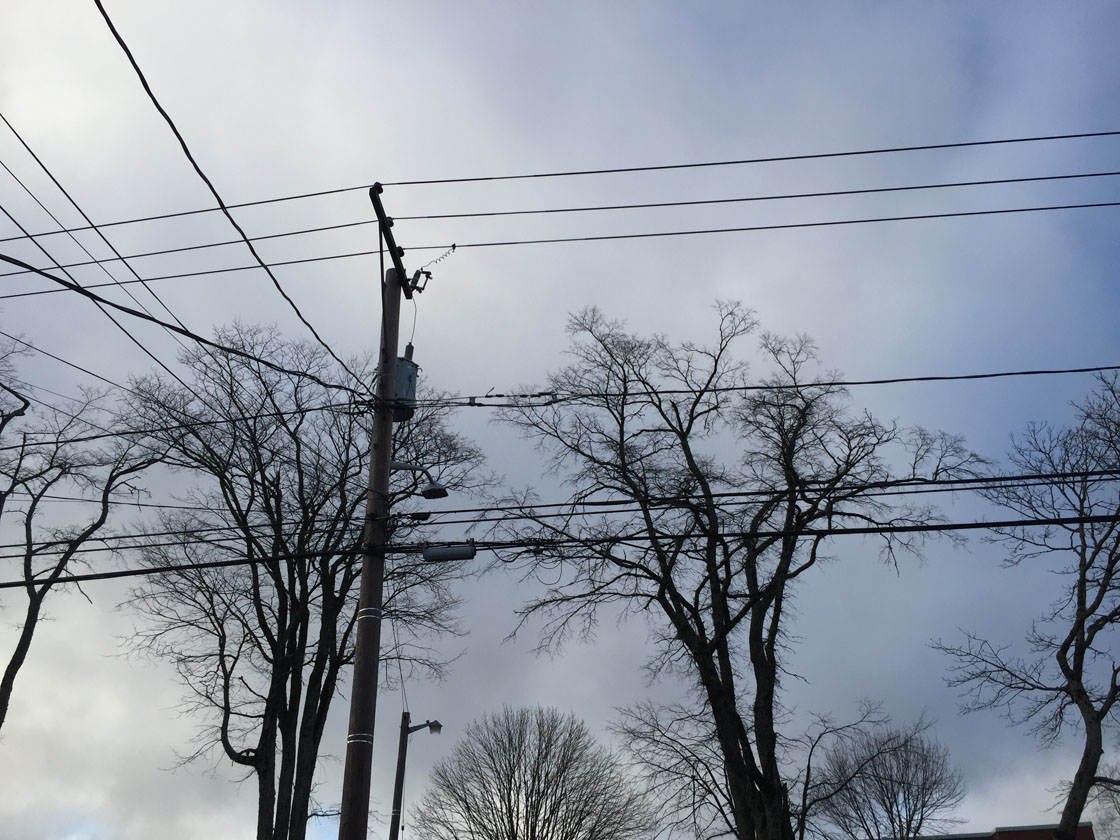
To give an example of how Hipstamatic can turn an ordinary scene into something far more visually appealing, take a look at the photos below. The first image is the original image without any Hipstamatic filters applied:
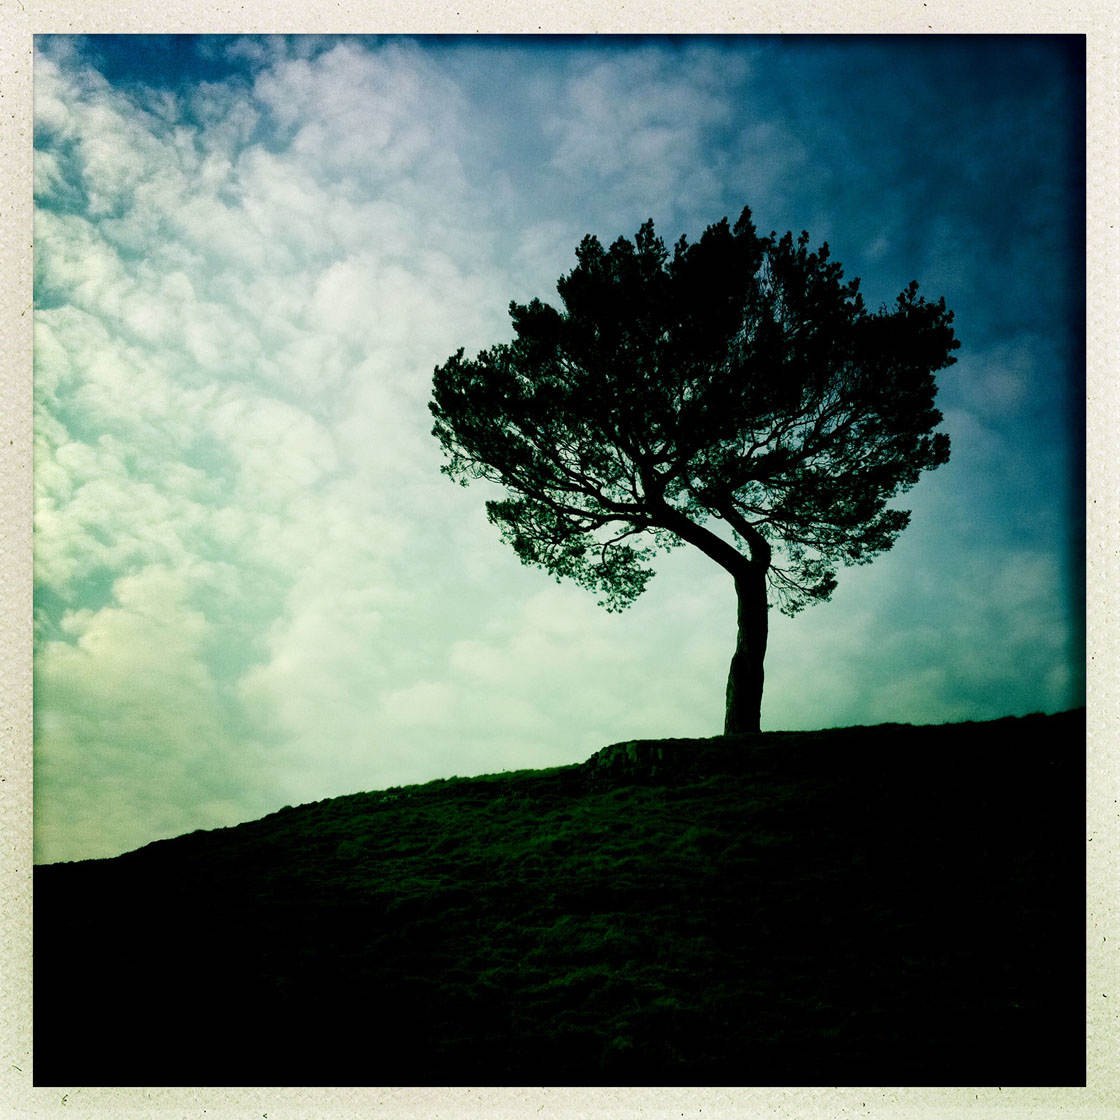
Next are some examples of the same scene captured using different Hipstamatic lens and film combos:
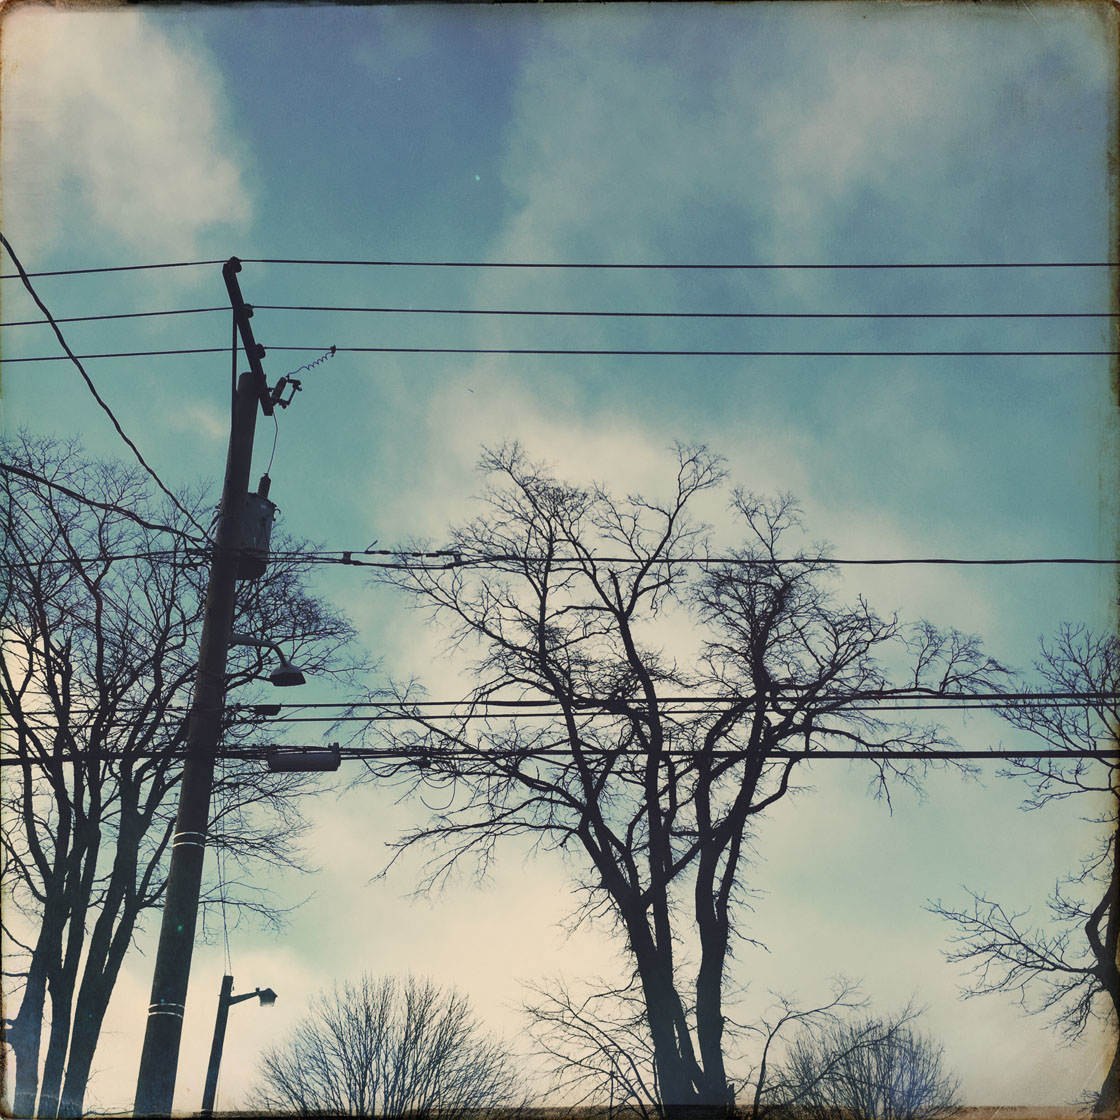
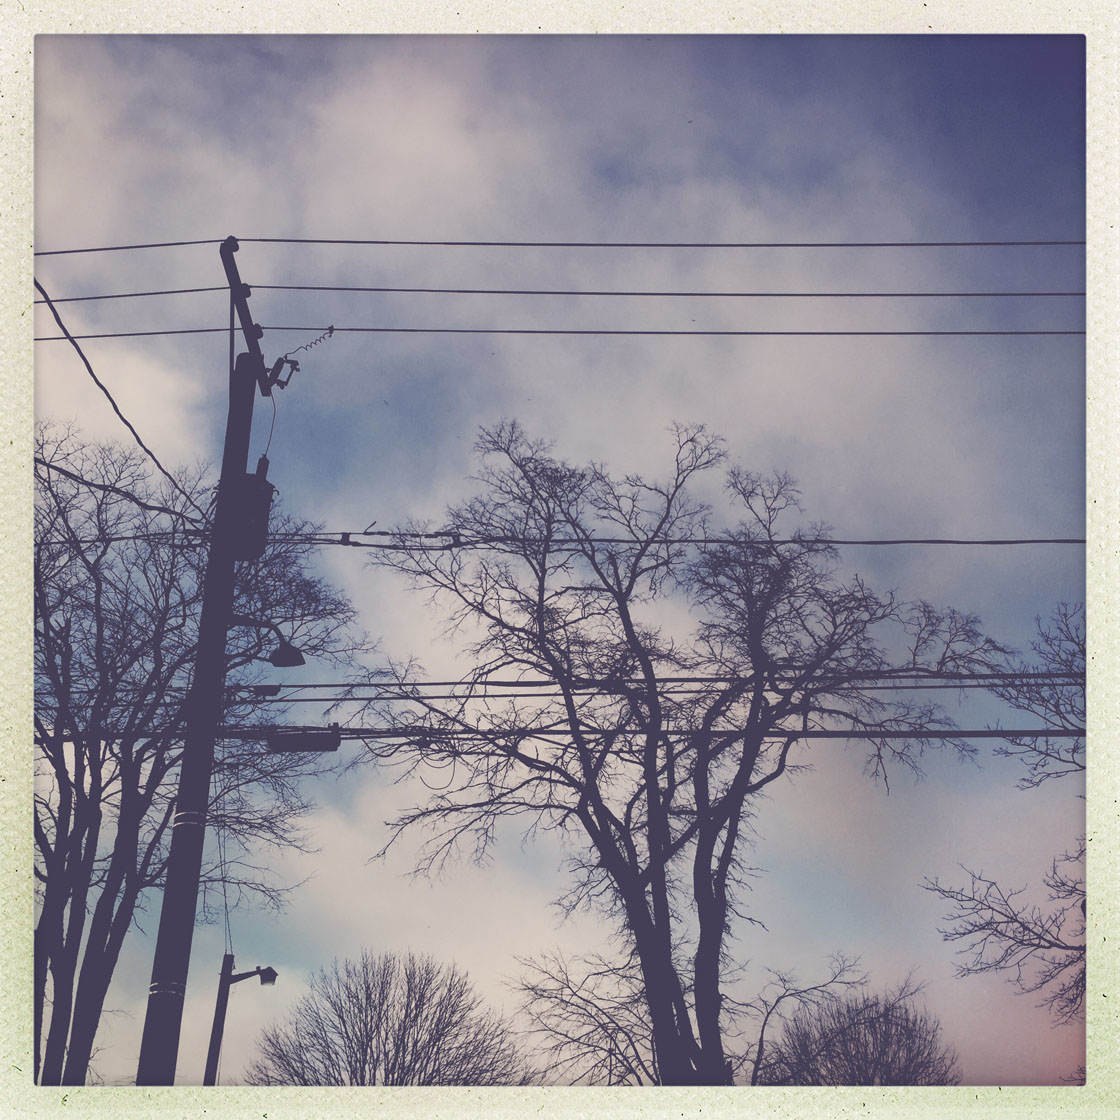
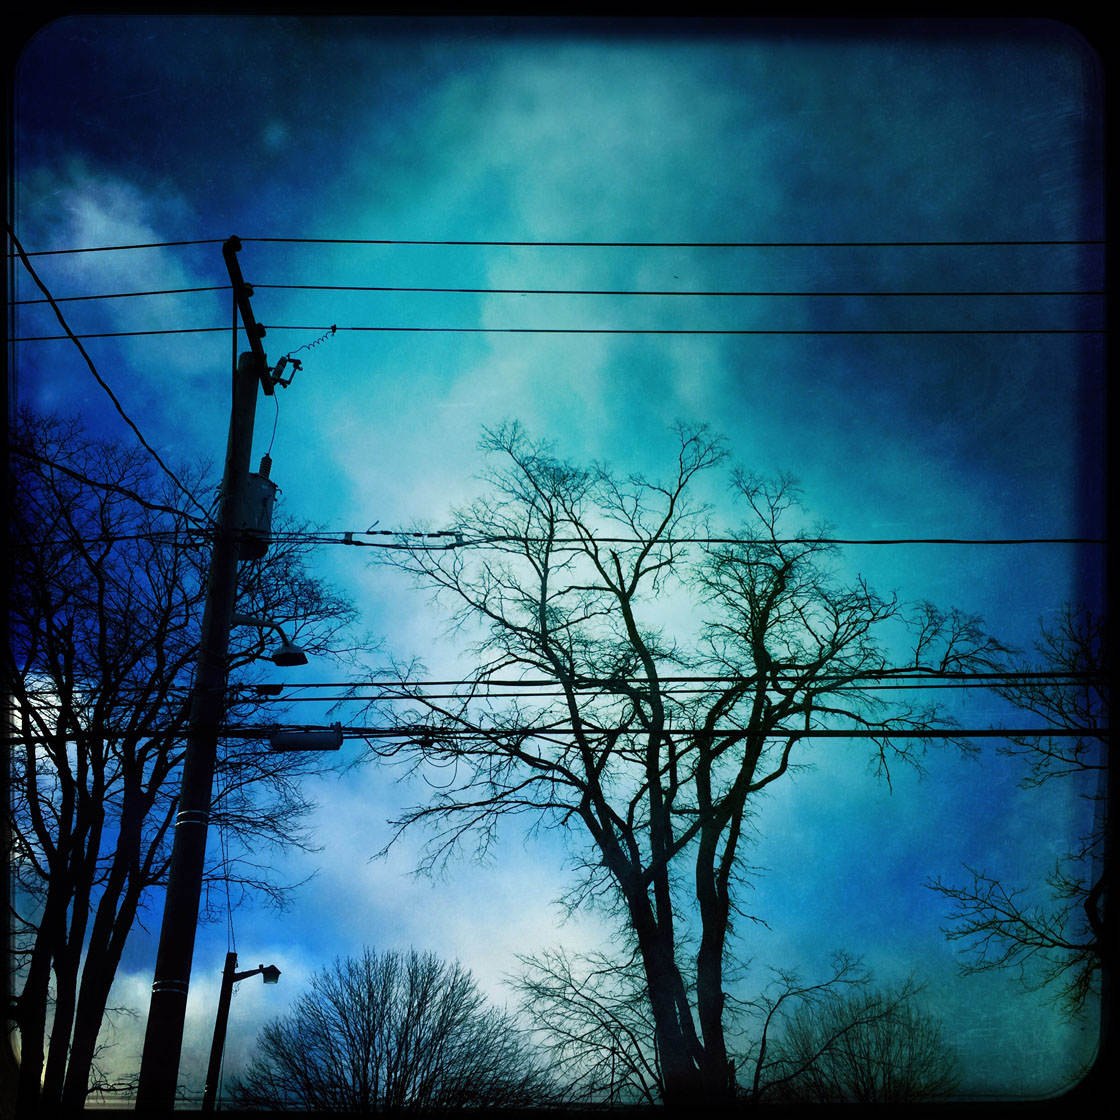
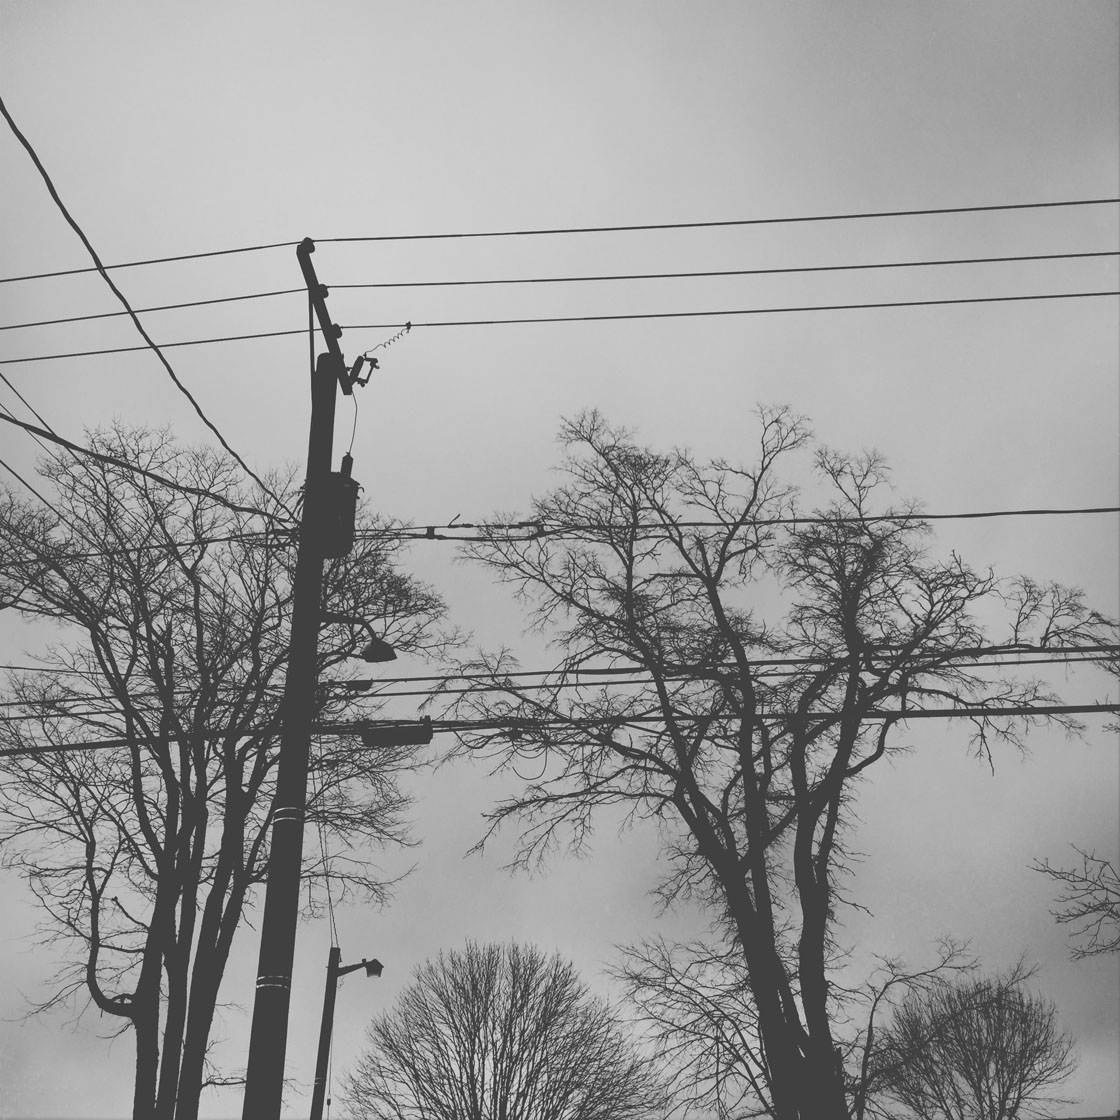
When taking photos with Hipstamatic, you can either let the app select a combo for you, or try out different combos of your your own choice until you find an effect you like.
Hipstamatic comes with a core collection of lens, film and flash options, and many others are available as in-app purchases.
2. Choose A Camera Interface
Hipstamatic has two different camera modes/interfaces built into the app. You can use the Classic camera interface that mimics the look and feel of retro film cameras:
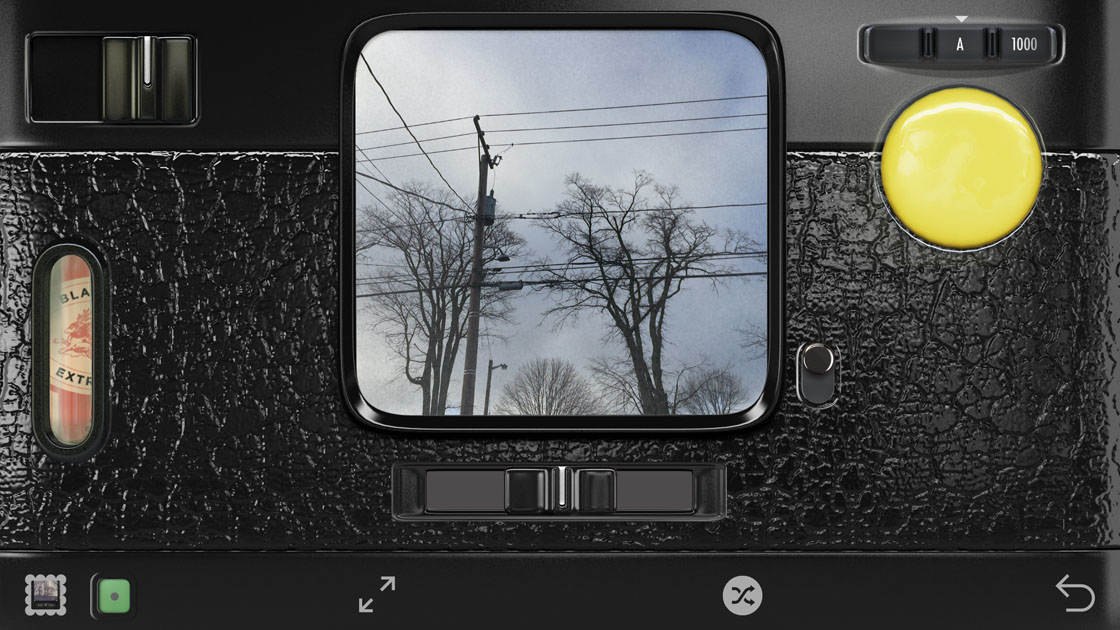
Or you can use the Pro camera interface which has a modern and professional feel. This camera mode is great if you want a bit more manual control when taking photos:
To switch between the two camera modes, simply tap the two opposing arrows icon (arrows are either facing toward each other or away from each other depending on which camera mode you’re currently using).
The instructions below give you an in-depth guide for using both the Classic and Pro camera interfaces.
3. Shoot With Hipstamatic Classic Camera
In this section you’ll learn how to take photos using the Classic camera mode in Hipstamatic. Ensure you’ve selected the Classic camera interface which should look similar to the screen below. If you’re currently in Pro camera mode, tap the opposing arrows to switch to Classic mode.

Back view of Classic camera
When using Classic mode, you can switch between the front and back views of the camera by tapping the Flip icon (curved arrow) at the bottom right of the screen. Above is the back view of the camera, and below is the front view:
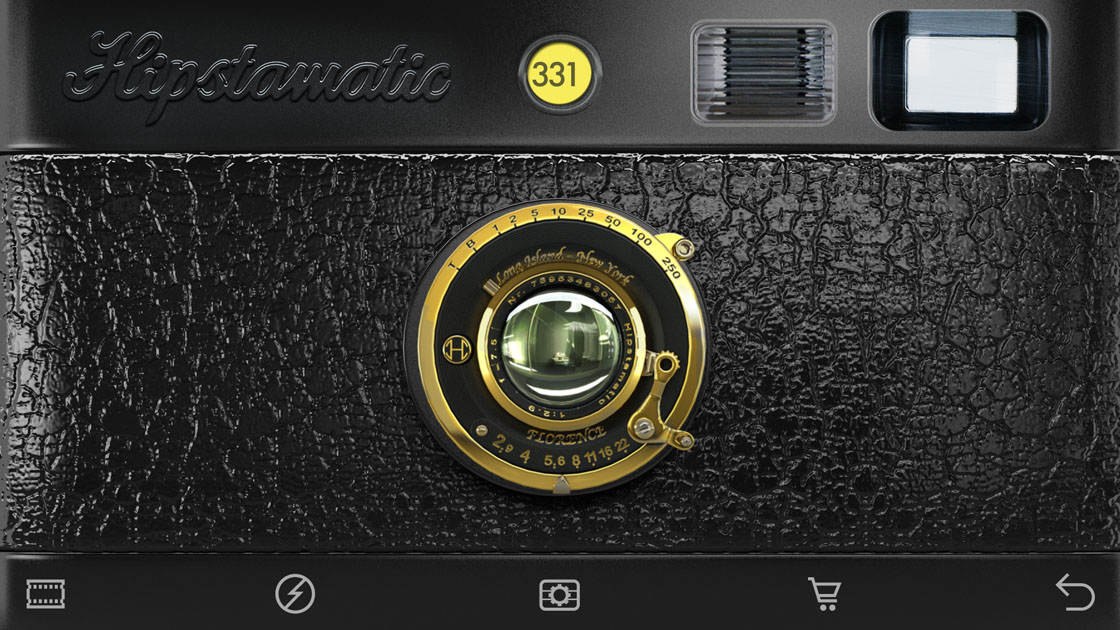
Front view of Classic camera
Depending on which camera feature you want to access, you’ll need to switch between the front and back views.
3.1 Take A Photo With Classic Camera
When you point the camera at a scene, you’ll see it appear in the square viewfinder. When taking pictures you can choose from two viewfinder options.
You can either view the scene without any filters (lenses, films, etc.) applied, or you can see in real-time what the photo will look like after the shot has been taken using your chosen filters (you’ll learn how to select lenses, films, etc. later in this section).
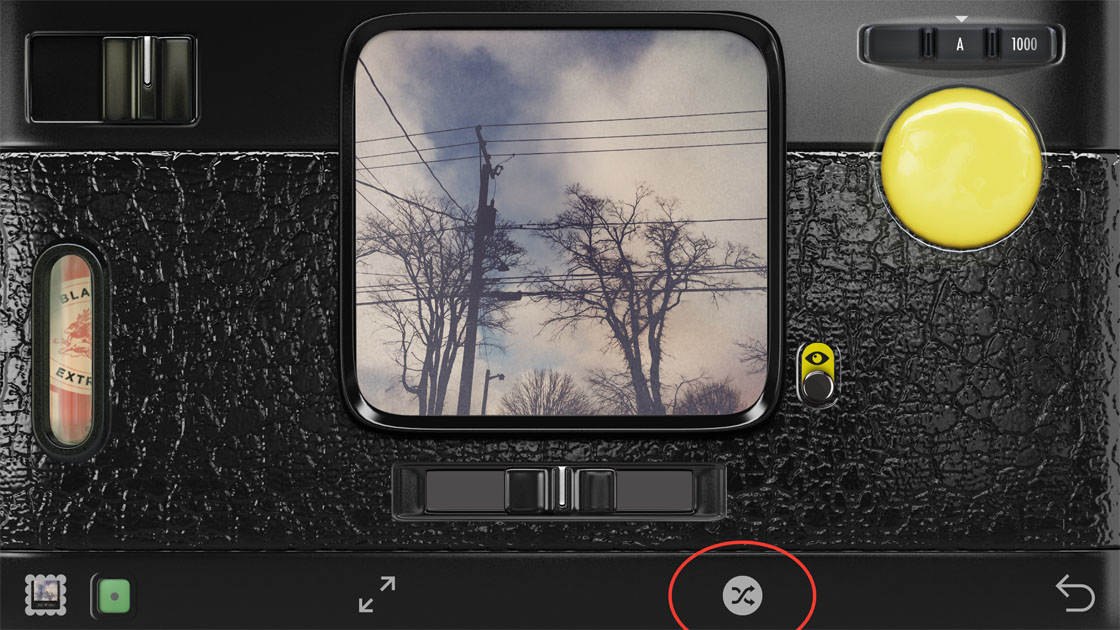
To switch between these two viewfinder options, tap the small black switch at the bottom right of the viewfinder (shown circled in red below):
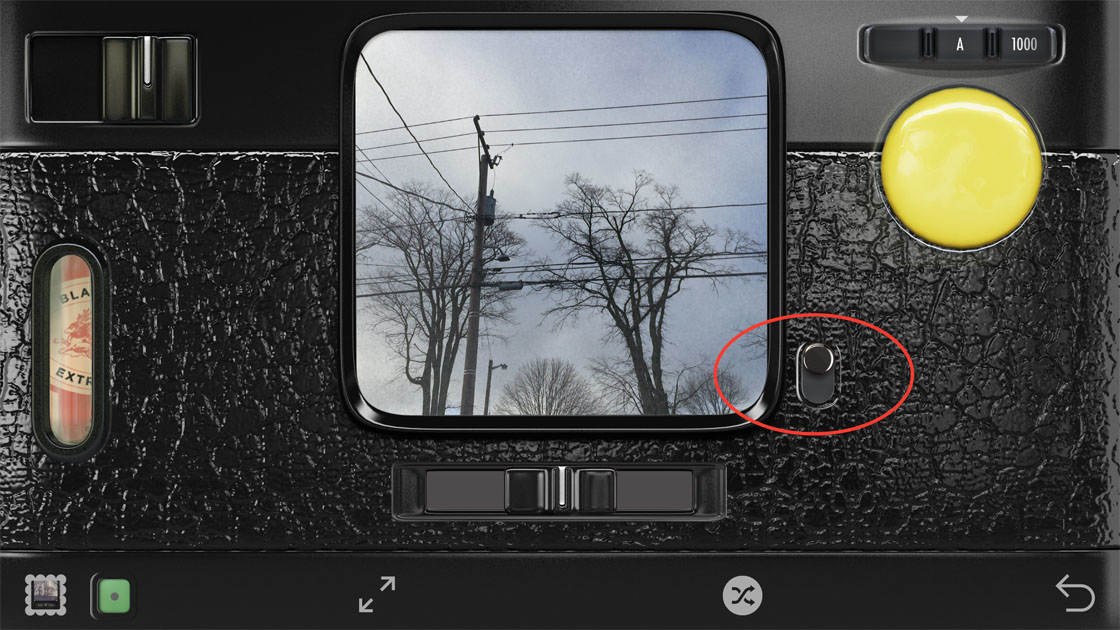
When the switch is in the off position (completely black), you won’t see the scene with any of your chosen filters applied, however, when the photo is taken the filters will be applied to the image.
When the switch is in the on position (yellow eyeball icon), you can see in real-time how the scene will look with the filters applied:
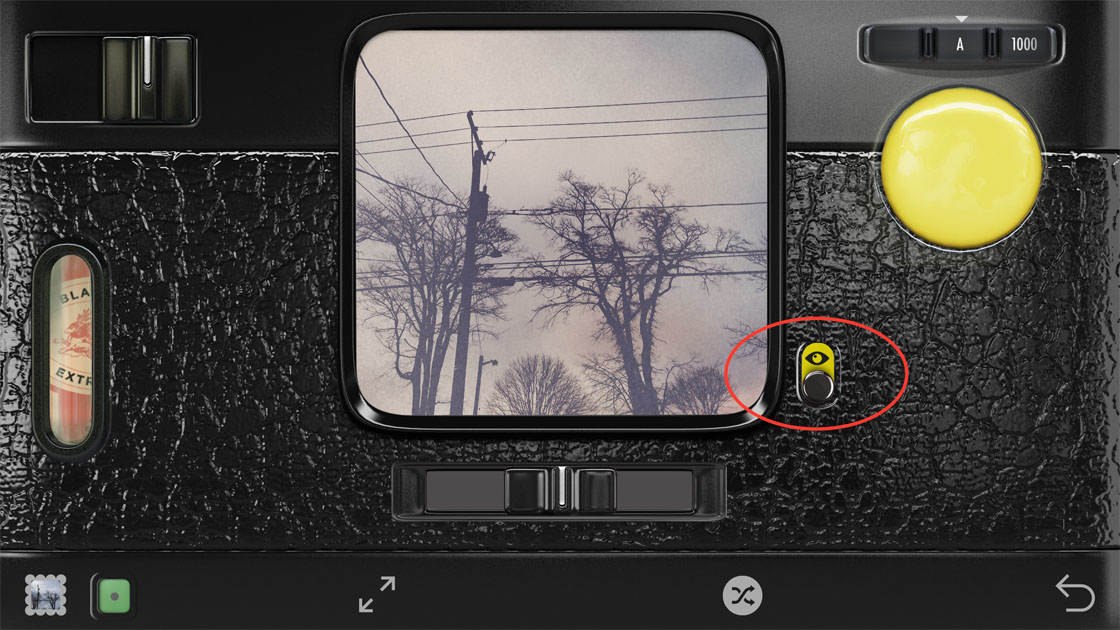
I would recommend having the viewfinder switch in the on position so that you can see the effect of the current lens, film and flash combo.
When you’ve composed your shot, take the picture by tapping the yellow shutter button at the top right.
Note that you can also enlarge the viewfinder by double-tapping on the viewfinder window. You then simply tap once on the viewfinder to take the shot.
To see the photos you’ve taken, tap on the square image thumbnail icon at the bottom left of the screen. The image gallery will appear displaying a preview of the photos you’ve shot with Hipstamatic:
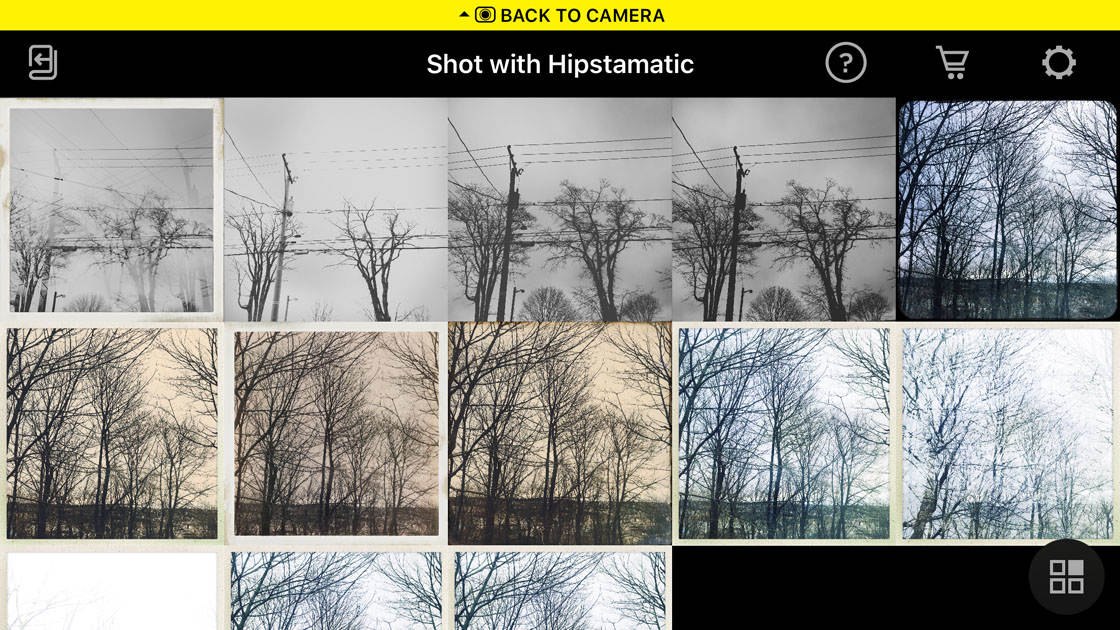
To see a larger version of a particular photo, tap the image you want to view. When viewing the full size image, you’ll be able to see which film/lens/flash combo was used, as well as the location where the photo was taken.
In the example below, you can see that the location was Greendale, the lens was Madalena, and the film was BlacKeys XF:
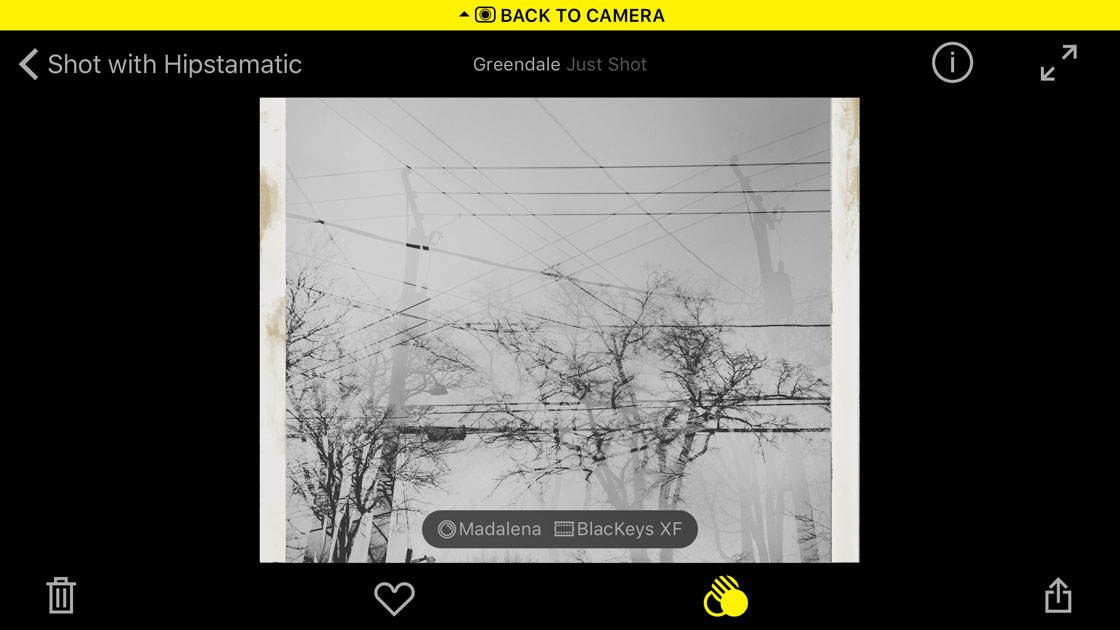
The other icons on this screen are as follows: The “i” icon at the top right reveals exposure and location data. The two opposing arrows display a full-screen view of your image.
At the bottom of the screen, you can tap the trash icon to delete the image, the heart icon to favorite the photo, the three circles to edit the photo (more on editing to come later), and the up-arrow icon to share the image.
To exit the image gallery and return to the Hipstamatic camera, tap the yellow bar at the top of the screen.
3.2. Choose A Lens/Film/Flash Combo
To specify the look and style of your image, you’ll need to select from the many different combinations of lenses and films (and flash if desired).
You can either select a preset combo from the Favorites screen, or you can create your own combo from scratch. Let’s look at the preset combos first. Start by tapping the round icon (second from the bottom right) shown circled in red below:
Swipe across to view the range of cameras with different lens/film/flash combos, but don’t tap on any of the cameras yet. Each camera has an example photo to show want kind of image style that particular combo will create.
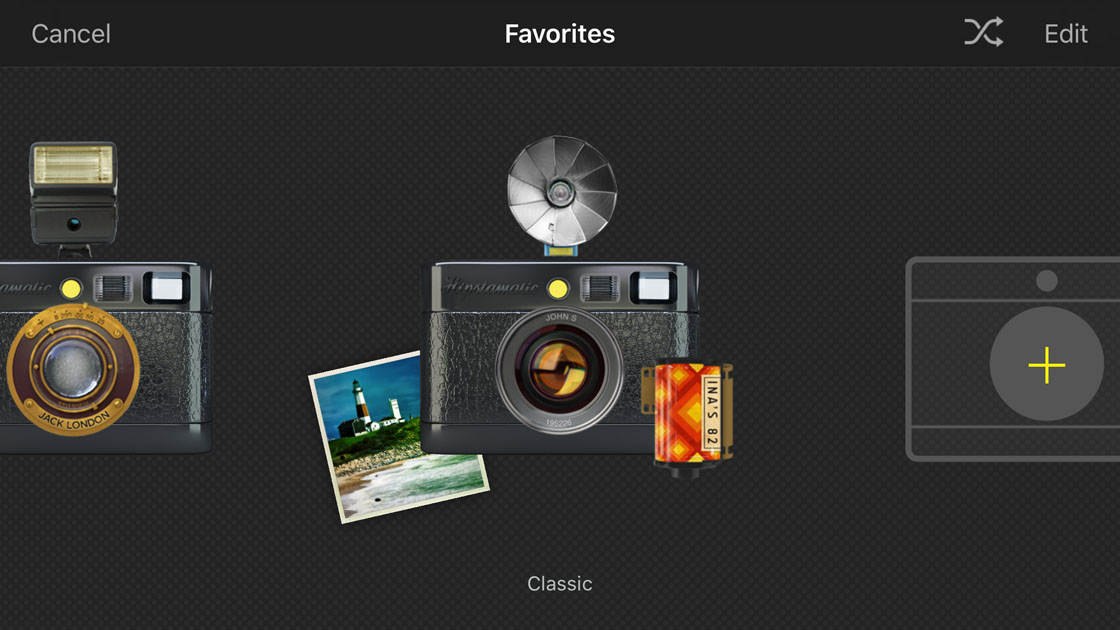
Tap and hold a camera to view more information about what settings will be used, then tap the X to return to the Favorites screen.
To select a particular combo from the Favorites screen, simply tap on the camera combo you want to use. Alternatively, you can tell the app to randomly shuffle the combos every time you take a picture, giving you a different effect for each shot. If you prefer this option, tap the Shuffle icon (two arrows at the top right) and select your preferred option:
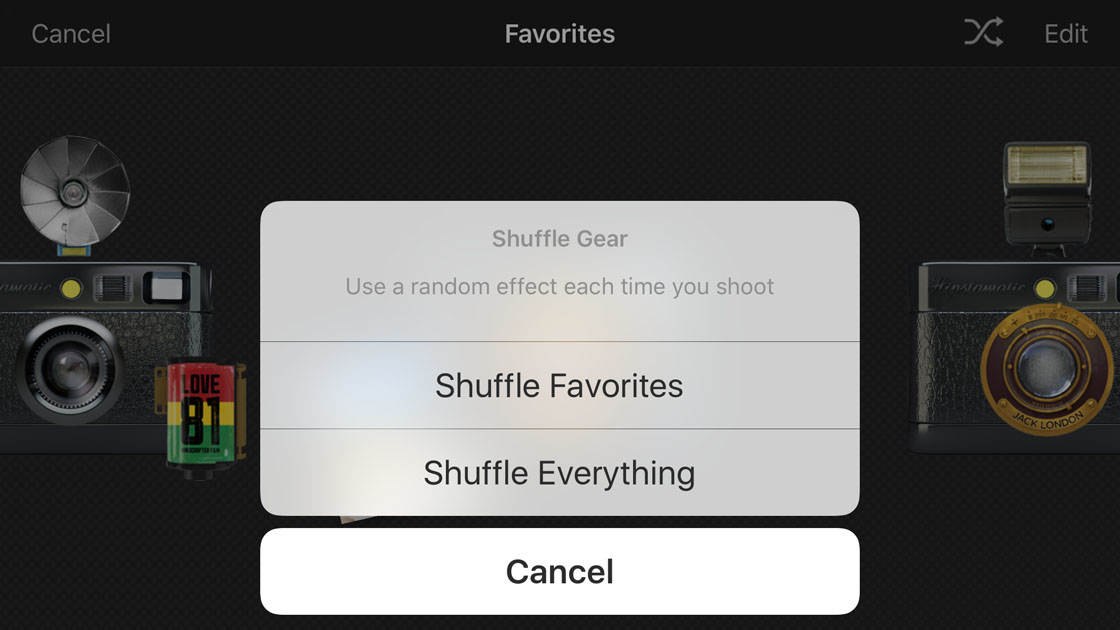
Once you’ve selected either a camera combo from the list of Favorites, or the Shuffle option, you’ll be taken back to the camera so that you can start shooting.
You can also create your own lens/film/flash combos and add them to the list of Favorites. To do this, tap the round icon (second from right) at the bottom of the screen to access the Favorites screen.
Swipe across the cameras to the far right, then tap the New Favorite (+) icon:
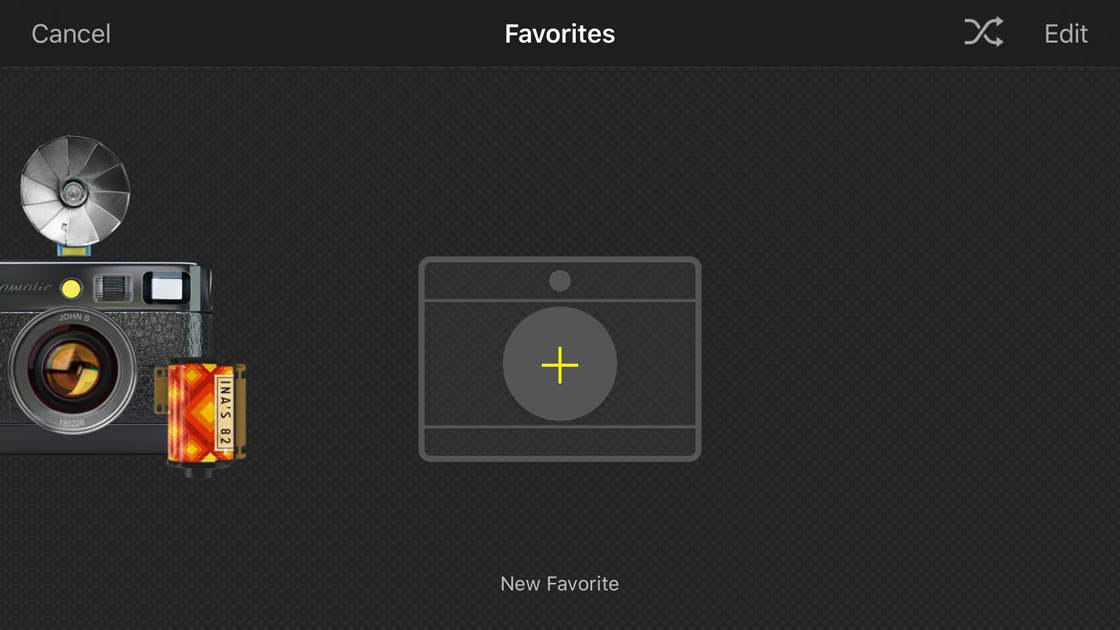
The following screen will appear, which has a preview image with three icons beneath it. From left to right these icons are: Lens, Film, Flash:
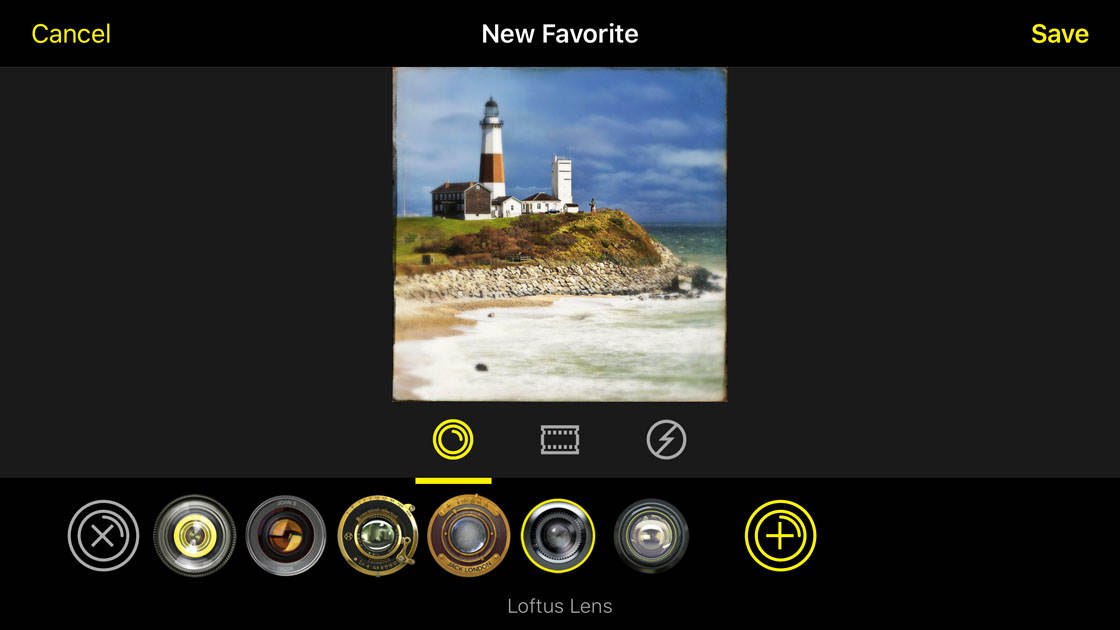
Start by selecting the type of lens that you want to use – remember the lens changes the colors and tones in your image. When you tap the different lenses along the bottom of the screen, the preview image will change to show what effect that lens will have on your image.
When you’ve selected a lens that you like, tap the Film icon (middle icon) beneath the image preview. The film determines the frame or vignette around the edge of the image, and it may also change the tone. Select a film style that you like from the bottom of the screen:
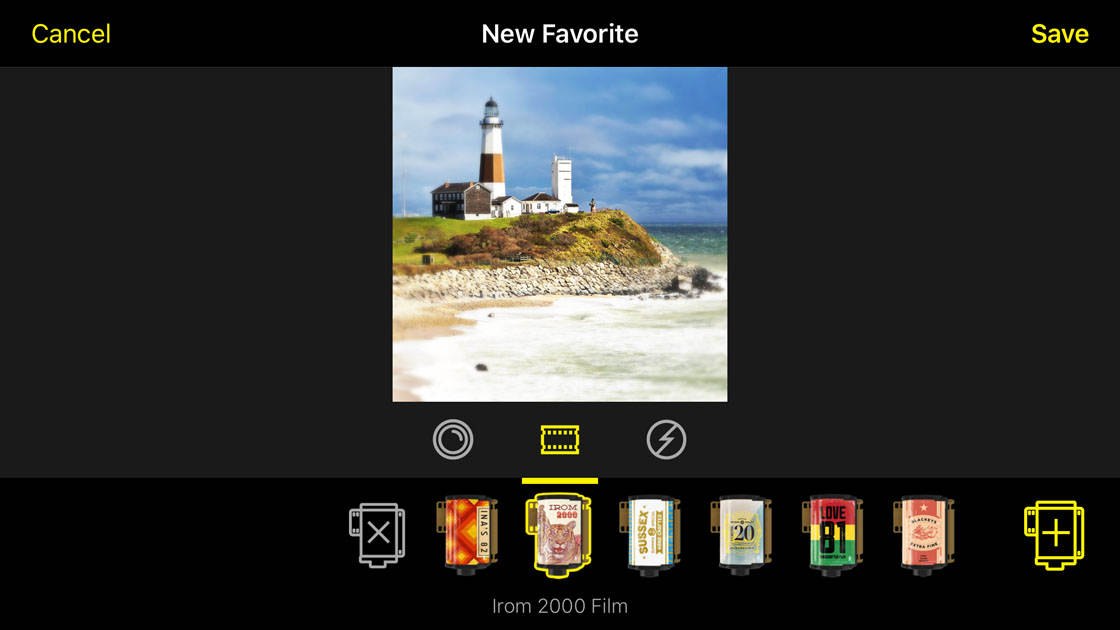
Next, tap the Flash icon (right-hand icon) beneath the image preview. The flashes add a particular lighting effect to your photo. If you want to use flash, select an option from the bottom of the screen, otherwise select No Flash:
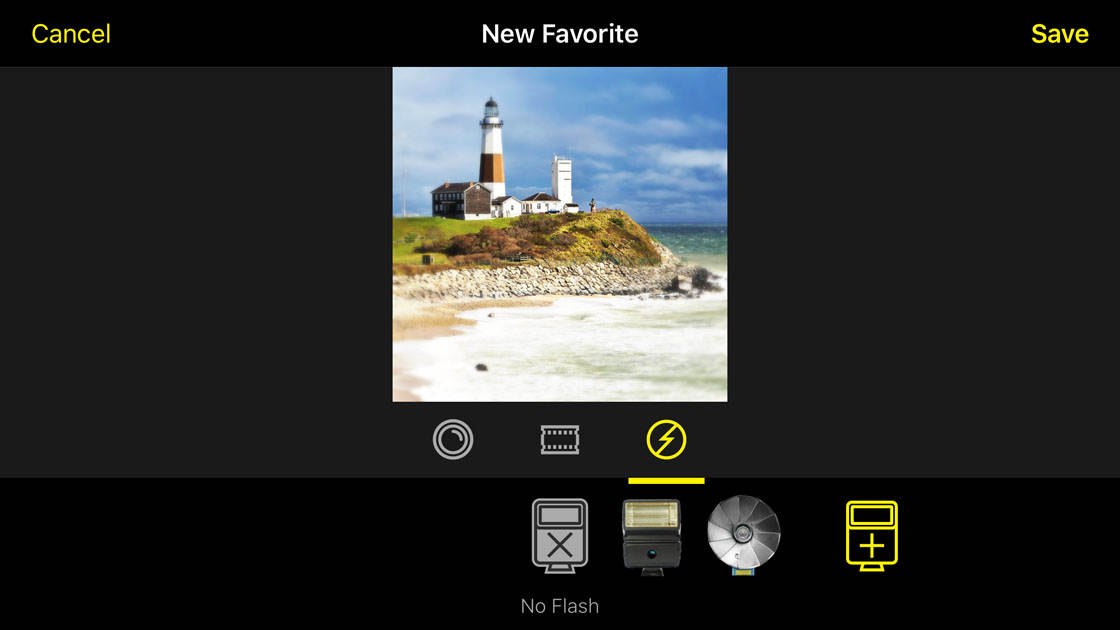
You’ll notice that there’s a plus (+) sign for the lens, film and flash options – tapping this icon takes you to the Hipstamatic store where you can purchase new lenses, films and flashes to add to your collection.
When you’re happy with your chosen combo, tap Save at the top right of the screen. On the next screen you can type a name for your combo, then tap Done:
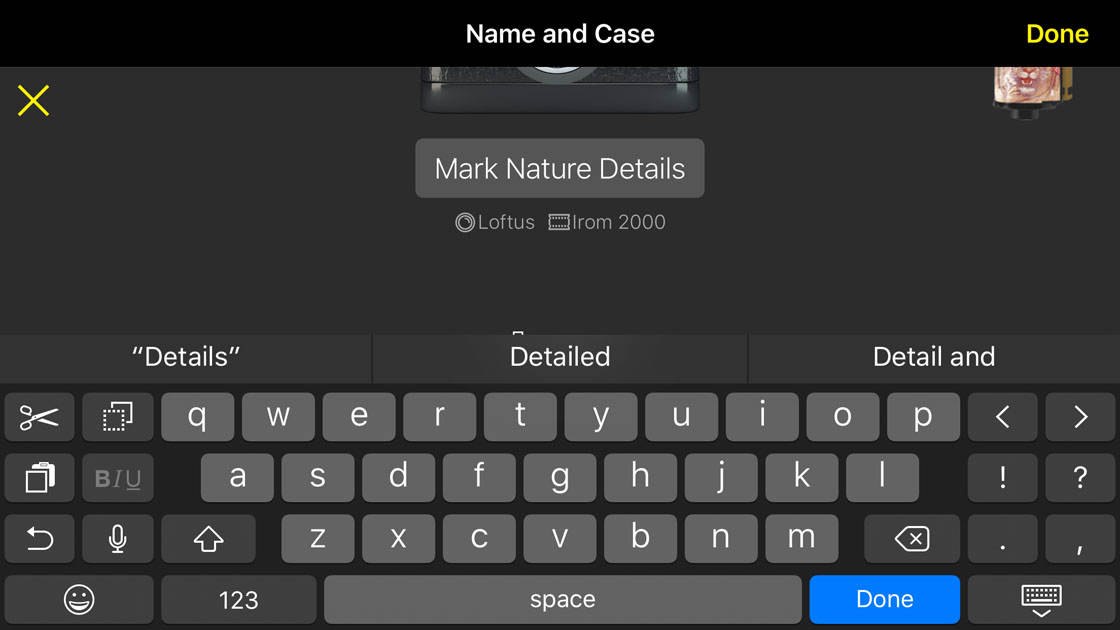
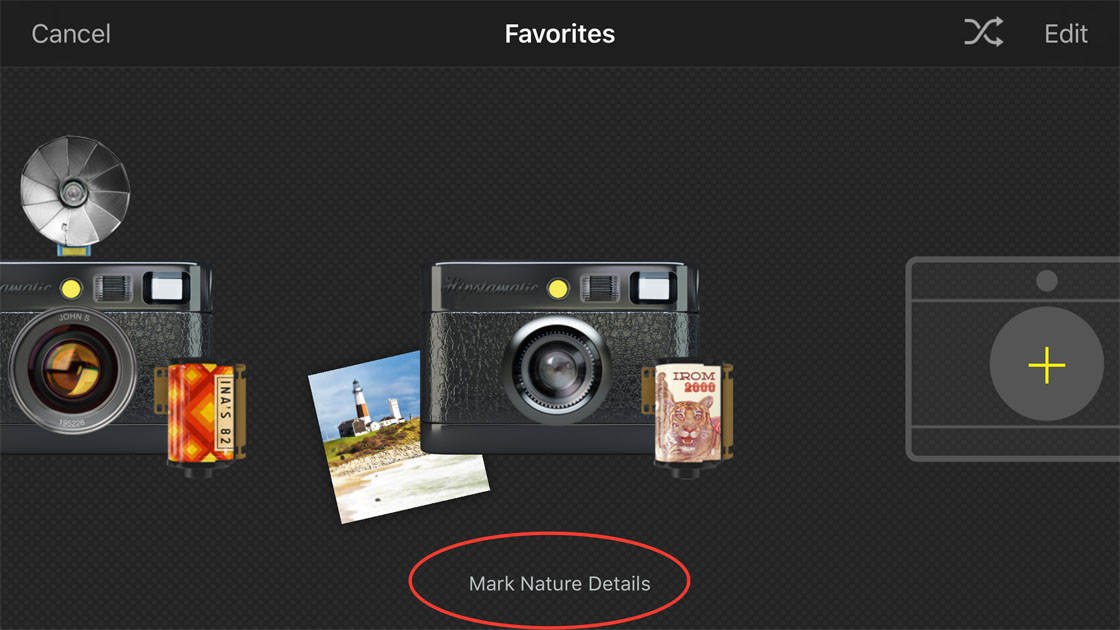
Your new combo will appear in the list of Favorites. To use this combo, simply tap on it and you’ll be taken back to the camera so that you can start shooting:
There’s one more method for selecting a combo of lens, film and flash for shooting. Remember there’s a back view and a front view in Classic camera mode – on the back camera view, tap the Flip icon (curved arrow at the bottom right):

This will switch you to the front camera view as shown below:

To choose a different lens, simply swipe across over the big lens in the middle of the screen until you find the lens you want to use.
To choose a film, tap the Film icon at the bottom left of the screen. Swipe up or down over the rolls of film until you find the lens you want to use:

To see more information about a particular film, including sample images, tap directly on the roll of film – tap Done to exit the film information.
When you’ve selected the film you want to use, tap the camera body on the right of the screen to return to the front camera view.
To choose a flash, tap the Flash icon (second from bottom left) then swipe across the different flash options:
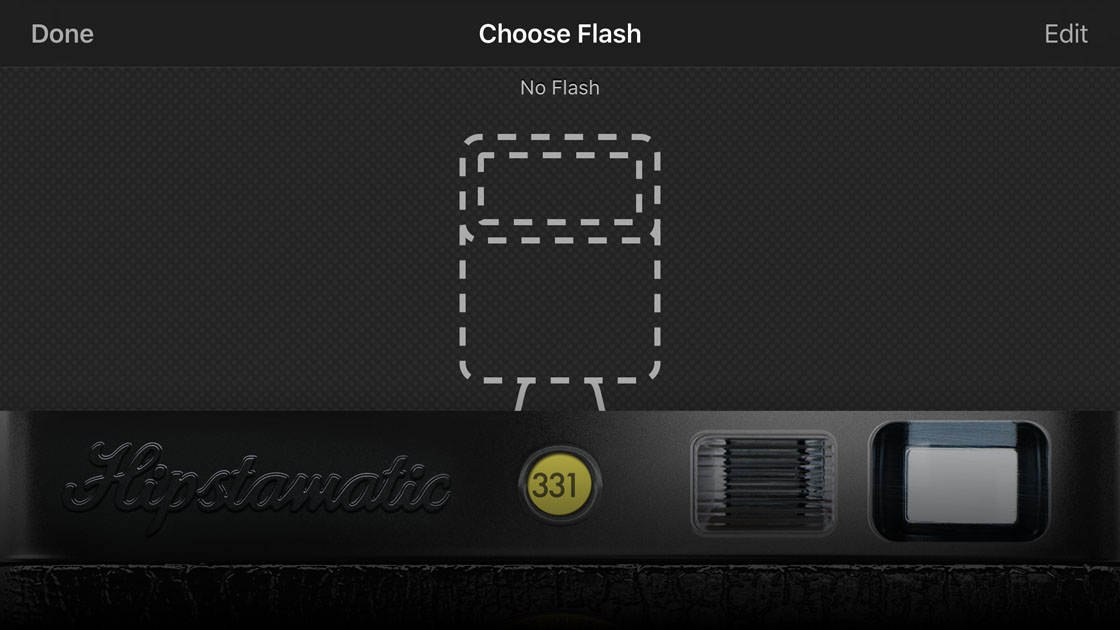
If you don’t want to use flash, select the No Flash option. Tap Done to return to the front camera view.
To purchase more lenses, films and flashes to add to your collection, tap the Shopping Cart icon (second from bottom right). Here you can view featured products or search for a particular item. To exit the shopping cart, tap Done:
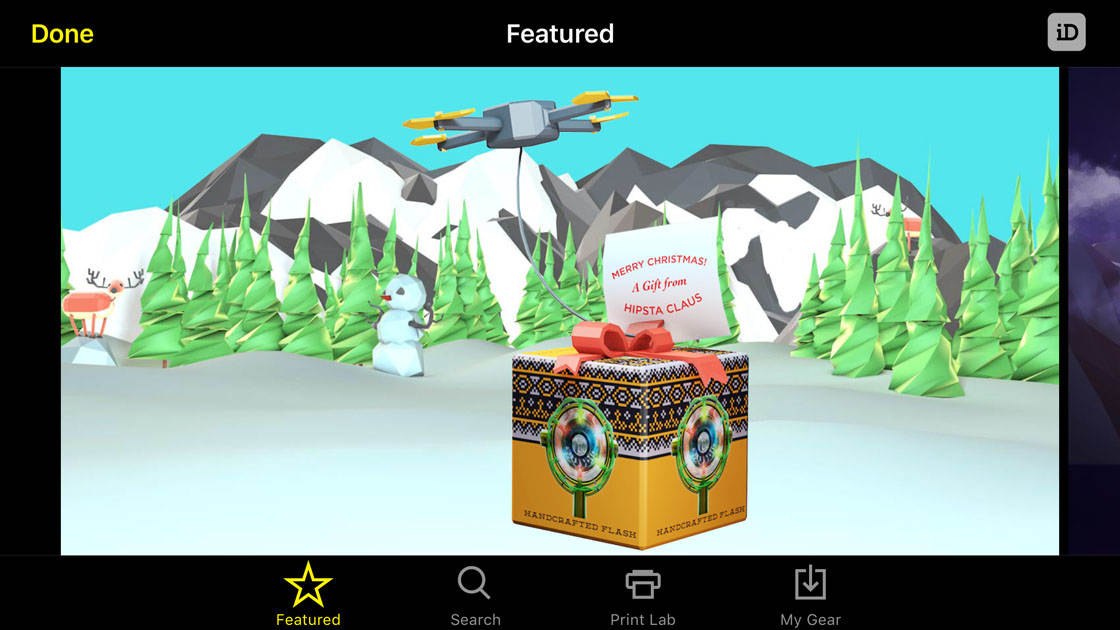
When you’re happy with the lens/film/flash combo that you’ve selected, tap the Flip icon (curved arrow at the bottom right) to switch to the back camera view, then start shooting!
3.3 Turn Flash On & Off
When you’re taking photos using the back camera view, you’ll notice a black slider beneath the square viewfinder. This allows you to choose whether the flash fires or not when you take a picture.
When the flash slider is in the middle, the flash will be switched off:
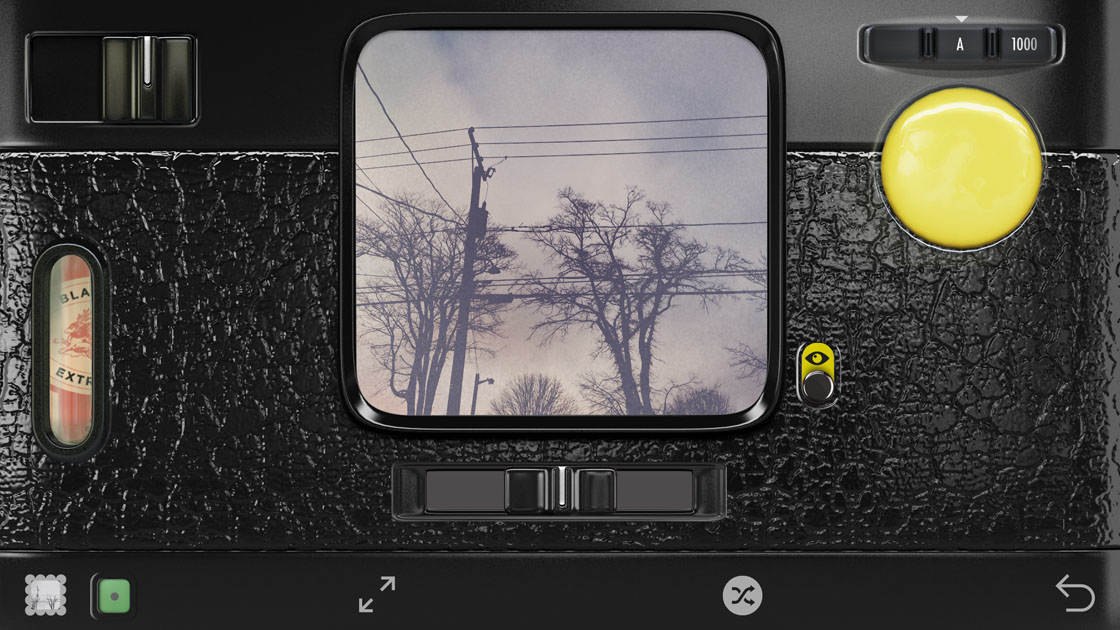
When the flash slider is moved to the left, your chosen flash effect will be applied to the photo, but the flash on the front of your iPhone won’t actually fire:
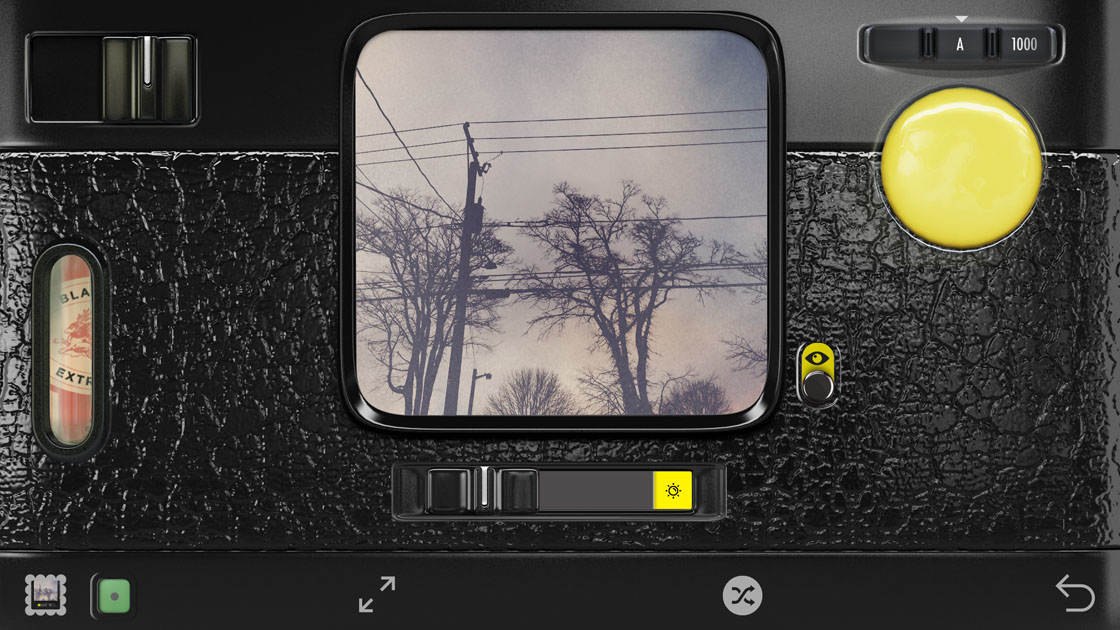
When the flash slider is moved to the right, your chosen flash effect will be applied to the photo, and the flash on the front of your iPhone will fire to provide more light on your subject:
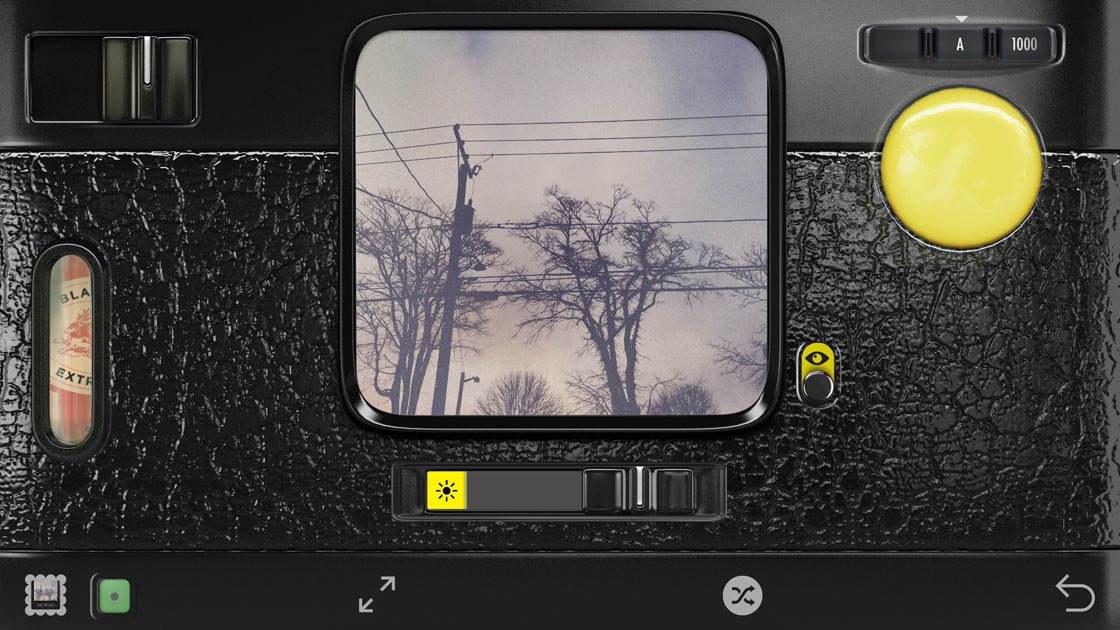
3.4 Adjust Shutter Speed
At the top right of the camera screen is the shutter speed dial. Adjusting the shutter speed does two things – it changes the exposure of the image (how bright it appears) and affects how movement is captured.
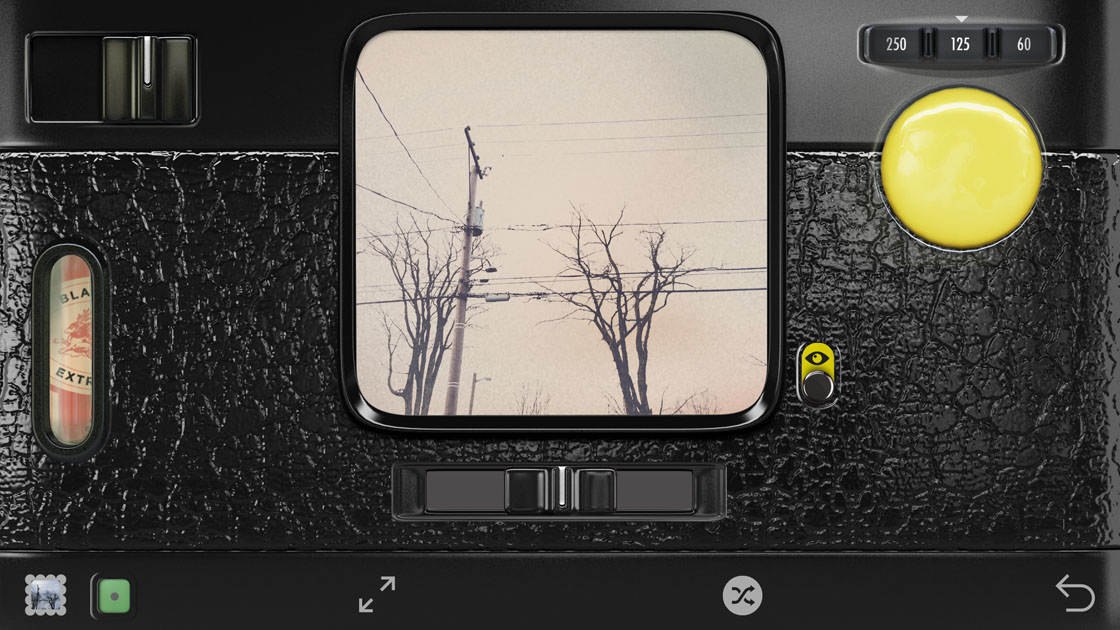
The lower the number on the dial, the slower the shutter speed will be. A slow shutter speed results in a brighter photo, and a fast shutter speed results in a darker image. In the photo below the shutter speed was set to 125 which brightened the image:
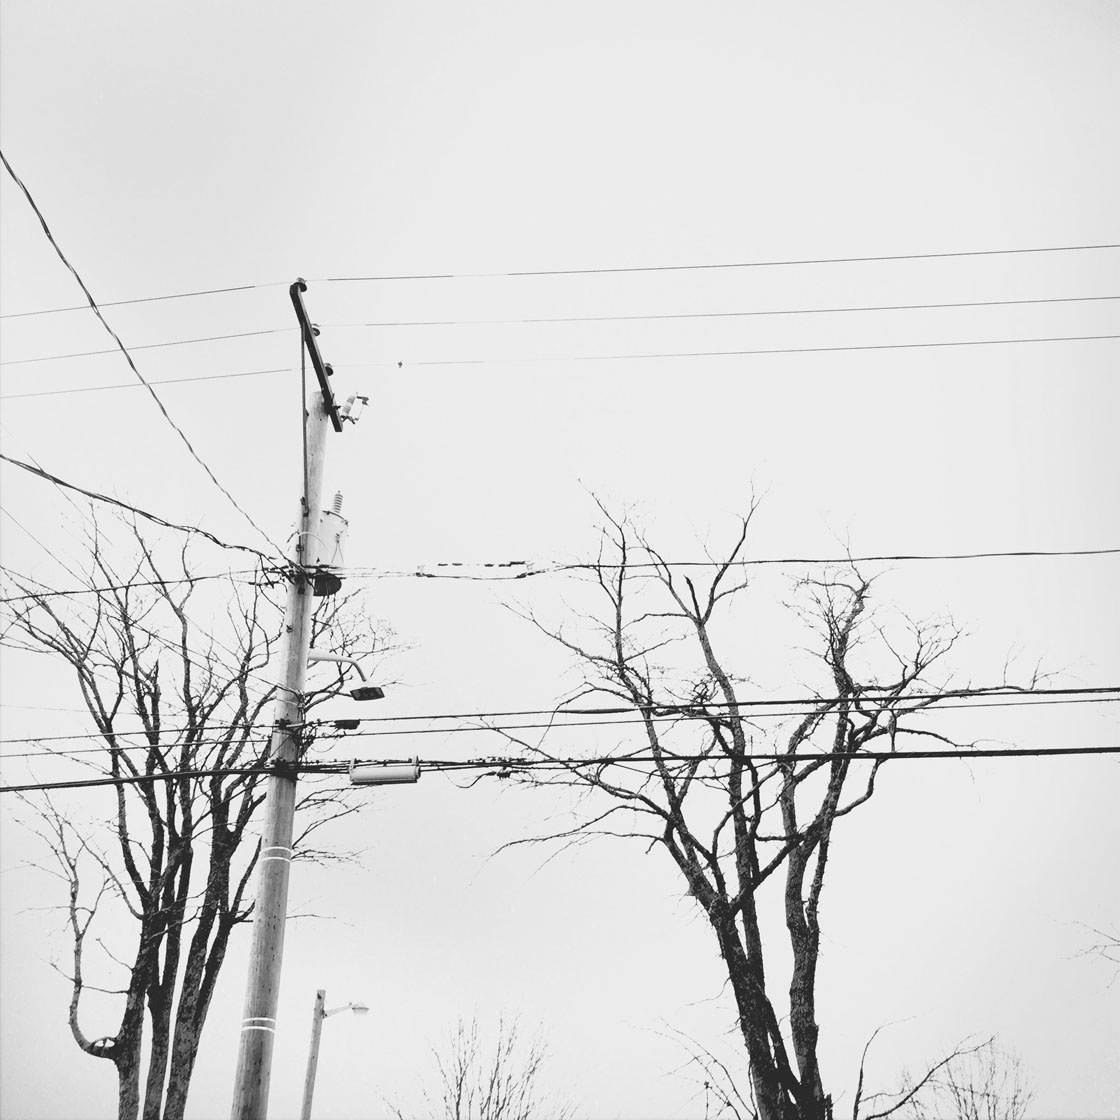
You may want to make use of this option to create artistically bright photos or very dark moody images.
If you’re shooting a scene with moving subjects, a fast shutter speed will freeze motion and a slow shutter speed will capture movement as a blur.
3.5 Create Multiple Exposures
Hipstamatic allows you to create interesting double exposure photos. You take two different pictures, and then the camera combines them together. This is a fun technique to use, and can result in some really intriguing fine art and abstract images.
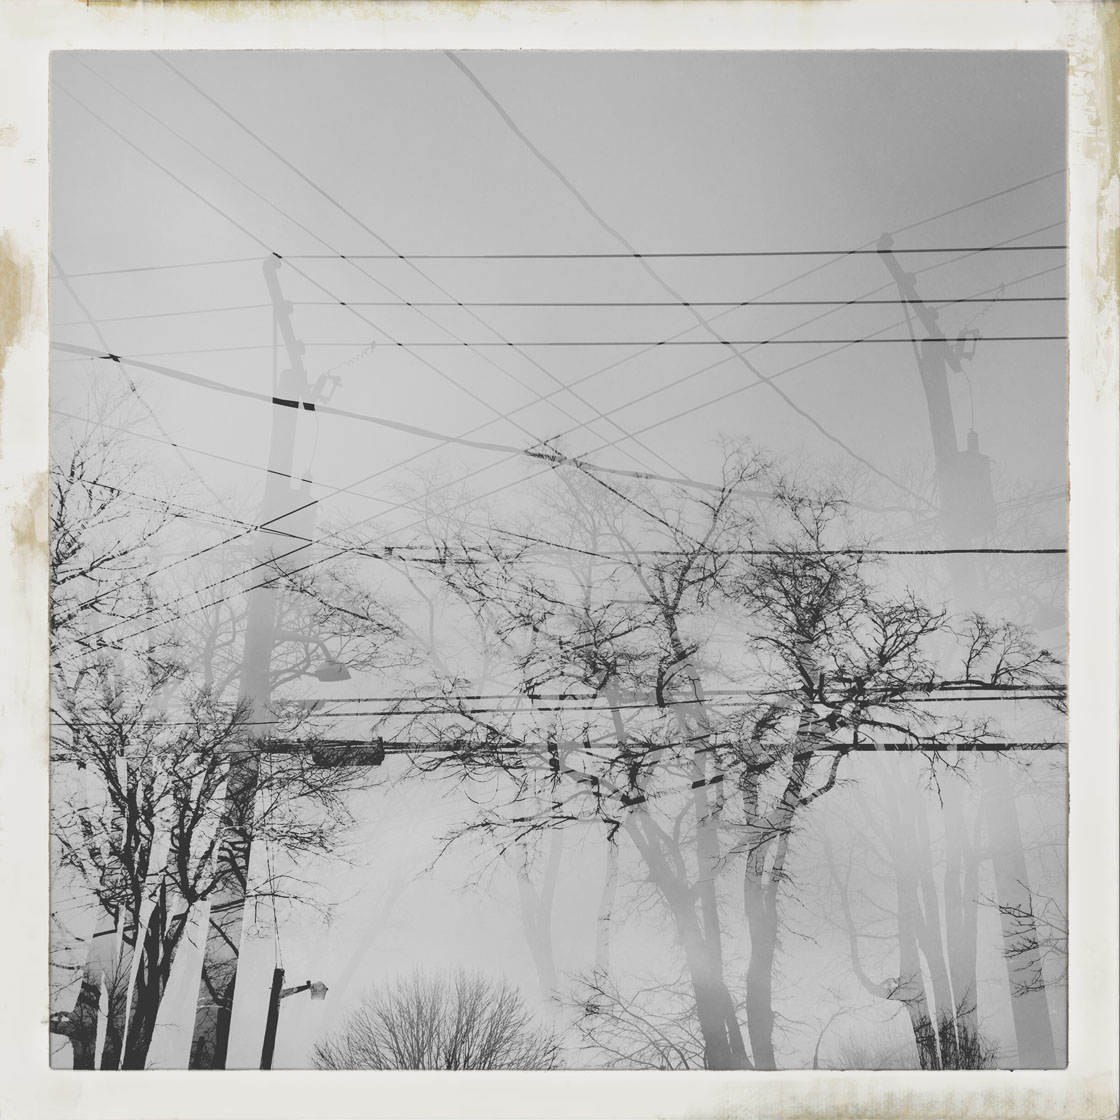
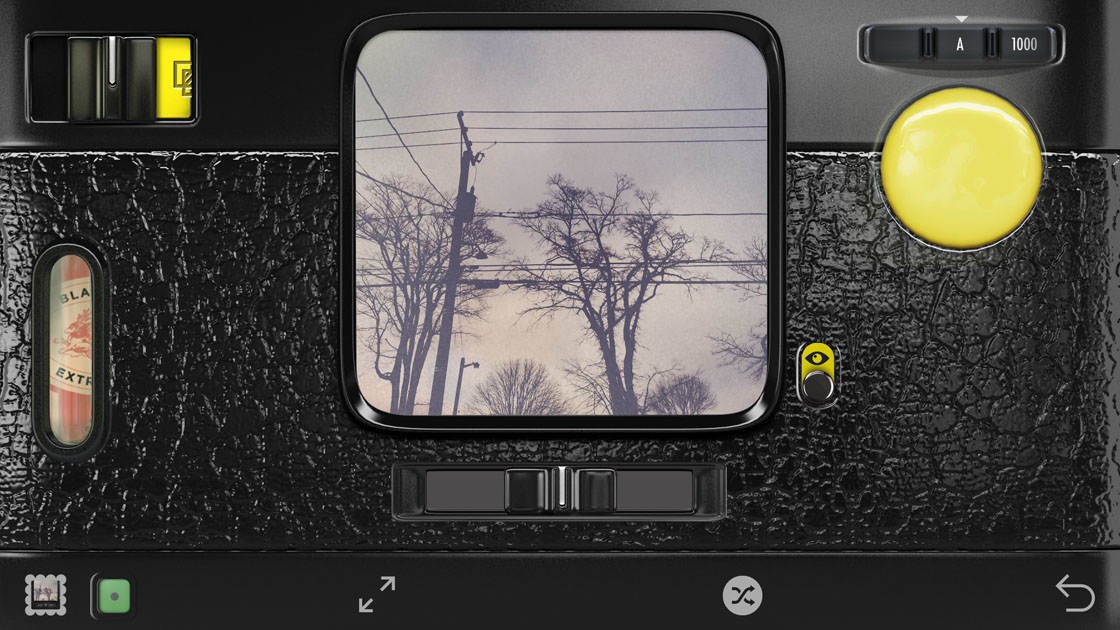
To create this kind of image, slide the Multiple Exposure switch (top left of the camera screen) to the left so that it turns yellow:
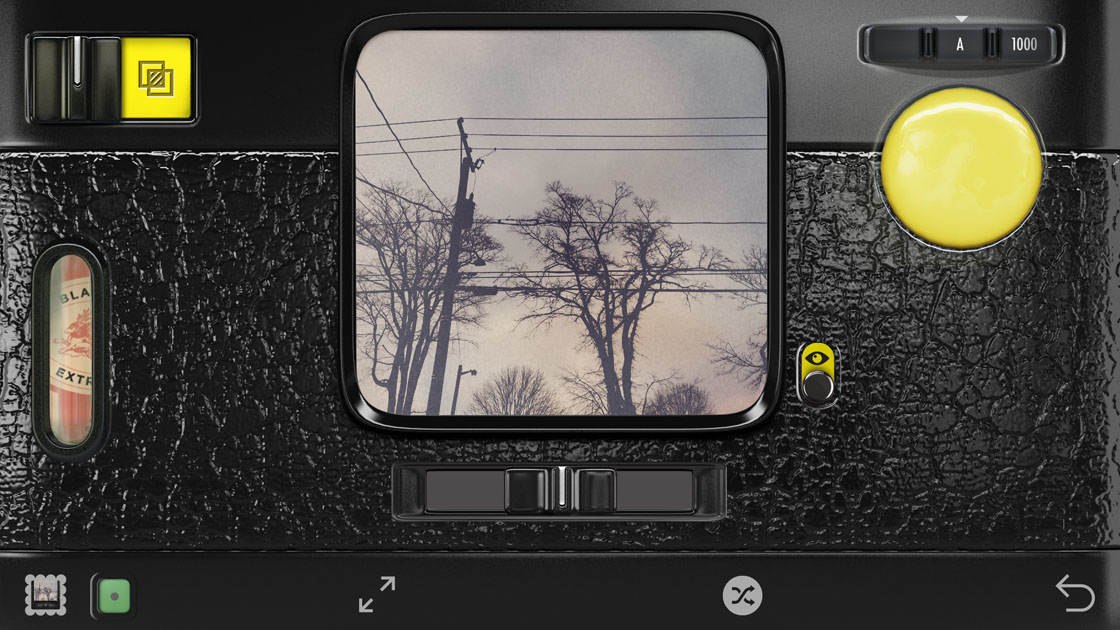
Take your first photo by tapping the yellow shutter button on the right. Notice that the Multiple Exposure switch has moved to the right so that only half of the yellow square is visible:
Aim your camera at a different subject or view, then take the second shot. You’ll see the “Multi Exposing” message appear while the app combines the two images together:
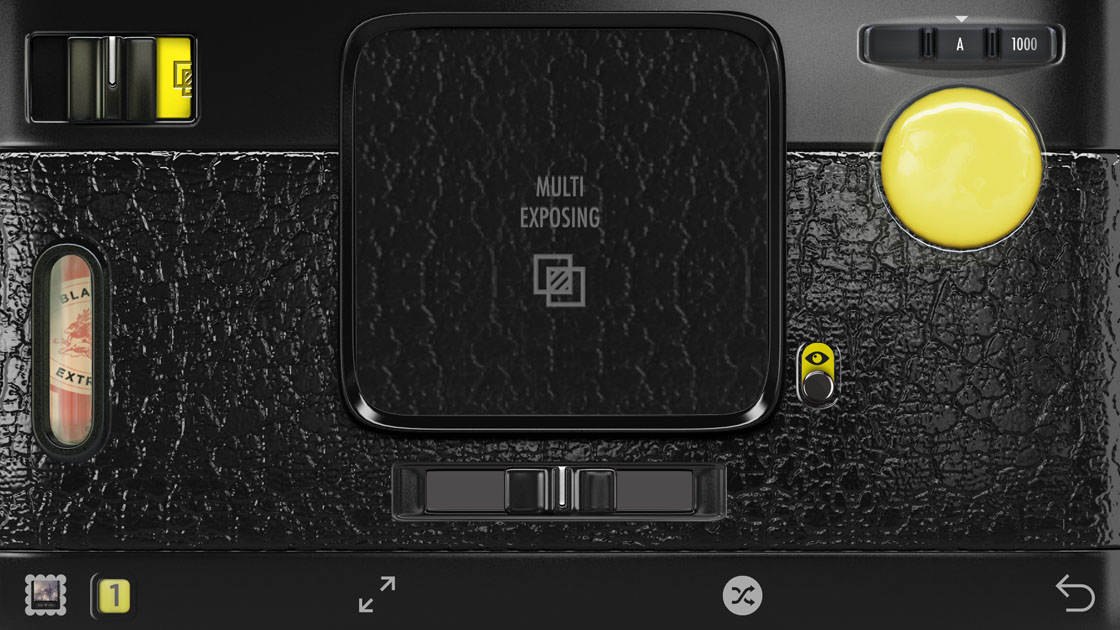
To view the double exposure photo in your gallery, tap the square image thumbnail icon at the bottom left of the screen. Tap the yellow bar at the top of the gallery to return to the camera.
Now that you’re familiar with the features of the Classic camera interface, let’s explore how to shoot photos using the Pro camera mode.
4. Shoot With Hipstamatic Pro Camera
Hipstamatic’s Pro camera mode offers an advanced camera app that gives you more manual control when shooting photos.
If you’re currently using the Classic camera mode, switch to the Pro camera interface by tapping the two opposing arrows at the bottom of the screen:
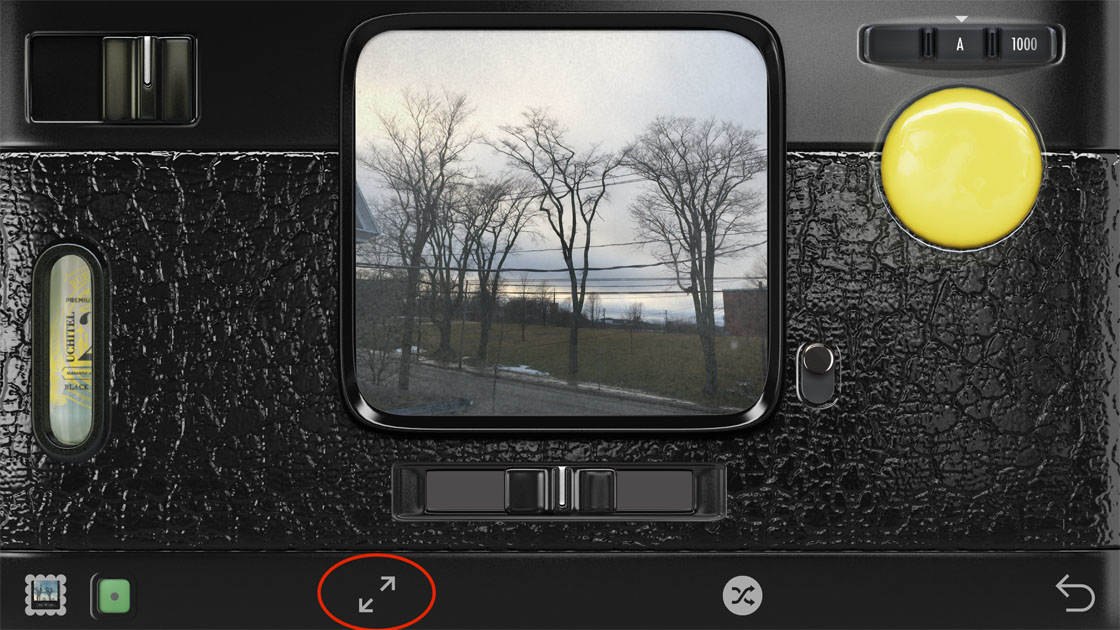
The Pro camera interface looks very different to the Classic interface. It doesn’t have any retro styling, and it has a larger rectangular viewfinder with icons around the edges:
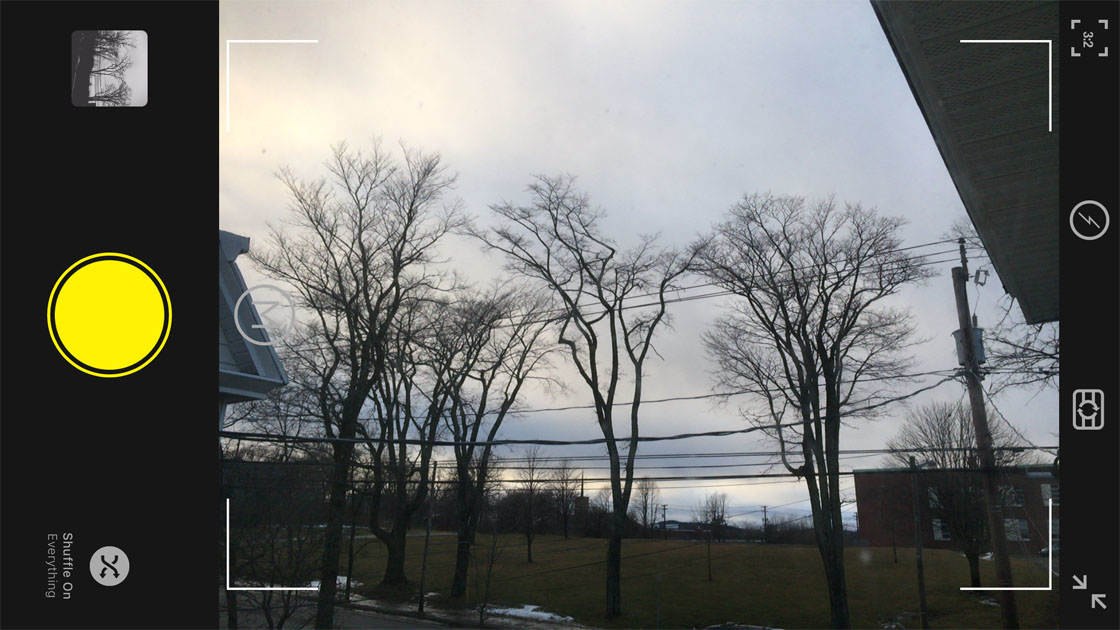
Let’s start using these camera icons to customize the final image. If you’re holding the camera in landscape orientation as shown here, the top right icon allows you to change the Aspect Ratio:
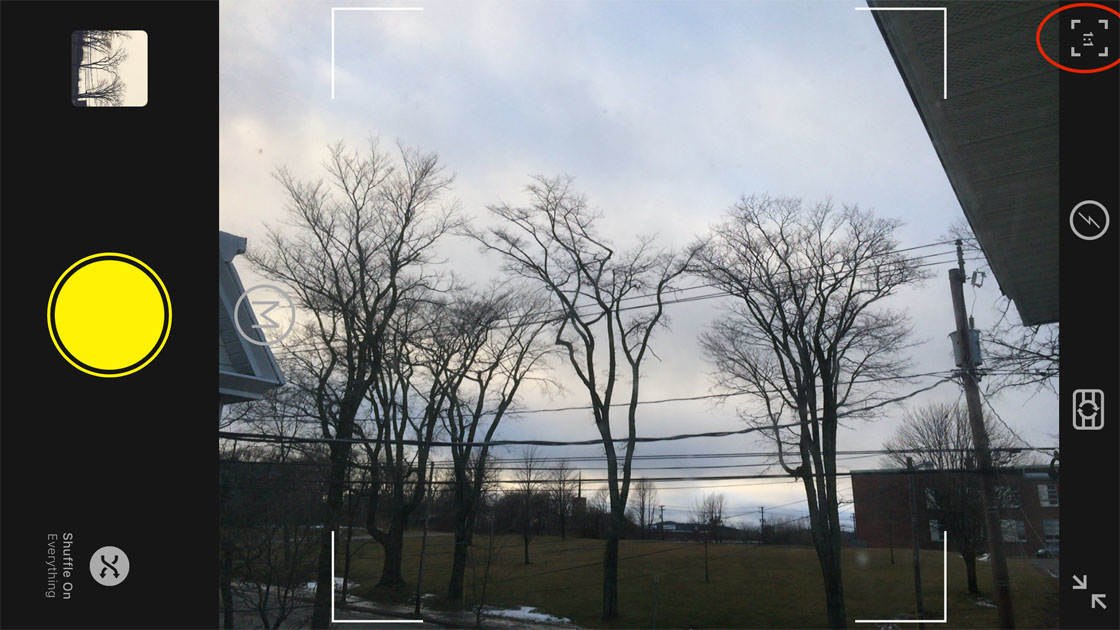
Aspect Ratio determines the relative width and height of the image. Selecting the 1:1 ratio will result in a perfect square image, whereas the 16:9 ratio will be much wider than it is tall.
The next icon on the right allows you to try out different flash options, including Flash On, Flash Auto, and Constant Light:
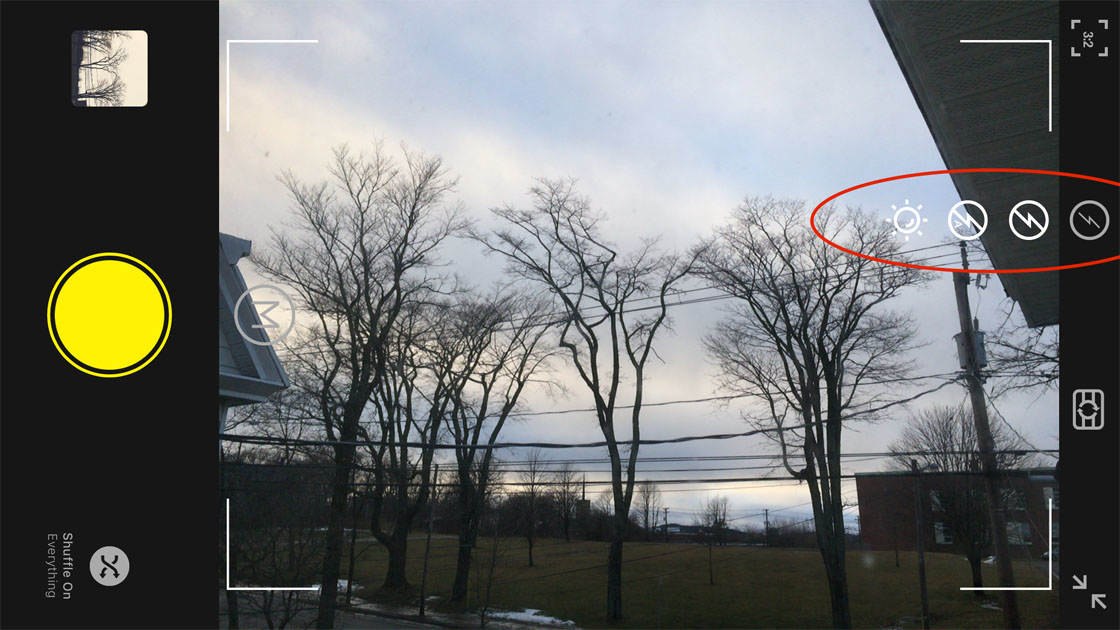
The icon below the flash allows you to switch to the front-facing camera so that you can take a self-portrait. At the bottom right of the screen are the two opposing arrows which would take you back to the Classic retro style camera.
The icon at the bottom left of the screen allows you to select which lens/film/flash combo you want to use – just like you did when using the Classic camera mode:
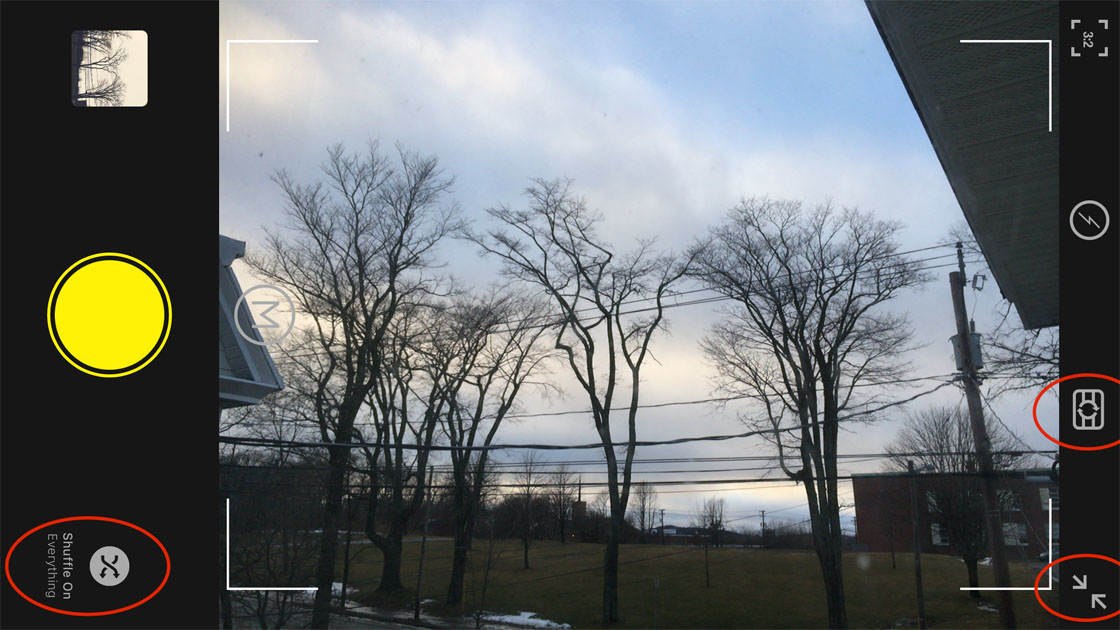
After tapping this icon, swipe through the different combos until you find an effect you like, or tap the plus (+) icon to create a new combo. Tap on the combo you want to use to return to the camera:
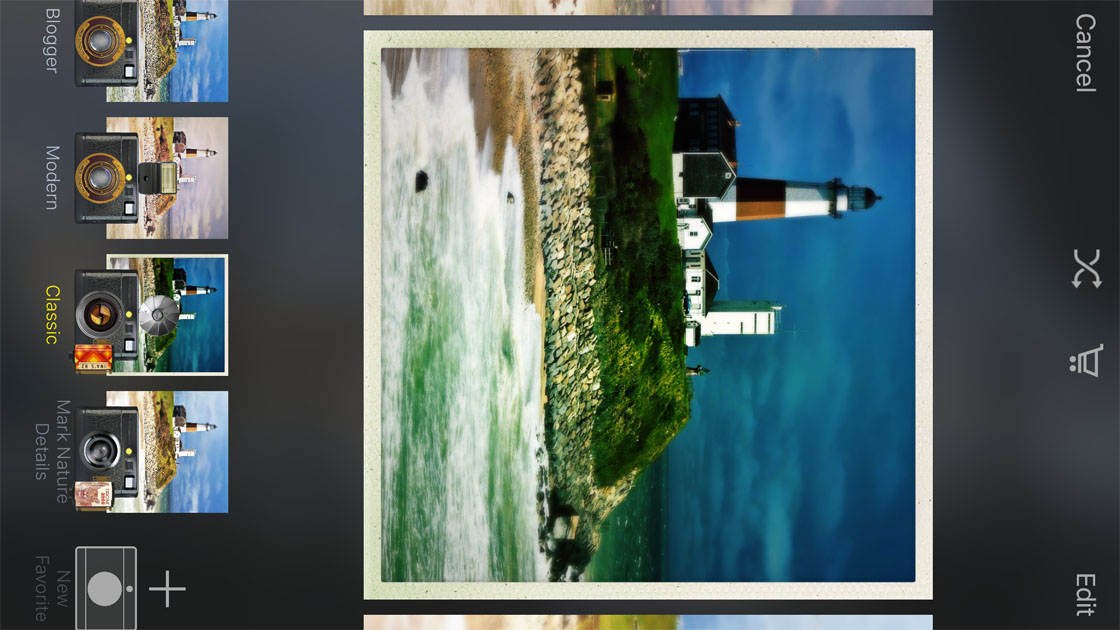
The “M” icon (to the right of the shutter button as shown below) stands for Manual, and it allows you to fine-tune the camera settings before taking your shot:
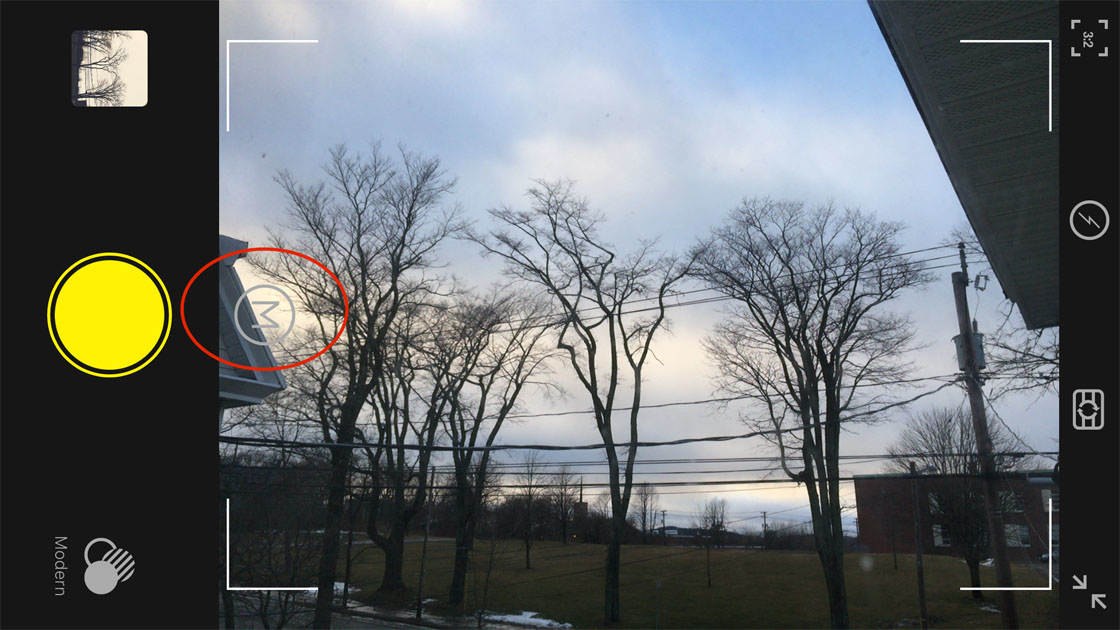
When you tap the Manual (M) icon a bar of icons will appear in its place:
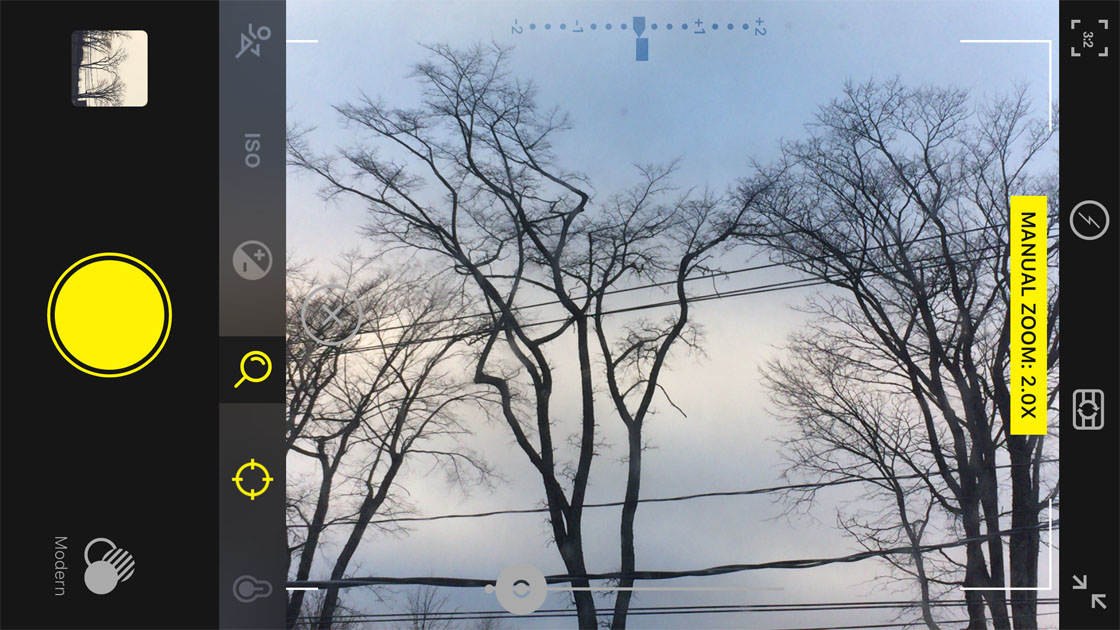
The round target icon allows you to adjust focus manually. And the magnifying glass icon lets you zoom in. Both settings are adjusted using a slider at the bottom of the screen.
The +/- icon activates the exposure slider which lets you adjust the exposure up or down for brighter or darker images:
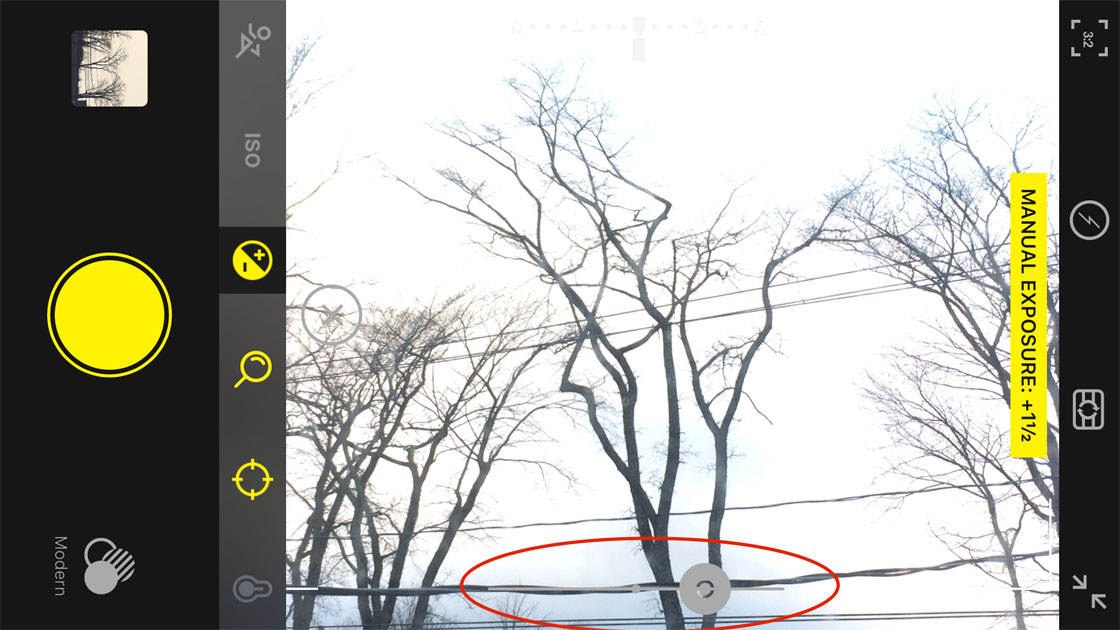
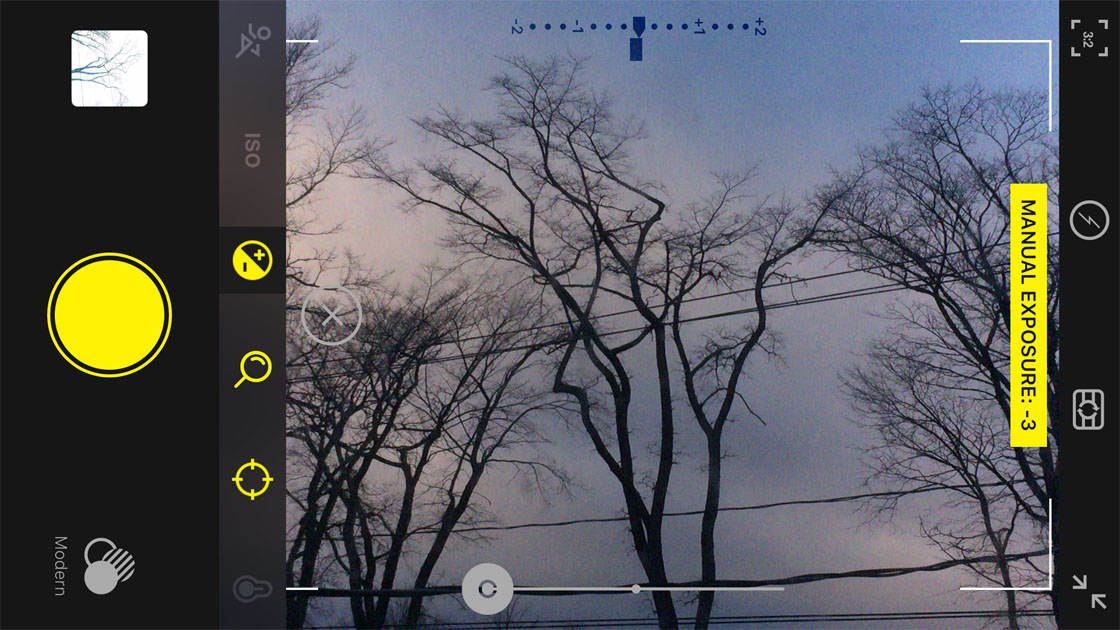
And now for the fun part! The ISO and Shutter Speed (running man icon) settings allow you to control exposure and how movement appears in your photo:
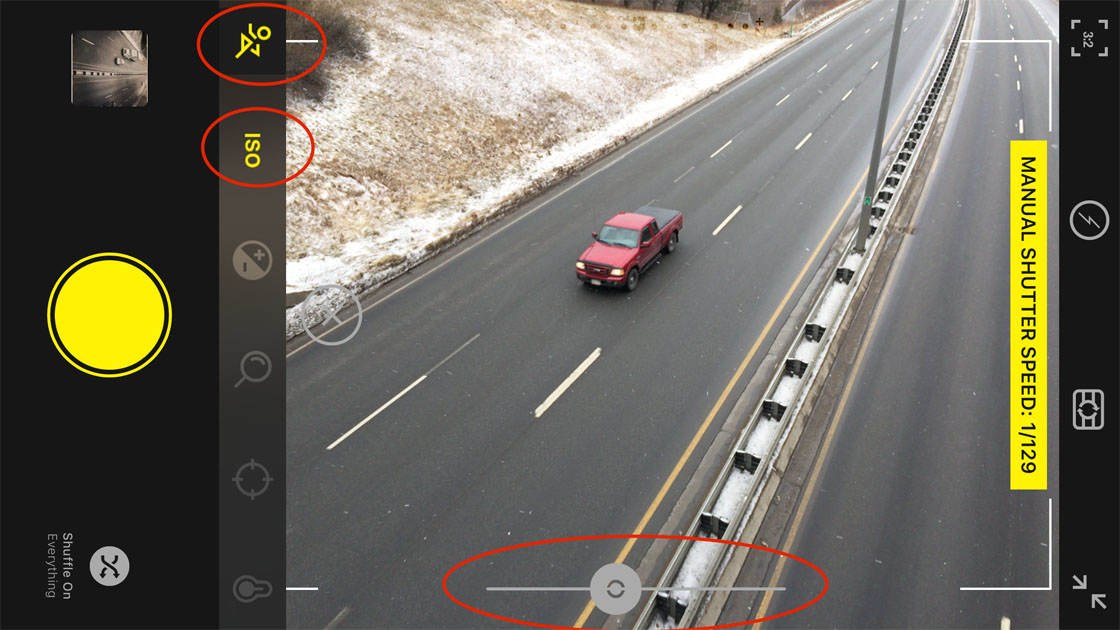
To create motion blur when photographing a fast moving subject, you’ll need a slow shutter speed and a low ISO (a low ISO helps to prevent the image from being over-exposed).
Start by tapping the ISO icon, and use the slider to reduce the ISO to the lowest number possible. Then tap the Shutter Speed icon (running man) and move the slider to reduce the shutter speed so that the scene appears almost too bright.
The reason for this is that the brighter the image, the slower the shutter speed, which equals more motion blur of moving objects.
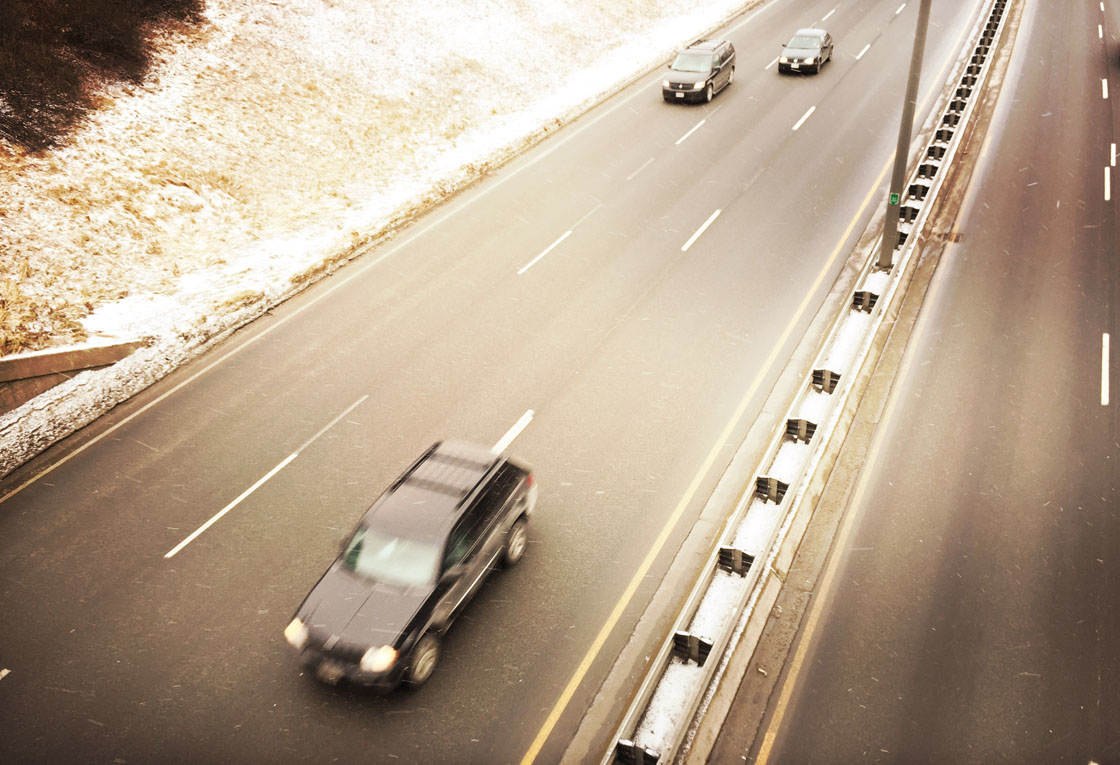
If you’re shooting in bright daylight conditions, you may find that your slow shutter images appear far too bright. It’s usually better to shoot around dawn or dusk, or on dark overcast days, to capture good quality show shutter photos.
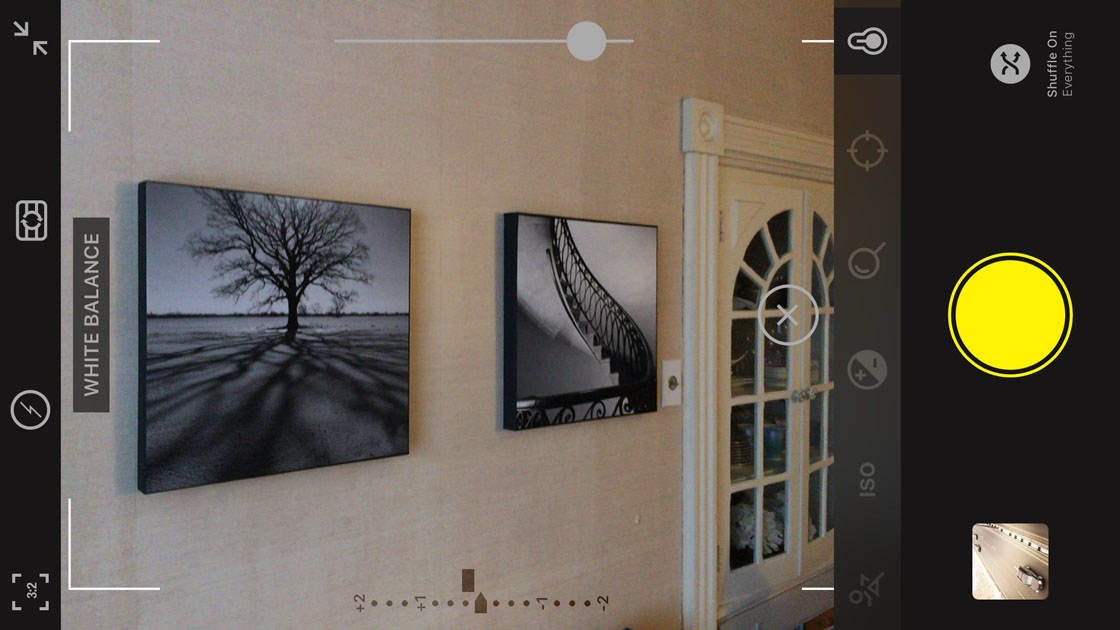
The last manual camera feature is White Balance (light bulb icon) which allows you to adjust the color temperature on a scale from blue to yellow:
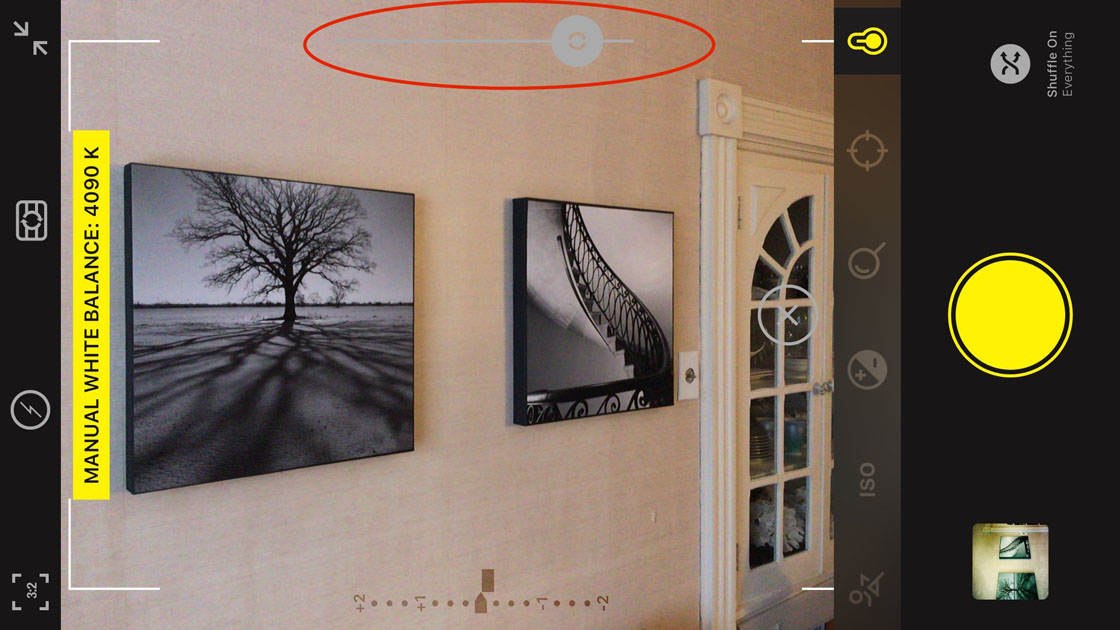
White balance allows you to warm up or cool down the colors, either to achieve perfect color balance or for creative effect. Drag the slider left to make the colors warmer (more yellow), and drag right to make them cooler (more blue):
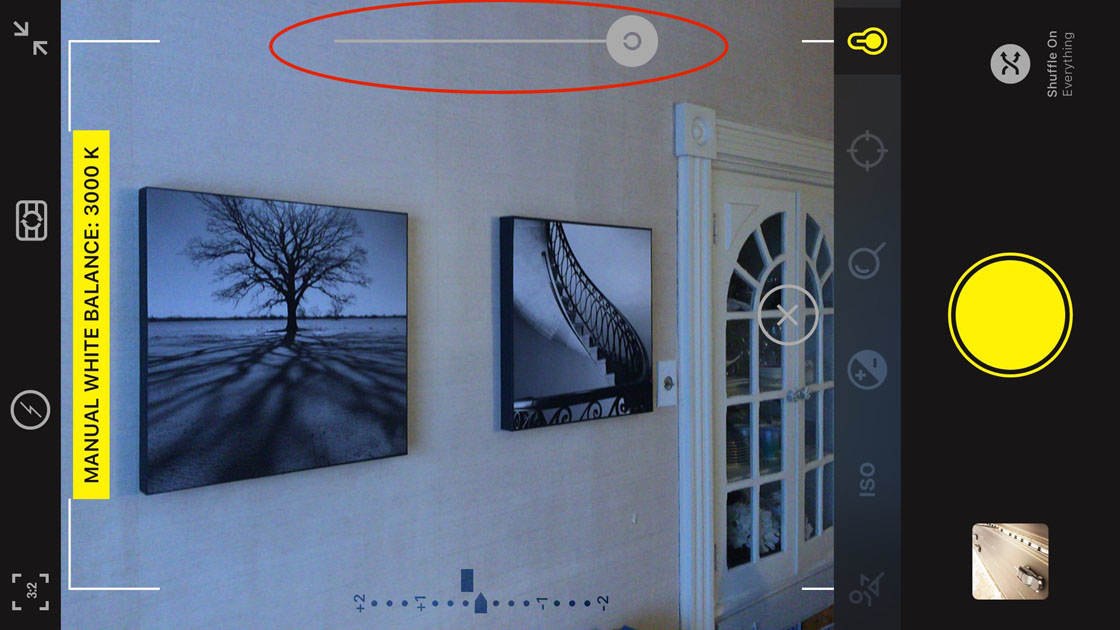
This is a really useful setting for indoor shooting situations where the scene is illuminated by artificial light with a yellow color cast. Simply drag the White Balance slider until you’re happy with the color tone in the viewfinder:

5. Edit Photos In Hipstamatic
Hipstamatic isn’t considered a professional grade photo editor. However it certainly has a lot of user-friendly editing features that allow you to get your photo just right, including the ability to select a different combo of lens, film and flash than you used for shooting.
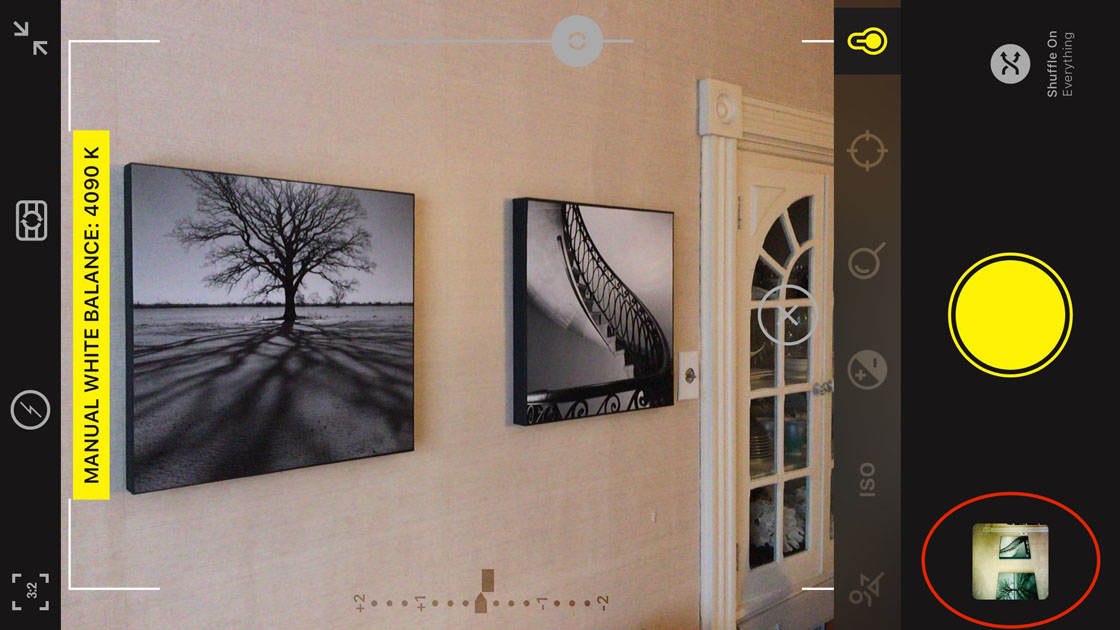
To access the editing mode, regardless of whether you’re using the Classic camera or the Pro camera, tap on the square image thumbnail that shows the last photo taken:
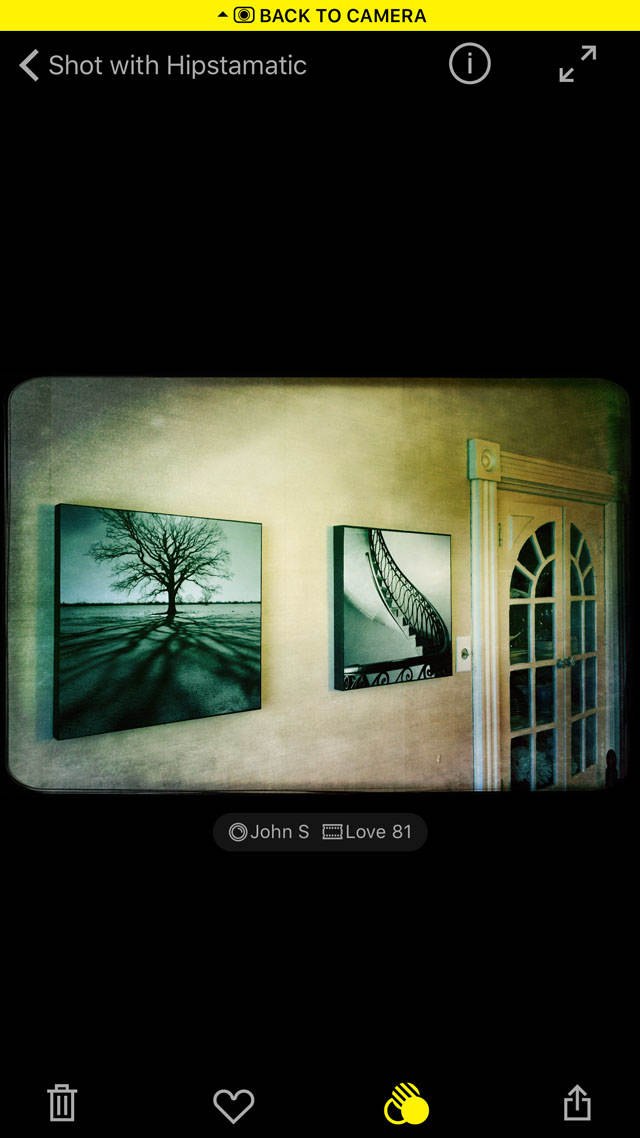
In your photo gallery tap the image you want to edit, then tap the Edit icon (three circles) at the bottom of the screen:
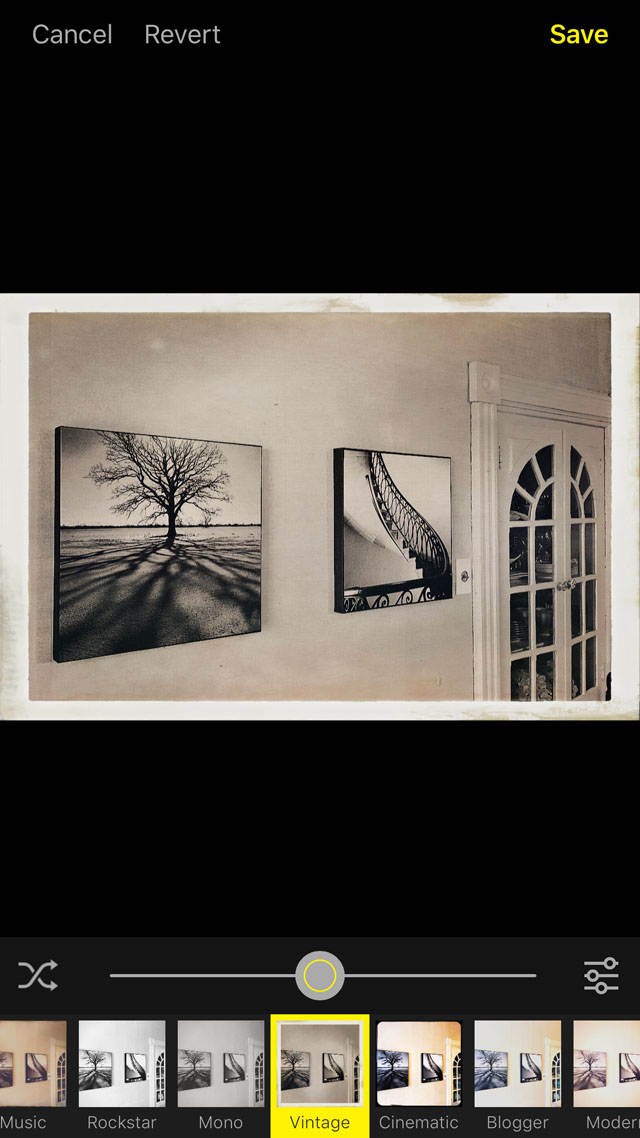
Swipe across the preset combos at the bottom of the screen, tapping on any that you like to see what effect it has on your photo. Once you’ve selected a preset that you like, use the slider to adjust the intensity of the effect until you’re happy with the final result. Tap Save when you’re done:
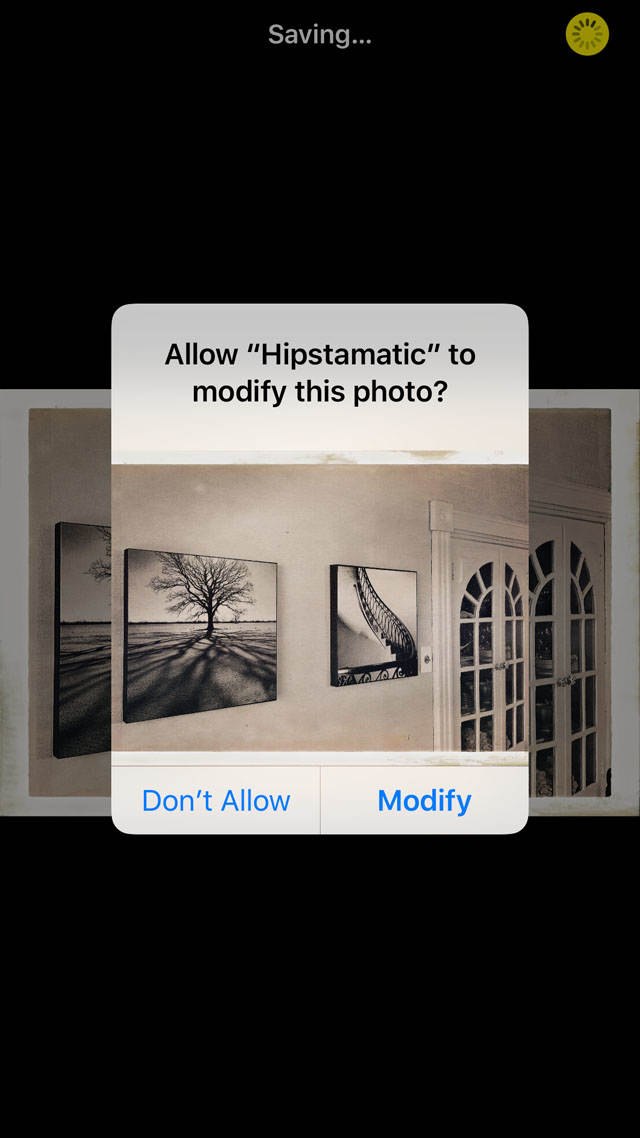
If you see the following prompt, tap Modify to allow the changes to be applied to your image:
In addition to the one-tap presets, there are a number of other editing options that you can use to enhance your photo. Tap the Edit icon (three circles), then tap the Adjustments icon (three sliders) located just above the Settings icon.
Beneath your photo you’ll see a row of icons which can be used to fine-tune and edit the image. The first icon allows you to select a different Lens. Changing the lens will alter the colors and tones in your photo:
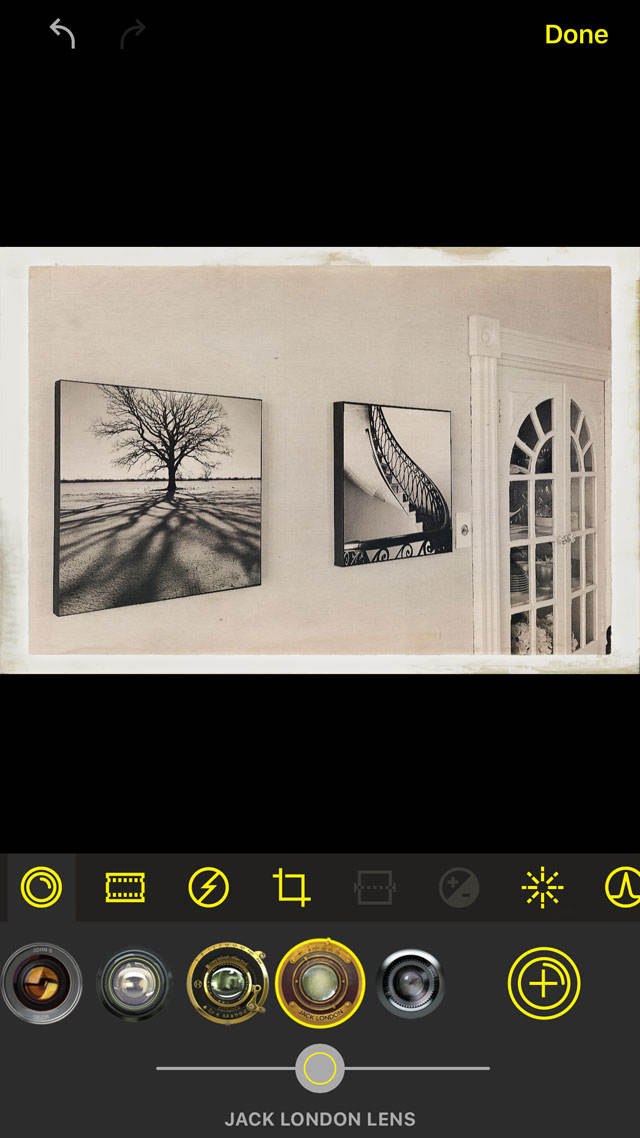
Use the slider at the bottom of the screen to adjust the intensity of the lens effect.
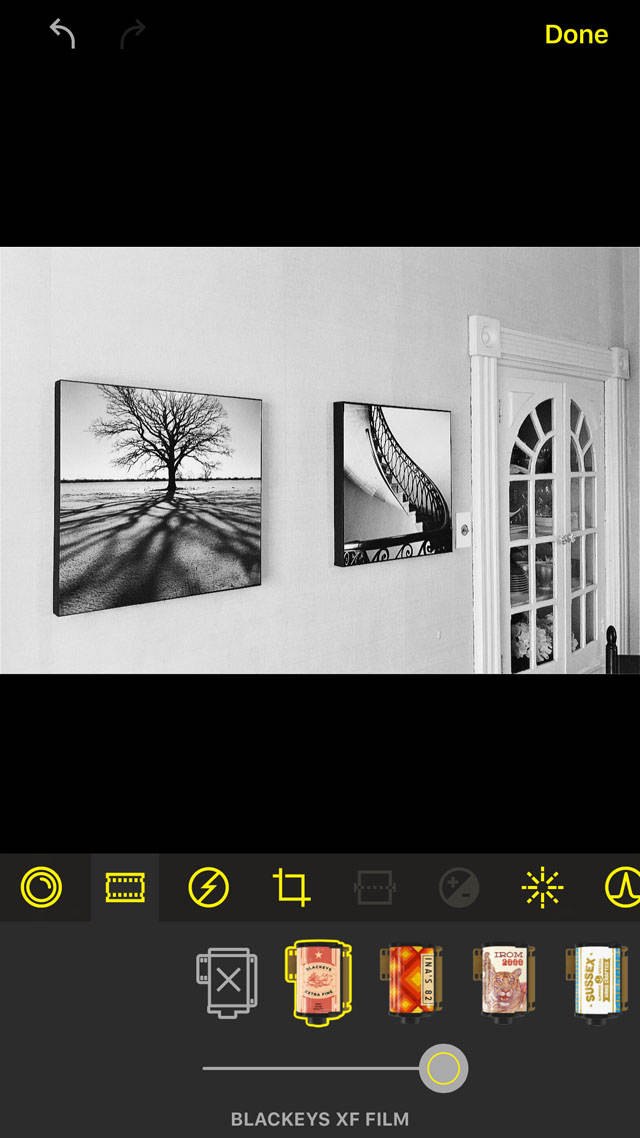
The second icon lets you choose a different Film. The film affects the frame or vignette around the edge of the photo, and it may also change the tones in your image:
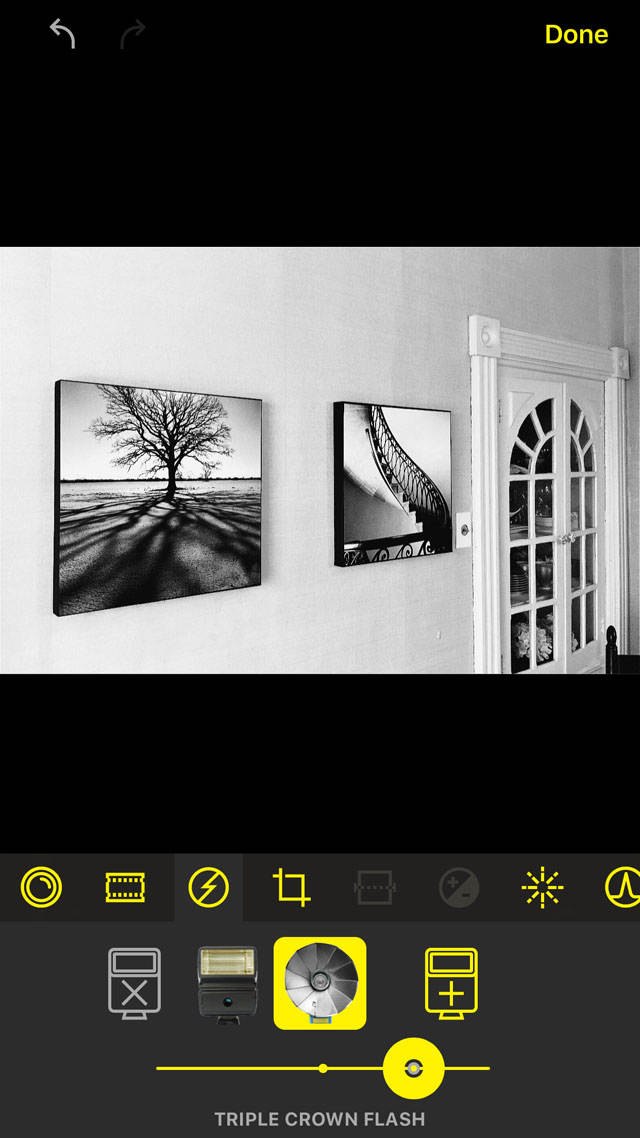
The third icon is for selecting a different Flash option:
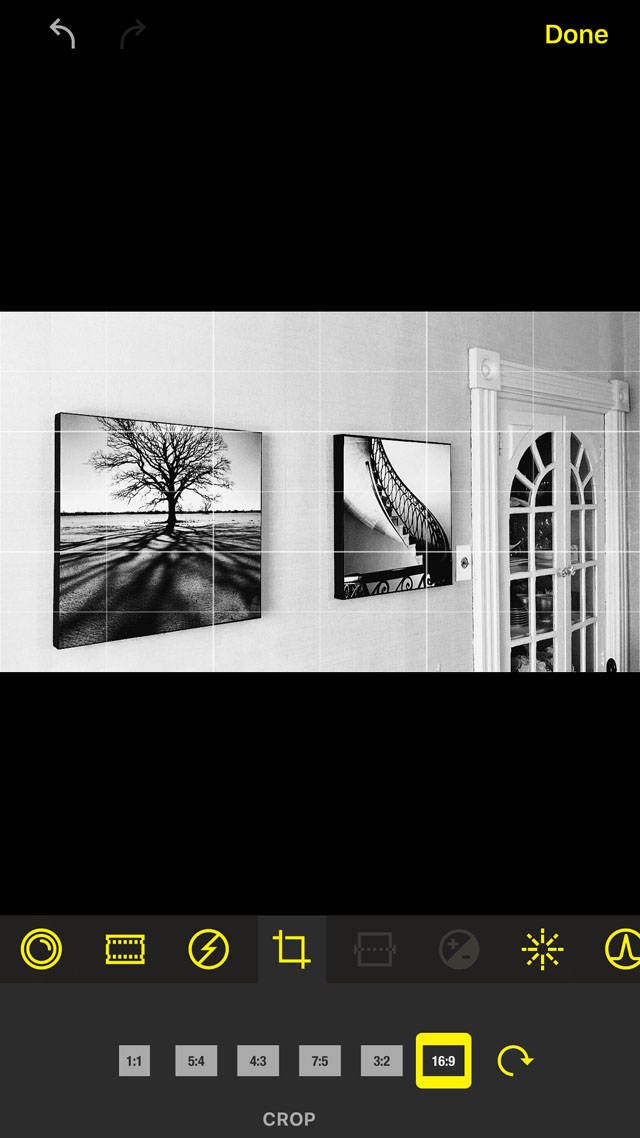
The next icon lets you Crop the image to a different aspect ratio, e.g 1.1. (square), 3:2 (normal 4×6 print ratio), 16:9 (wide angle), etc:
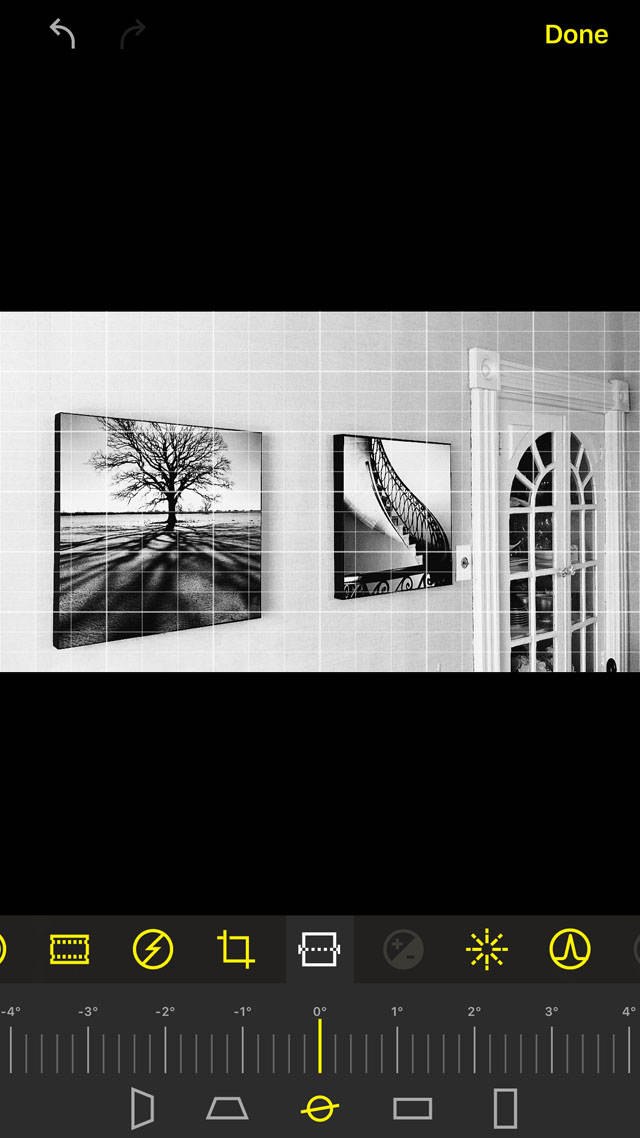
Next up is the Straighten Tool. This is great for leveling horizons and correcting perspective distortion:
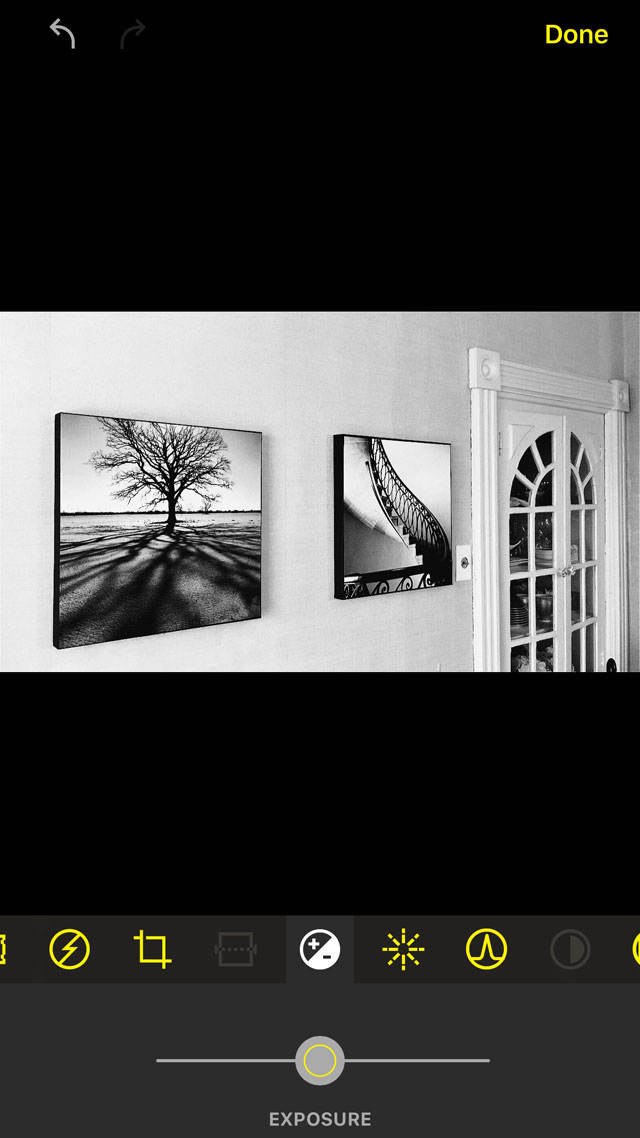
The +/- icon is the Exposure Tool. Move the slider left or right to darken or brighten your image.
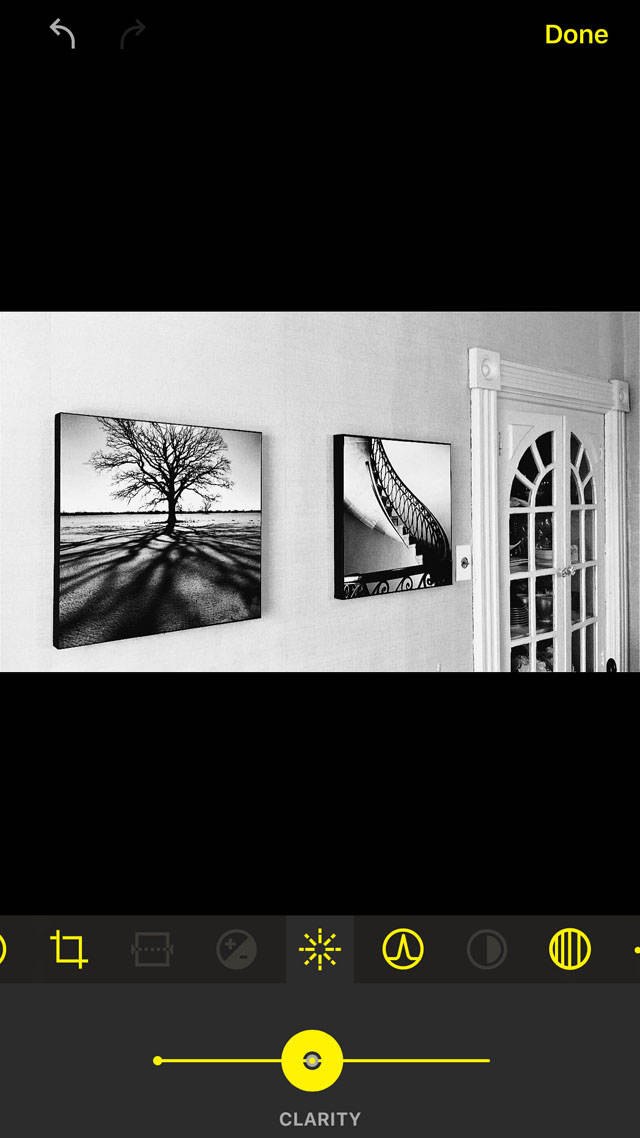
The next icon is Clarity. This tool can really make your image “pop” and it’s great for adding some grittiness to your photo. Use the slider to adjust the strength of the effect:
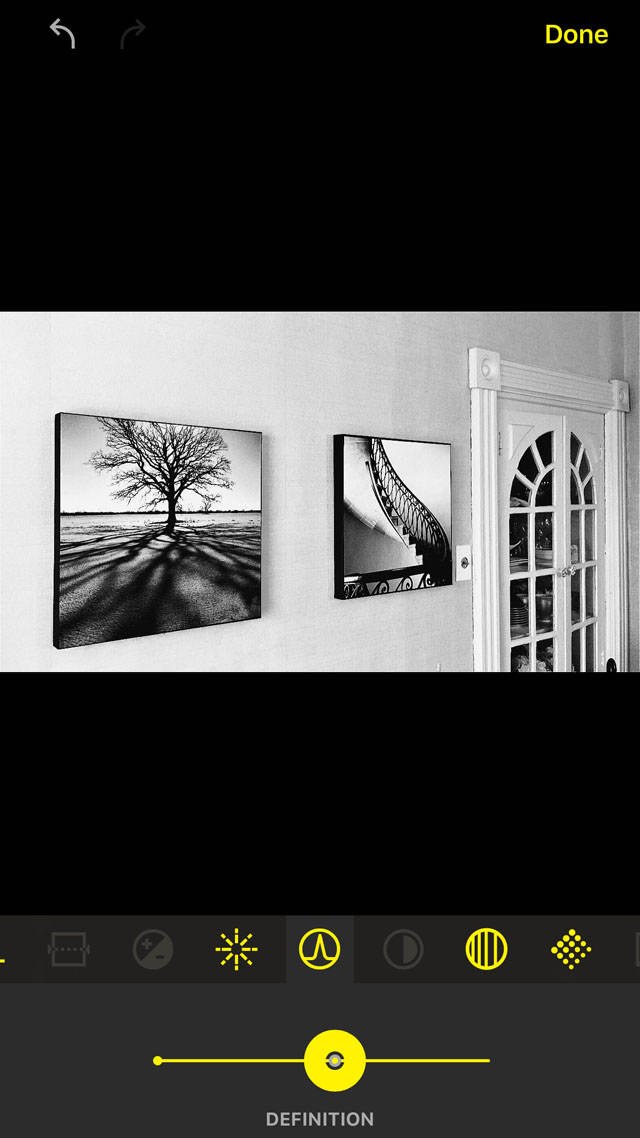
Next is the Definition Tool, which is similar to Clarity, but relies more on sharpening contrasty areas such as the places where dark areas meet light areas. This tool is great for sharpening detail in your photo:
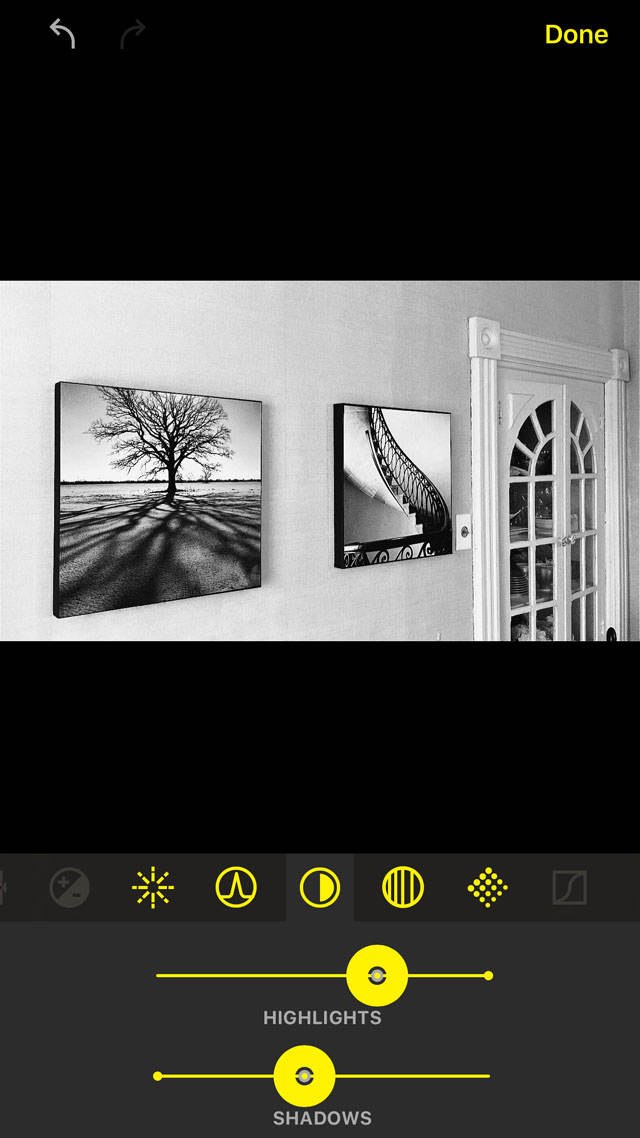
Highlights & Shadows lets you independently adjust the brightness of the shadows (dark areas) and the highlights (bright areas):
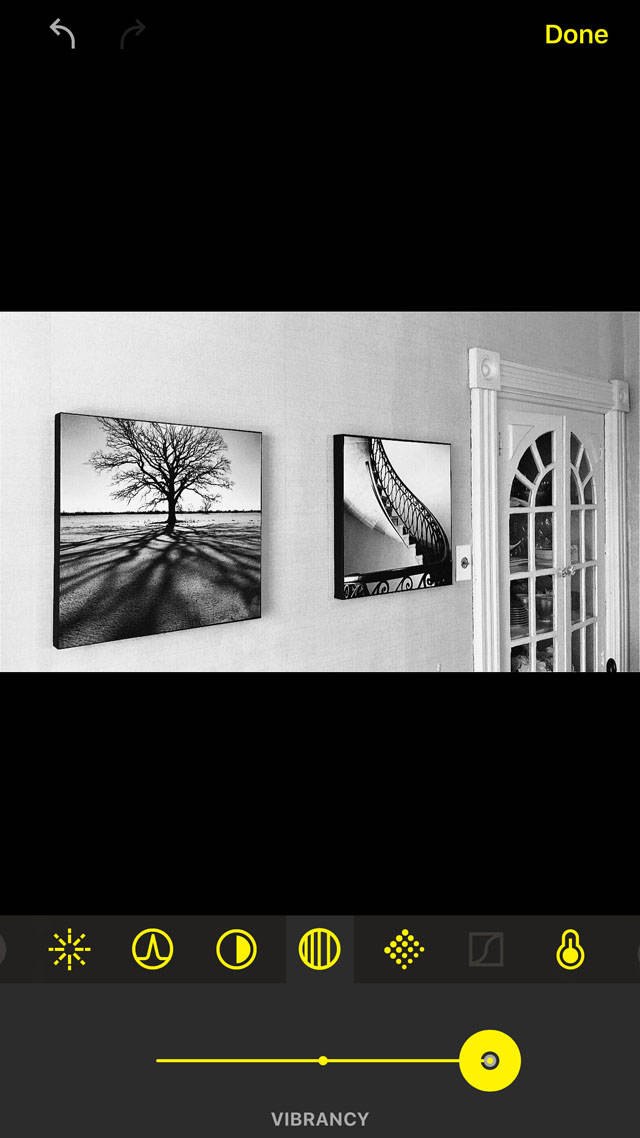
The next icon is Vibrancy which punches up colors in a more realistic way than simply increasing a photo’s saturation. This tool won’t have much effect if your photo is black and white:
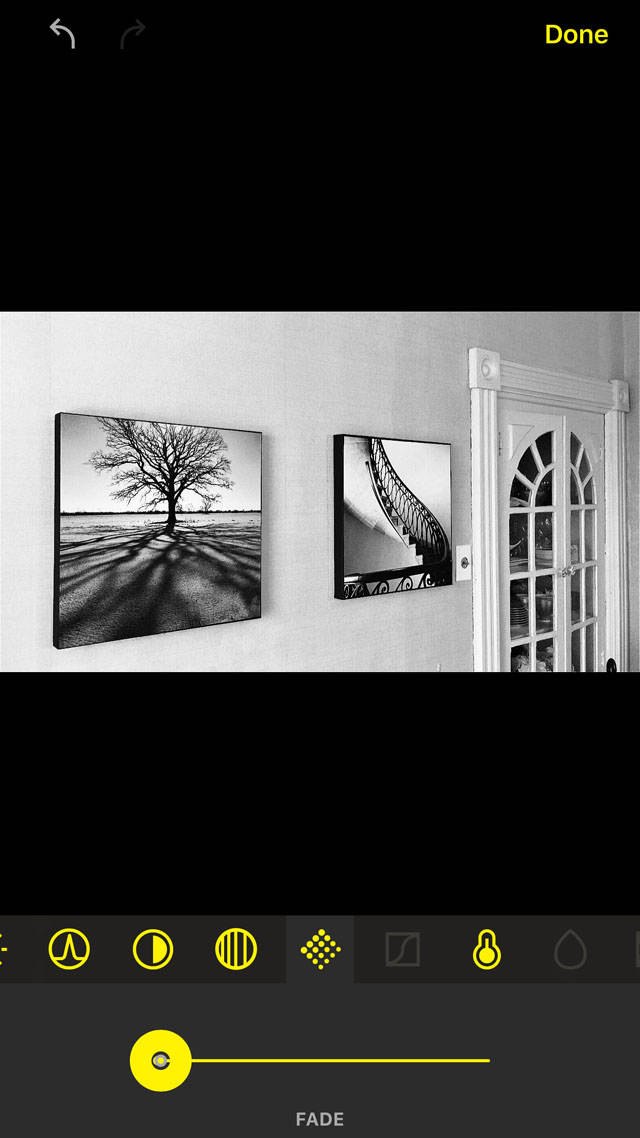
Fade reduces contrast and removes the “punchiness” of an image. I didn’t fade this photo as I wanted to maintain the contrast between shadows and highlights, so I made sure the slider was set to the far left:
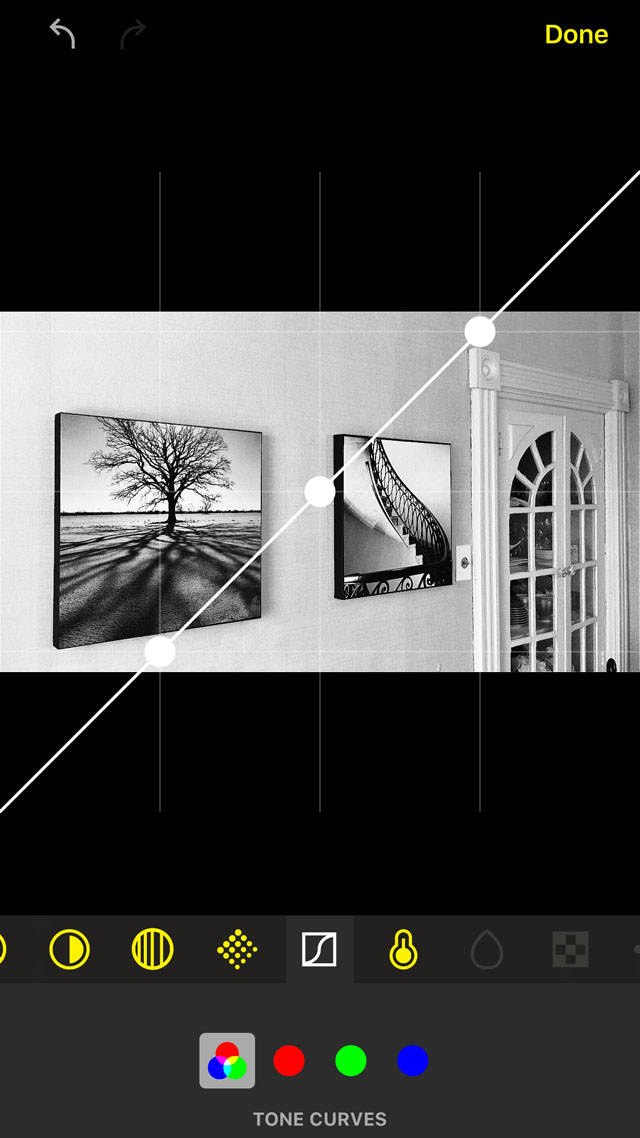
The Tone Curves Tool allows you to adjust the shadow, midtone and highlight areas of your photo. Simply press on any of the three white circles and drag them to a different position:
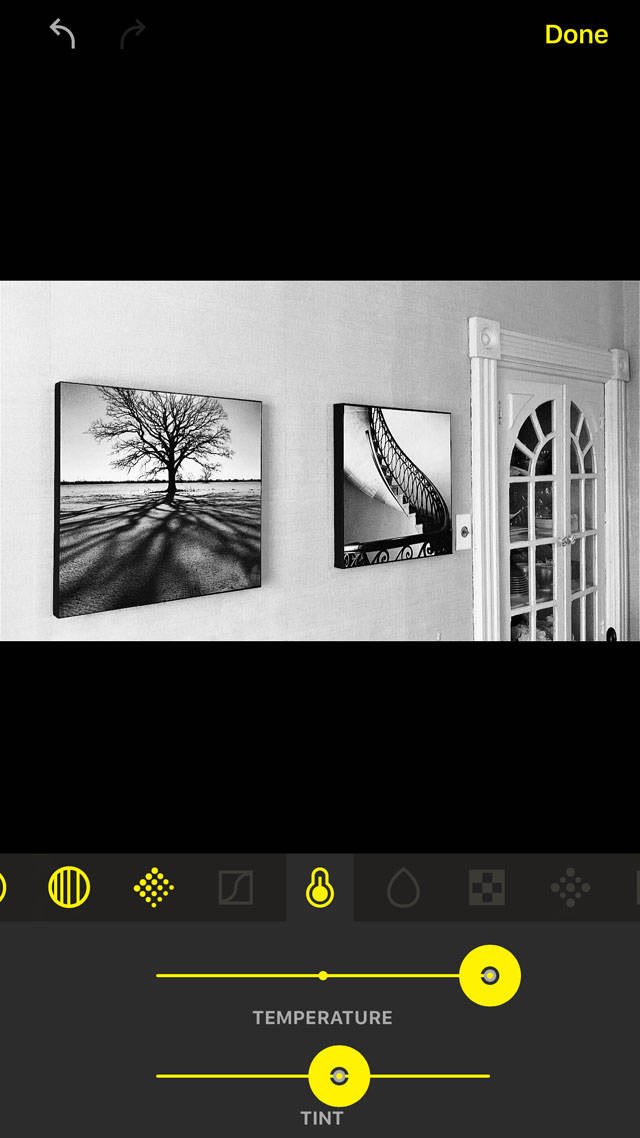
The White Balance Tool lets you change the color tones in your photo. The Temperature slider goes from blue to yellow, and the Tint slider goes from green to magenta:
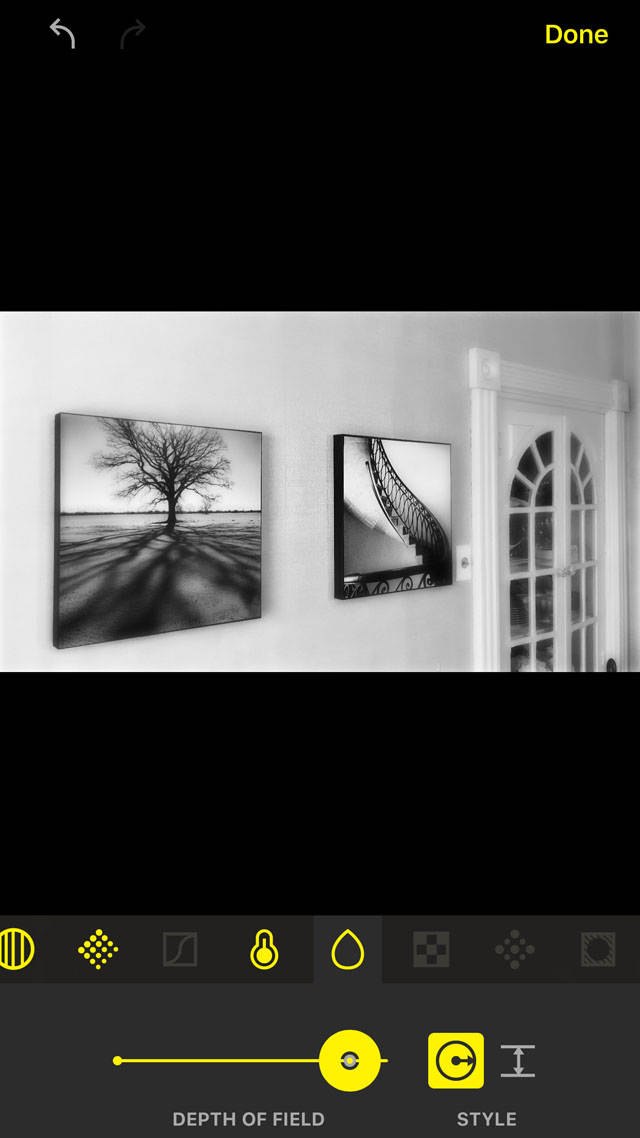
The Depth of Field Tool offers a lens blur effect. It replicates high-end camera lenses that allow for a beautifully shallow depth of field where the subject is sharp while everything else appears blurred. You can choose a radial/circular blur, or a blur that works in a linear manner:
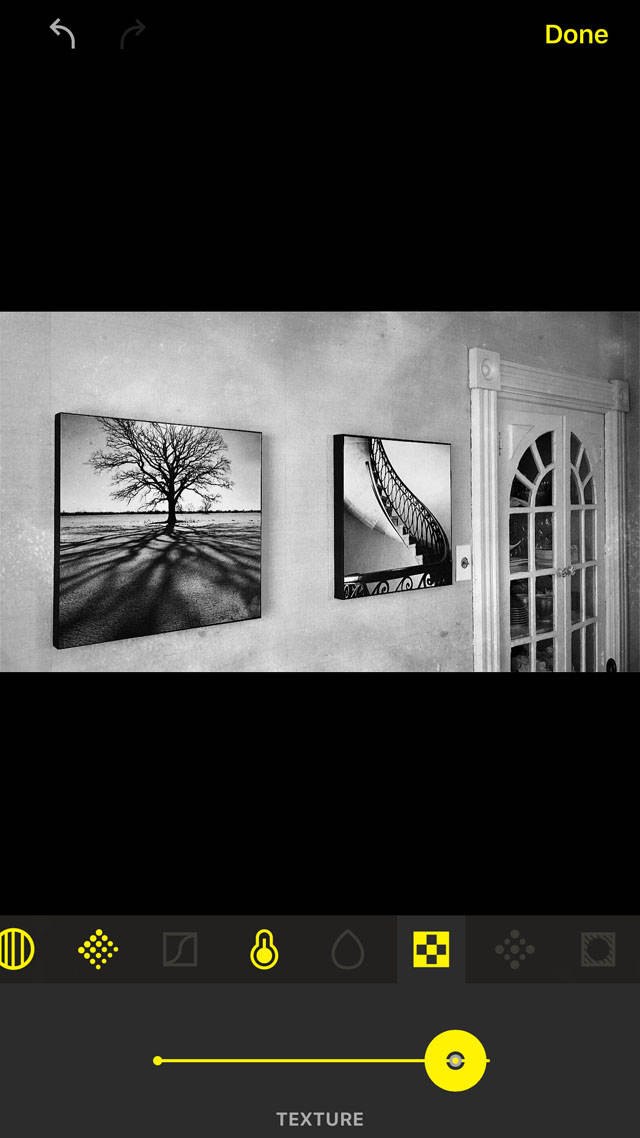
The Texture Tool adds a gritty textured look to your photos:
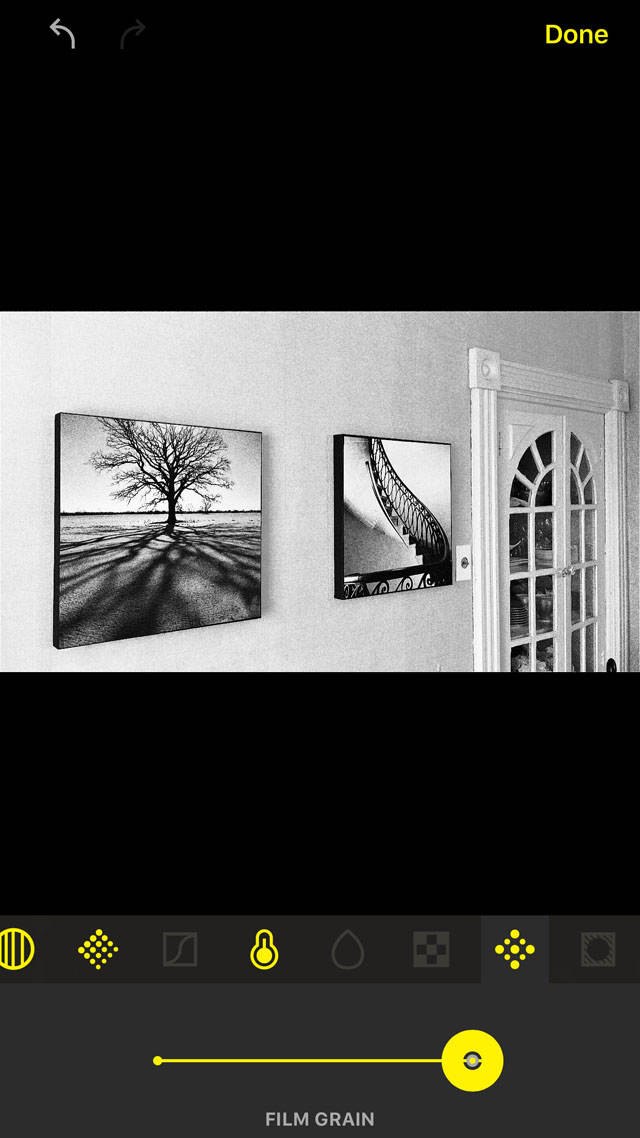
If you want to replicate the effect of grainy film, use the Grain Tool to add various amounts of grain to your photos. This effect looks especially good with black and white images:
Finally, the Vignette Tool allows you to darken the edges of your photo. A vignette can help to replicate the look of old camera and lens combinations, and it’s also useful for drawing the viewer’s attention to the main subject:
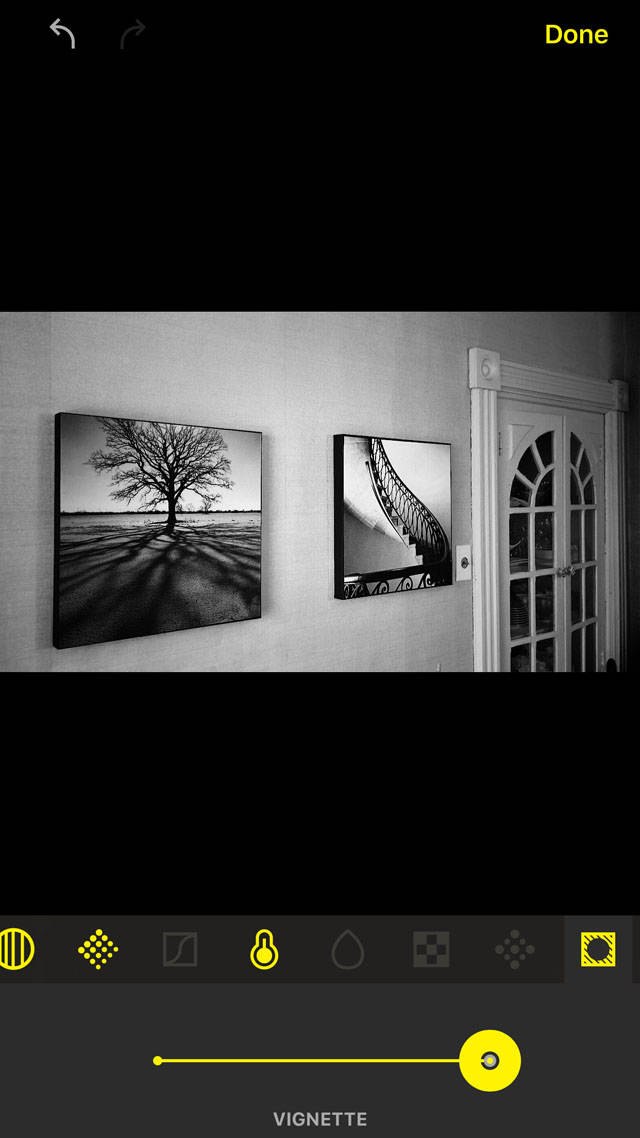
When you’ve finished editing your photo, tap Done at the top of the screen, then tap Save to save the changes to your gallery.
Hipstamatic: Conclusion
Hipstamatic allows you to create a wide range of image styles, including retro, vintage, and black and white.
The app has two different camera modes (Classic and Pro), so you can choose to shoot using whichever interface you prefer. Both modes allow you to choose a lens/film/flash combo, so you can always create the exact look and feel that you envisioned.
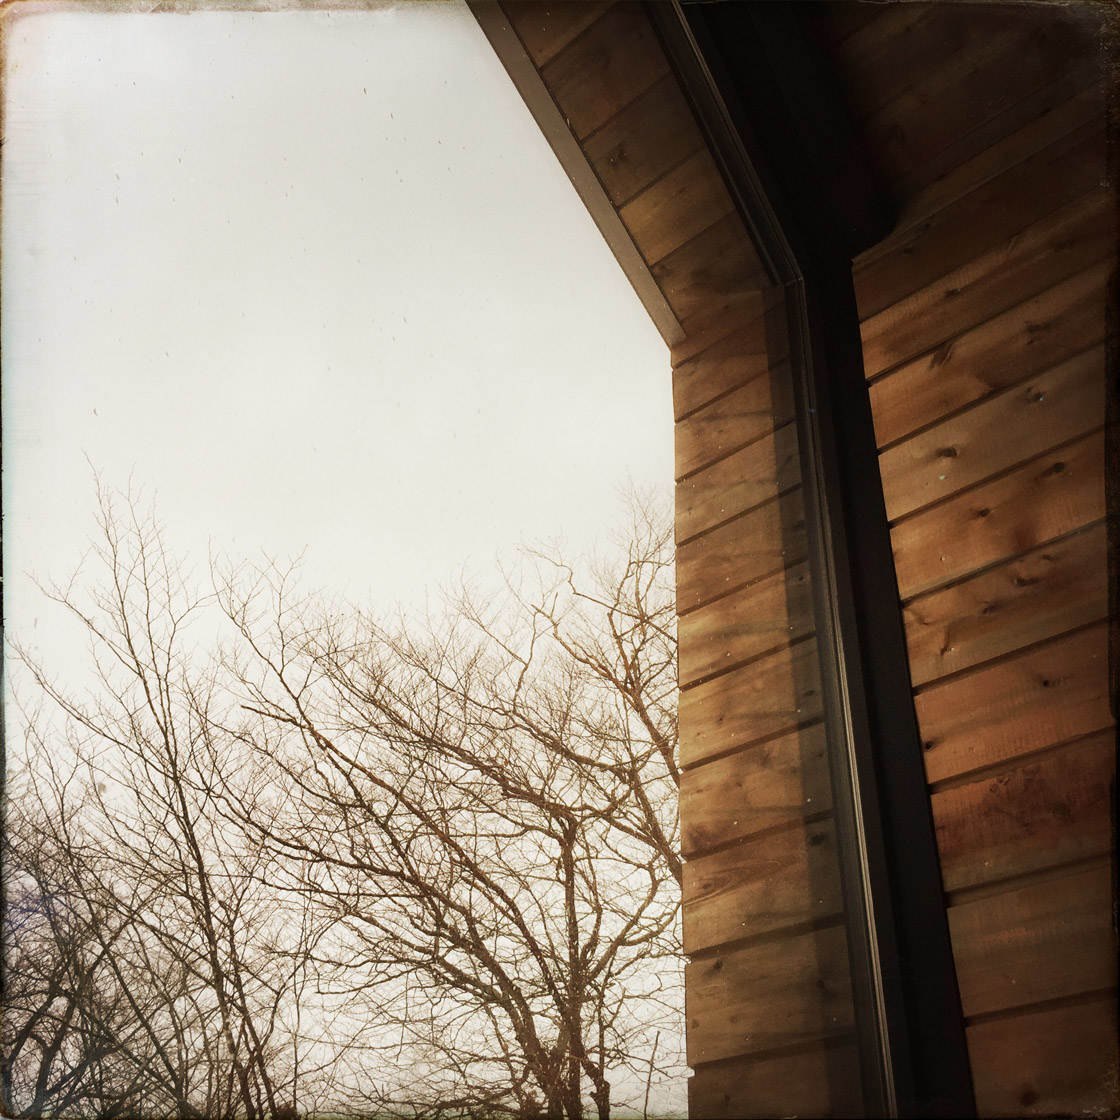
The editing tools within the app allow you to fine-tune the image after you’ve taken the shot, giving you the option to enhance the effects you used – or even completely change them.
With so many different visual combinations offered within this app, you can create really unique images with a wonderful artistic edge.

“To switch between these two viewfinder options, tap the small black switch at the bottom right of the viewfinder (shown circled in red below)”
I am using an iPhone 7Plus, and this little button switches between wide angle (W) and telephoto (T). Is there another way to view with filters versus without? Thank you!
Hi Lisa, very good question. I use a 6+ so I don’t have that extra option that you do, however I will try and find the answer for you.
Thank you, Mark!
@lisa Gordon You have go to the settings and enable the live view for the classic camera
Thank you SO very much!!!
Thank you Beabarba!
Hi! Why are my photos all appear yellow? I tried diff flashes and films etc but they all looked the same. AM i missing something?
The sixth photo from the top of the article, the very blue with the trees and the power lines. Do you mind telling what settings you used for that photo? Thank you.