Fog and mist present wonderful opportunities to capture beautiful atmospheric iPhone photos – be they dark and moody or light and airy. But shooting in this kind of weather can also be challenging. You have to find a good location with fog, and deal with shooting in low light conditions. You also need to find ways to add a sense of depth and dimension to your images. In this tutorial you’ll discover how to overcome these challenges, as well as tips for enhancing the mood of your foggy iPhone photos in post-processing.
1. Check The Weather Forecast
Occasionally you’ll get lucky and draw back the curtains in the morning to receive a surprise foggy world that presents a wonderful photographic opportunity.
However, to help you improve your chances of finding some foggy wonderfulness, keep an eye on the weather forecast. That way you can be prepared so that you’re up, out and ready to shoot before the fog disappears.
It’s useful to know how mist and fog actually form, so that you can get a feel for when it’s most likely to occur.
These murky conditions occur when small water droplets are suspended in the air, and they’re most commonly seen when warm moist air is suddenly cooled.
The difference between fog and mist is largely determined by the visibility. If visibility is below 1km then mist becomes fog.
There are optimum conditions for the formation of fog and mist which include clear skies, light winds, moist air and low temperatures at ground level.
Long nights allow for the formation of fog and mist, so you’re more likely to encounter it during the autumn and winter months.
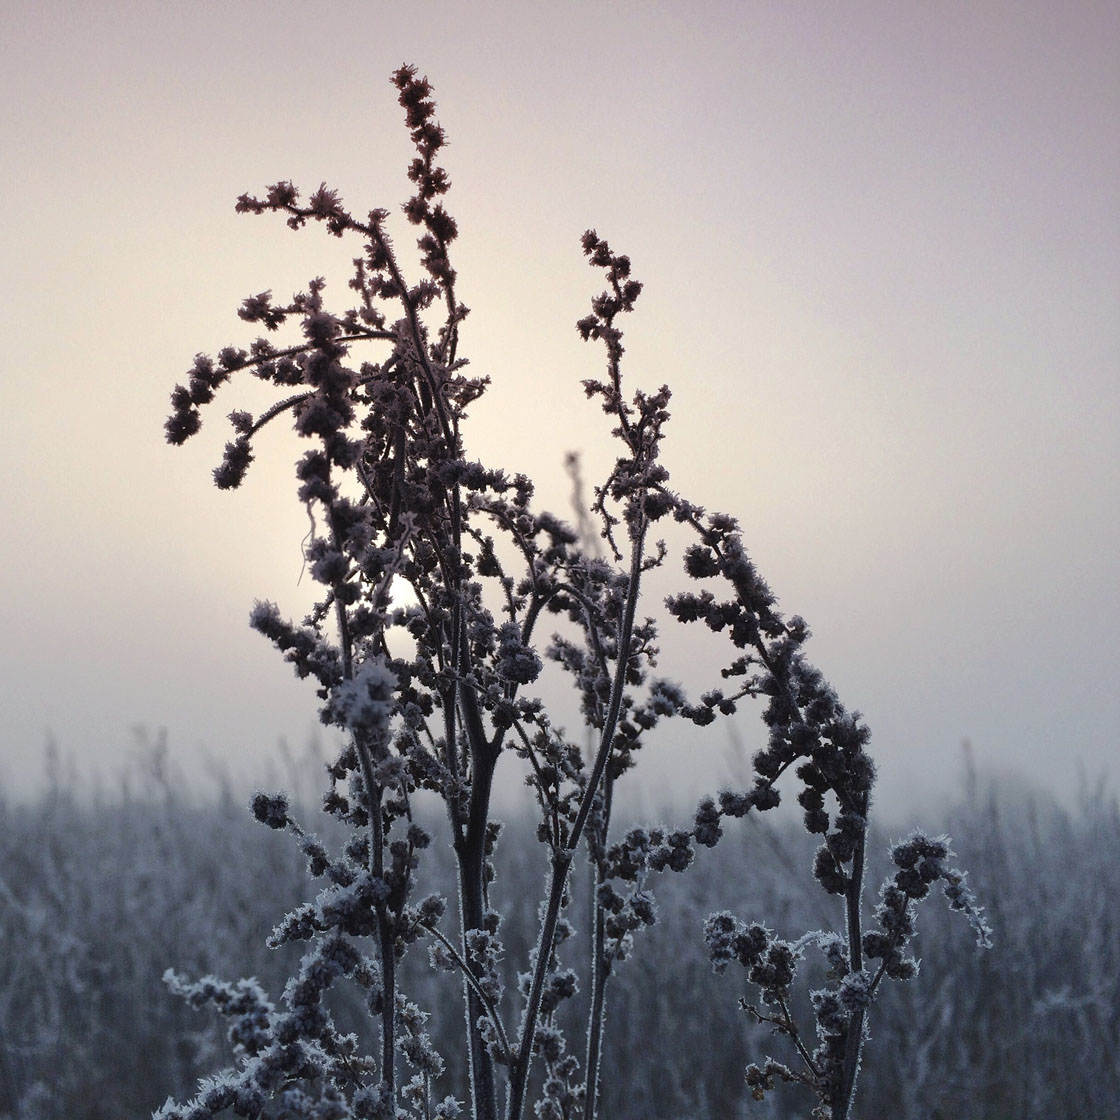
Freezing fog occurs when the temperature dips below freezing. The water droplets in the air in sub-zero temperatures remain as liquid until they come into contact with a solid surface, at which point the object will become coated with ice.
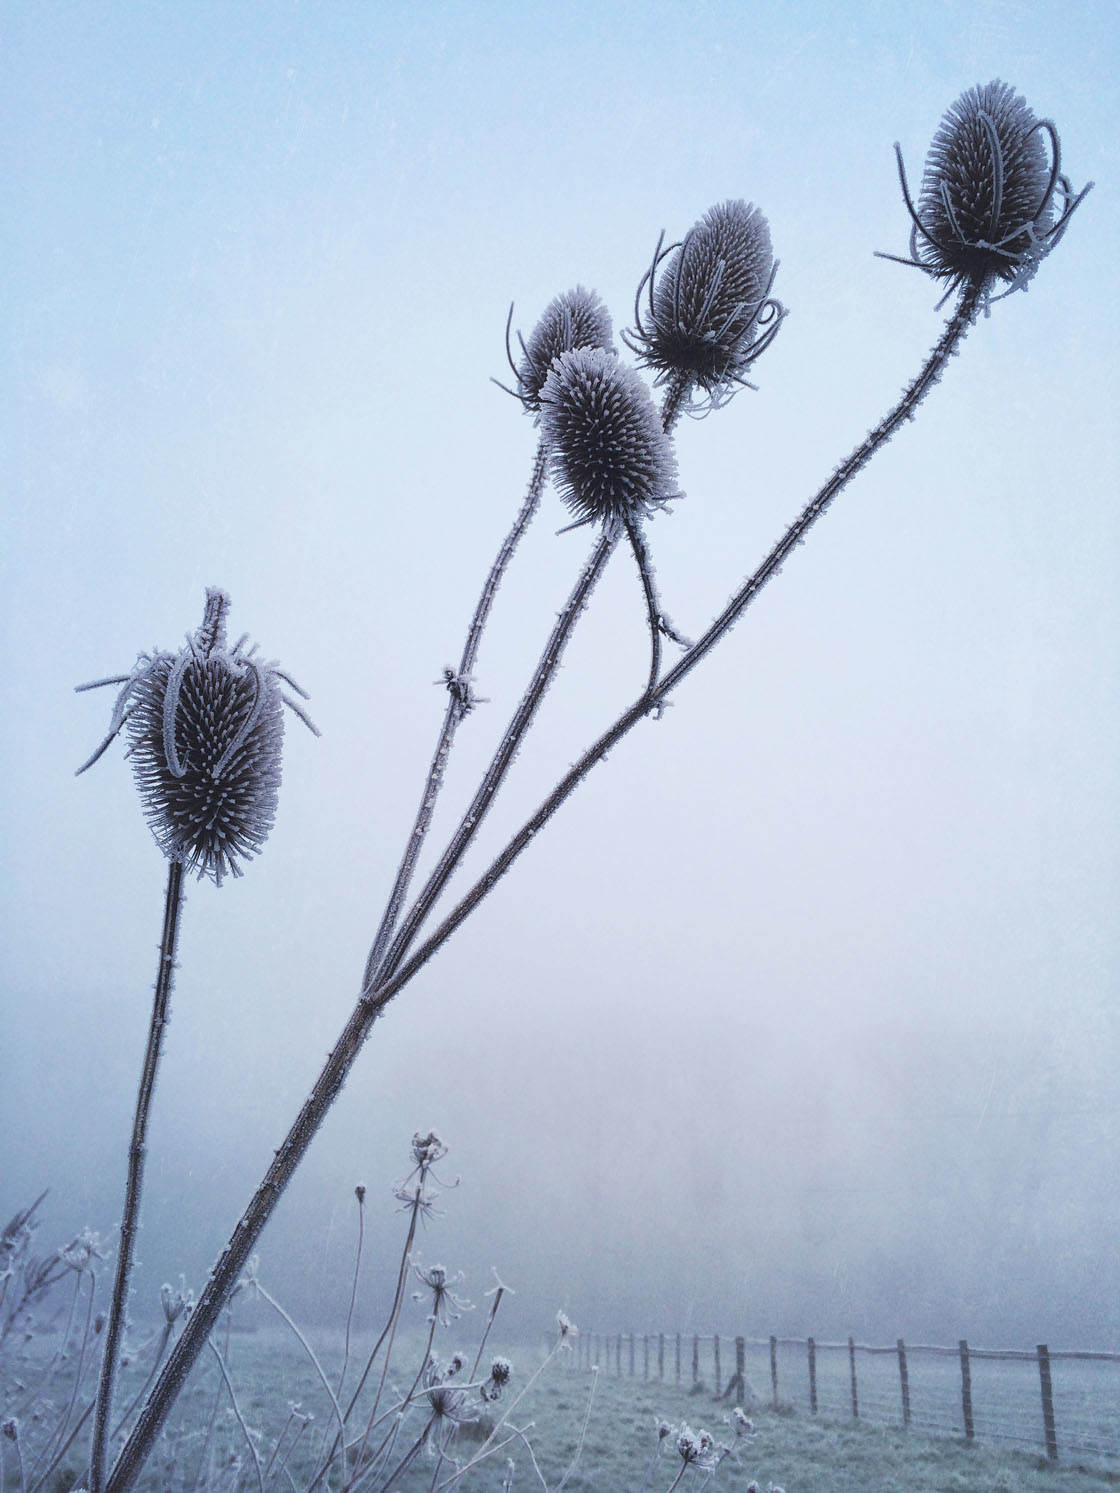
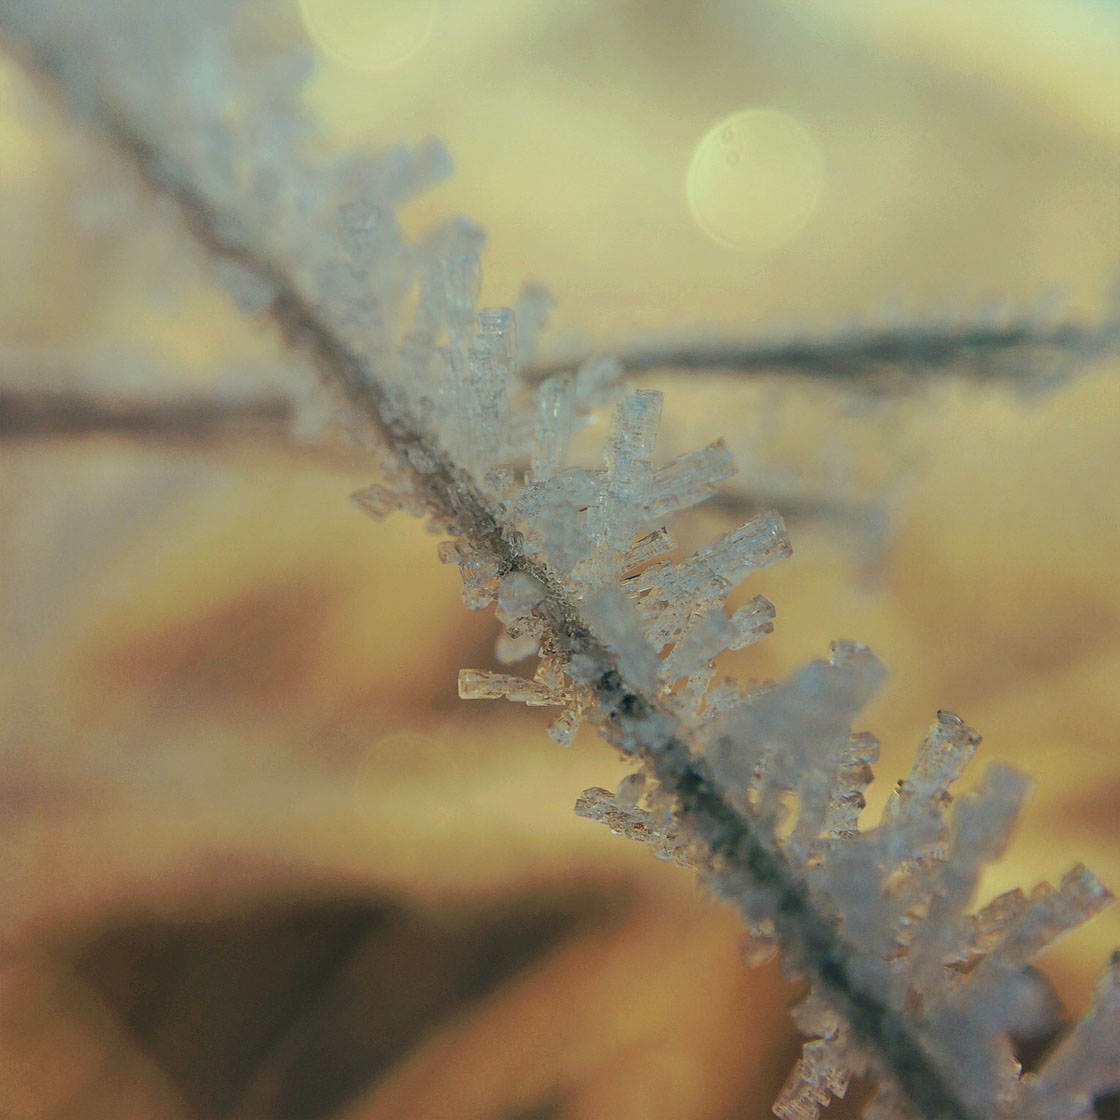
In these conditions, look out for beautiful feathery ice deposits forming on surfaces. With a bright foggy backdrop, your icy subjects will stand out perfectly.
If you have a macro lens, you’ll be able to get really close to capture the stunning detail of these ice formations.
When shooting in sub-zero temperatures, be aware that your iPhone’s battery life can be greatly reduced by the cold, and your phone may decide to suddenly turn itself off.
So try to keep your phone protected between shots in a warm pocket close to your body.
2. Get To Know Your Local Fog Hot Spots
By regularly keeping an eye on the weather forecast, and getting out into the landscape to shoot, you’ll soon start to notice places that are more prone to foggy weather.
Where I live, there are a couple of locations within a 20km radius of my home that regularly seem to be lost in fog. So check out the forecast for several places that you can easily get to, and then go out and explore.
Types of places that you’re more likely to find mist and fog are over water, on fields, in forests, and up hills. Explore these places in foggy and non-foggy conditions so you know where to go when the weather conditions are right.
If you’re in a familiar place, you’ll be less likely to get lost. As beautiful as it is, if you’re in a strange place, being deep in the fog can be quite disorientating.
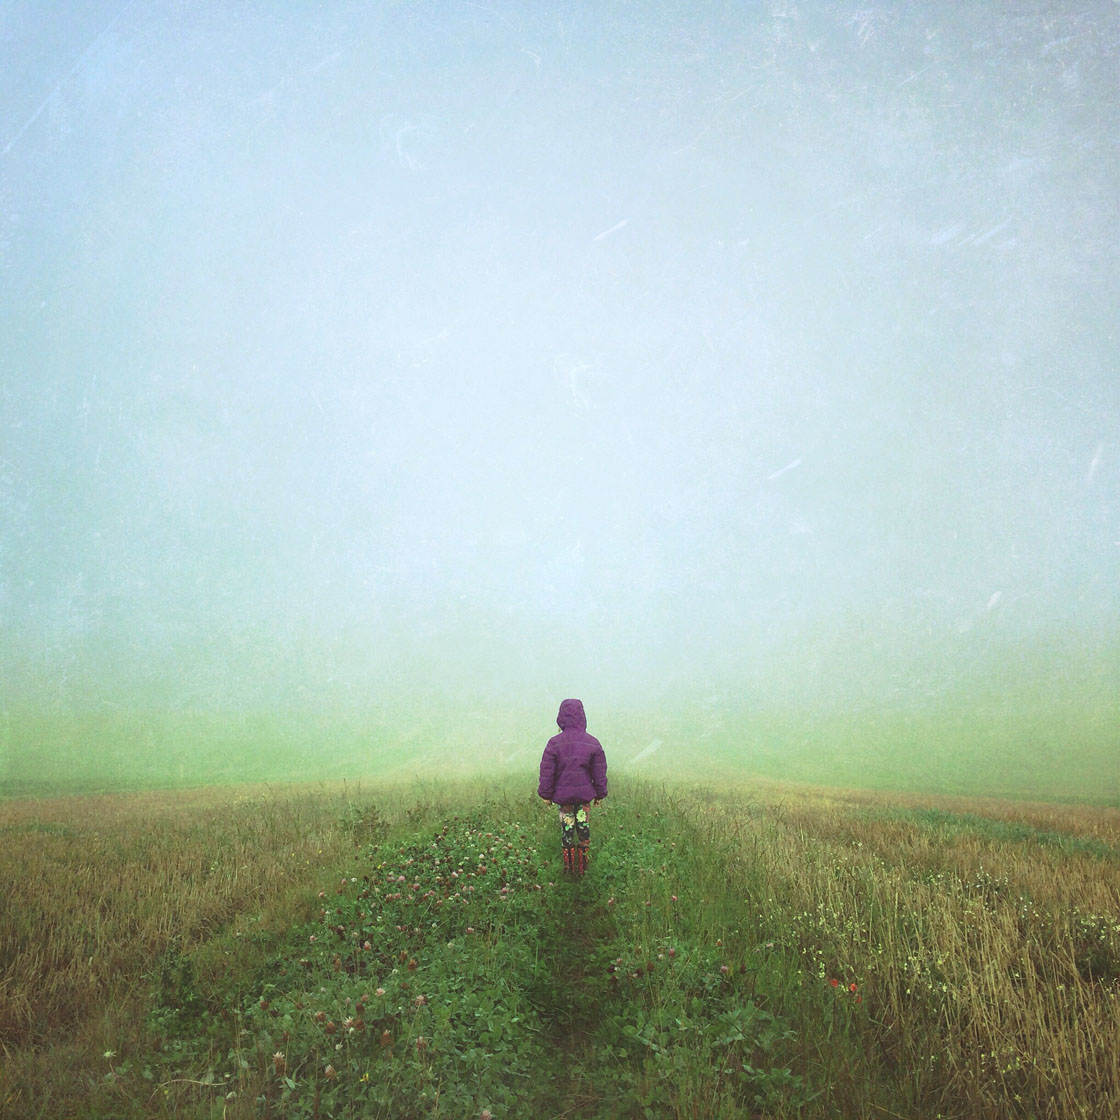
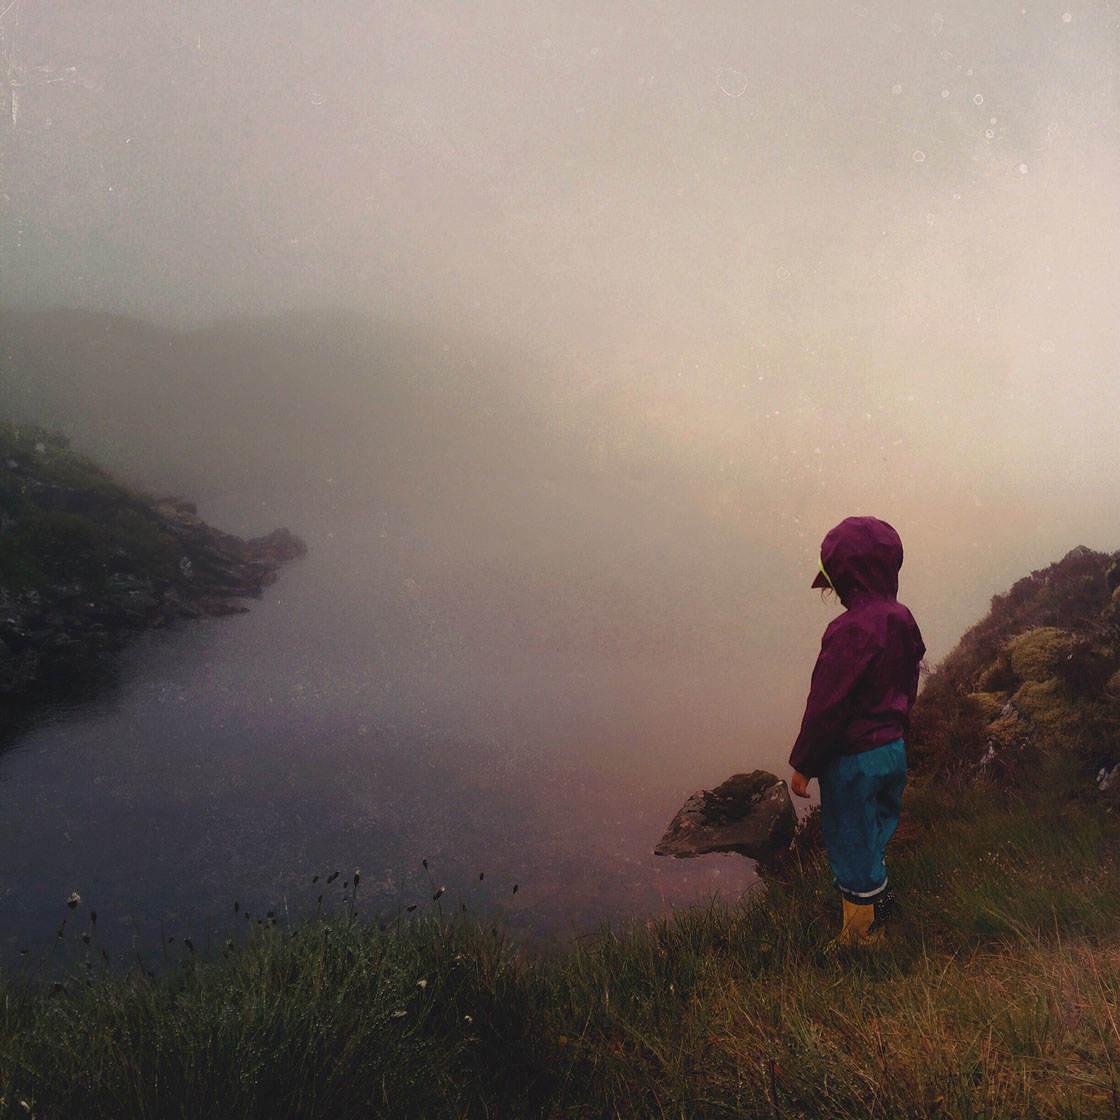
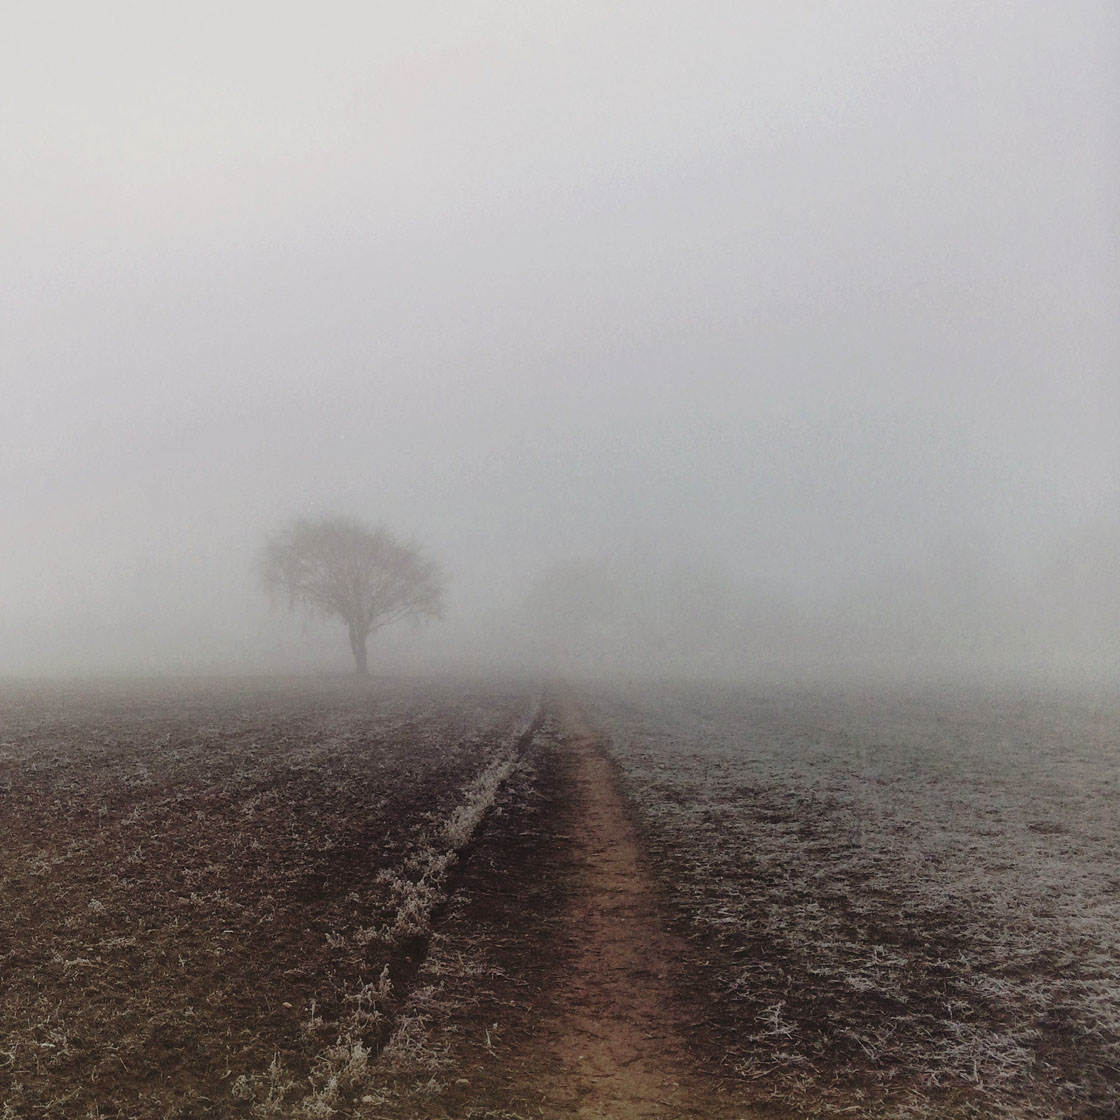
A disappearing horizon in a foggy field gives a wonderful sense of space. You can add a focal point and a sense of mystery to your image by including a lone figure in the landscape.
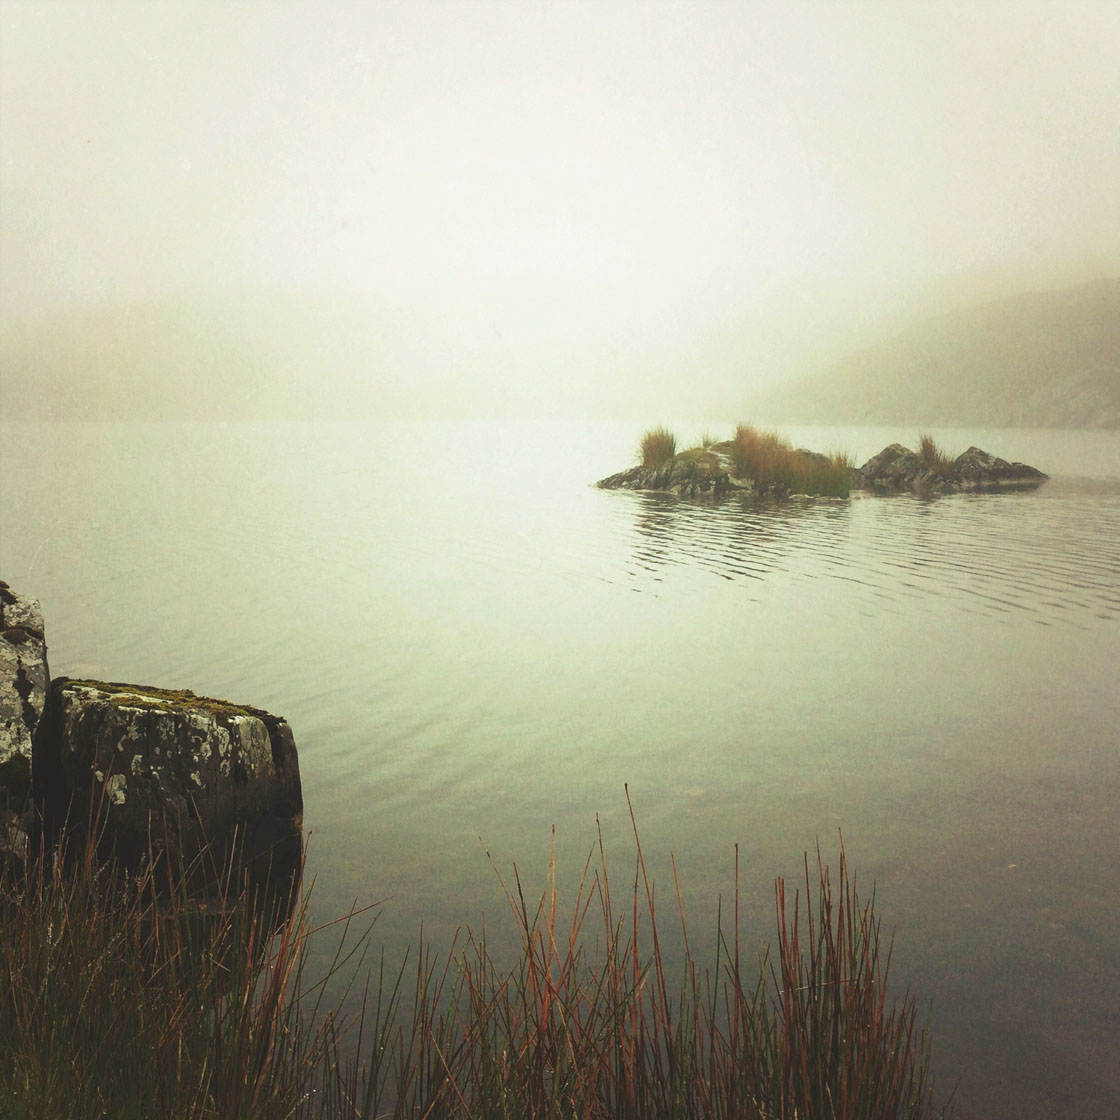
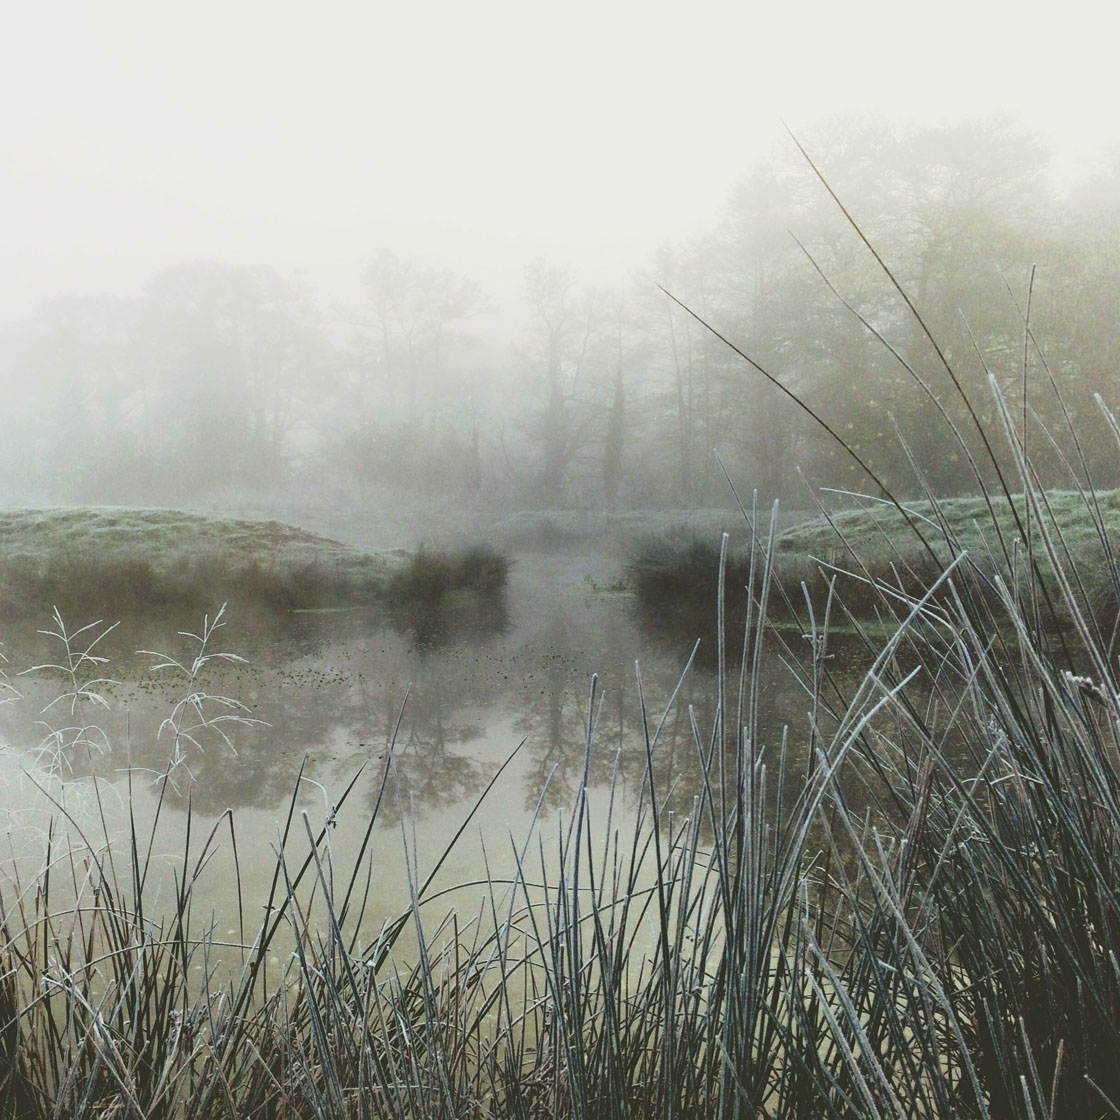
Mist or fog over water is beautifully serene. Look out for a water reflection, and make the most of any water birds straying into shot for an extra dose of calm.
Be aware that fog can be quite “patchy” and it will often occur in varying densities within a relatively small area.
So when there’s a chance of fog, try to plan a long walk over varying terrain. You’ll then be able to move in and out of the dense fog patches for some great photo opportunities.
3. Get Out Early
Fog and mist are most commonly found early in the morning before temperatures start to rise.
Once you’ve seen what great atmospheric shots you can get in the fog, nothing will get you out of bed quicker than the promise of fog and mist!
There’s something quite magical about the first appearance of the sun shining through the morning fog and mist.
Taking photos as the light comes through the mist will enhance your images with a wonderful warm glow.
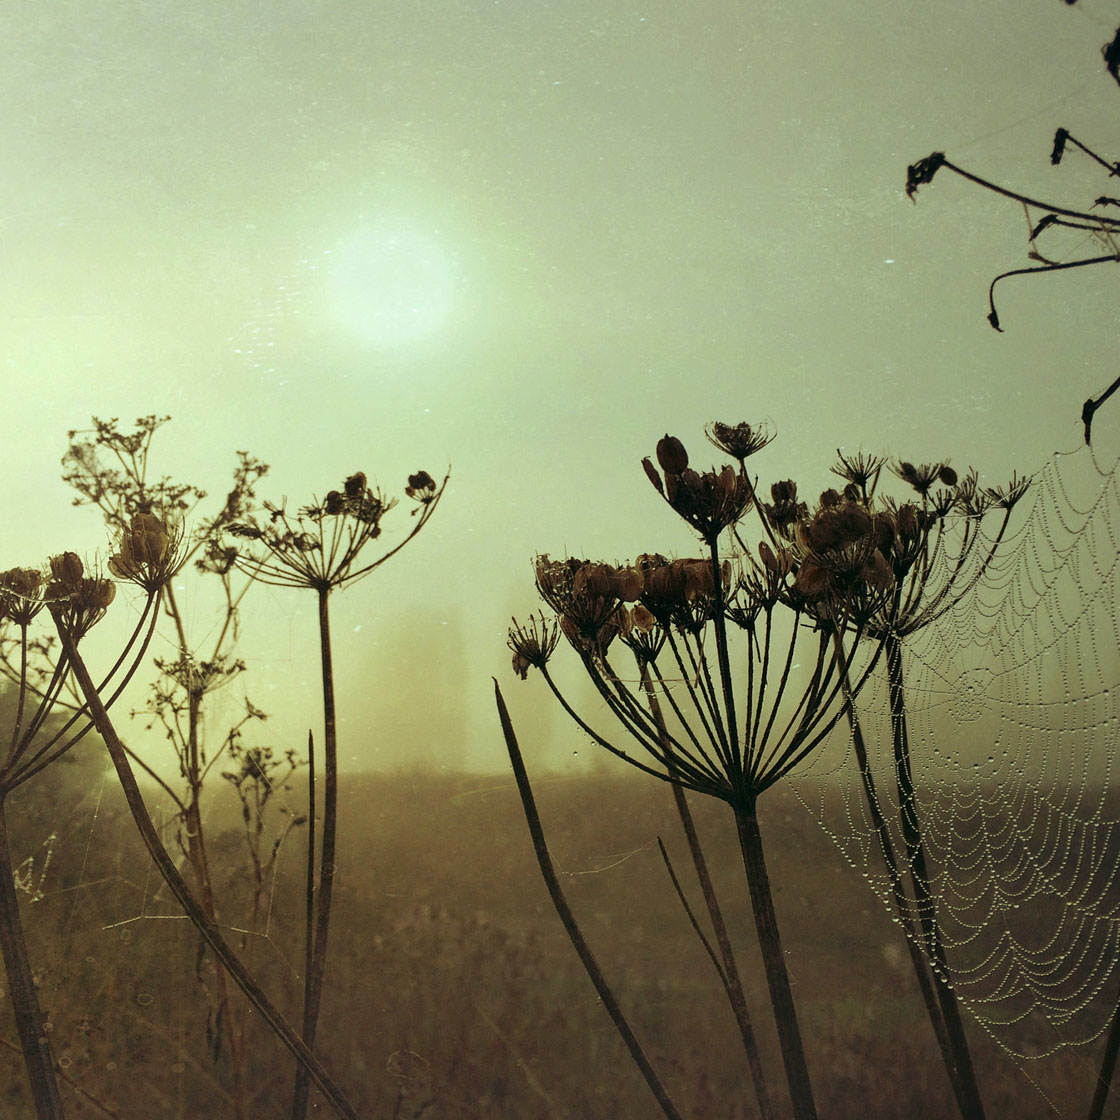
The first light filtering through the fog and mist is initially quite soft, so this is a great time of day to include the sun in your image, before it becomes too bright.
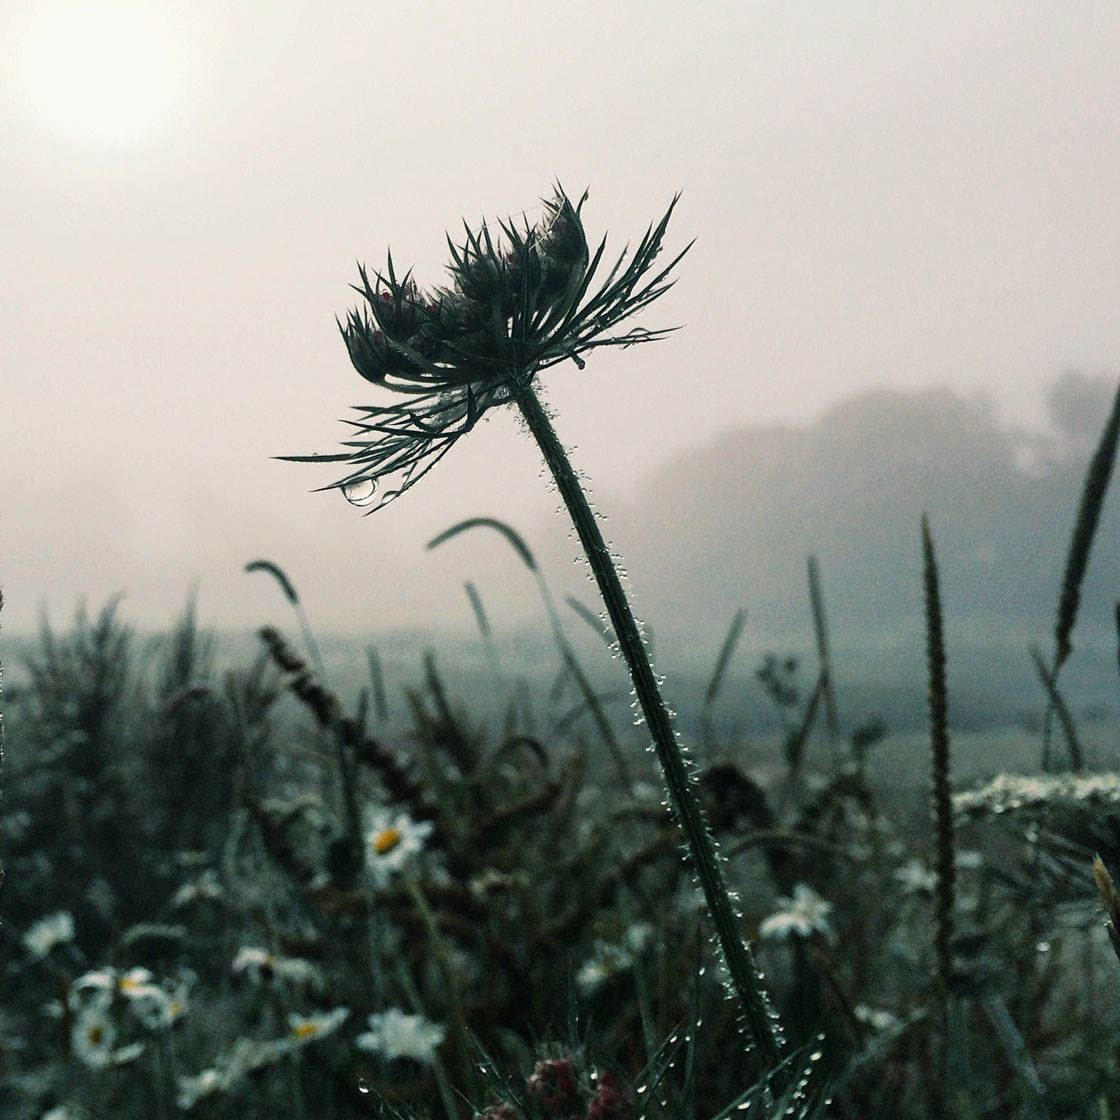
You could try softening the sunlight further by lining up an object such as a plant between your iPhone camera and the sun.
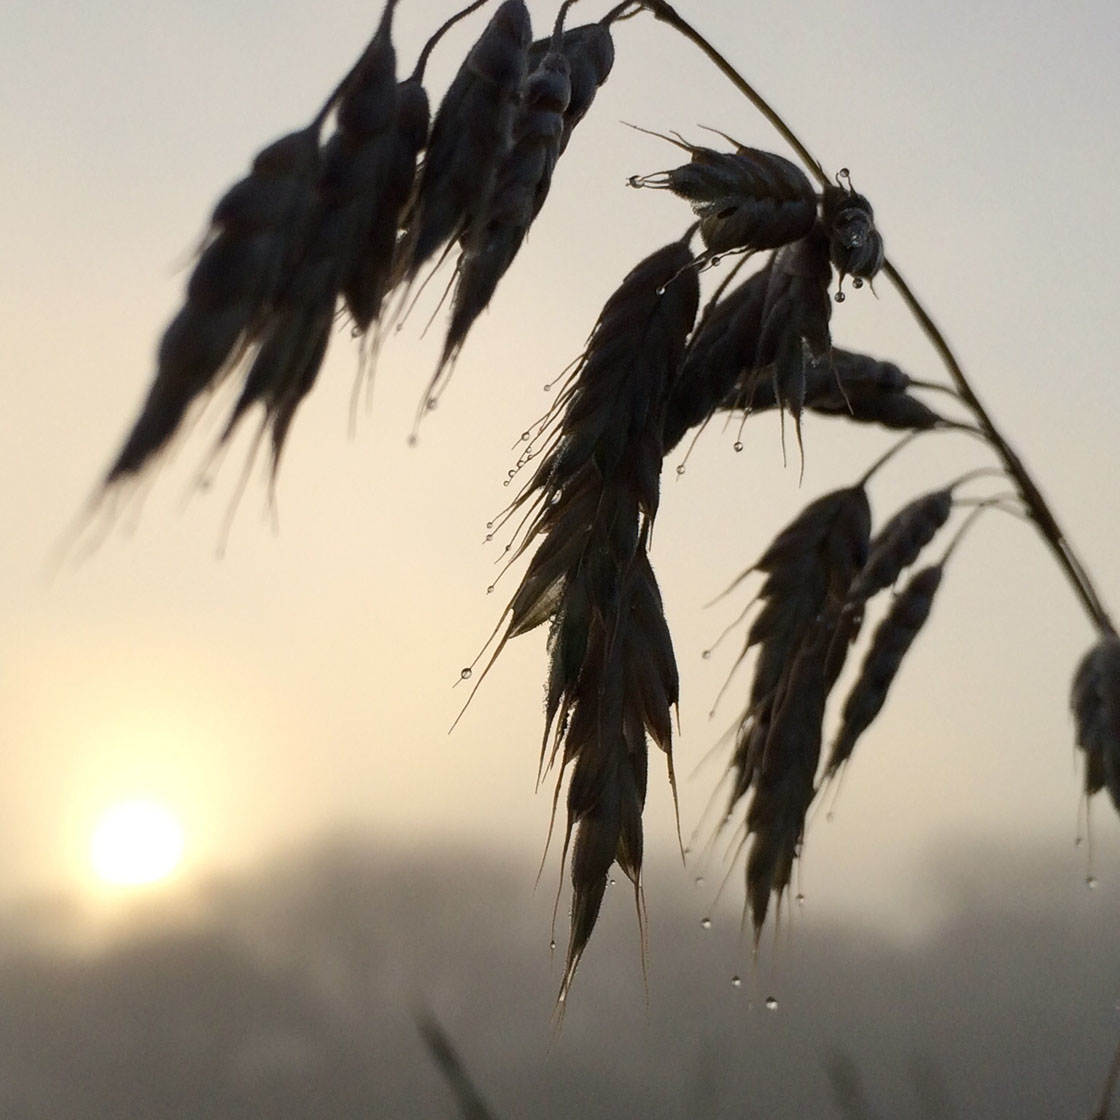
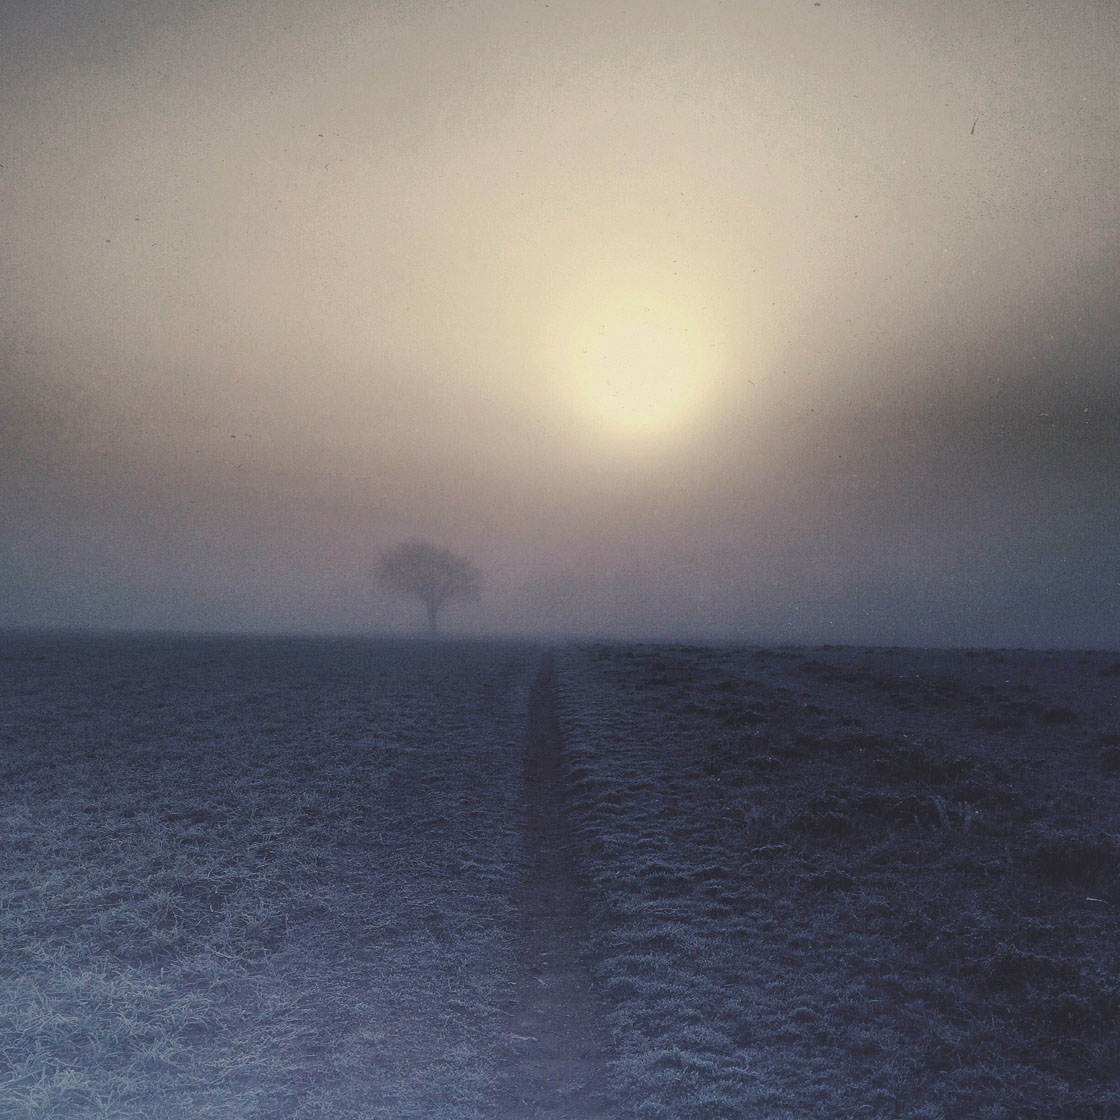
For a dramatic image, you could include the full sun in your composition, just as it begins to appear over the horizon.
The light will beautifully enhance the details in your photo, especially if there are tiny water droplets on your subject.
4. Keep Your iPhone Steady
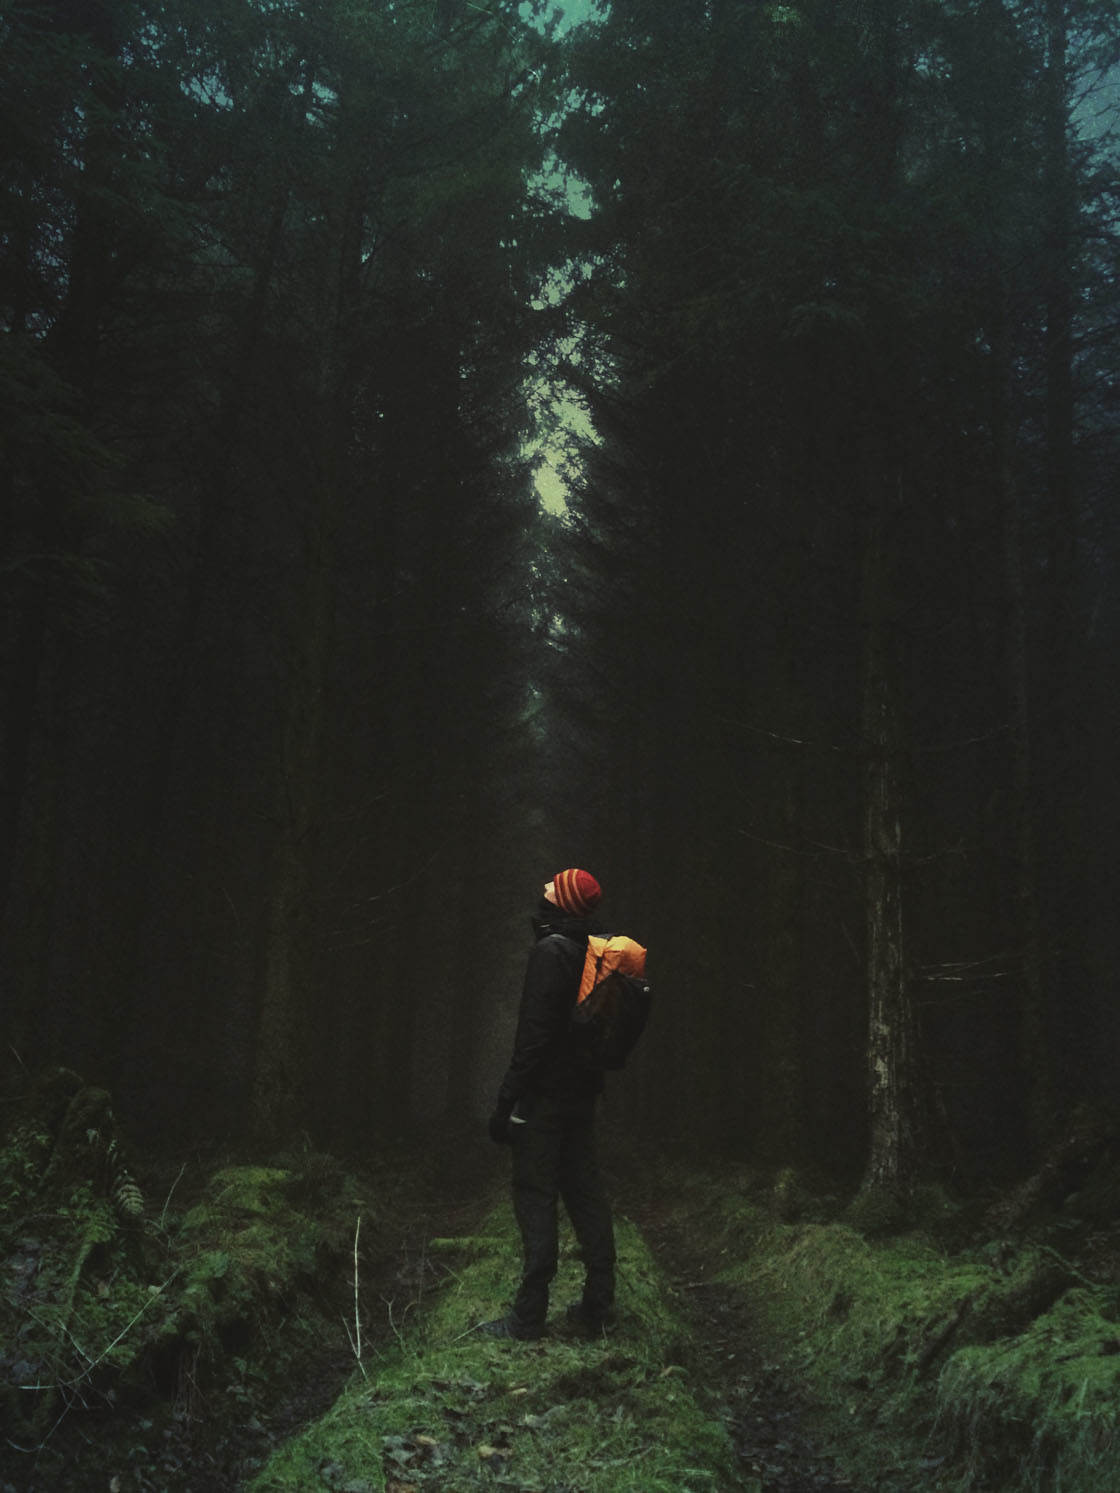
Taking photos in foggy and misty conditions often means shooting in low light. Thick fog blocks a lot of the sunlight, and even more so if you’re out doing forest photography.
When you’re shooting in low light, you’ll need to pay particular attention to keeping your iPhone steady, otherwise you can end up with blurry shots due to the slower shutter speeds that your camera needs to use.
If you have a tripod for iPhone, it’s a good idea to take it with you. You’ll also need an iPhone tripod mount to attach your phone to the tripod. This will allow you to easily keep your phone perfectly still to ensure you get the sharpest shots possible.
If you don’t own a tripod, you could try steadying your iPhone on something solid like a wall, a fencepost or a rock in order to avoid camera shake.
If you need to handhold your phone, try steadying yourself by leaning against a solid object such as tree.
Keep your elbows tucked against your body to steady your arms, rather than holding them out in front of you. Take slow steady breaths to keep your body as still as possible.
It’s also really important to hold your iPhone steady when taking photographs of close-up details in nature.
The closer you are to your subject, the more exaggerated any movement will be in your photo.
5. Adjust Exposure Manually
When shooting in fog, the lighting conditions can often trick your iPhone into using the wrong exposure settings, making your photo either too bright or too dark.
So it’s important that you know how to get good exposure in your photos. That way, the brightness levels will always look great!
If the scene is mostly white with fog, the iPhone can think that the scene is too bright and end up under-exposing the photo, making it appear too dark.
If you’re shooting in darker conditions such as a foggy forest, your iPhone will have a natural tendency to brighten up the image – so what you see on your screen won’t be as dark and moody as the forest appeared in real life.
To get the brightness right in your photos, you’ll need to manually adjust the exposure before taking the shot.
To do this, start by tapping the point you want to focus on, then swipe up or down on the screen to access the exposure slider. Swipe up to make the image brighter, or down to make it darker.
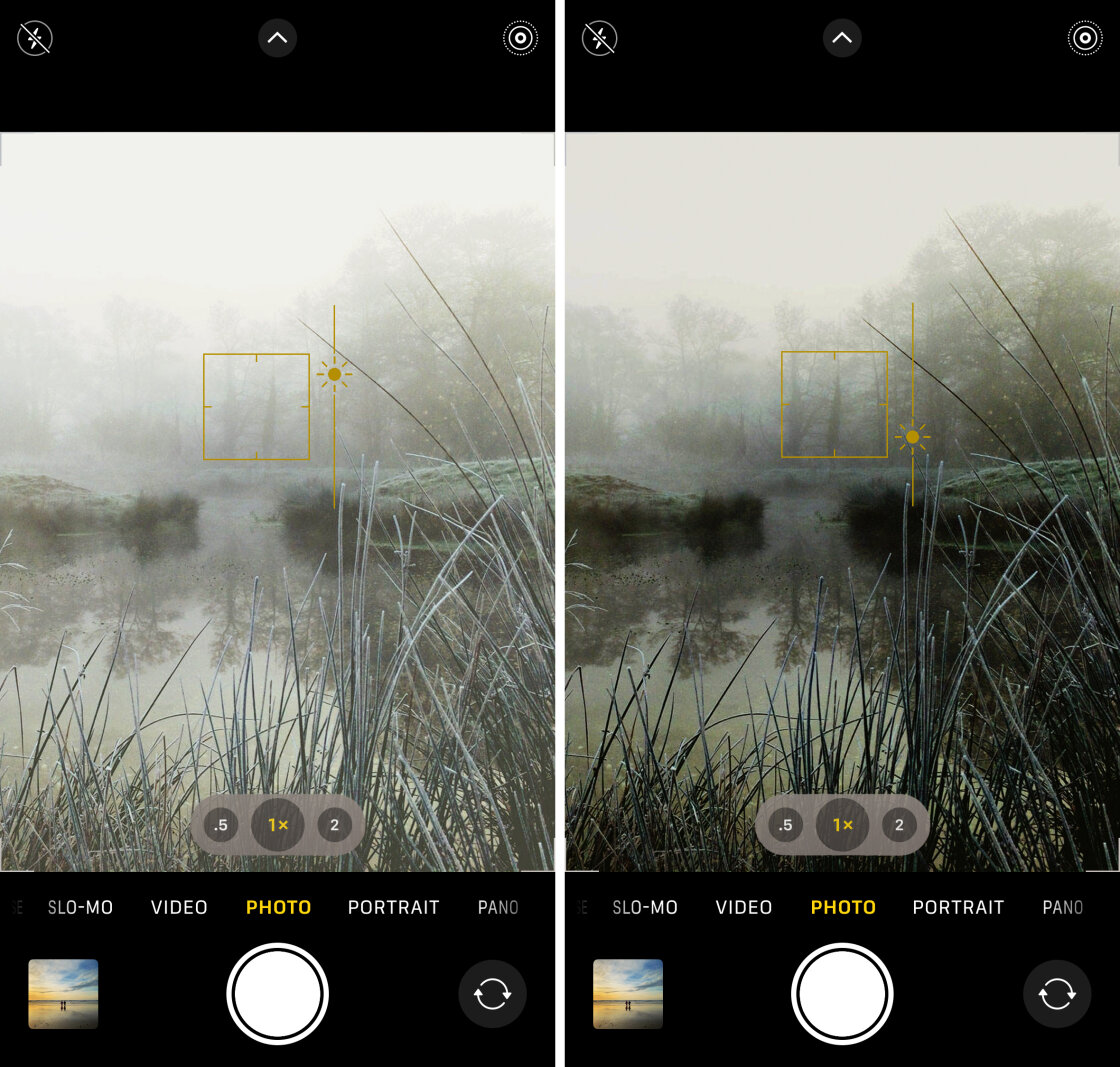
As you can see from these two screenshots, adjusting the exposure changes the image quite dramatically.
6. Look For A Focal Point
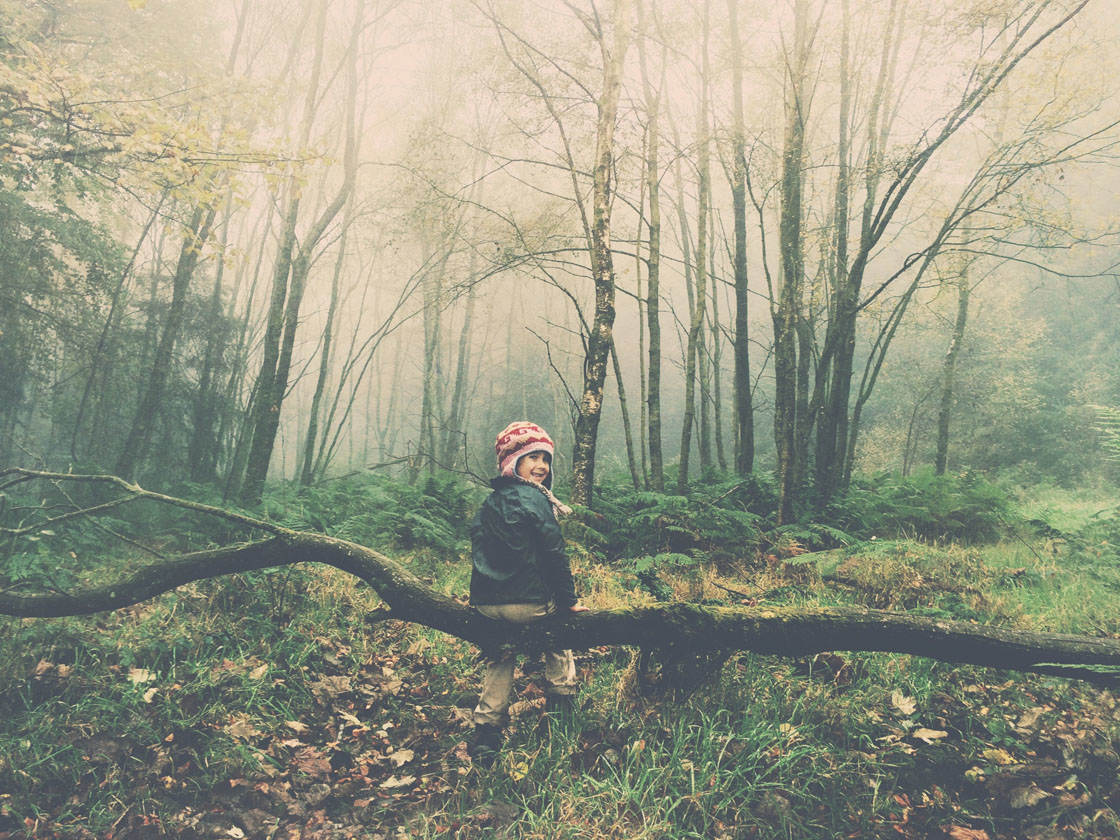
To give your fog photos impact, you’ll need to include a main subject or focal point that stands out against the fog.
This will give the viewer a place to focus their attention, and it can also help to tell a more compelling story about your adventures in the fog.
It gives the viewer a sense of what stood out to you in that bleak and foggy landscape.
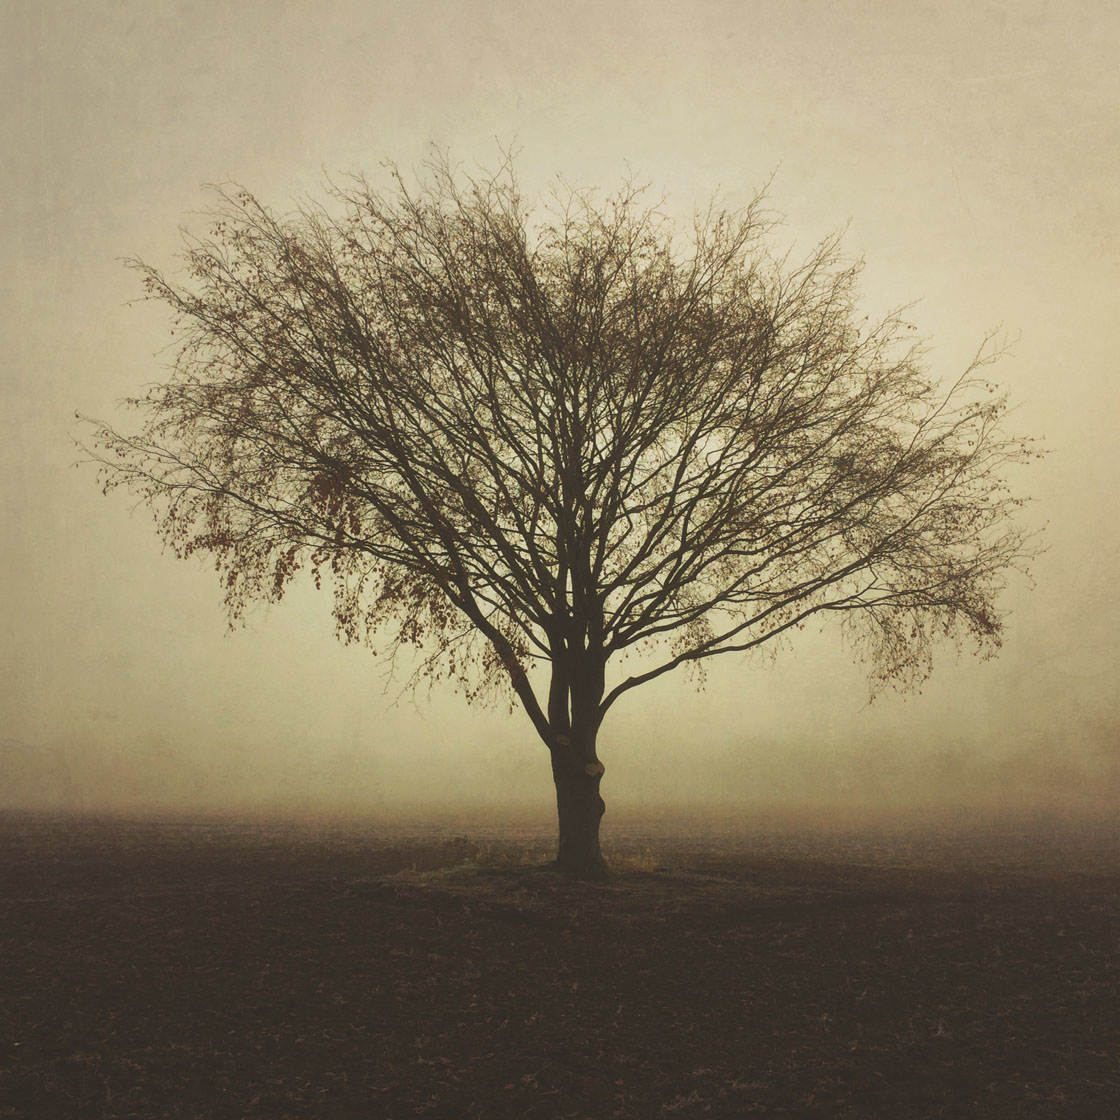
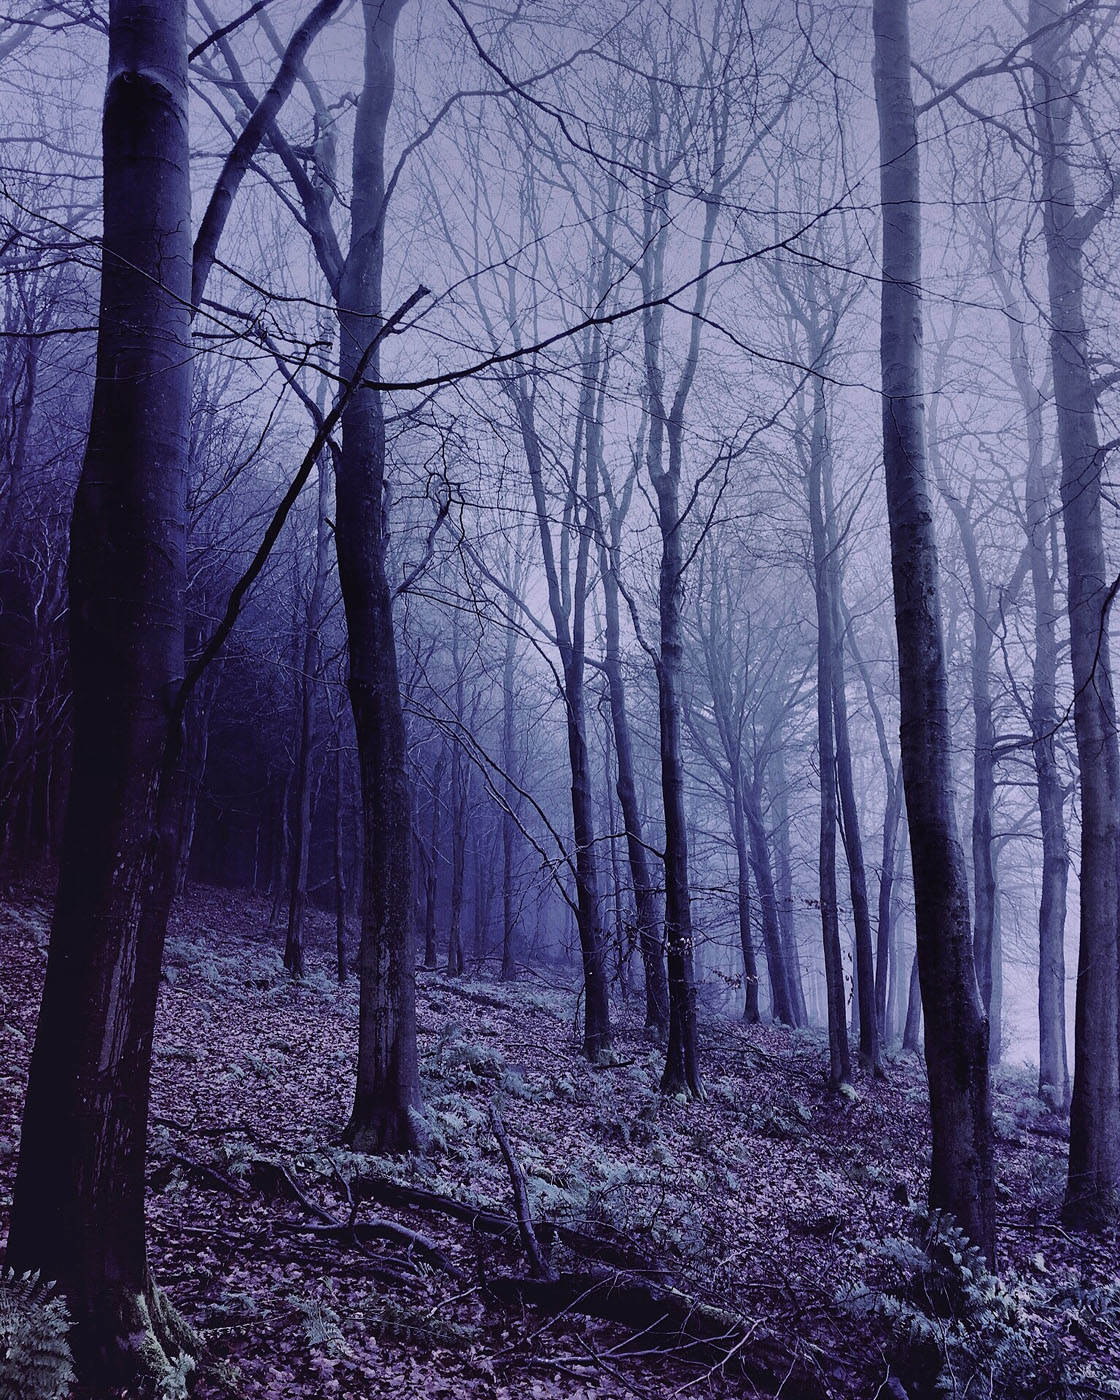
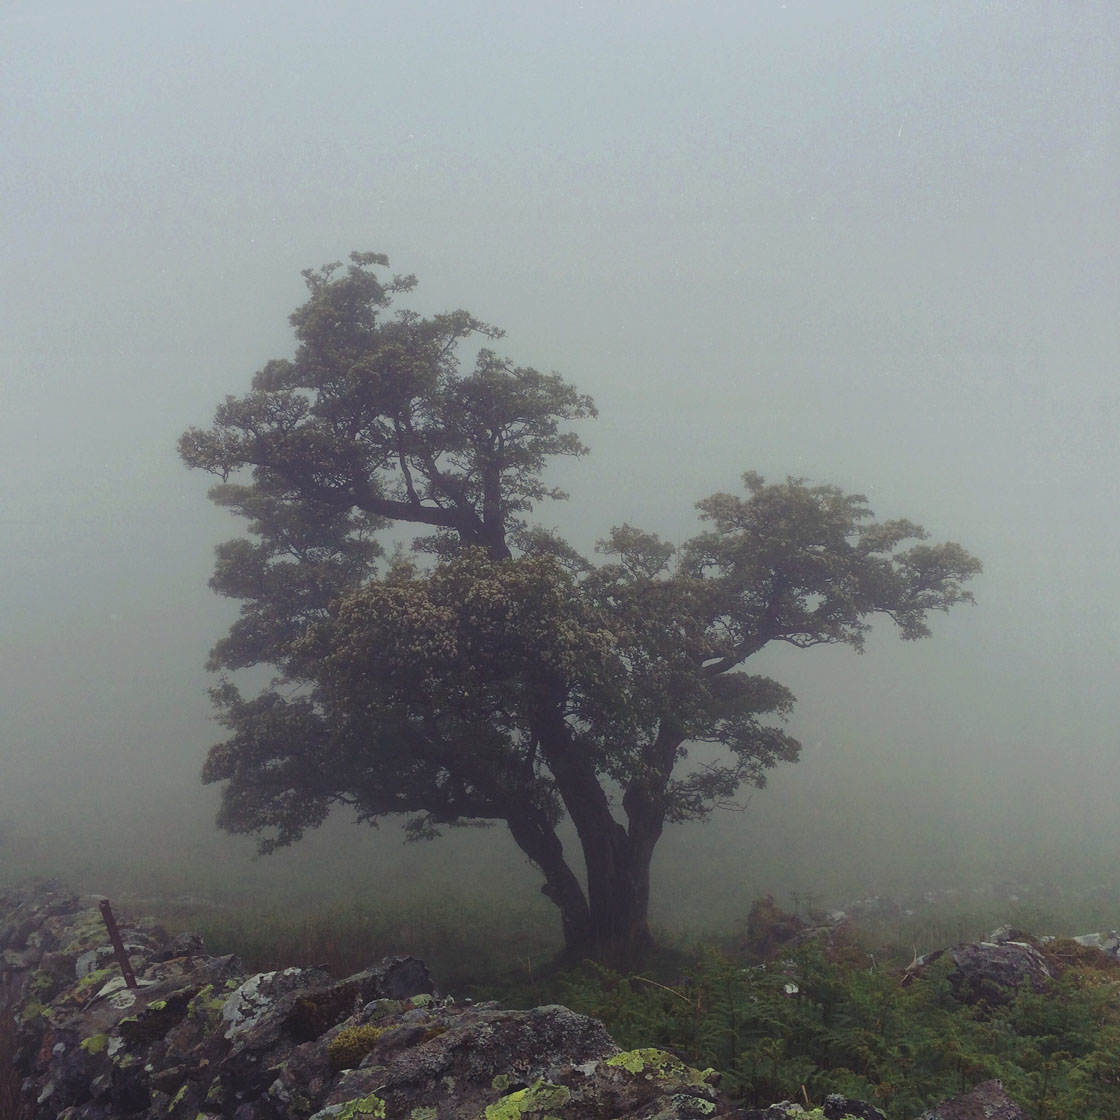
Lone trees make great subjects against a foggy background, especially in winter when their bare branches form wonderful shapes against the fog.
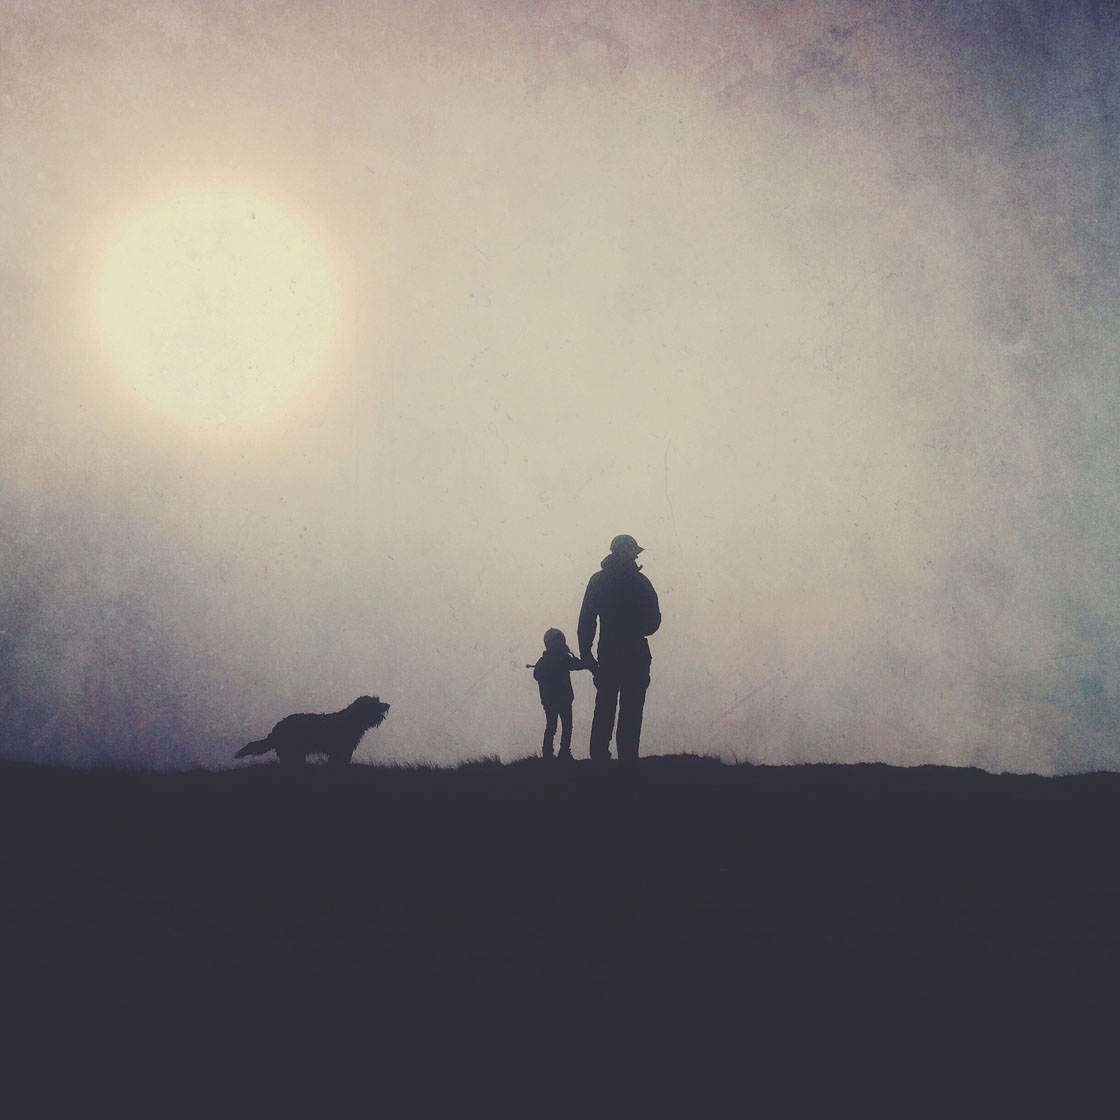
Have fun coming up with ideas for creative shots. If you have some company, try creating some silhouettes of people against that sun as it breaks through the fog and mist.
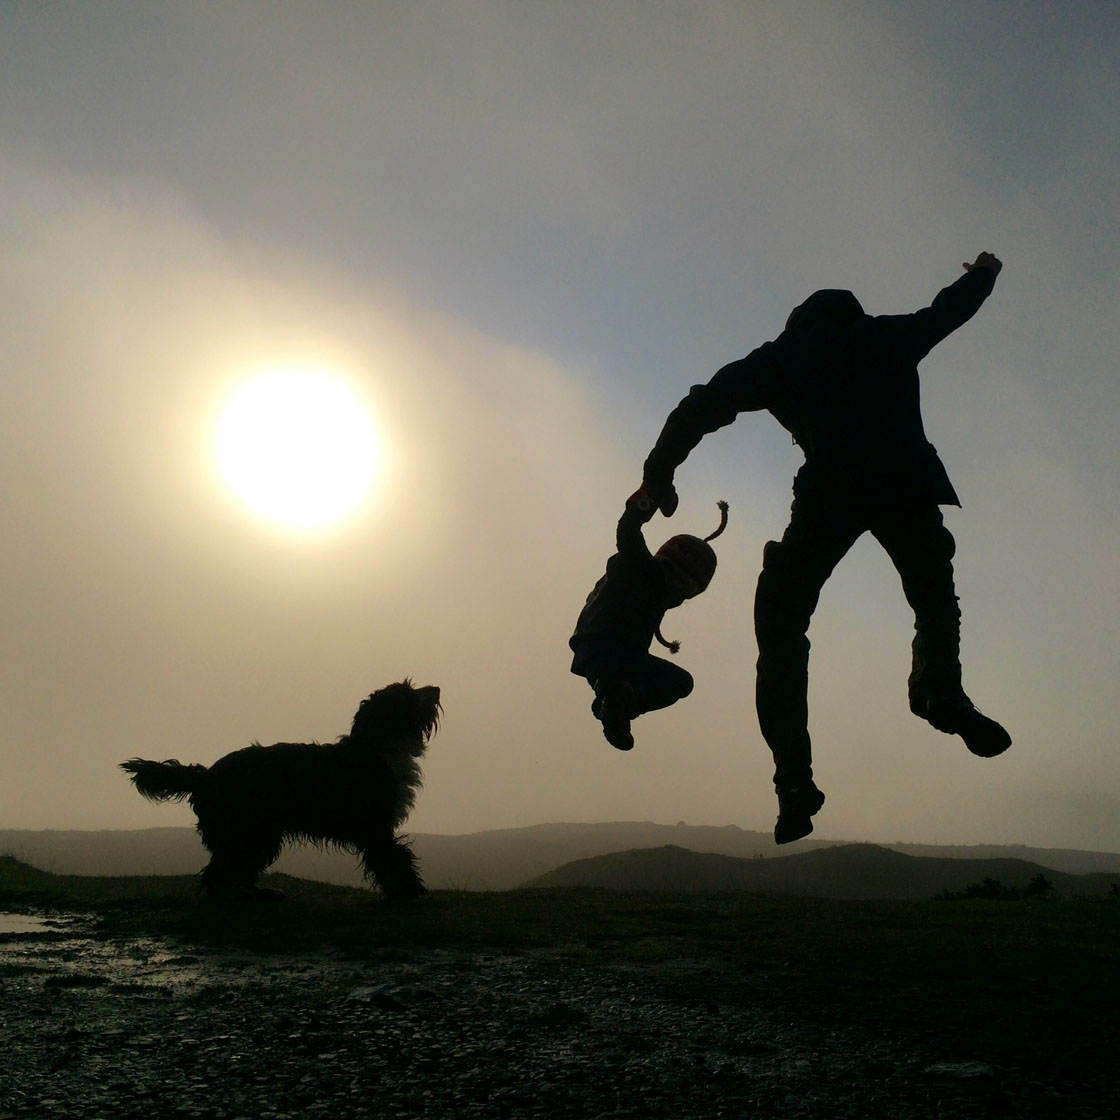
For action shots like the one above, remember to use burst mode on your iPhone to take multiple shots. You can then select the best photo later. To activate burst mode, simply hold down the shutter button in the camera app.
Shots that you couldn’t plan might also present themselves to you as you enjoy your walk through the fog.
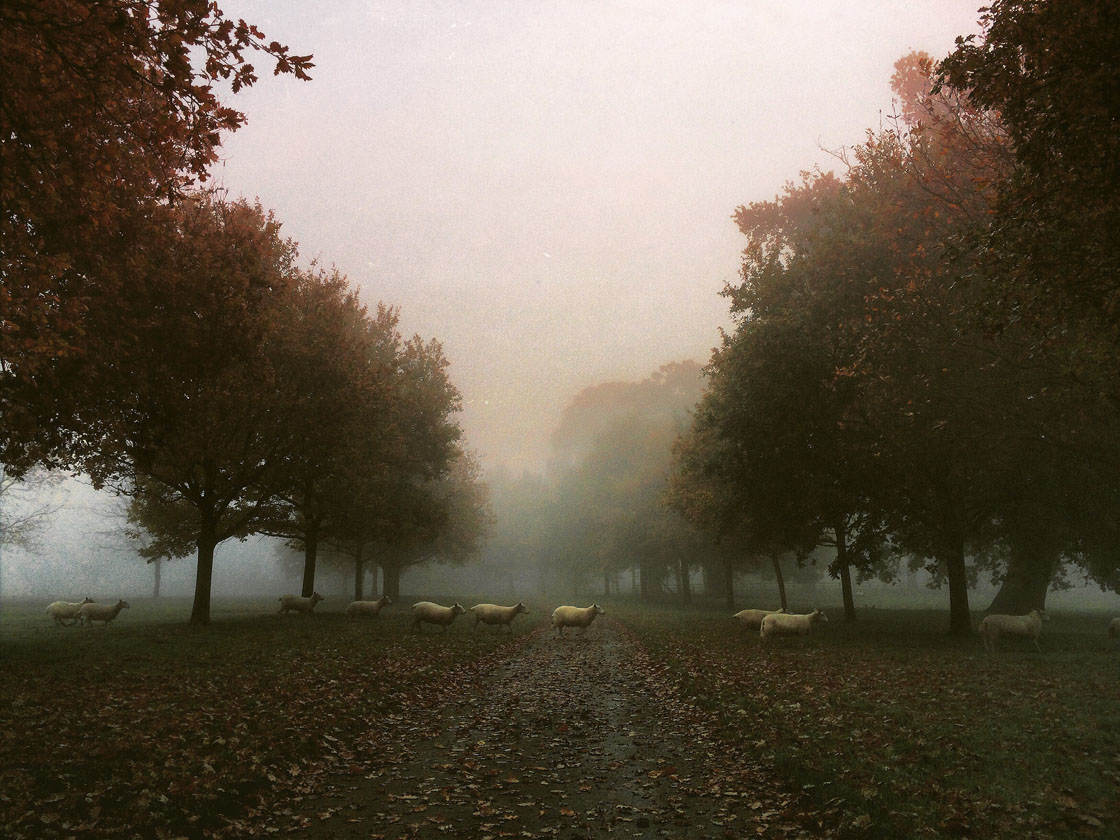
These sheep crossed the path ahead of me at just the right time. Luckily there were quite a few of them giving me a chance to get into position with my iPhone.
7. Emphasize Depth & Scale
To show fog as fog, and not just as a plain background, you need to position objects at various depths in your image.
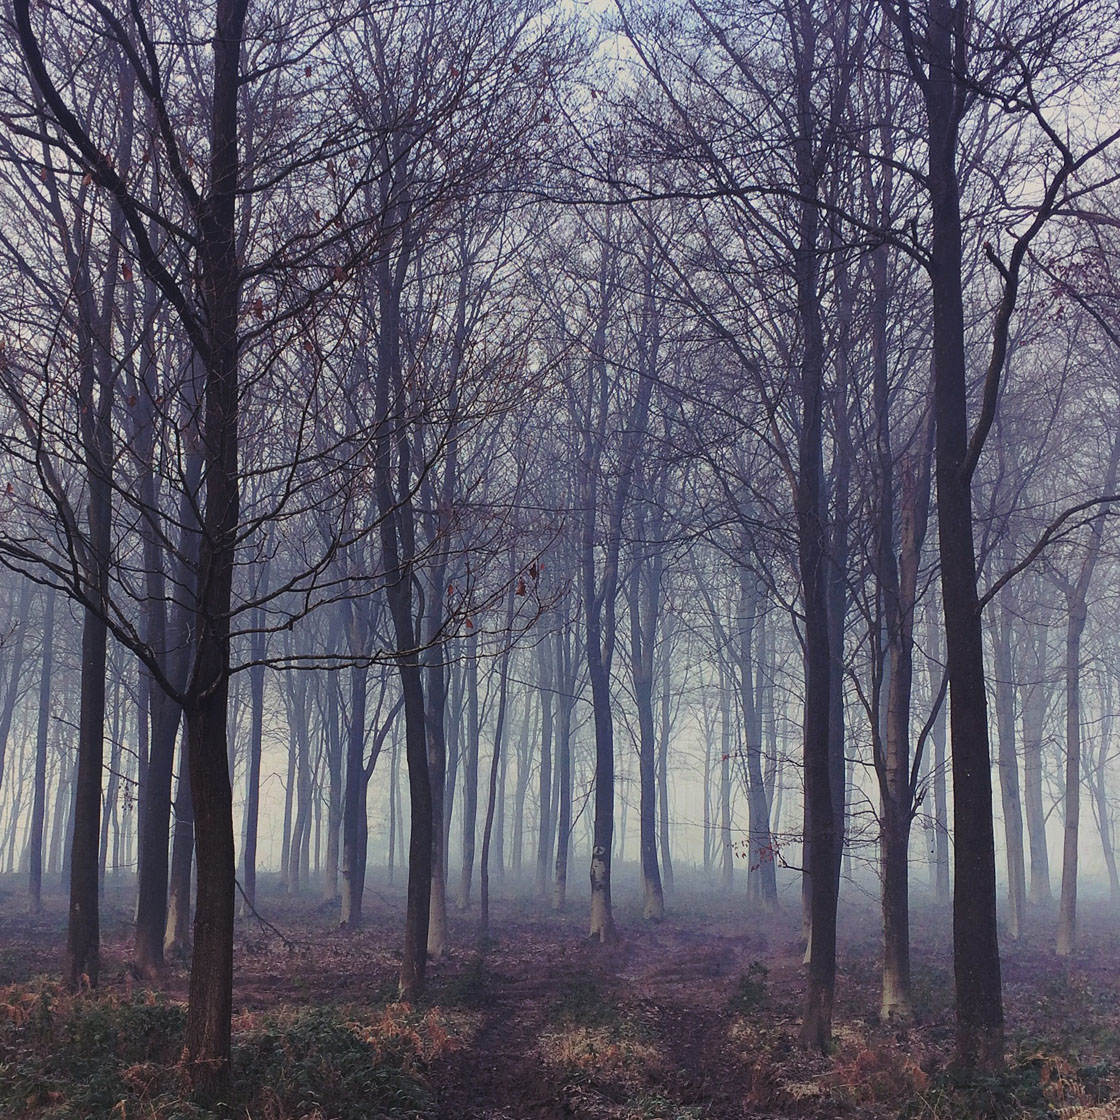
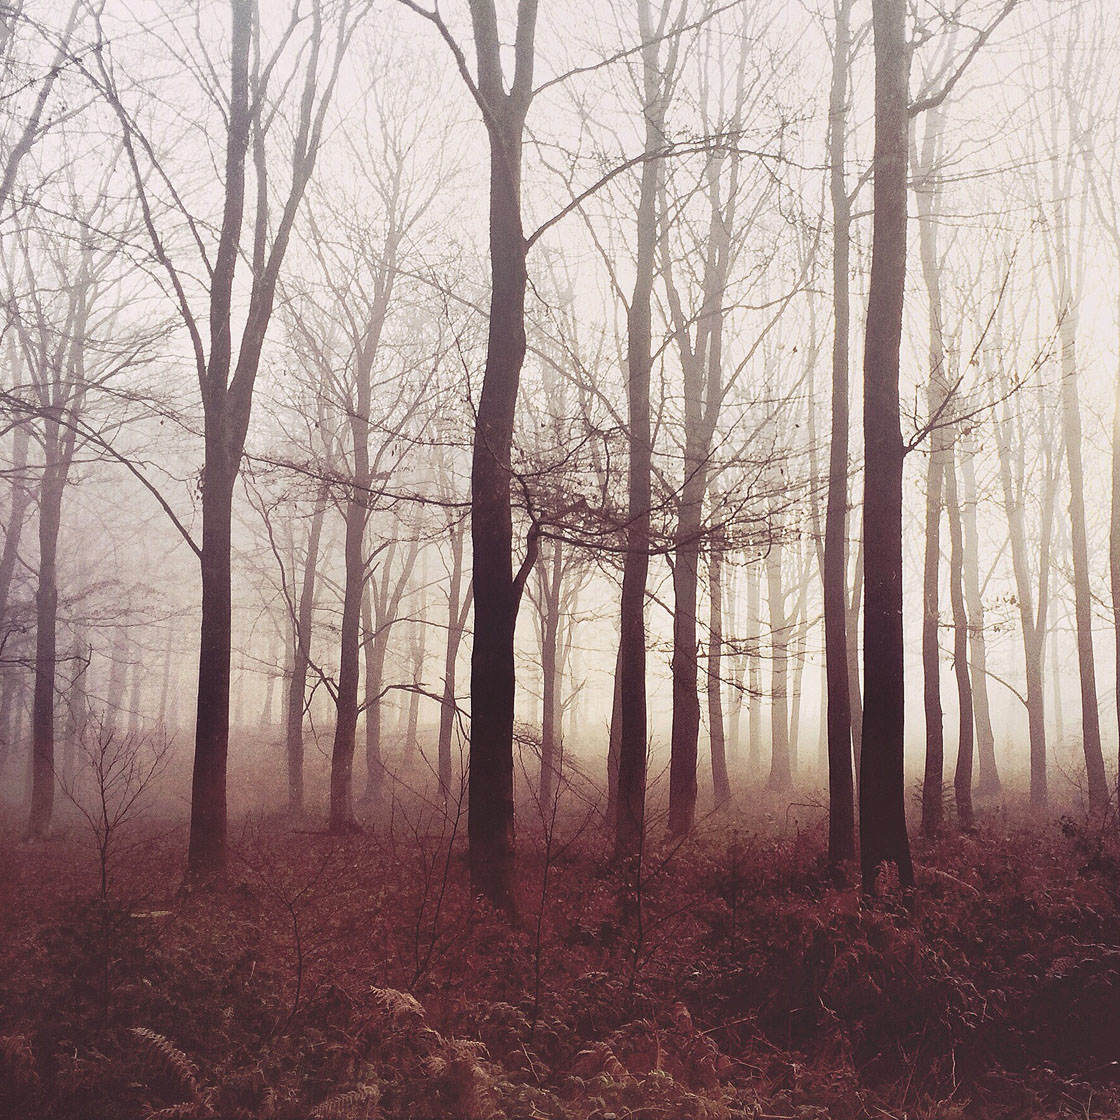
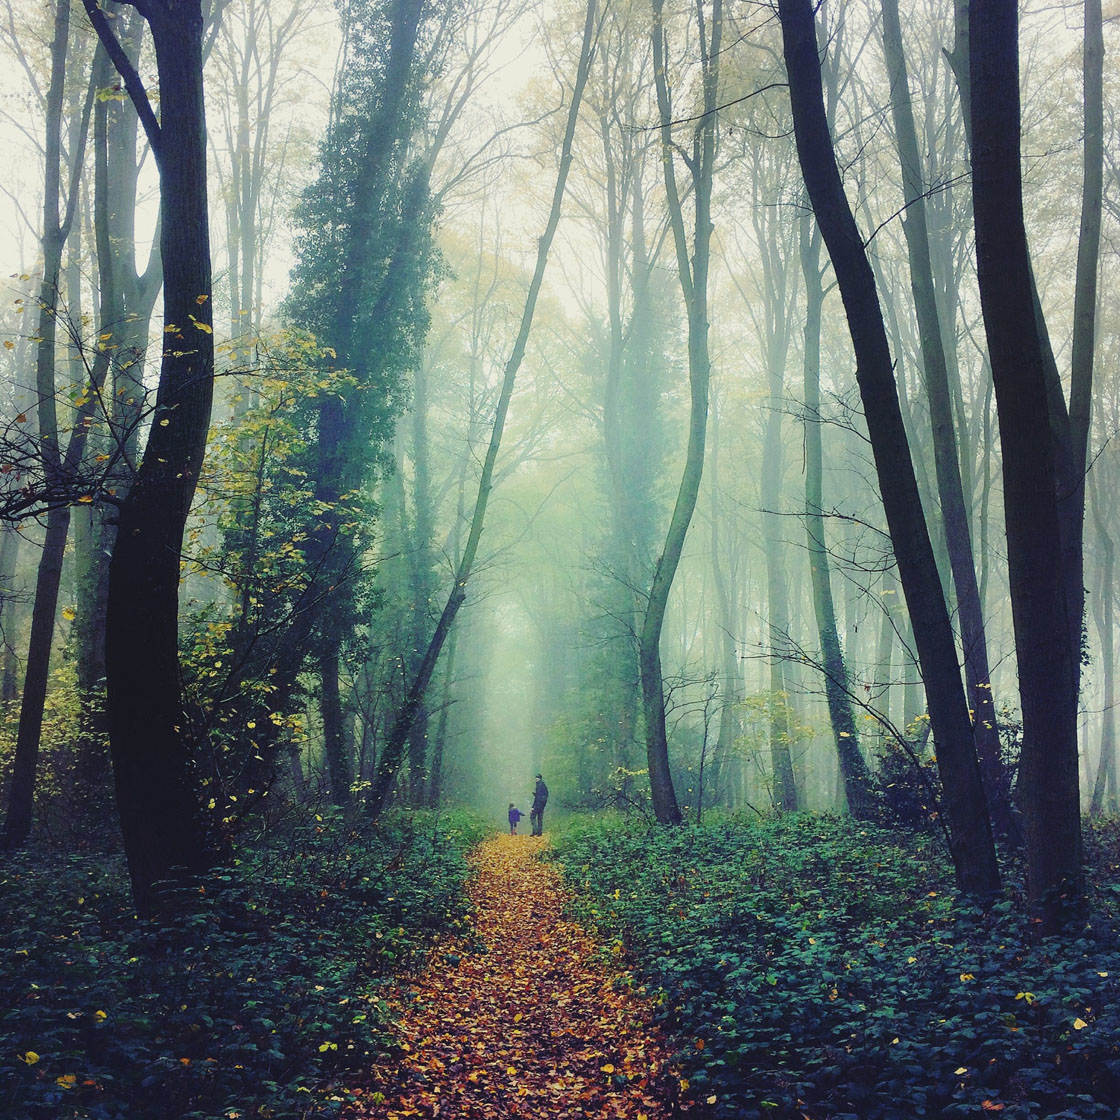
Forests are great for this with trees going back as far as the eye can see until they become lost in the fog.
When taking a shot across an open space try to include something in the distance.
Trees or people work great with the faded outlines showing the extent of the fog.
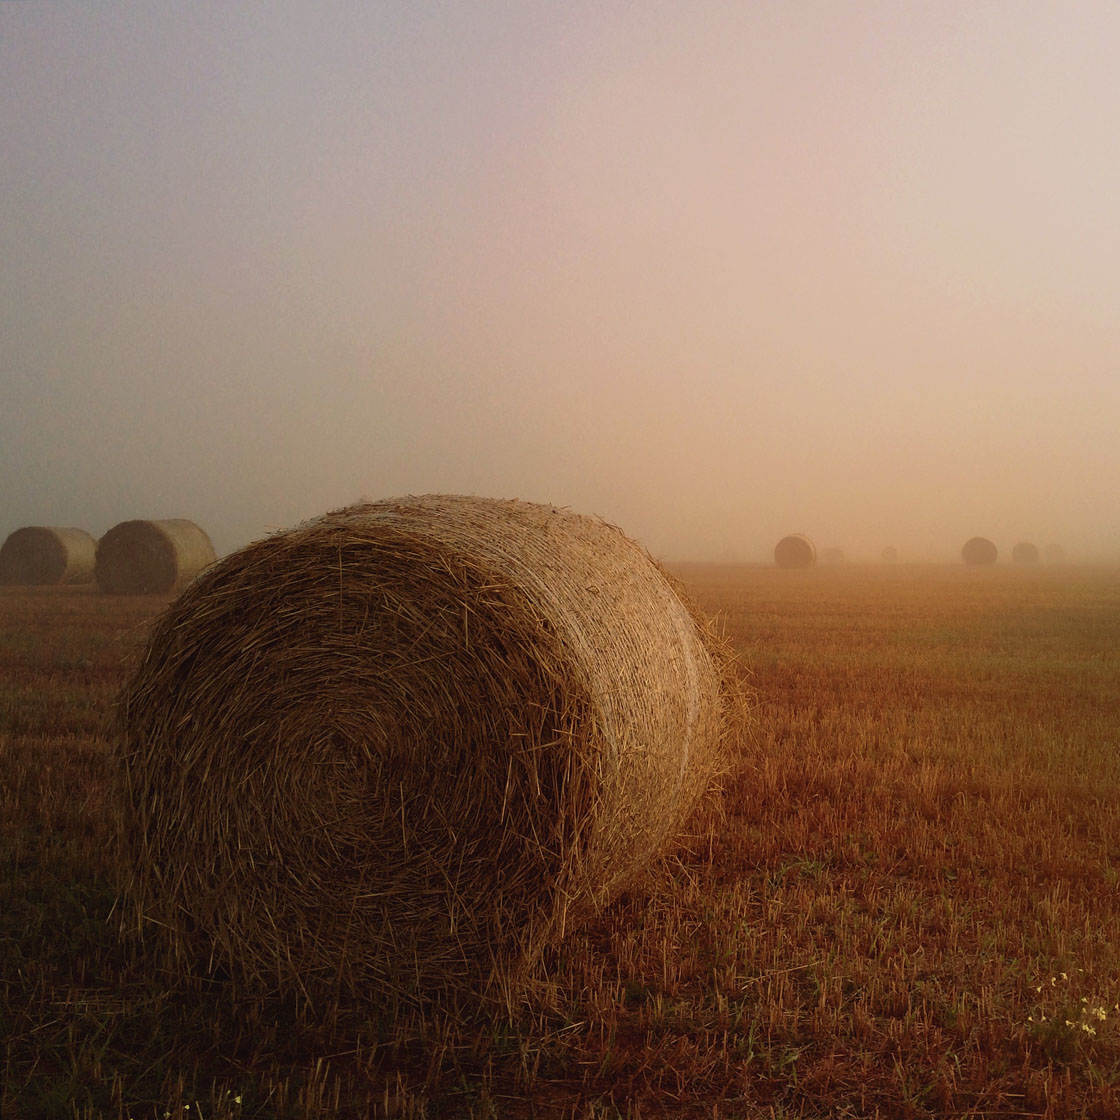
Another way to show depth in an image is to focus on something in the foreground, such as a plant or a fence.
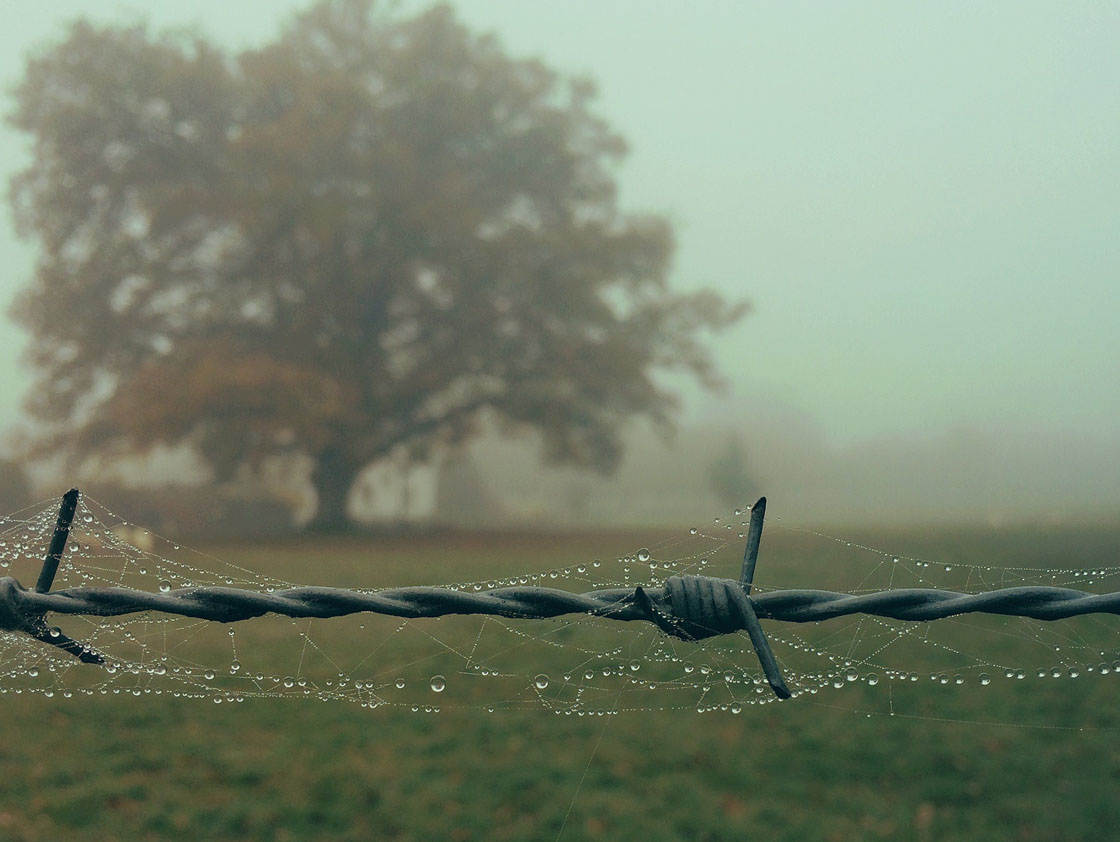
Fog makes a great backdrop to show up details in a close-up subject. It helps to have something in the background that’s fading into the fog, such as the trees in the photo above.
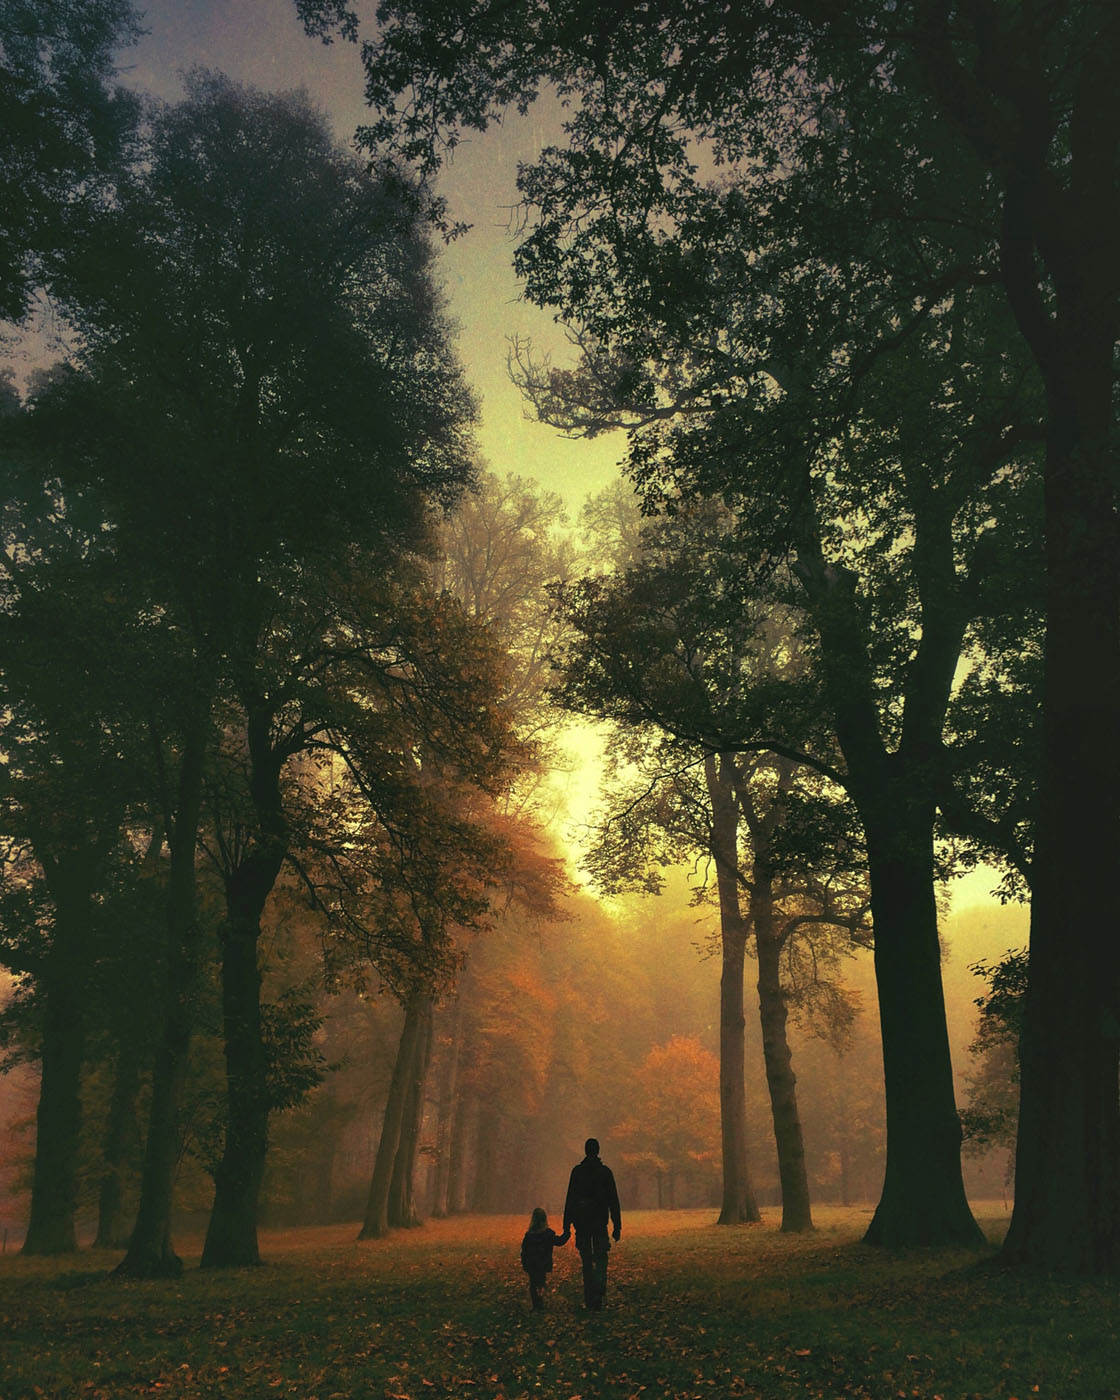
To create a sense of scale, include people in your shots. This is a great way to indicate the impressive size of trees in a foggy forest.
Capture people unaware, or have fun with different poses against a wonderful foggy background.
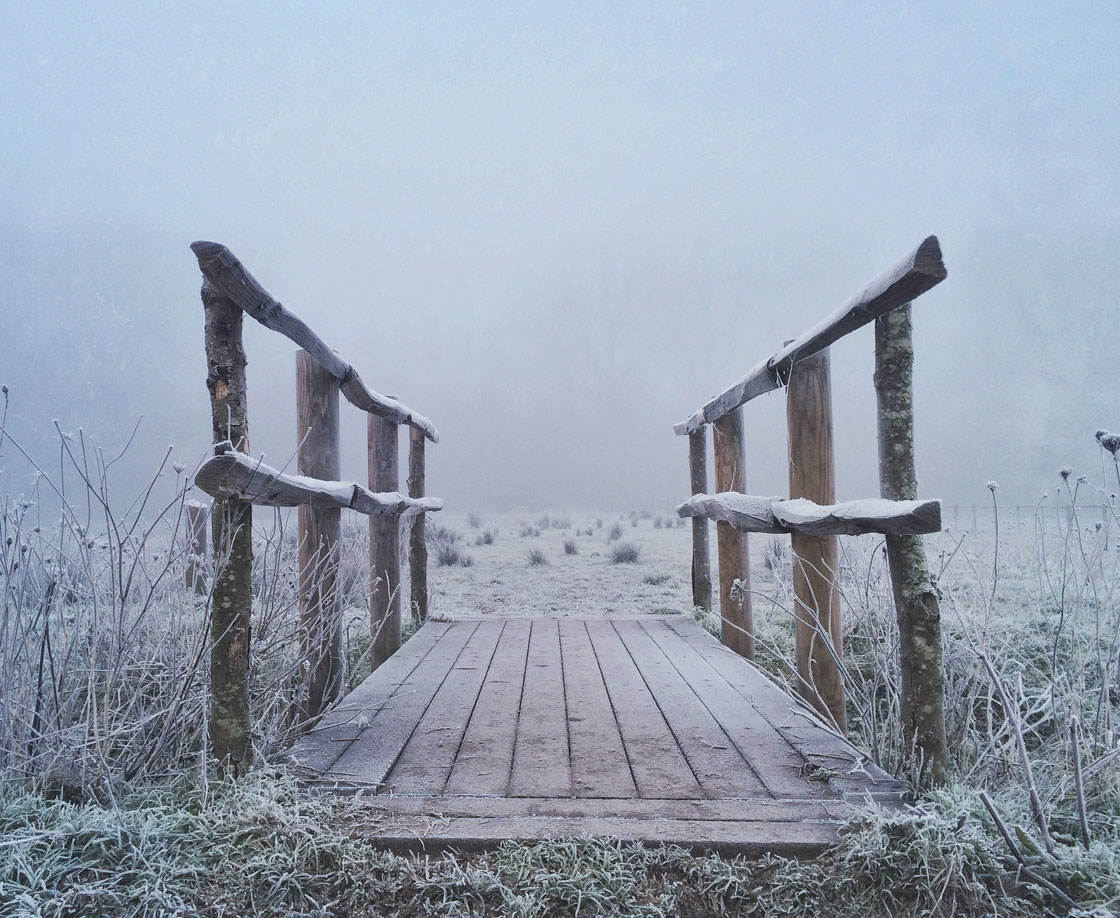
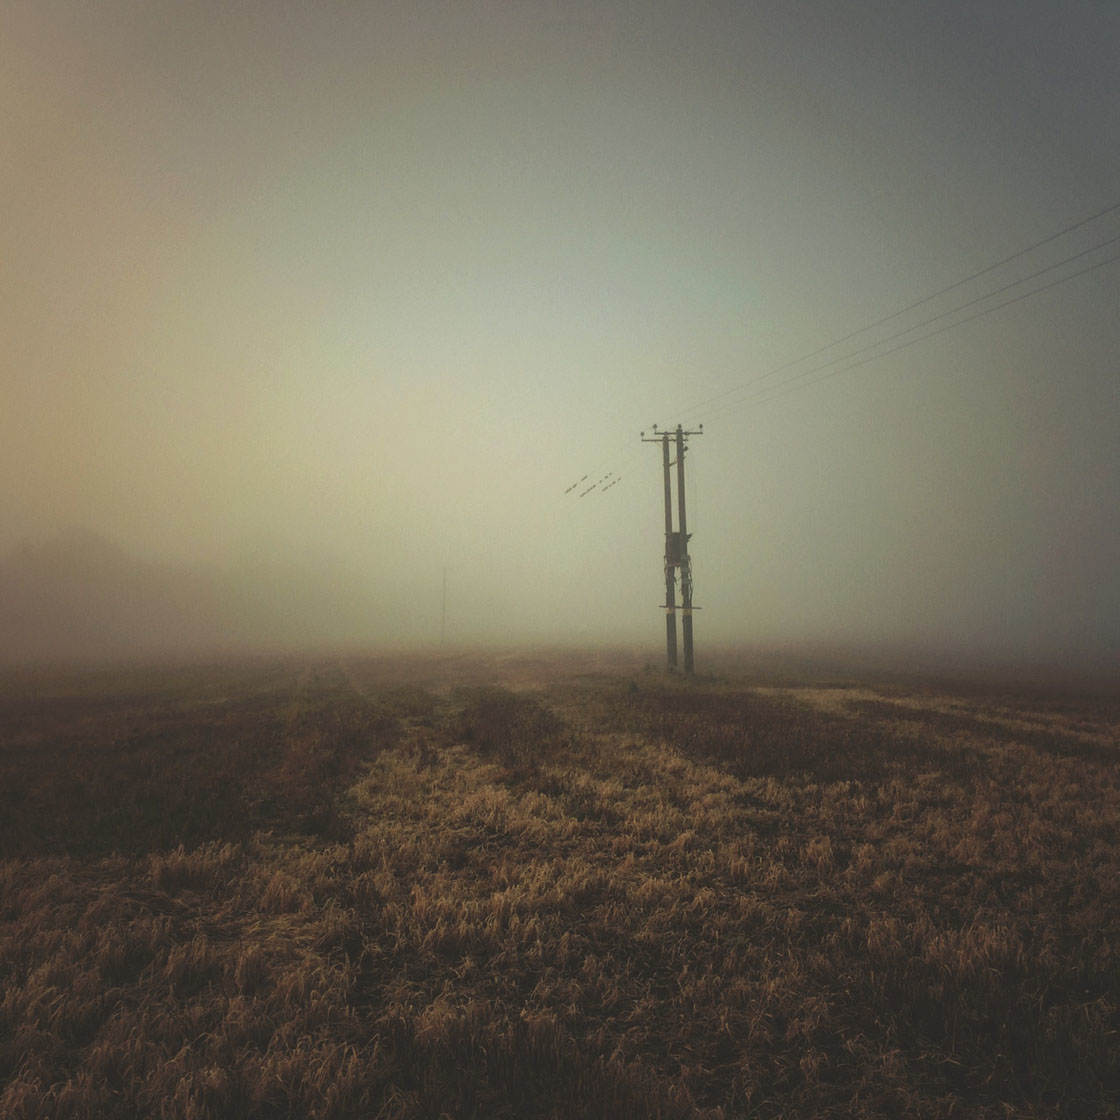
8. Find Leading Lines
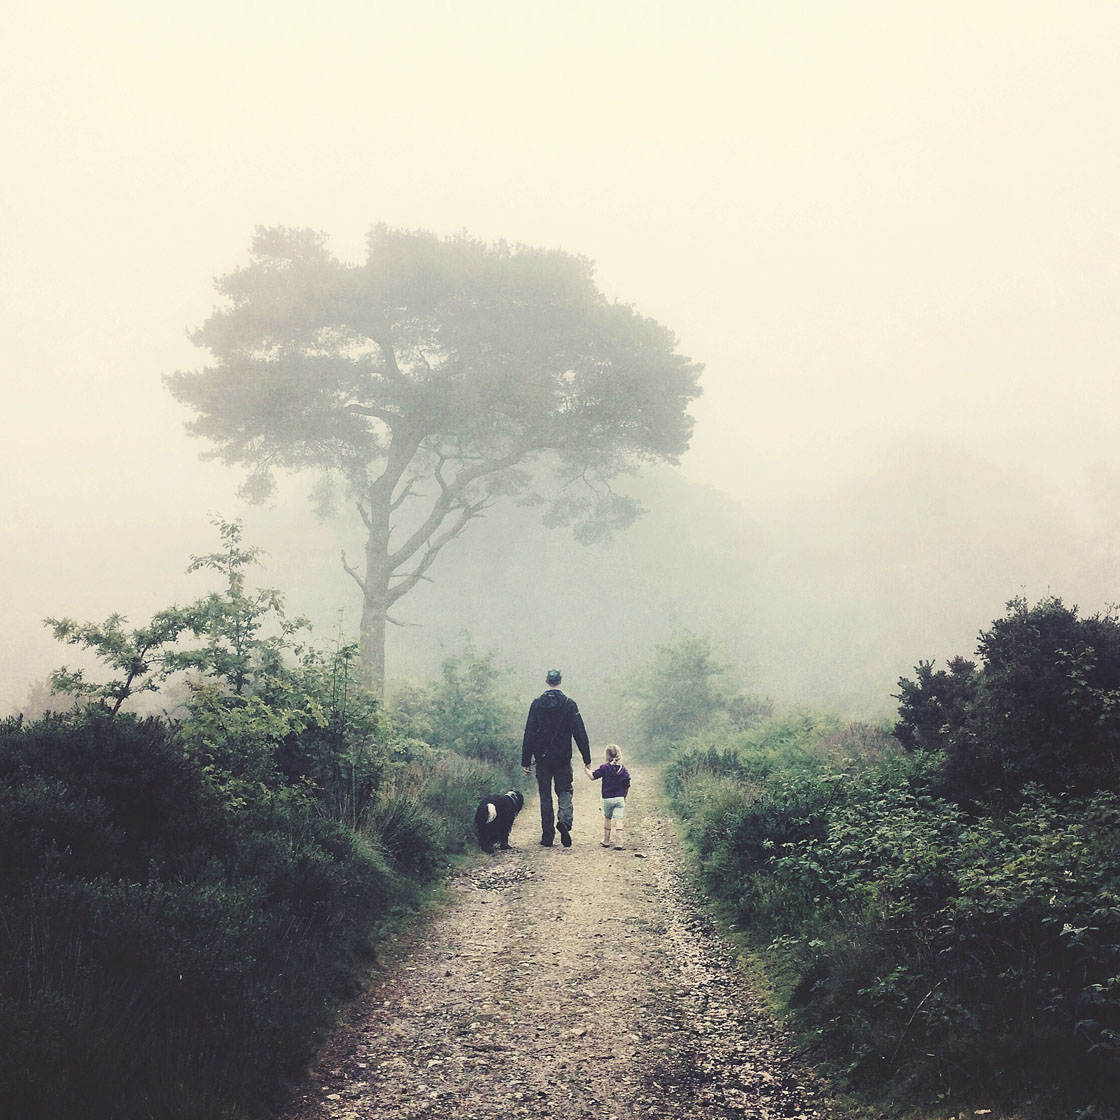
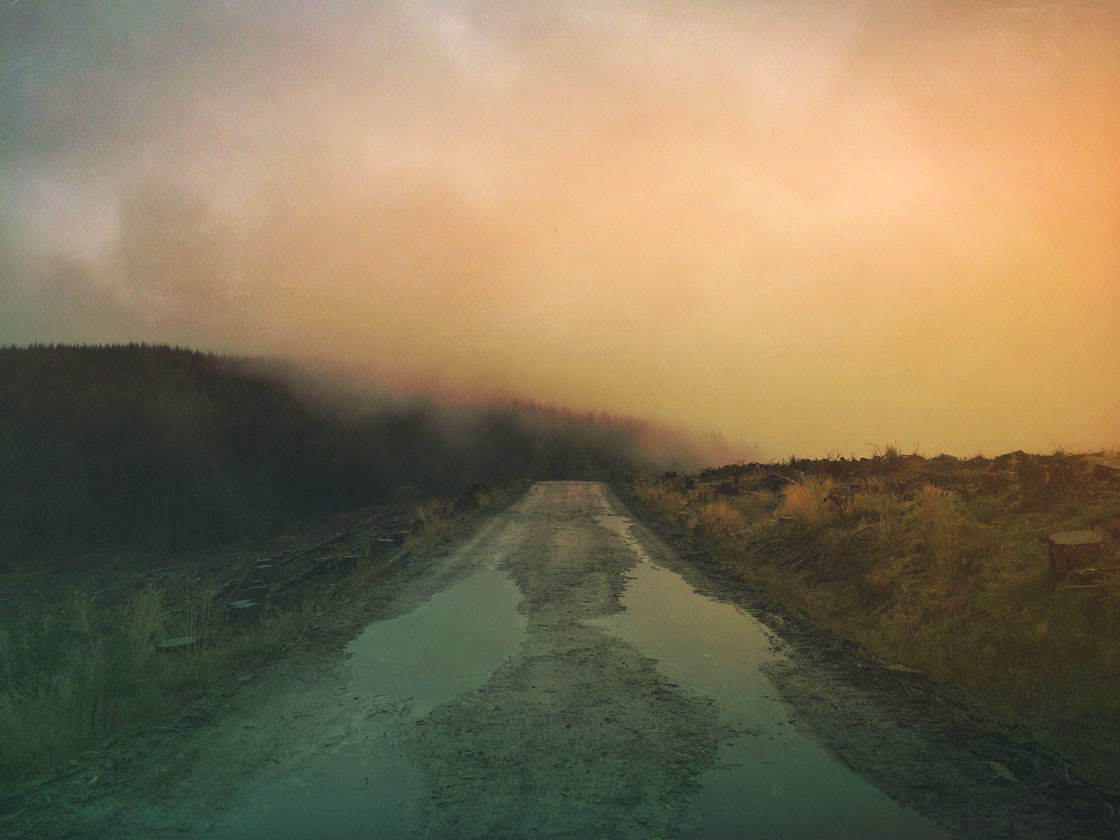
Leading lines are great for drawing the viewer’s eye into the foggy depths. So always try to seek out paths and roads to feature in your photos.
In the photo above, a simple track across an open field draws your eye into the distance, adding a strong sense of depth.
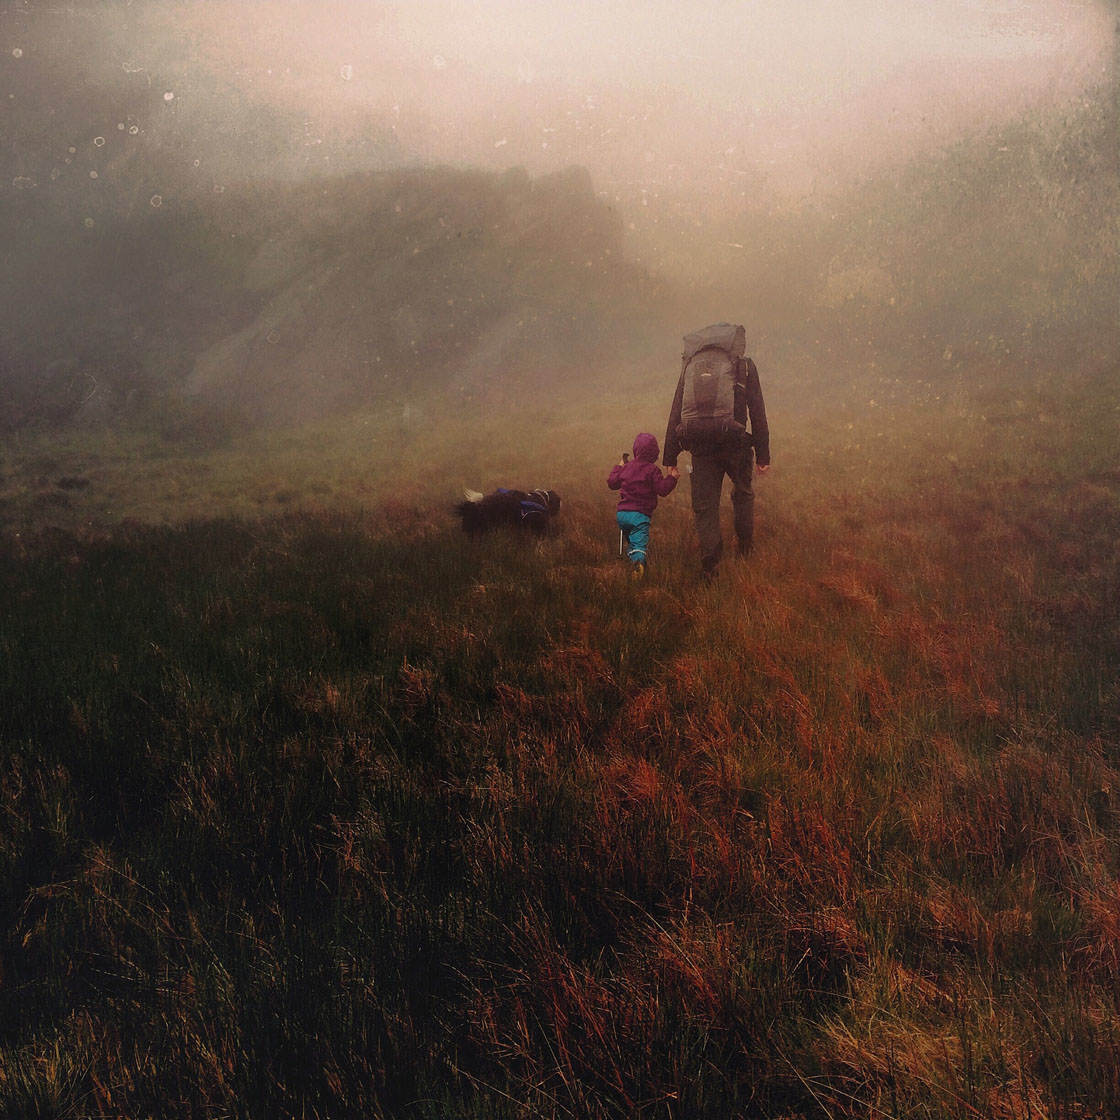
I’m a big fan of including people in my images. They’re great for adding mood, mystery and an interesting storytelling element.
So if you have a companion with you, ask them to walk away from you down the path. This will create a focal point in your photo, and the path will lead the eye directly towards them.
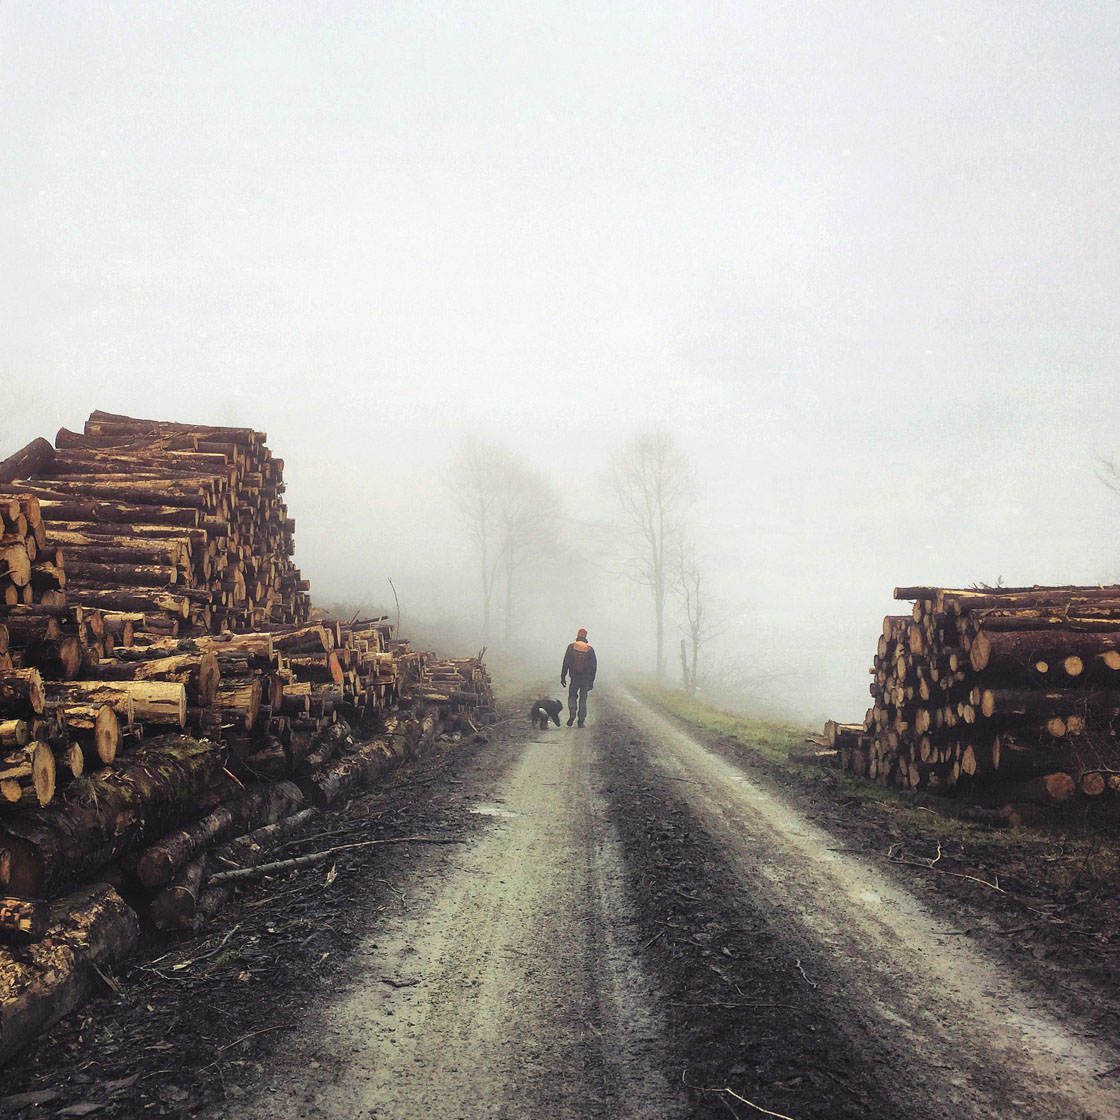
Take several shots as they move further away, so that you can select the best picture later.
You could also try varying your shooting position. Crouching down will alter the perspective of an image and give more prominence to items in the foreground.
Roads that lead into a foggy landscape also make for great photographic opportunities. Look for interesting markings on the road, or signs to the side, to add more interest to your image.
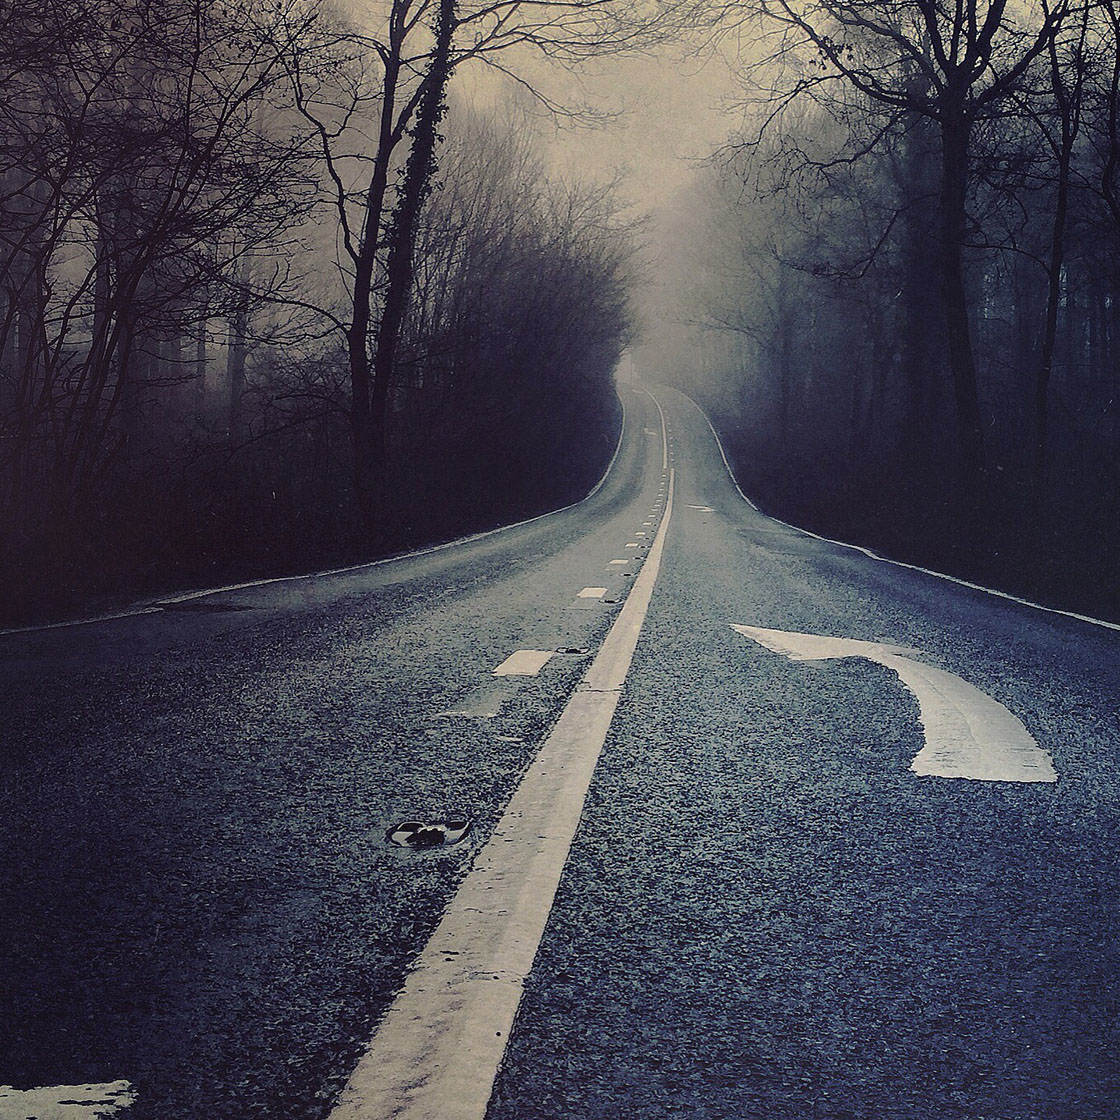
Just make sure it’s safe to stop and take a photo in the middle of the road. If you can’t see the cars coming they can’t see you either!
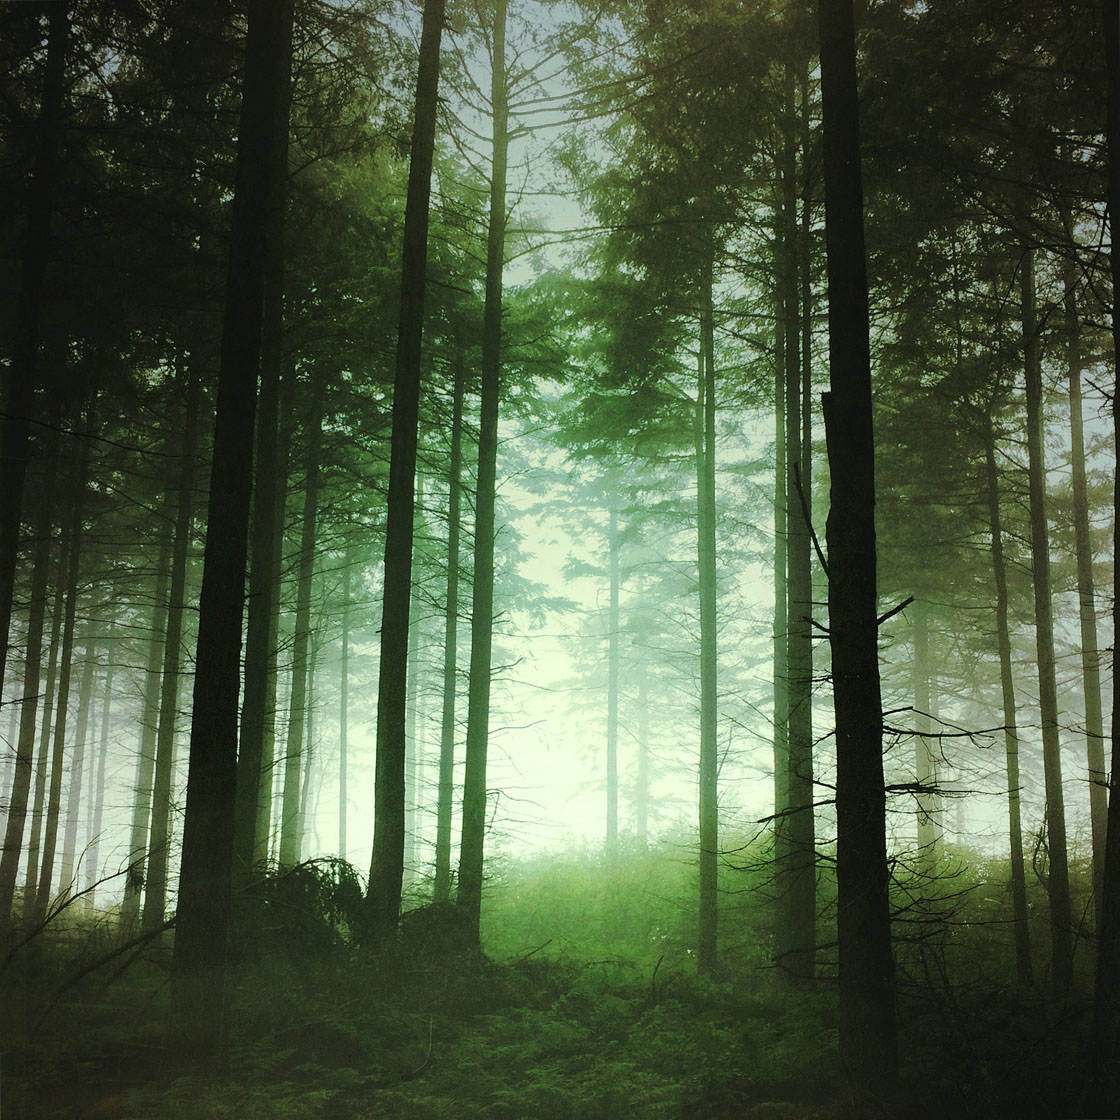
9. Capture Light Rays
Fog and mist allow for the appearance of magical light rays as the sunlight is scattered by the water droplets in the air.
You’re probably most likely to see them as light shines through the gaps between branches in trees.
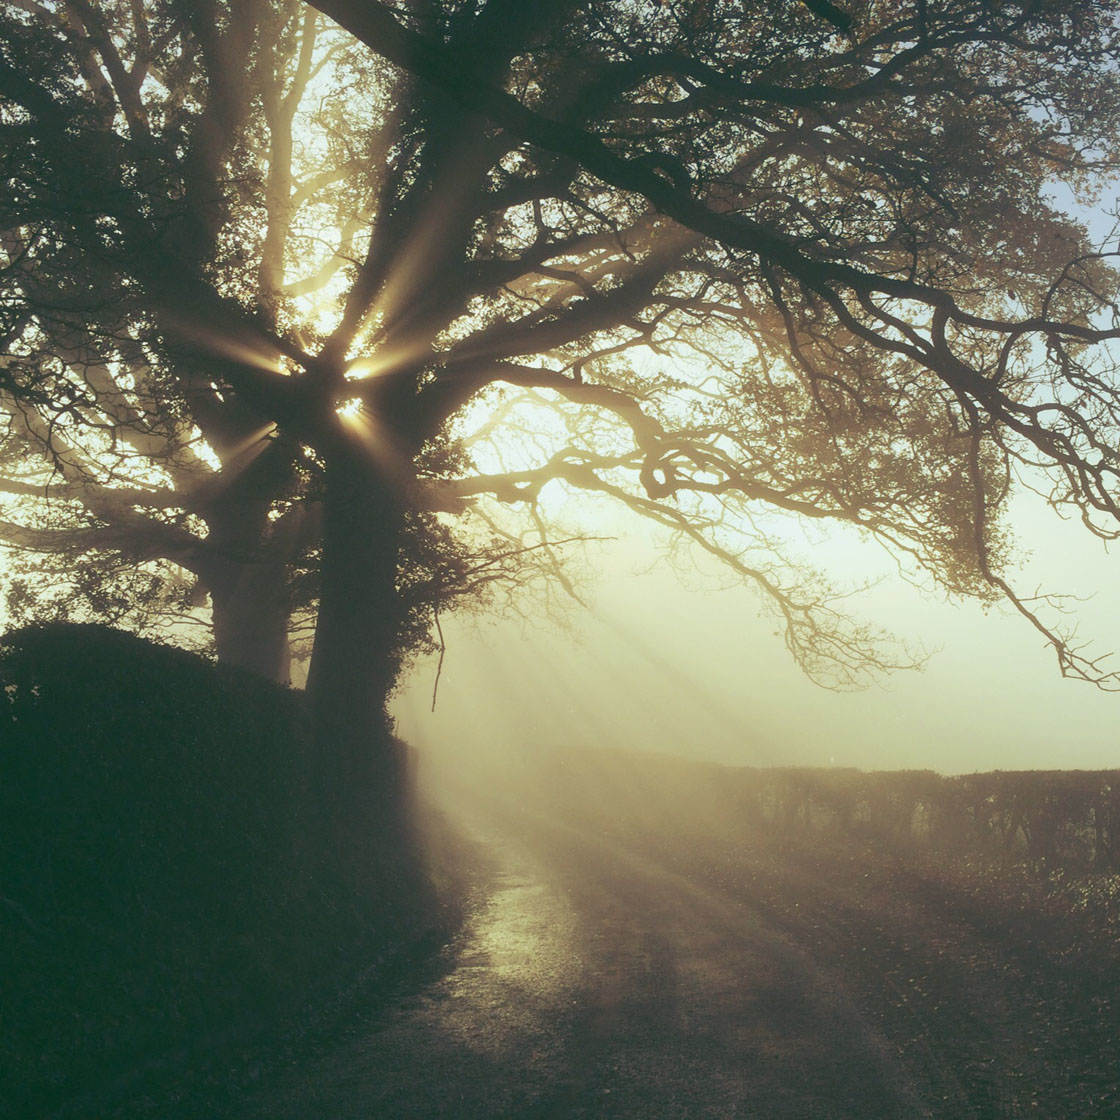
You’ll need to get into just the right position to capture these rays. Move back and forward until you find the perfect spot where the beams are at their strongest. But be quick as they may disappear as quickly as they appeared!
10. Explore Different Shooting Perspectives
When you’re shooting in fog, take some time to look around you for interesting shooting angles that will make the most of the foggy conditions.
As well as visibility decreasing as you look forward, it will also be decreasing as you look up. To show this in your image, you’ll need to include something at the point where visibility is lost.
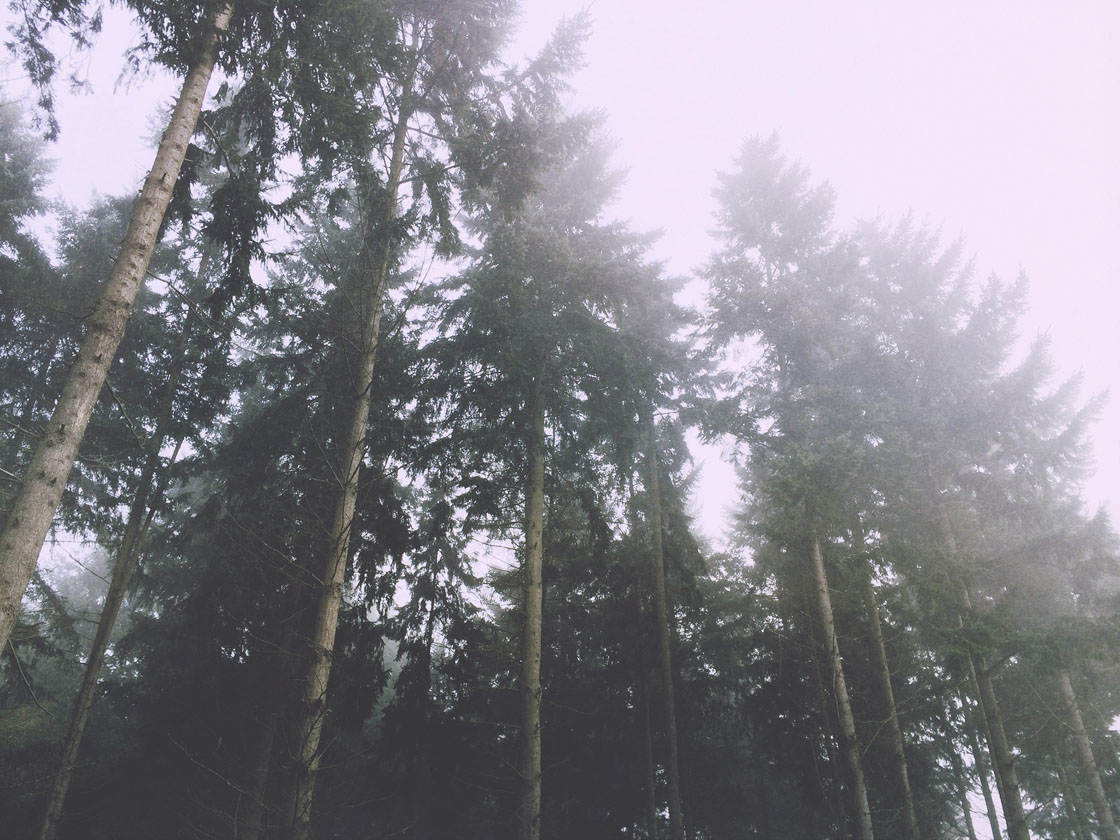
Tall buildings in a city or trees in a forest work really well. Get down as low as you can and shoot up into the fog.
If you’re up high on a hill or mountain, then you may get above the fog and mist. A fog filled valley is a sight to enjoy and definitely worth getting a photo of.
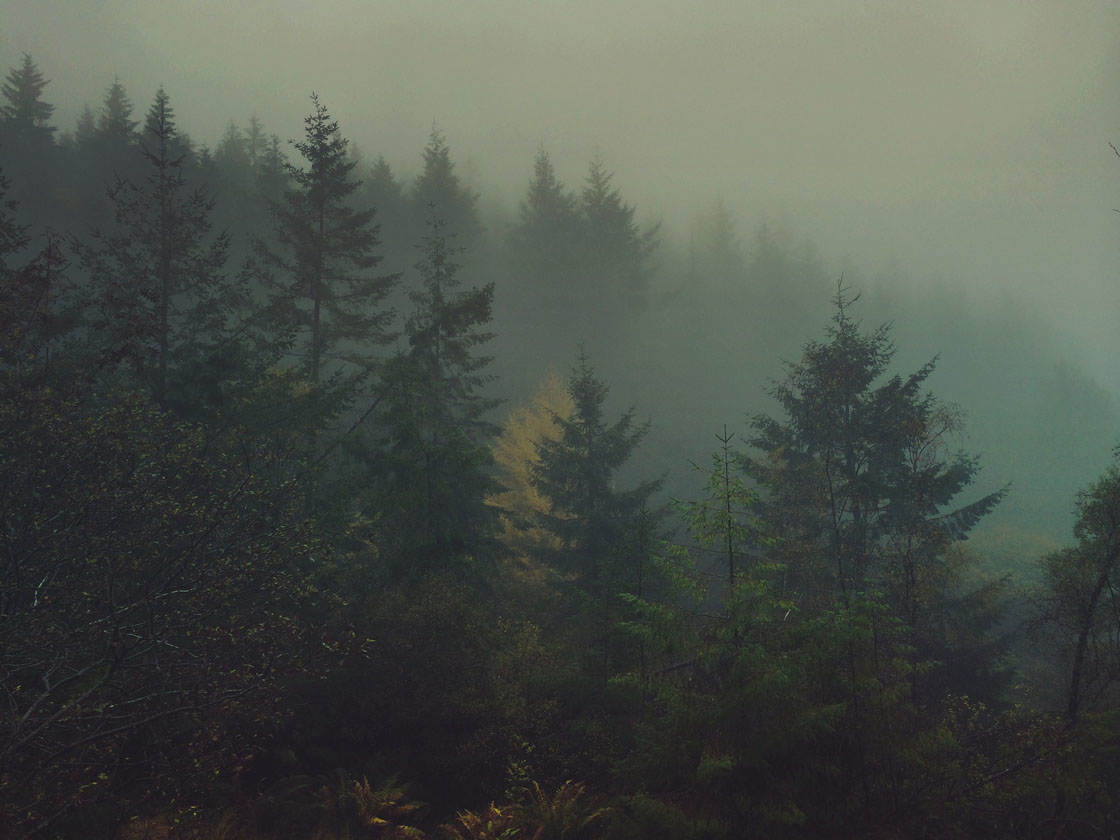
Getting up high to look down on treetops in the fog and mist also makes for a striking photo.
If you’re struggling to get the bright foggy background behind your subject, crouch down and shoot from a low perspective.
This is especially useful when photographing close-up subjects. Get down really low so that the subject shows up well against the brighter background.
Another useful tip is to remember to look behind you. Turn around every now and again on a walk for a completely different view.
A change in light as you shoot in the opposite direction can give your images a completely different feel.
With this in mind, it’s not a bad thing to walk back the way you came for a different perspective.
11. Edit To Enhance The Fog
The fun doesn’t stop when you’ve finished taking photos. With the huge variety of editing apps available for the iPhone, you can enhance your images in many different ways.
From basic exposure adjustments and filters to interesting textures and light leaks, there are plenty of options for beautifully enhancing the fog in your photos.
The free Snapseed app is great for editing your iPhone photos. You can use the Snapseed photo editor to crop and straighten images, and adjust various settings such as brightness, contrast and color.
Or try the free VSCO app. The VSCO filters offer a quick way to change the mood of your photo. And the VSCO photo editing tools allow you to fine-tune color and exposure.
The very reasonably priced Mextures app offers greater creativity with a huge number of textures, color filters and light leaks to enhance the mood of your image.

In the image above I used Mextures to really emphasize the mood of the day – a fog-filled cold winter walk with strong winds. The image has been desaturated to tone down the color, and a light texture has been added.
In the photo below, the foggy sky has been darkened to increase the sense of drama. I also applied a texture to add extra visual interest and enhance the overall mood.

Another way to dramatically change the mood is to alter the colors in your image. In the photo below I used a combination of VSCO and Mextures to add a burst of color to the fog rolling-in.
Finally, it’s worth mentioning that if you can’t find any fog, you can always create it in post-processing! There’s an app for pretty much anything, and fog and mist are no exception.
Photoshop apps for iPhone like Lens Distortions allow you to add a fog filter to any image in the absence of the real thing.
Conclusion
As you’ve seen from the photos in this tutorial, fog adds a wonderful mood to your photos. It completely transforms the landscape, providing you with brand new photo opportunities.
To get the best possible images, start by improving your chances of finding some mist and fog by following the weather forecast and becoming familiar with your local fog hot spots.
Always try to include a focal point such as a person, tree or close-up flower in the foreground. Capture objects at varying distances to create a greater sense of depth in your photos.
Fog often means that you’ll be shooting in low light conditions, so make sure you keep your iPhone steady, and adjust the exposure to ensure the brightness levels are correct.
And finally, don’t forget that you can enhance the atmosphere of your fog photos in post-processing using a range of image editing apps.

Thanks for these useful tips Cat. It’s definitely worth getting up early on a misty morning for the chance of capturing such atmospheric photos 🙂
Thanks Kate – lie-ins are overrated 😉
This was taken around one moth before. Location is Mihinthale, Sri Lanka
Great shot Manoj! Having something close in the foreground is a really good technique to use in this kind of weather 🙂
So good Manoj – one to be proud of!
Great tips!
Glad you found them helpful! 🙂
Thank you, most informative session, will help enhance future photos. Thank You.