If you’re looking for a powerful suite of iPhone photo editing tools, all packed into a clean and no-nonsense interface, you should definitely consider the new Polarr app. Polarr is one of the best photo filter apps for iPhone. And it has a sophisticated set of editing tools. In this article you’ll discover how you can take your iPhone photo editing to the next level with the Polarr app.
Overview Of Polarr App
Polarr is one of those rare apps that offers a powerful suite of editing tools without any gimmicks. While there are many great editing apps that offer a wide range of editing tools, many of them often include additional features that can feel too gimmicky.
Features such as painting over your images with kitschy textures and adding “stickers” may be fun to play with, but they’re not typically considered serious photo editing tools.
Based on the highly-regarded free web-based photo editor of the same name, the free Polarr app now makes this collection of powerful editing tools easily accessible on the iPhone.
Polarr offers an extensive assortment of pro-level editing features and controls, yet it’s readily accessible to iPhone photographers on almost all levels, just like the corresponding web app.
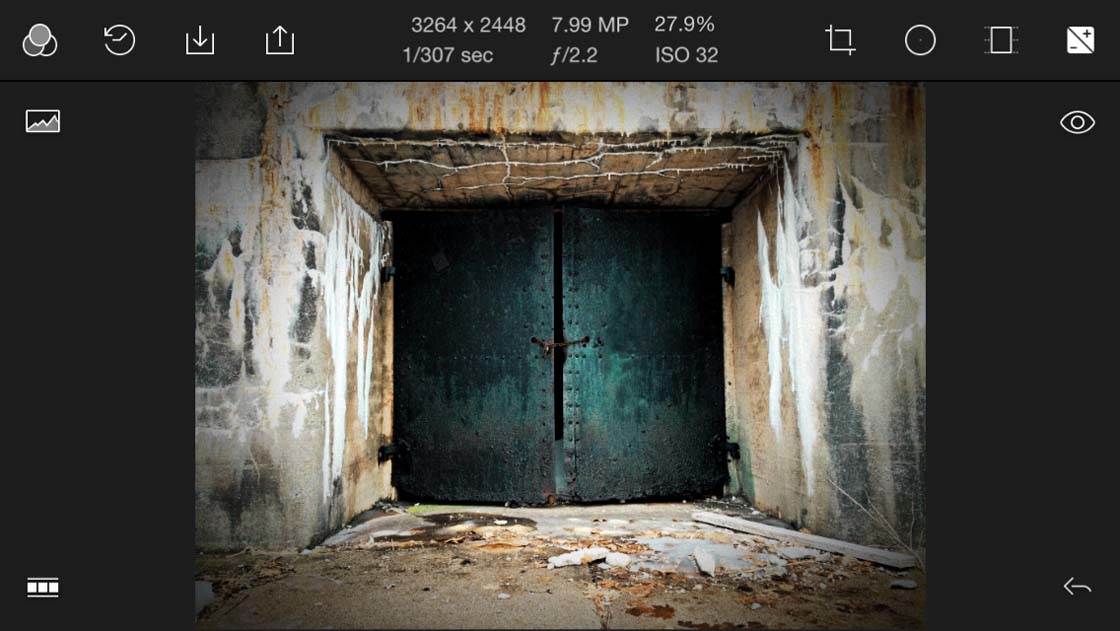
Because it’s a full-service editing app, the interface can appear a bit busy and even cluttered. However, the layout of the interface has been carefully designed to spread the functions out on the left, right and bottom of the screen, and you can adjust this workspace to show more or less of the tools depending on what you’re working on.
Therefore, even if the interface appears a bit cluttered upon first glance, once you realize how adjustable it is, you’ll quickly find that the interface tends to stay out of your way while you’re editing.
For example, if you want to apply a filter preset (located on the left of the screen) to a photo, you can tap a button to hide the image editing tools on the right side of the screen to give you more space to work with the filter.
You can also show or hide most of the other toolbars with a simple tap. This helps to free up a lot of space and declutters the screen.
Interface Features
Now let’s take a quick look at all of the toolbars and what they have to offer. One quick observation is that the app is meant to only function when holding your iPhone horizontally. This is necessary due to the way the toolbars function.
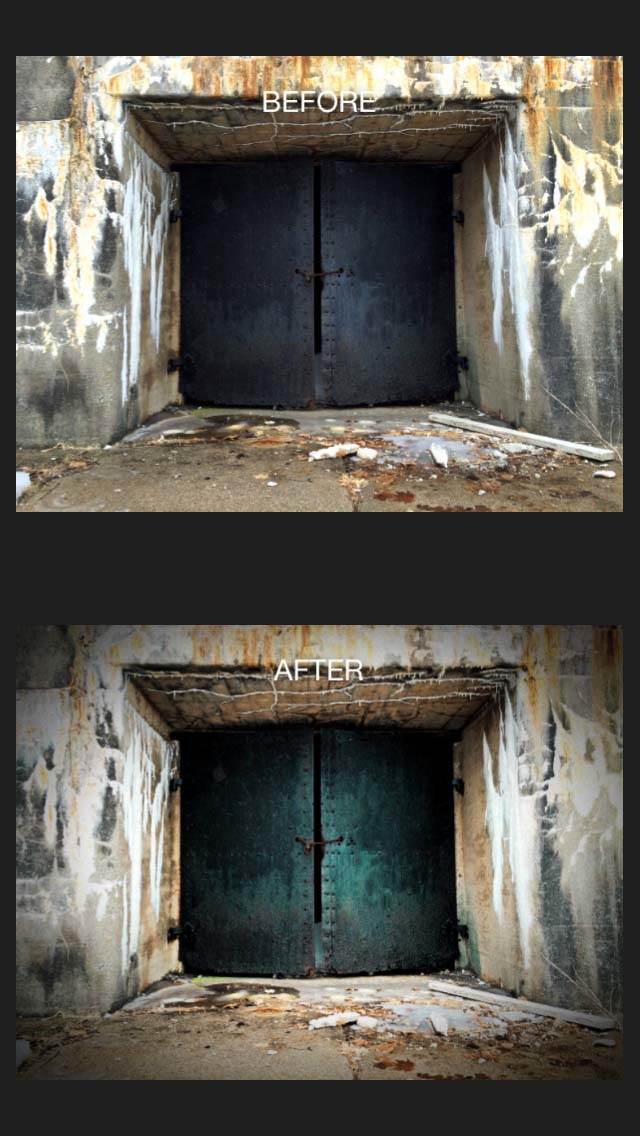
However, if you tilt your iPhone into the vertical position while using the app, you’re presented with a side-by-side before and after view of your current photo. This is a unique way to review how your edited photo compares to the original.
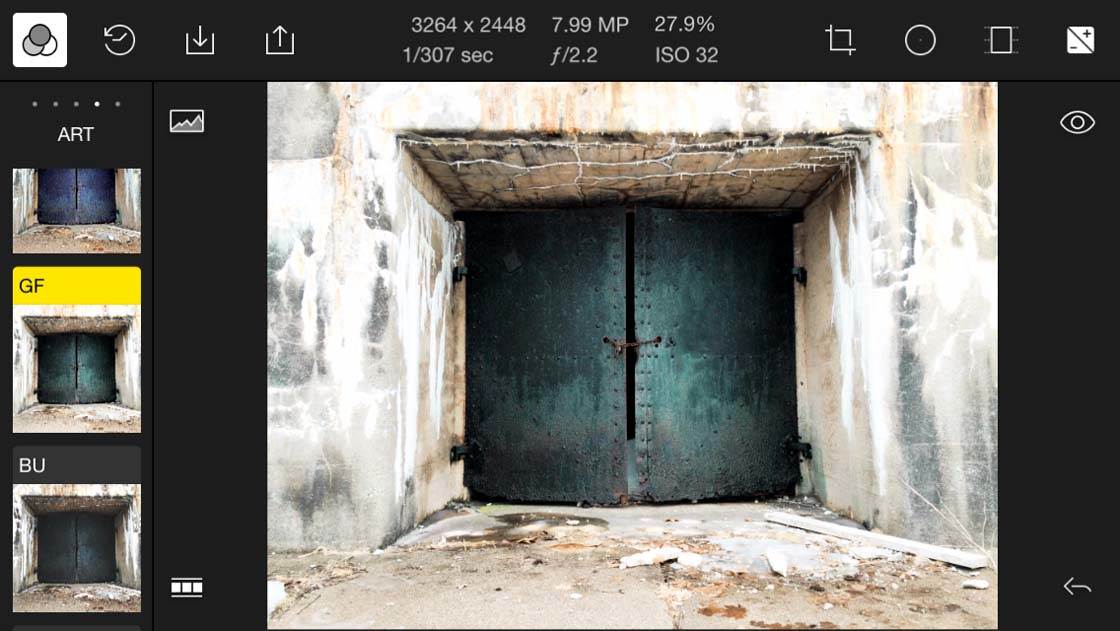
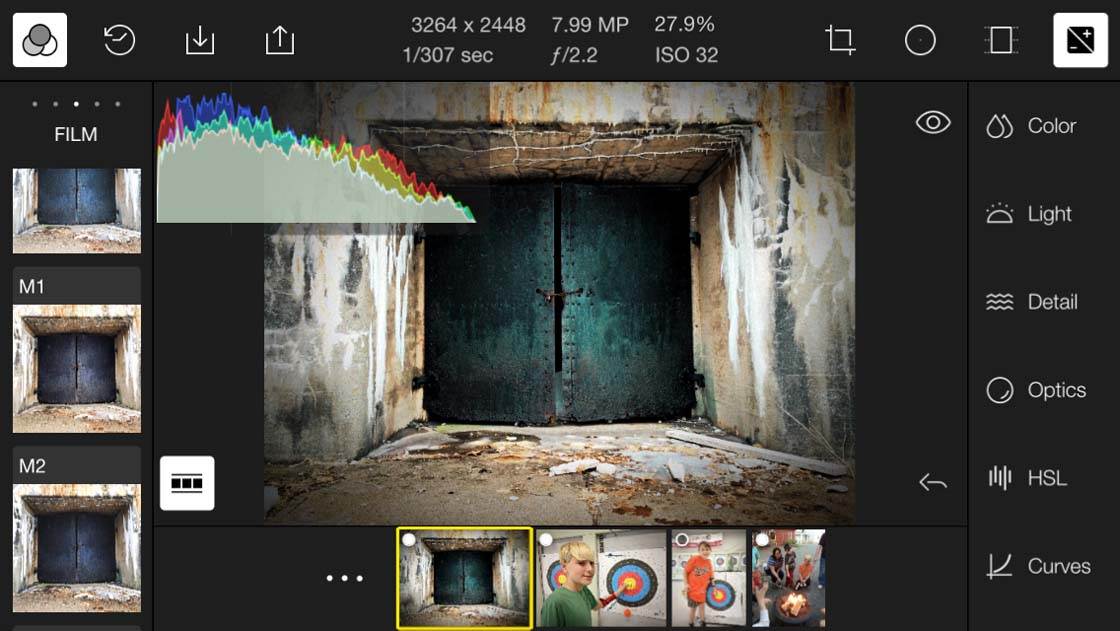
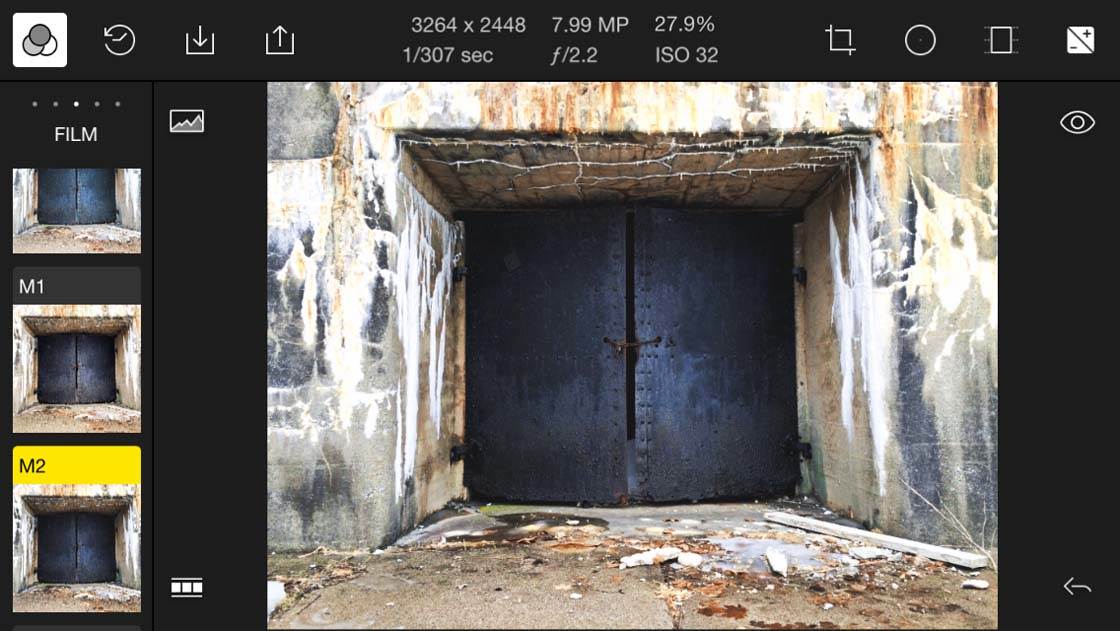
The left side of the screen includes filter presets in five categories: Most Used, Modern, Film, Art and Custom. There’s a great selection of filters, but if there aren’t enough for your tastes you can always tweak them endlessly using the editing tools on the right side of the screen.
You can also create custom filter presets for use on future photos, but this feature requires an in-app purchase which also unlocks a few other “pro” tools including a gradient tool.

Now let’s look at the toolbars on the right side of the screen. There, you’ll find the expected classic adjustment tools such as exposure, contrast, highlights and shadows, temperature, distortions and vignette.
The labels for these tools (Color, Light, Detail, Optical, HSL, Curves and Toning) might take a bit of getting used to if you’re not already familiar with these terms.
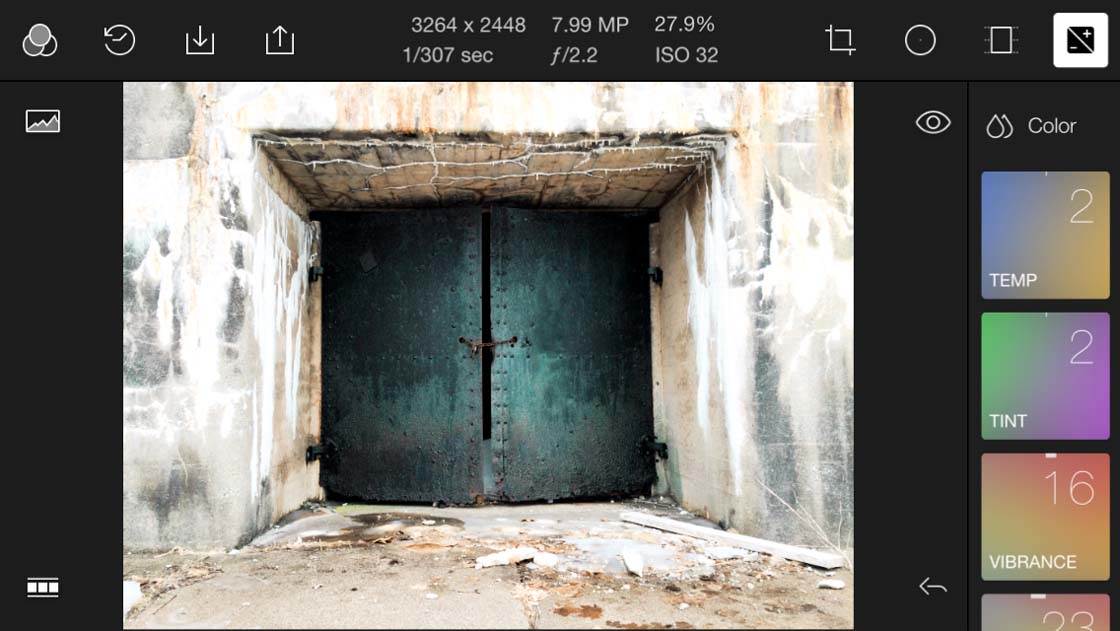
Most of the tools mentioned above pop open to reveal additional controls which you can use to fine-tune your edits. You simply slide your finger over the “box” for the relevant tool you wish to adjust in order to change the level/value of the effect.
I found this aspect to be a bit difficult to work with at first. The slider-like function is highly sensitive making it hard to control. With a little practice though, it’s really not all that difficult.
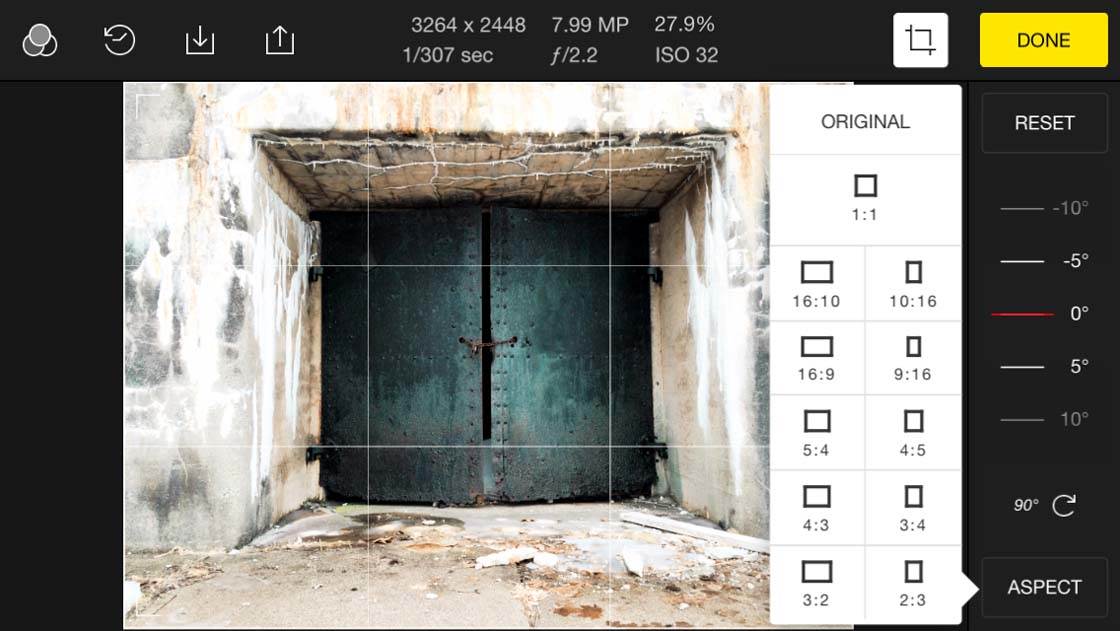
A full range of crop tools is available to suit your needs no matter what they might be. You can also make adjustments by tilting your iPhone from side to side. Just select the control and tilt your phone.
Additionally, Polarr provides infinite Undo/Redo and History controls that allow you to return to any point in your editing sequence.
Many of the adjustment options in Polarr are rarely seen in mobile apps, but are common in desktop photo editing software. If you look at the reviews on the App Store, you’ll see numerous comments about Polarr being like Lightroom in terms of functionality.
While the desktop version of Lightroom still offers far more functionality, such comparisons are not unjustified. The variety and depth of the available controls is excellent.
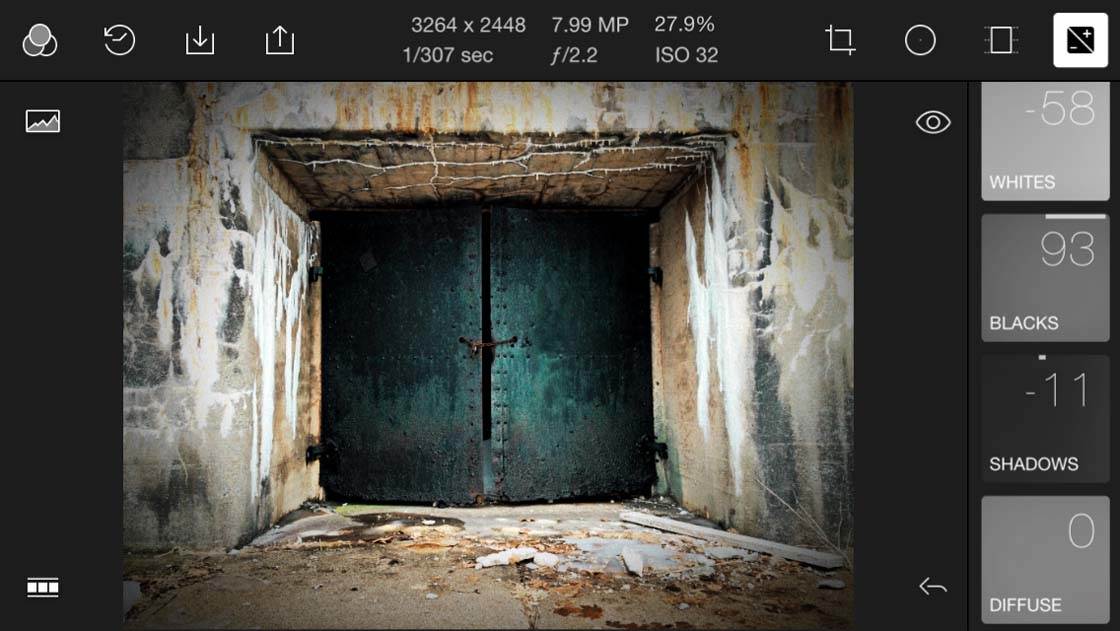
Being able to separately adjust your white and black levels, apply a proper clarity adjustment, and have access to many other advanced editing tools all in one app is extremely convenient.
The developer has done a great job of fitting all of these features into the app while still making it easy to navigate.
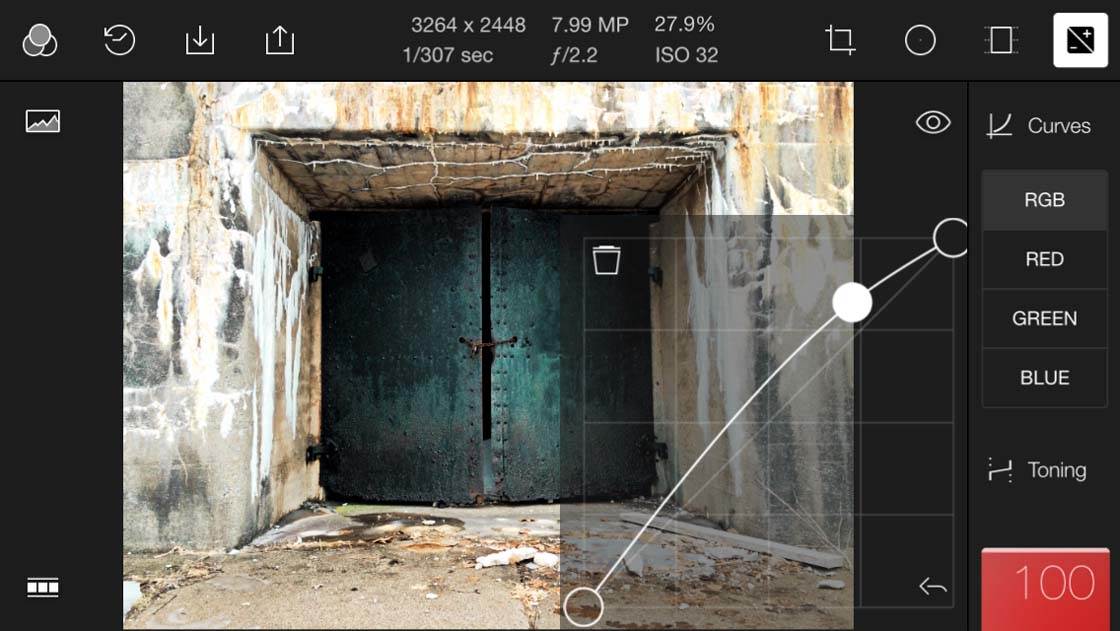
There are even advanced editing tools like HSL channels and Tone Curves that help you to adjust the colors and luminance (light) levels.
You can even apply split-tone adjustments where you add color to the shadow or highlight regions of an image with any colors you choose.
Finally, there’s a dynamic histogram that you can turn on or off with a simple tap to help you balance your color and exposure values.
Universal App For iPhone & iPad
Polarr is a universal app that works on both the iPhone and iPad, although it’s only optimized for the iPhone 5 and newer (and more recent versions of the iPad).
Editing with Polarr on an iPad is actually a bit easier due to the much larger screen size, but it’s perfectly acceptable to use it on your iPhone as well due to the ability to hide many of the toolbars when you’re not using them.
Users of the new, larger iPhone 6 and 6+ models will also find that they have more screen real estate to use.
Final Thoughts
While Polarr is an excellent editing app, it’s not without its potential faults (although these depend on your own approach to photo editing).
For one, the app is lacking any sort of layers capability like Pixelmator and other more advanced editing apps. While not a deal breaker, this is something to be aware of when considering the app for a spot on your iPhone.

One of the best things about mobile photography (especially with iOS devices) is the sheer variety and selection of available editing apps to choose from.
Even if you’re primarily interested only in more advanced editing apps, you still have quite a few to consider – and Polarr should be high on that list.
Polarr is available for free on the App Store. Additional filters and a couple of really advanced tools are also available for a one-time in-app purchase of $4.99.
But unlike some other apps that hide the most useful tools behind in-app purchases, the free version of Polarr works just fine as it is. Upgrading to the “pro” tools version will add functionality, but the free app is simply fantastic!

How does this stack against Snapseed, Filterstorm, PS Express etc? I see reviews for apps like Polarr but am loathe to buy more apps that really don’t replace more established apps with better capabilities and interface.
I tried Polarr a few weeks back, but couldn’t really get my head round how to use it and gave up, in preference for Snapseed and Enlight. However…I read your article and decided to give it another shot. They’ve up-dated it recently and made it much easier (imho) to use. Totally knocked out with how good it is! I’d say it can sit alongside the afore-mentioned apps and is fast becoming the one I go to first. As for Filterstorm, I don’t know. Long time since I bothered with that one. Polarr, Enlight and Snapseed’ll do me.
Thanks for the article, btw.