Do you want to create stunning long exposure photos with a beautiful motion blur effect? While there are specialist iPhone apps for this, there’s actually a long exposure feature built right into the iPhone Camera app. All you need to do is shoot a Live Photo and then convert it to a long exposure! In this article, you’ll learn how to achieve this jaw-dropping effect using the Live Photos long exposure feature on your iPhone.
What Is A Long Exposure Photo?
Long exposure photography involves capturing a photo over a longer period of time than normal.
In most cases, when you take a photo, the camera uses a fast shutter speed. It captures the photo in a fraction of a second. And this freezes any movement in the scene.
But with long exposure photography, the photo is captured using a slower shutter speed. The photo is captured over a period of several seconds, e.g. 2 seconds, 8 seconds, 30 seconds, etc.
During this longer exposure time, any moving elements in the scene appear as motion blur. Common examples are the red streaks of tail lights at night, or the soft, misty effect of moving water.
Now, there are several specialist long exposure apps for iPhone. And many of them have the option to adjust settings such as shutter speed (exposure time), blur strength, etc.
But there’s a far simpler way to create a long exposure photo. And you can do it right in the built-in iPhone Camera app.
All you have to do is capture a Live Photo… and then use the Long Exposure effect.
What Is A Long Exposure Live Photo?
Live Photos is an iPhone camera feature that captures 1.5 seconds of video before and after you press the shutter button. So you end up with a 3-second video clip.
Now, you can keep your Live Photo as a video. Or…
You can convert it to a long exposure photo!
Remember, a Live Photo is captured over a period of 3 seconds. So when you convert it to a long exposure, it creates an image with a slow shutter effect.
It does this by automatically layering each of the individual frames that were captured during the 3-second Live Photo.
How To Create A Long Exposure Live Photo
Step 1: Shoot A Live Photo
The first step in creating an iPhone Long Exposure image is shooting the Live Photo.
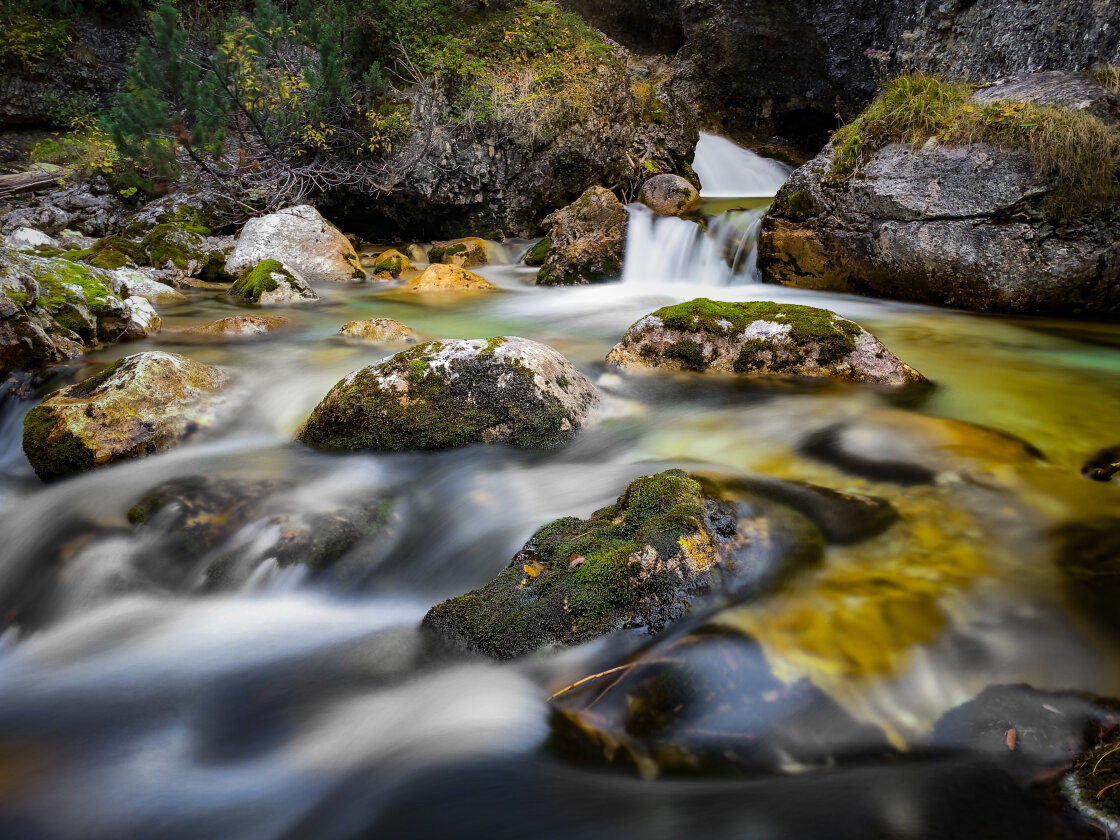
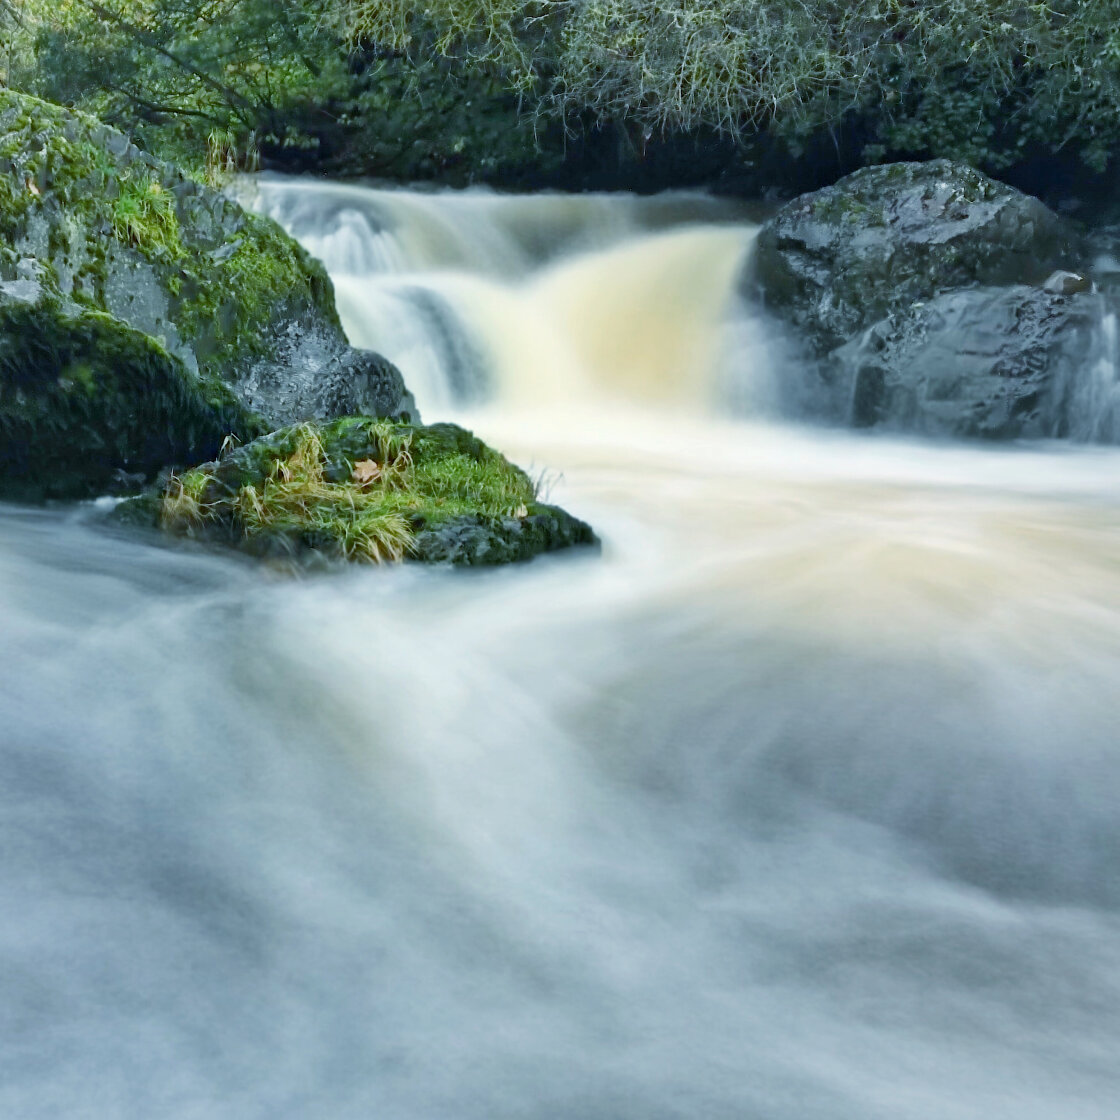
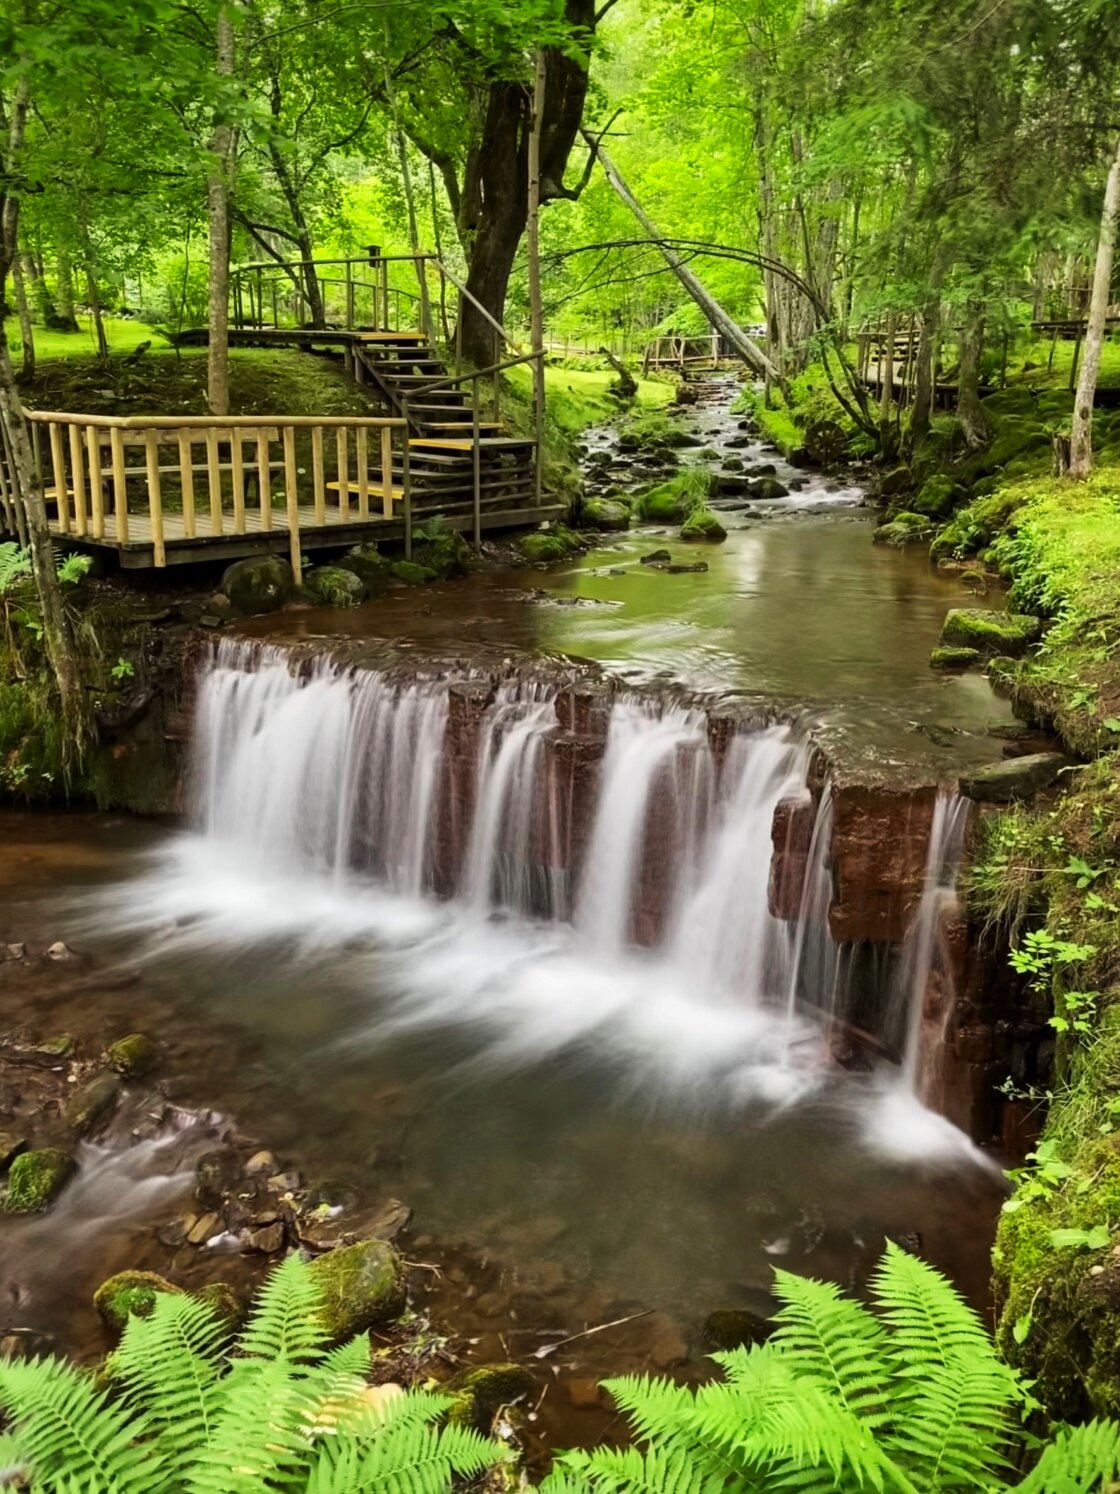
Long exposures work best if you choose a scene that has some constant motion in it, like moving water or heavy traffic.
Now, you don’t have to use a tripod when shooting Live Photos. But you’ll get the best results if you keep your iPhone as steady as possible.
If you have an iPhone tripod, I recommend you use one.

Otherwise, try to rest your iPhone on a steady surface to keep it still.
Before shooting, make sure the Live Photo option in your Camera app is switched on.
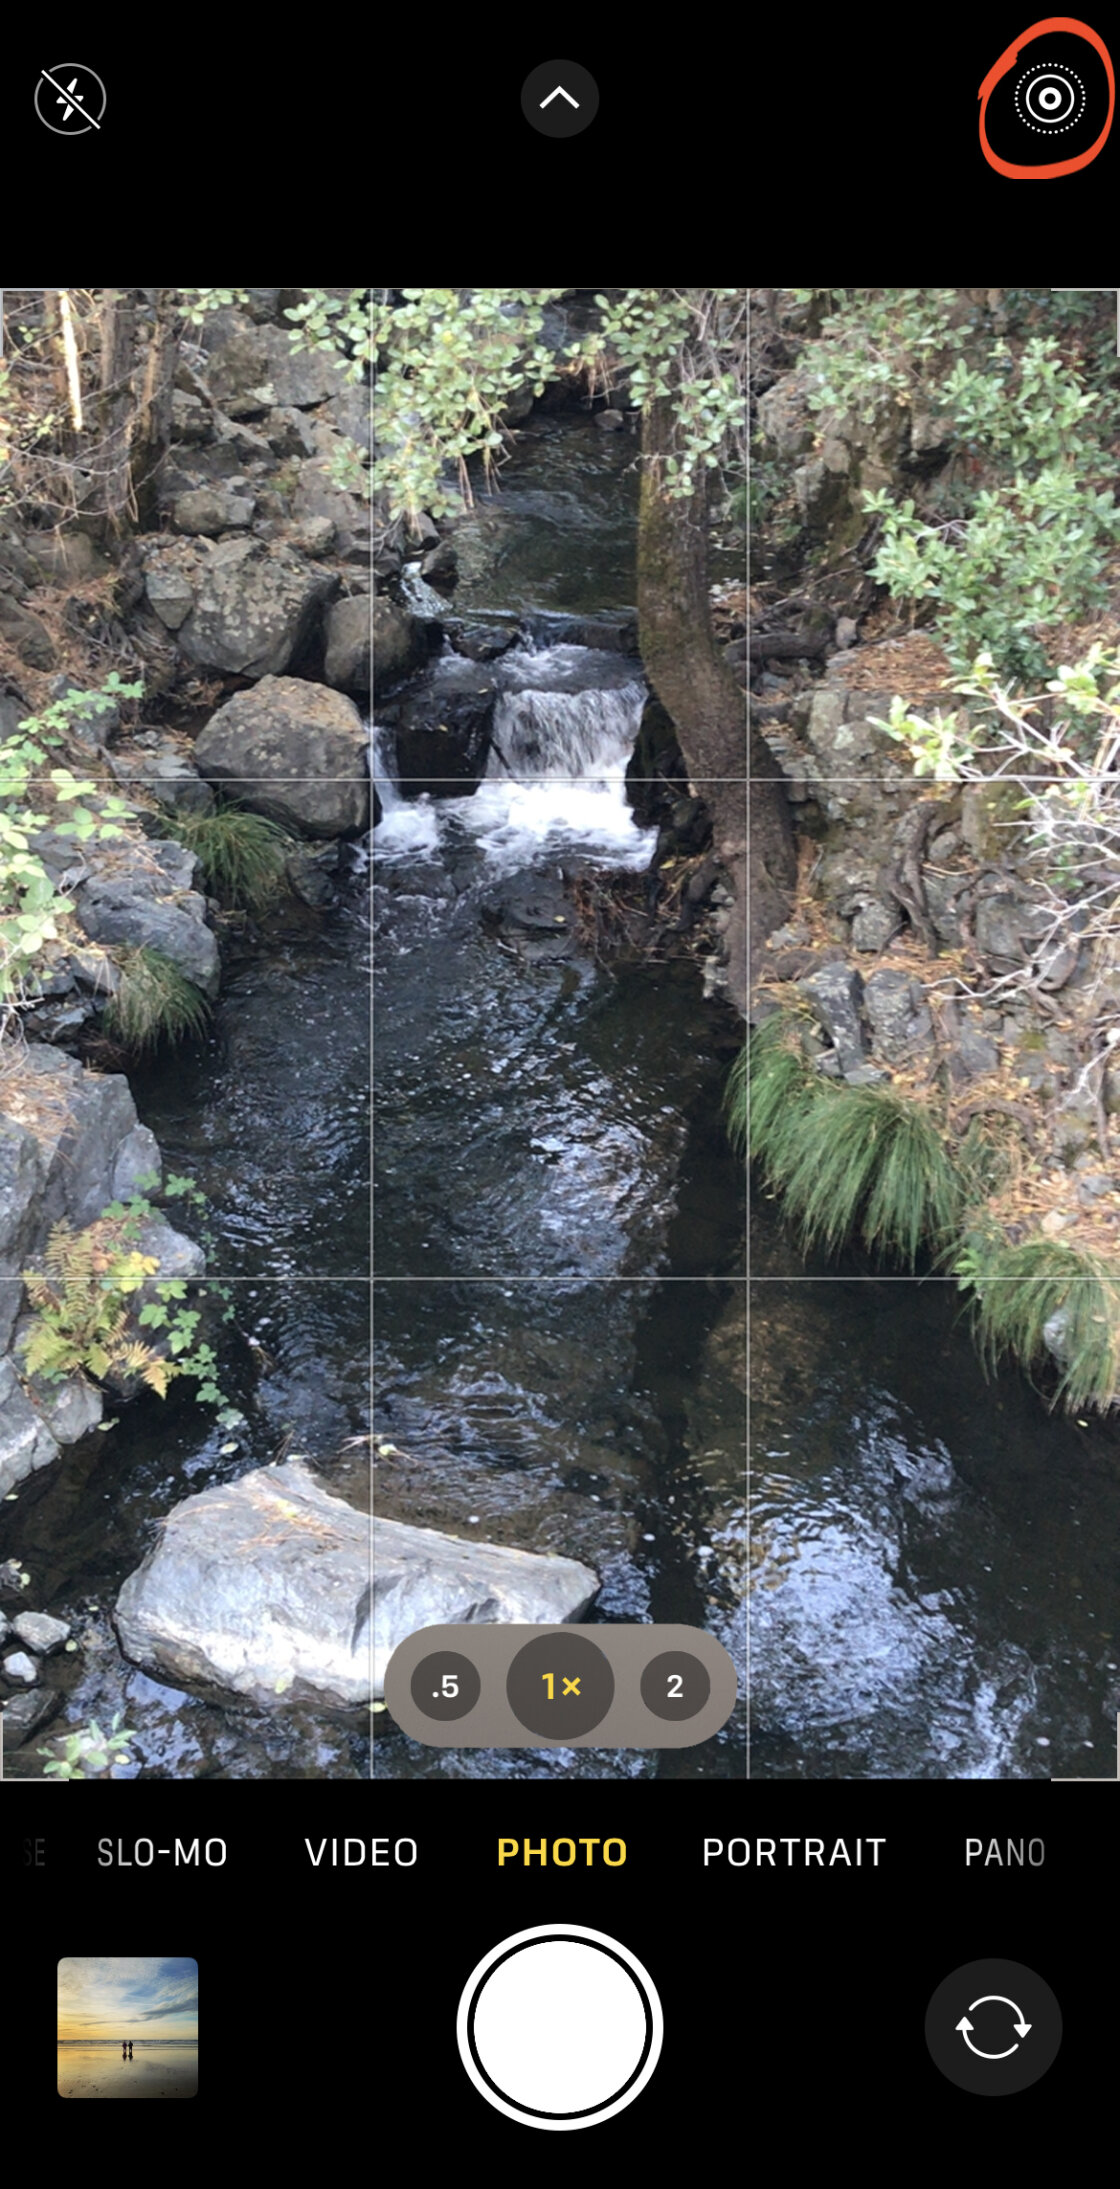
If Live Photos is off, the icon (concentric circles) will have a line through it. To switch it on, simply tap the Live Photo icon at the top of the Camera app.
Now, simply frame your shot and press the shutter!
If you’re not using a tripod, it’s really important to keep your camera still during the 3-second exposure time. That includes 1.5 seconds before you press the shutter and 1.5 seconds after.
Here’s the 3-second Live Photo of the waterfall above (hit the arrow to play it):
Step 2: Convert Your Live Photo To A Long Exposure
Now it’s time to convert your Live Photo into a stunning long exposure image!
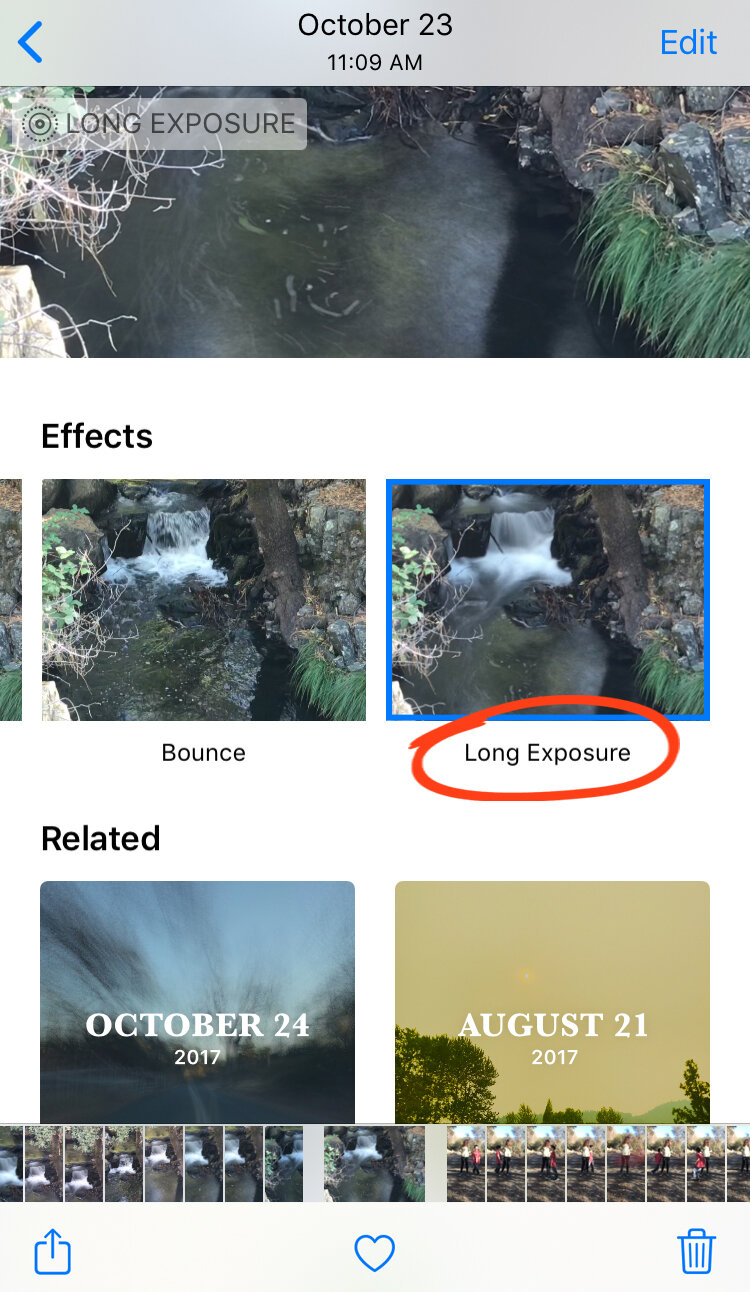
Go to the Photos app and open your Live Photo.
Swipe up on the photo. You’ll now see Live, Loop, Bounce, etc. in the Effects section. Swipe across the effects and tap Long Exposure.
Now watch as your Live Photo is converted into a long exposure photo!
Anything that was moving in the original Live Photo will now appear as motion blur.
Here’s the final image after converting my Live Photo to a long exposure:
Hopefully, you’ll be pleased with the results of your own long exposure photo. But if you don’t like what you see, it’s easy to undo the Long Exposure effect. Just go back to the Effects menu and select Live to revert to the original Live Photo.
Create Unique Photos With The iPhone Long Exposure Effect
As you can see, it’s easy to create a long exposure image using Live Photos.
Once you start using this technique, you’ll be able to create some really unique iPhone photos.
Below are some ideas for long exposure photos that you could shoot. Why not give some of them a go!
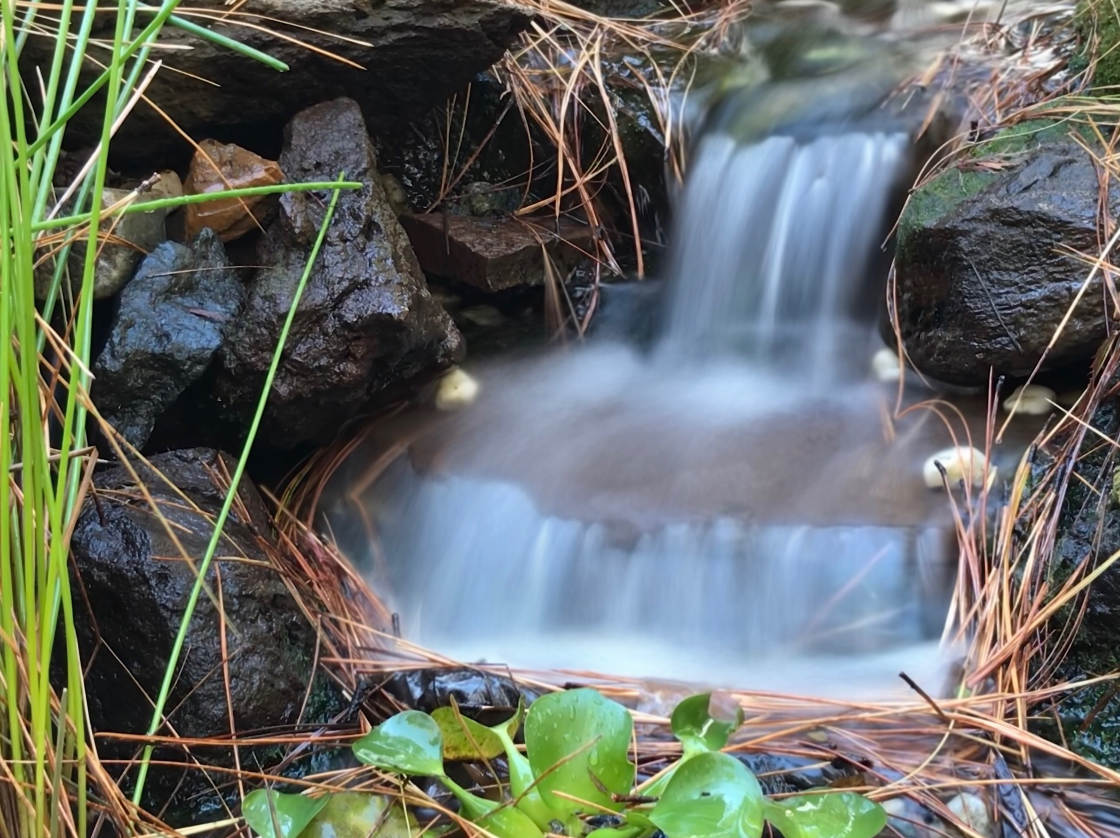
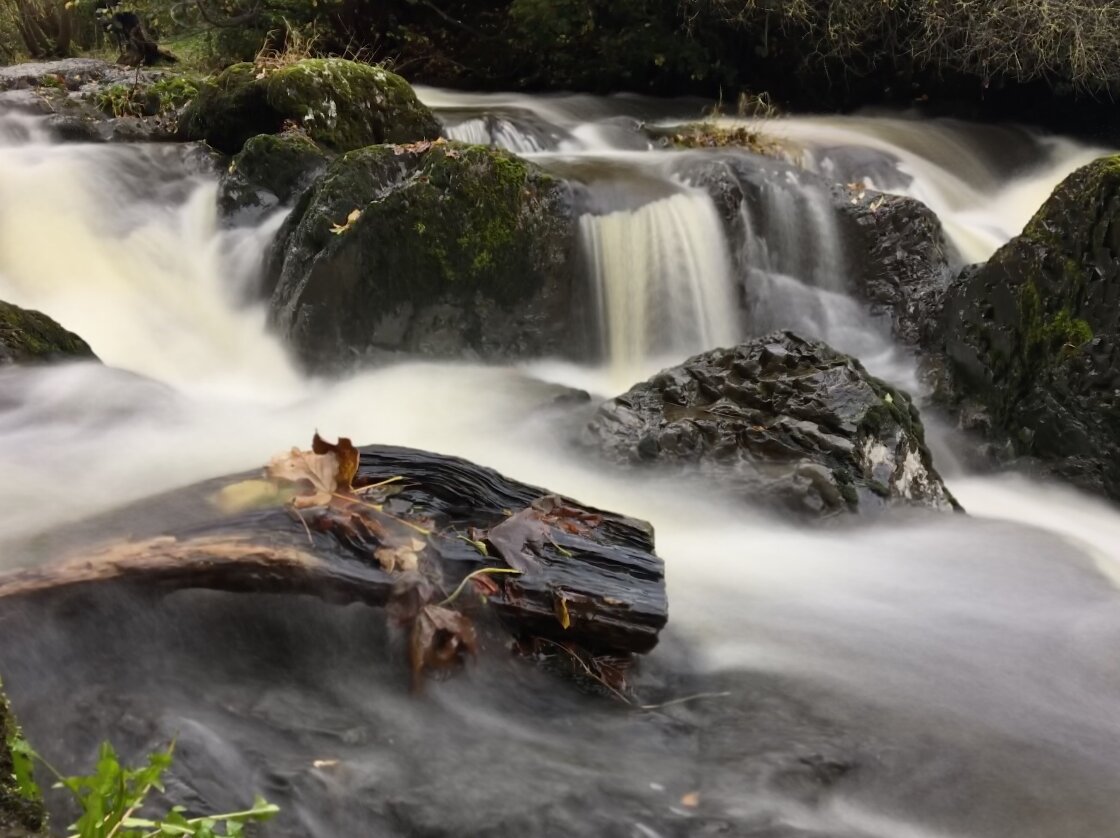
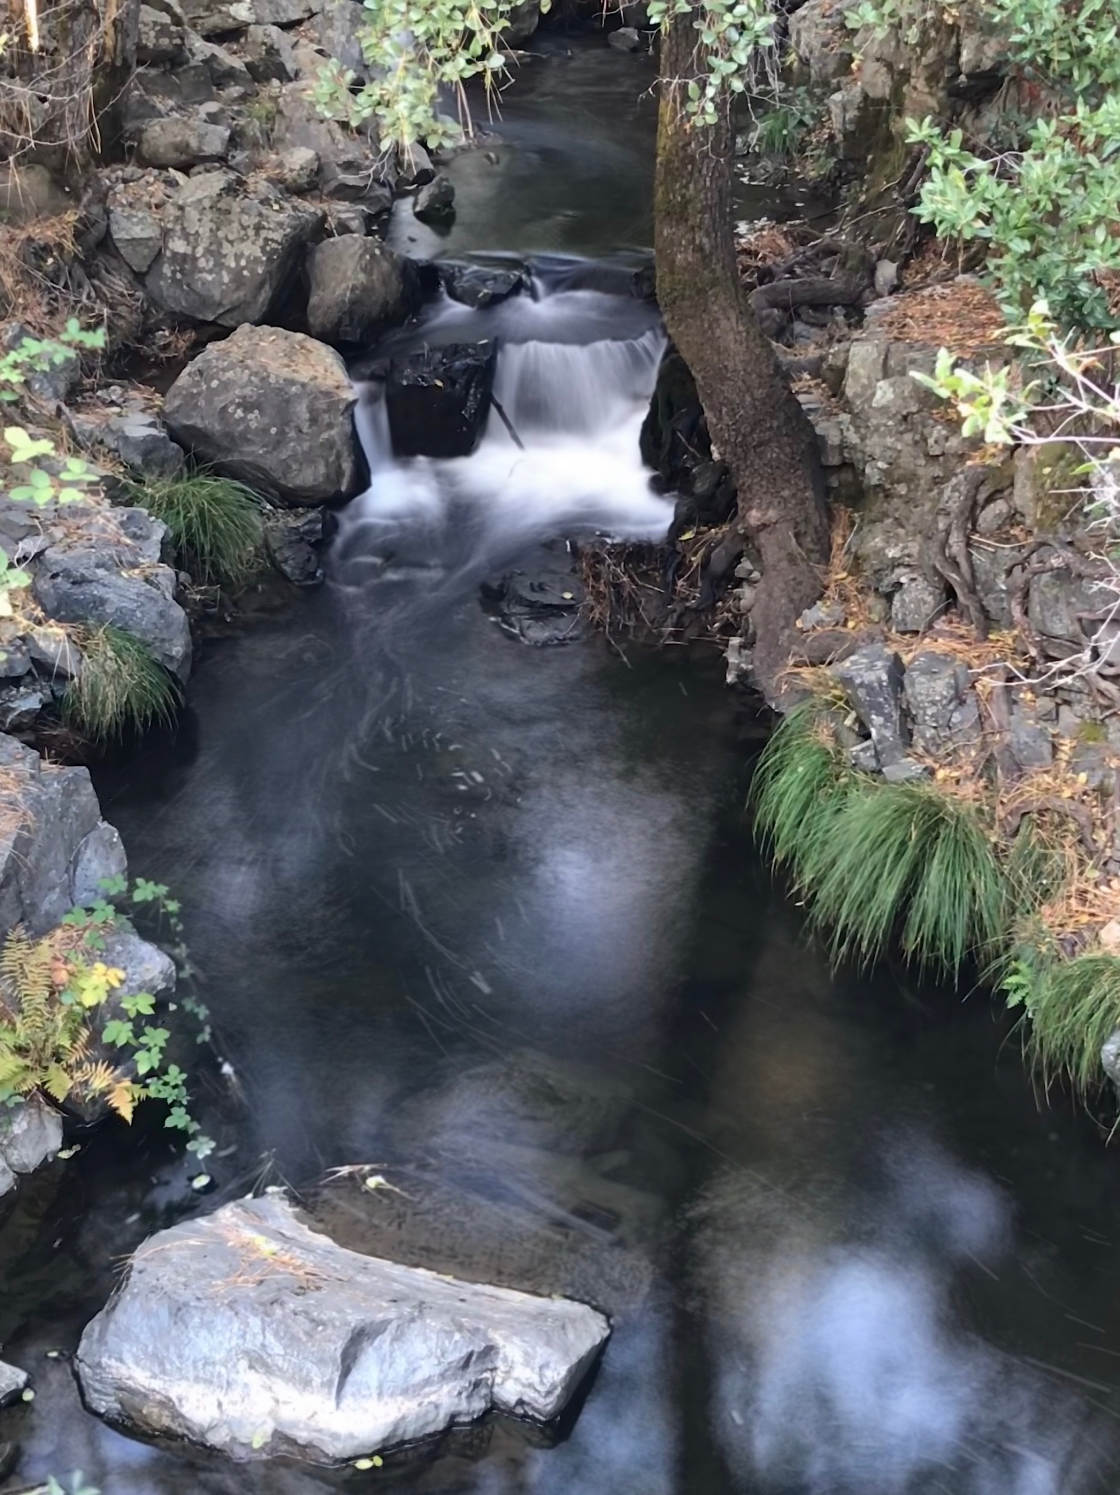
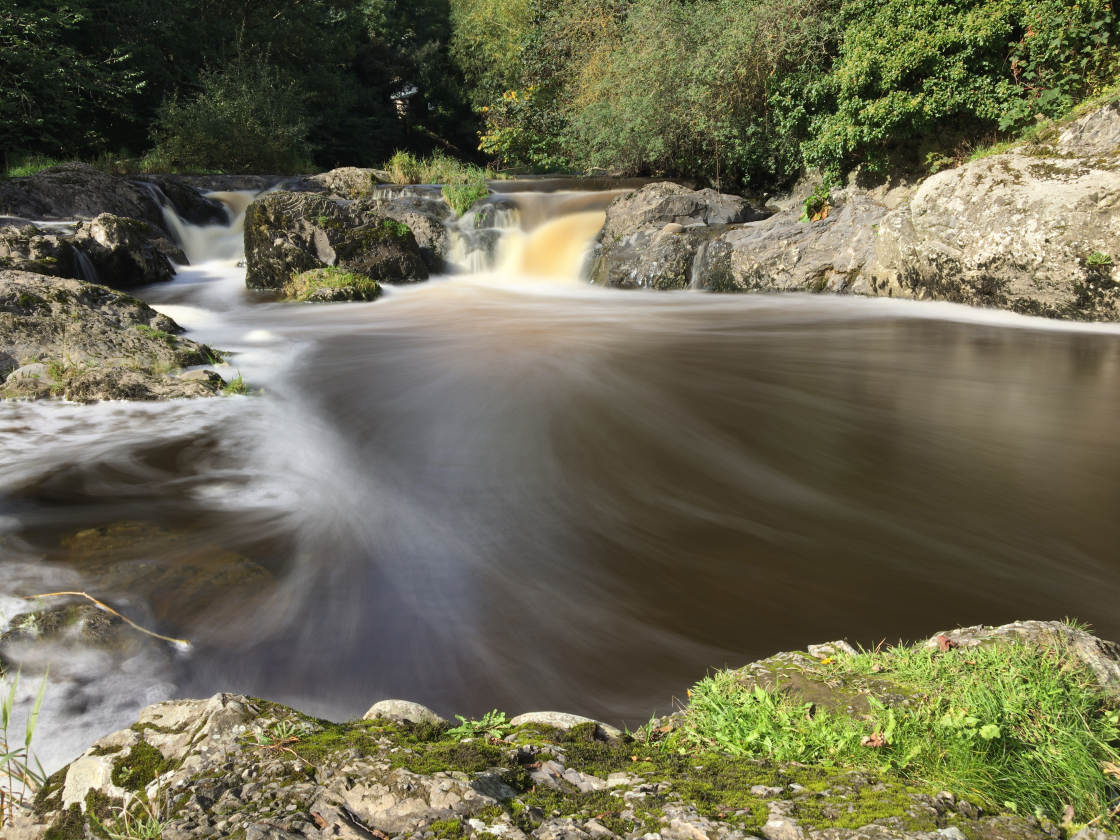
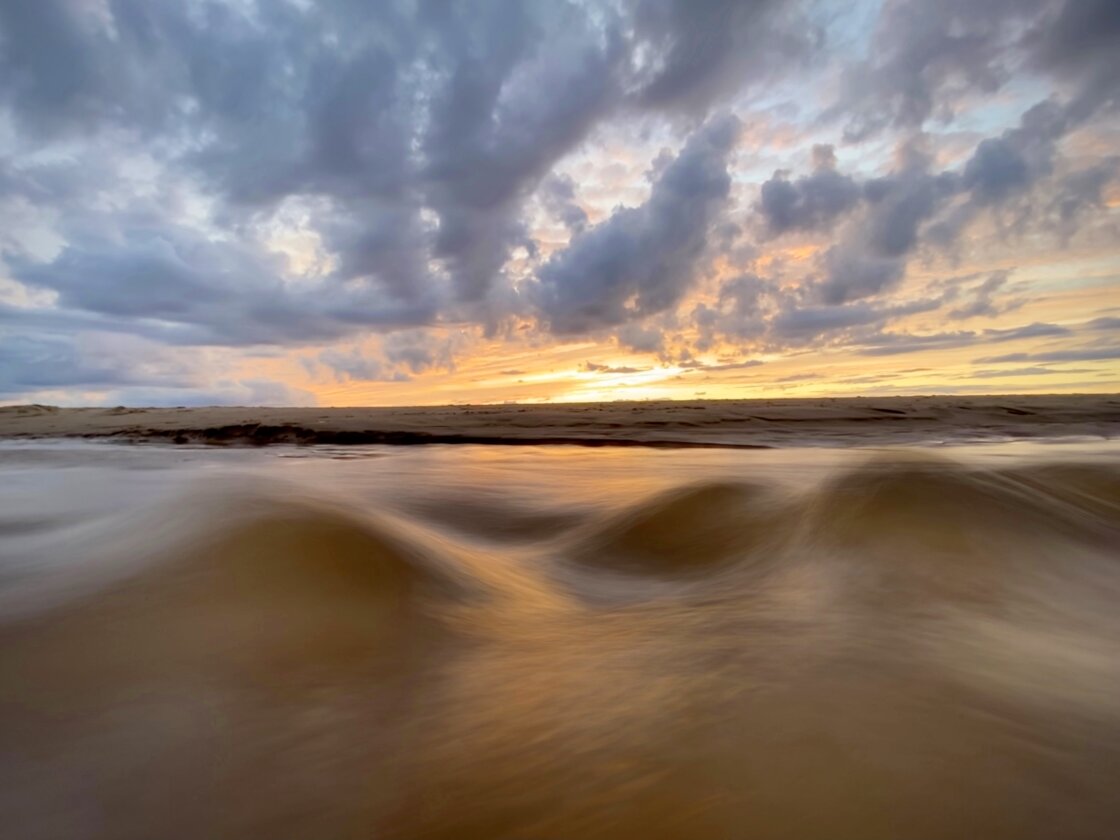
Capture Moving Water
You’ve already seen several examples of long exposure water photography. And this is a great place to start.
Rivers and waterfalls make amazing subjects for long exposures. The movement of the water will appear beautifully soft and misty.
Waves on the ocean also look really interesting when captured as a long exposure.
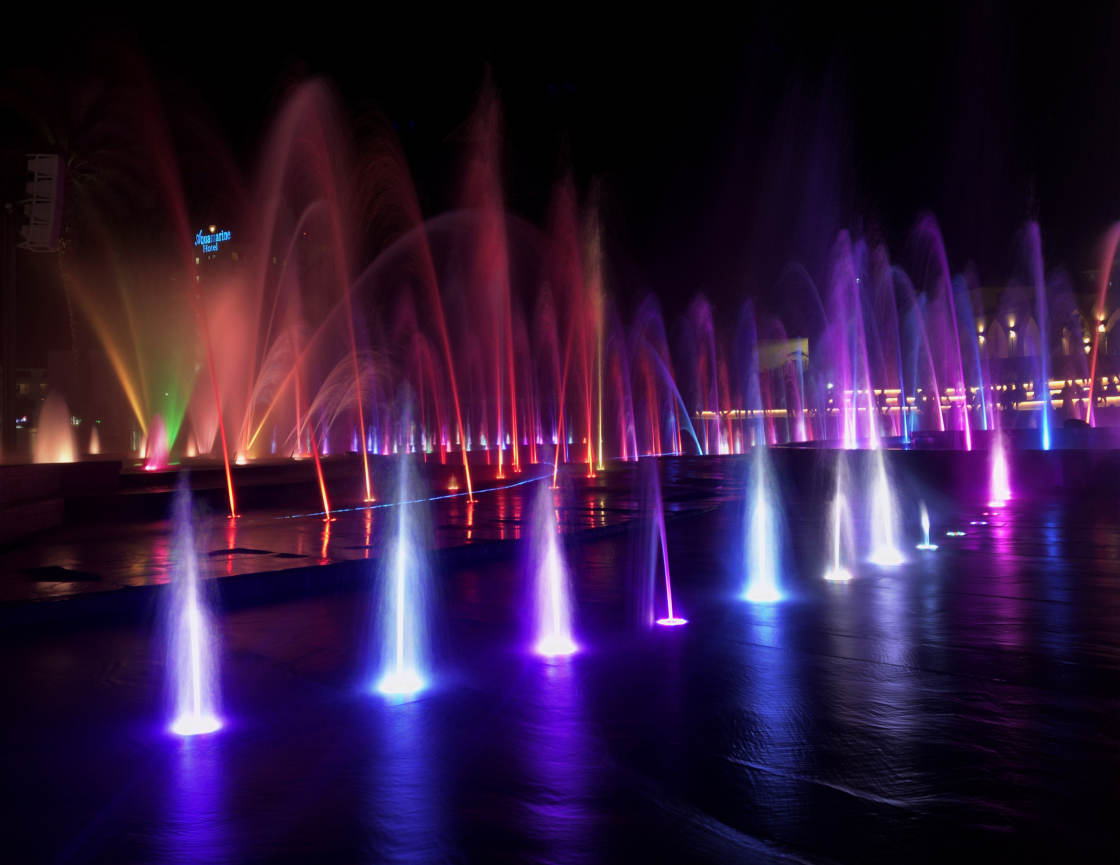
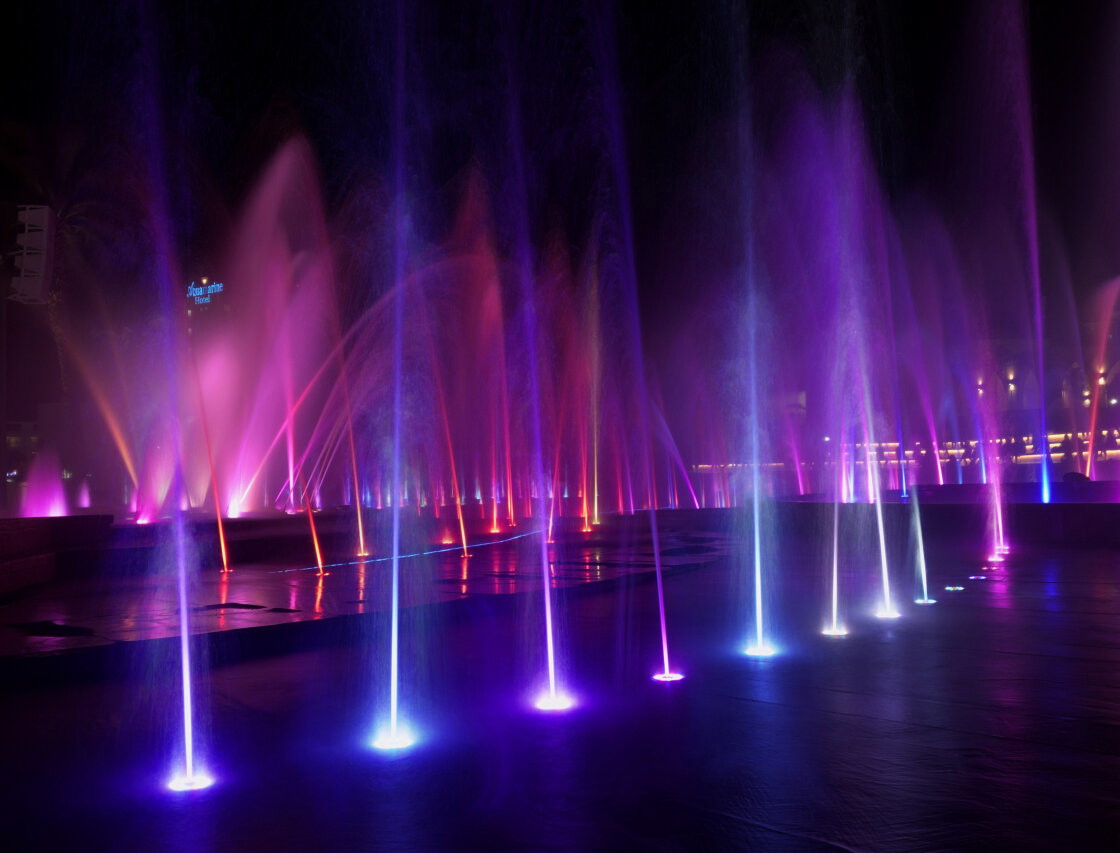
And don’t forget about fountains too. These illuminated fountains look so much more interesting as a long exposure.
Shoot On A Windy Day
Sometimes a little action in a small part of a scene adds interest to an otherwise ordinary photo.
Windy days are great for long exposure photography because you can capture motion in anything that blows in the breeze.
In the photo above, the flag is blowing in the wind. And this motion is captured in the long exposure. It conveys a sense of movement which adds to the story of the photo.
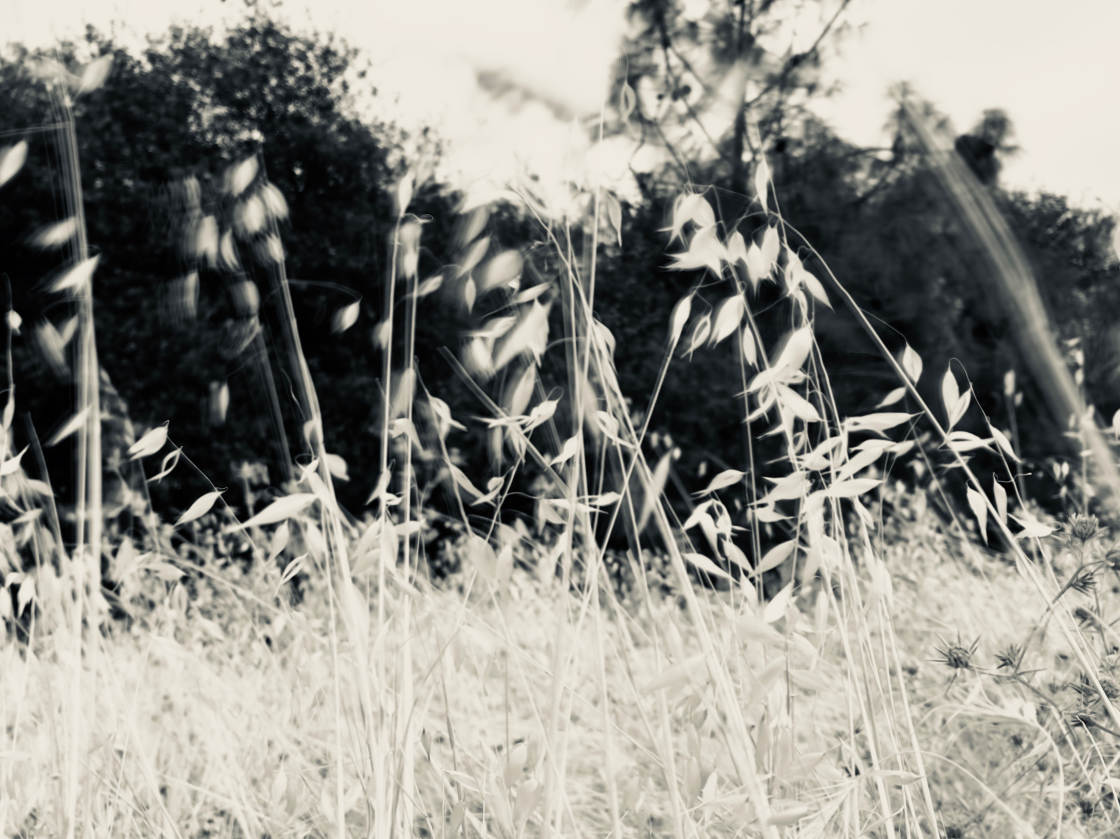
Even a little breeze can create an interesting effect. Check out the motion blur in this photo of dry, wild grass:
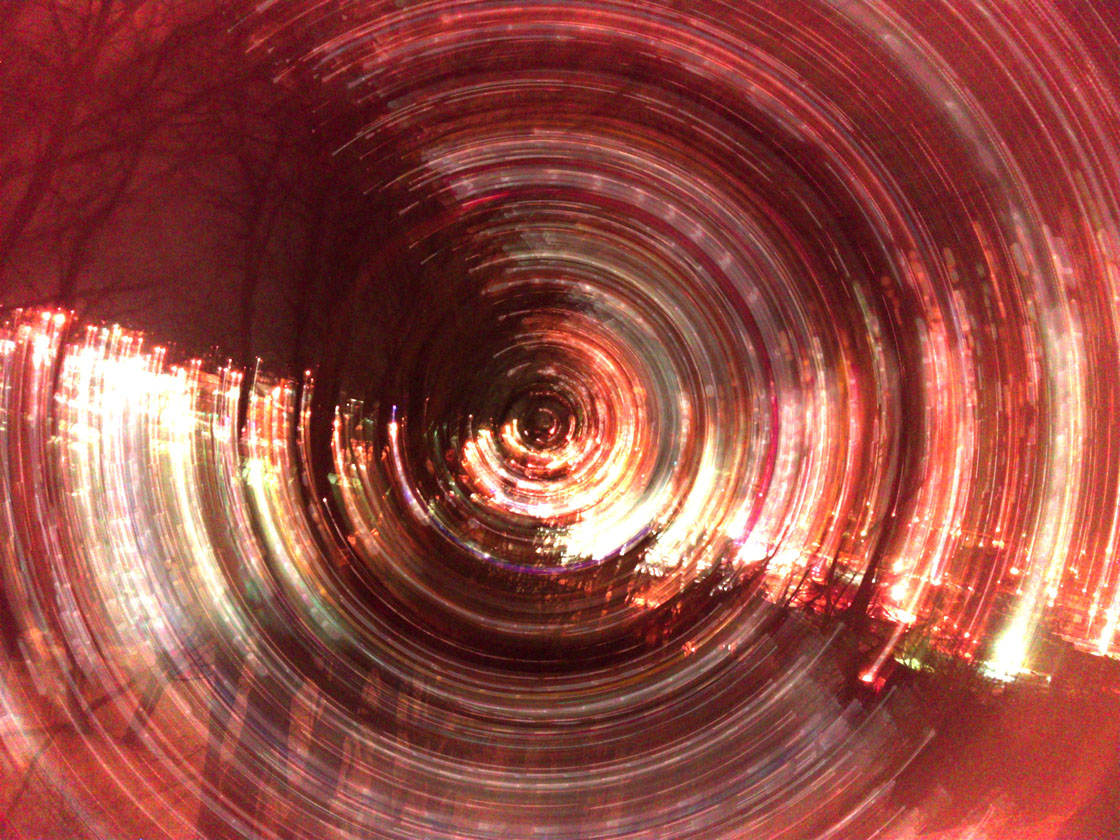
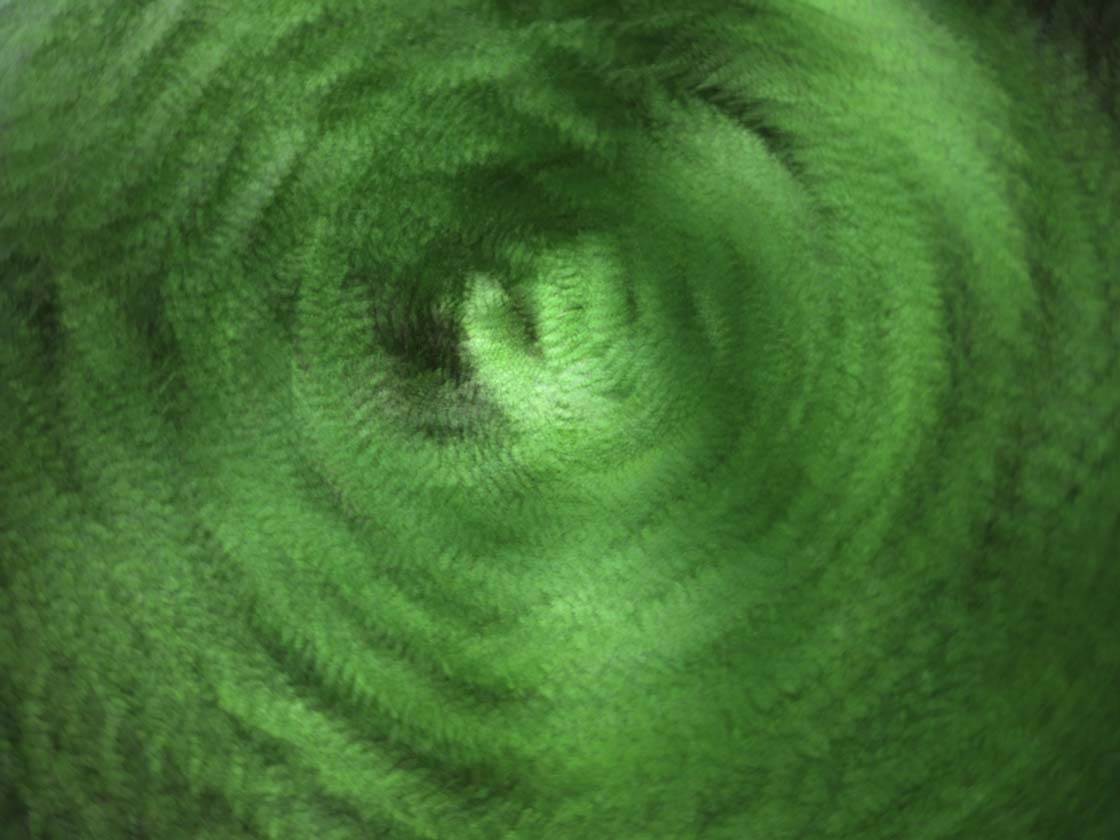
Paint With Light & Capture Light Trails
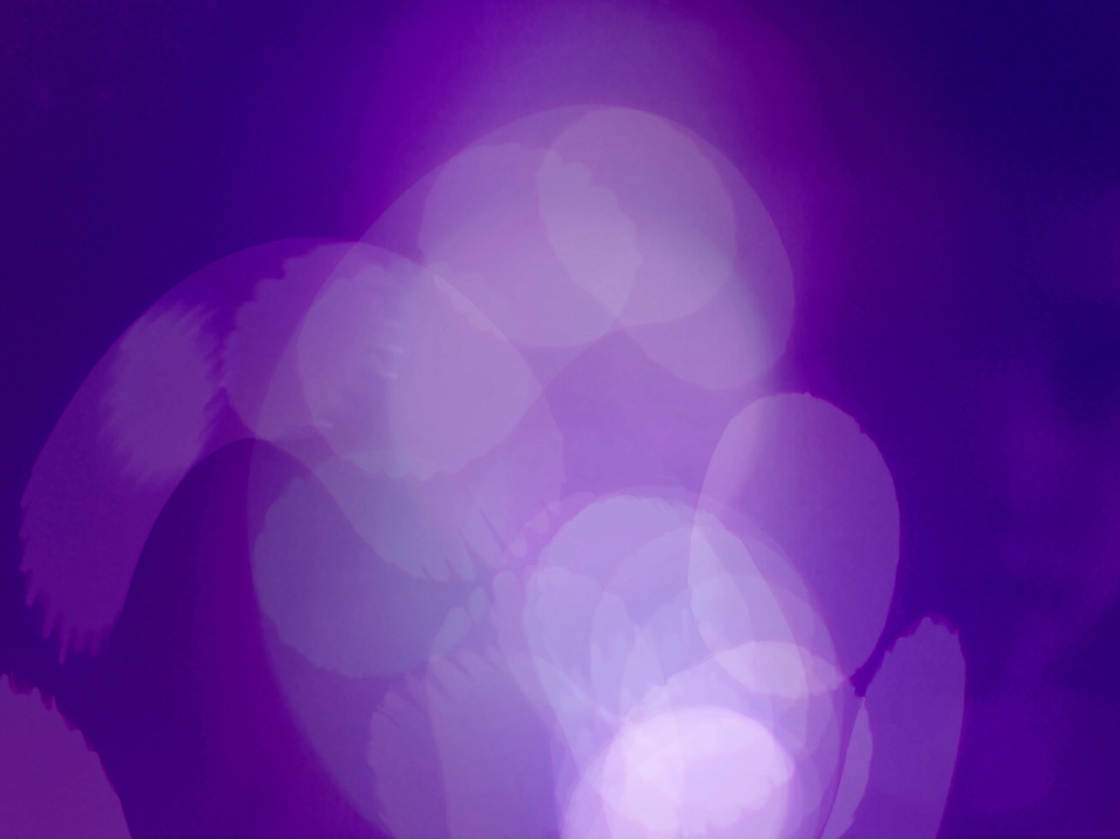
Light painting is a fun technique that your family can help you with. You need a hard point of light like a glow stick, a 4th of July sparkler, or an LED flashlight. In the image below, my son is waving a black light, which has created a fun, repeating effect. If you look carefully, you can also see his face on the right side of the image.
Here’s the Live Photo version of the same image:
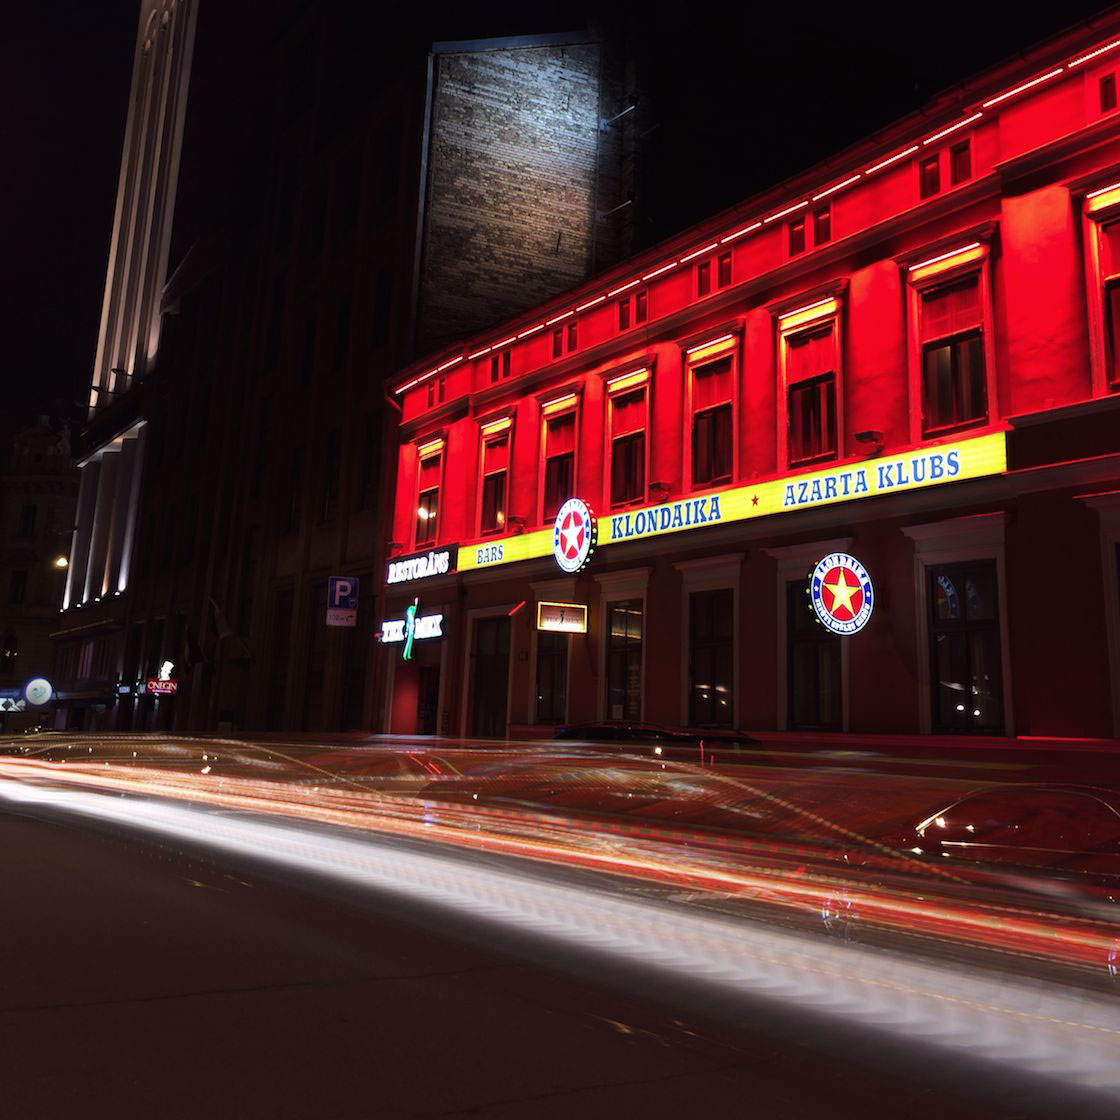
You can do something similar with a car’s headlights and taillights. This works best if you live in a city, or somewhere where there’s plenty of traffic. As cars drive into and out of the frame, their lights will create long streaks of red and white light.
Fireworks look pretty cool with this technique, too.
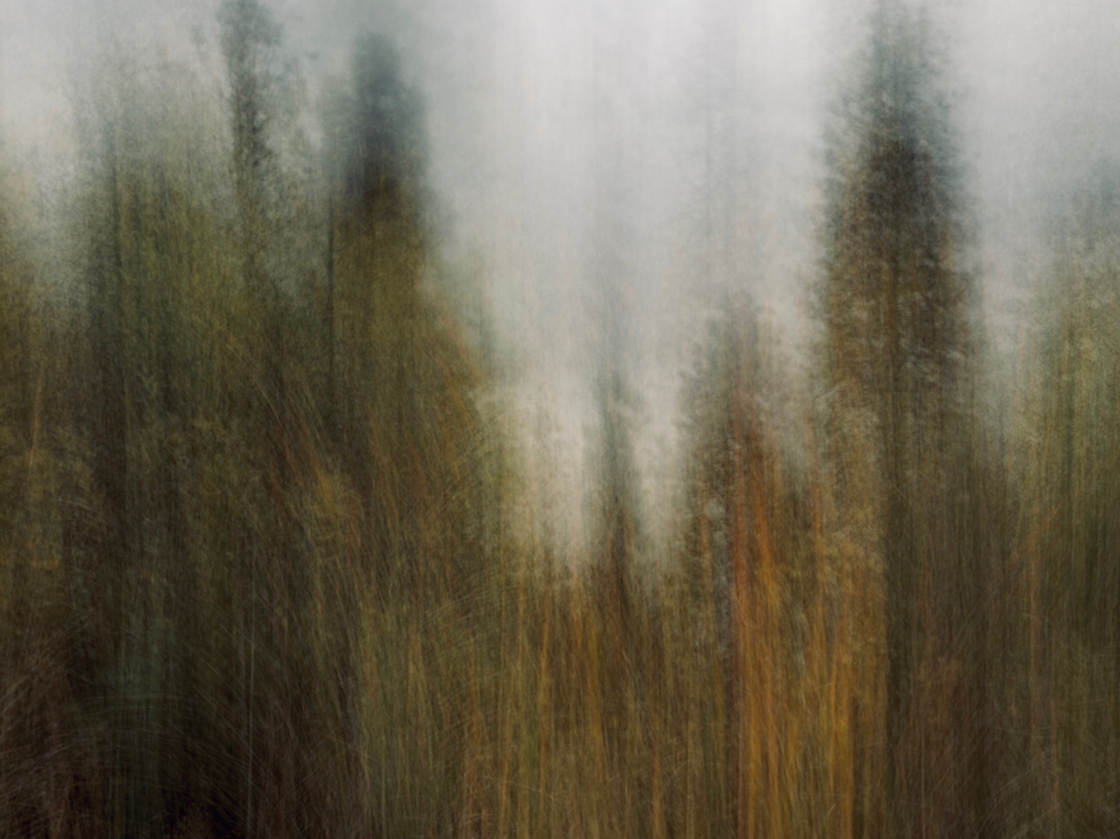
Move Your Camera On Purpose
Another effect that’s fun to try is “deliberate camera motion”.
You don’t need your tripod because you’re going to be moving your iPhone on purpose during the exposure.
Use a slow, up and down or side-to-side motion (avoid jiggling or shaking). Choose vertical objects like trees for up and down motion and horizontal objects like a coastline for vertical motion.
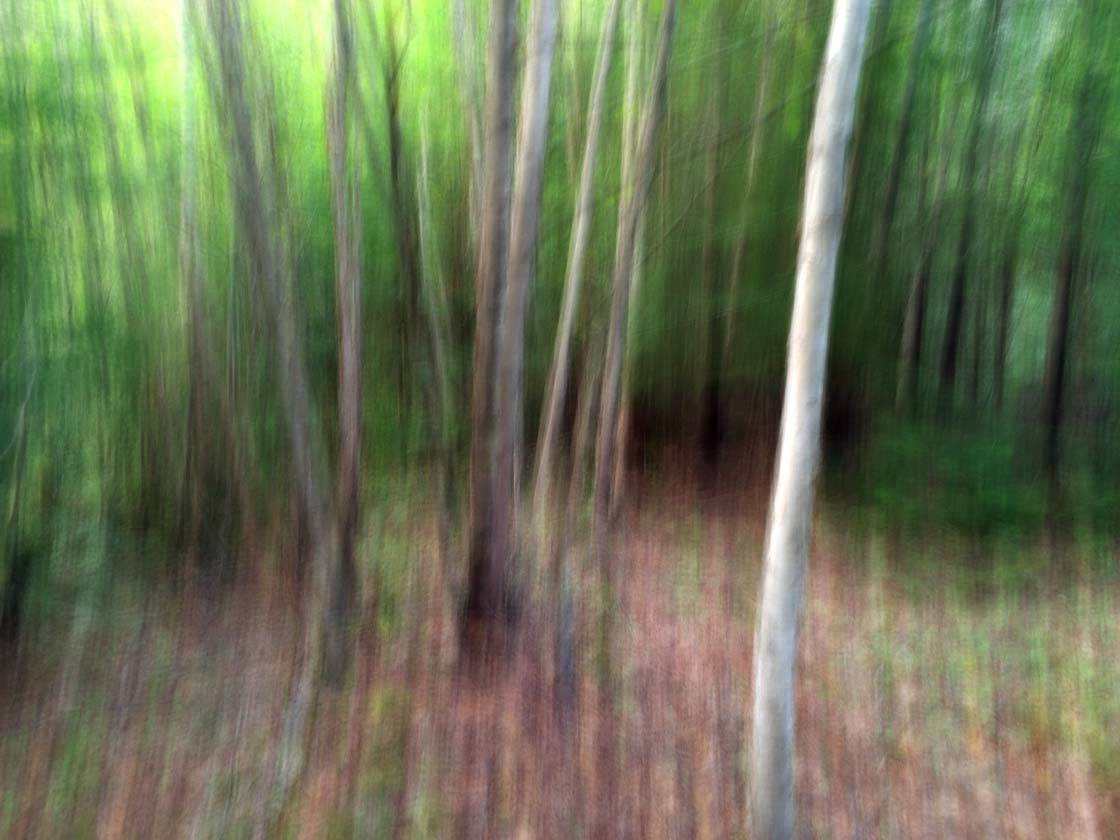
Start moving your phone before you press the shutter, and keep going for a couple of seconds afterward.
Remember that your iPhone captures 1.5 seconds of video both before and after you press the shutter button.
With this technique, you’ll capture images that look almost like impressionist paintings. Here’s one I shot of the cattails and pine trees near my backyard pond:
Be A “Ghost” Photographer
When you shoot your kids or your grandkids with a Live Photos long exposure, you can make them look like ghosts (kids love that).
Unless you live next door to The Tower of London, an iPhone Long Exposure is probably the closest you’ll ever get to shooting an actual ghost. Remember that your subjects need to be moving pretty slowly.
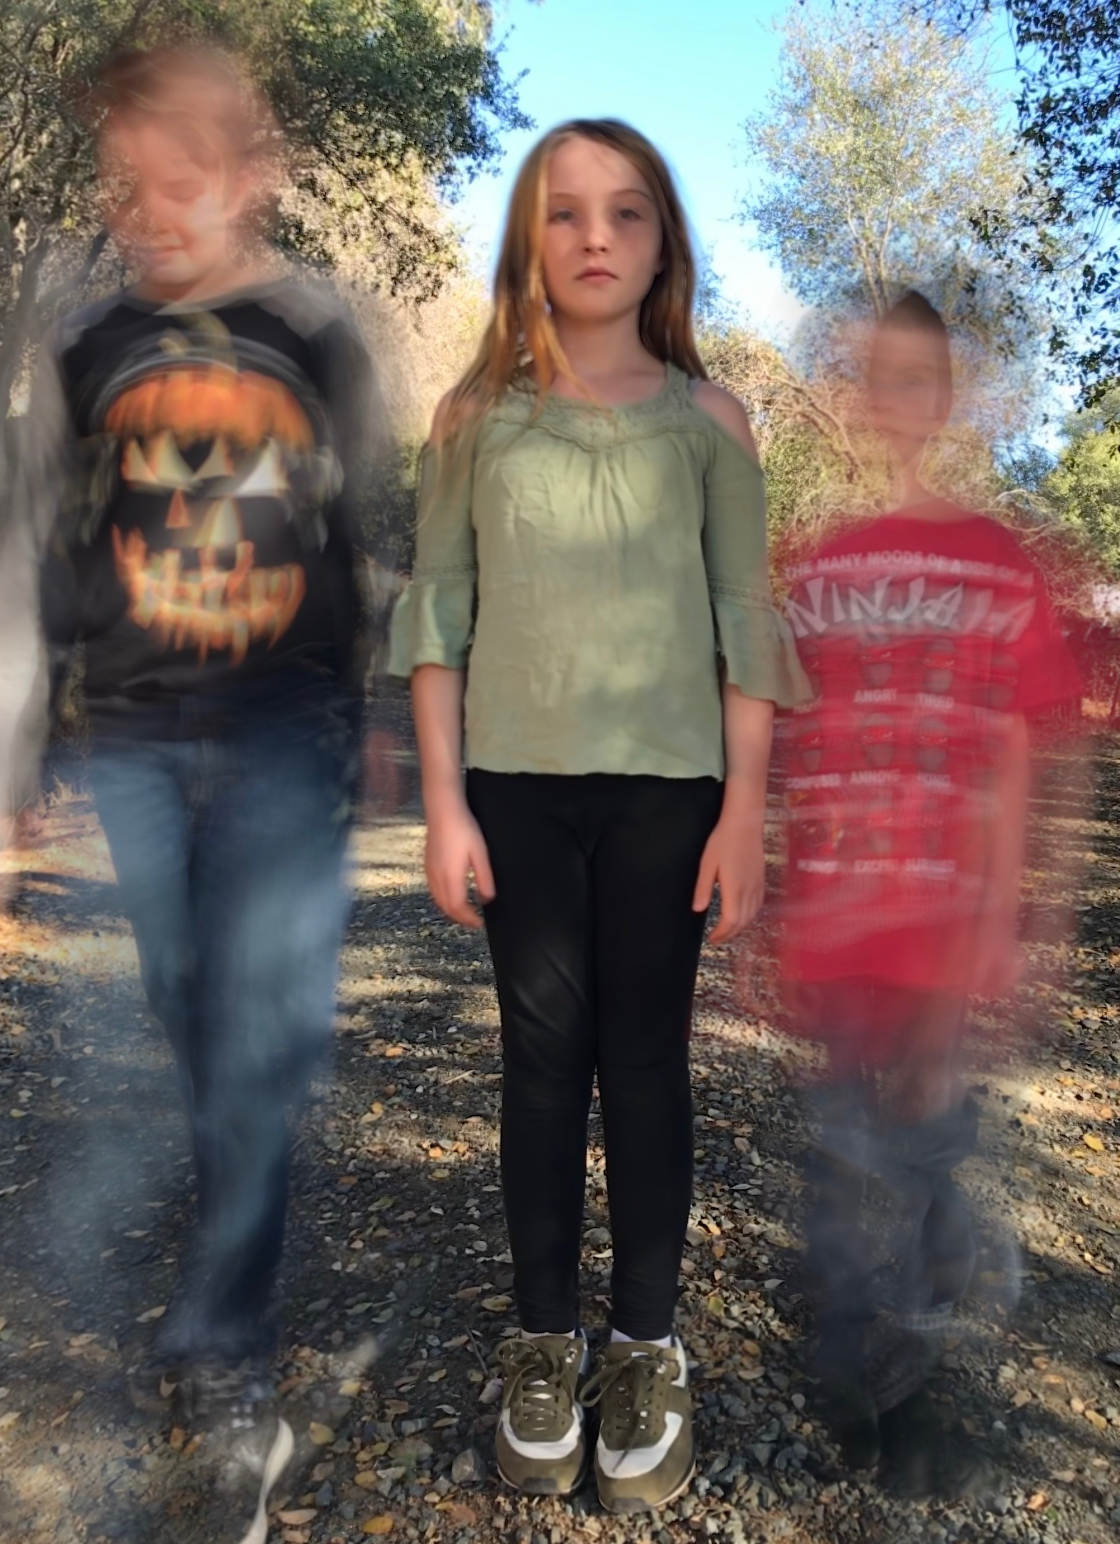
In this photo, I asked my daughter to stand absolutely still whilst her young friends moved about (as young people often do). This gave a ghostly result which still included an identifiable subject: my daughter’s face.

Thank you, now I have found something New… What fun I can have.
Honestly if I knew about the long exposure thing I wouldn’t have taken my DSLR out as often!! This is cool. Nice little thing to find, not sure why apple didn’t make more out of this, cause it’s actually a cool feature!
Thank you very much for good information. Now, I can do same thing others classmates doing with other phone.
There is no live button, I only just updated to 11.3 a few weeks ago https://uploads.disquscdn.com/images/439023c9f43ec46c44ee10978c8a8055e89d61b8fa1d534cfffdbee8d77571c7.png
Which iPhone model do you have? Live photos are only available in iPhone 6s and newer.