I am very excited to interview Chet Davis, a fellow iPhone photographer and technology expert. Chet is the author of iPhone Photography Secrets, an iPhone photography video course that has been taken by almost 800 students worldwide. In this interview you are going to learn some of Chet’s best iPhone photography tips and techniques.

Tell us a little bit about yourself and your iPhone photography.
I’ve been working with the iPhone for the past 4 years, and I’ve been into crafting what I call digital storytelling – video and photography – for the past 20+ years. I really become heavily involved with iPhoneography only in the past two years. But it has become a habit for me… a good habit I would hope to say.
Why do you use your iPhone instead of a more capable digital camera?
My iPhone is the camera I always have with me… it sounds cheesy but it is so true. I have other cameras, both digital still and video cameras as well that go with me on certain shoots and trips, but with my iPhone I can capture the beauty of everyday life. And there is SO much when we choose to really look for it (and capture it). But I also know that my iPhone has its limitations… I will gravitate towards my other cameras when it comes to more dramatically lit shots, or for telephoto work.
What apps, if any, do you use for taking photos besides the native camera app?
I do use the native camera app a good deal – but I shoot as well with Camera Awesome, and more recently I’ve been using KitCam app . I really like the split focus/exposure options in Camera Awesome as well as the timed exposure settings.
What are your favorite apps for post-processing? Are there any functions or features that you find particularly useful?
My favorite app for post processing is most definitely Snapseed. I really find the interface very smooth and easy to work with – but also very powerful. I really enjoy the look it helps to give my photographs. In Tune Image I almost always add some of the Ambience and fine-tune the Saturation. For a while I was also a big fan of the Dramatic filter in Snapseed but have pulled back a little from that though I still use it on some images.
In Instagram I find myself between X PRO II and LoFI mostly. And I just started working with PopAGraph… some interesting layered options in that newer app.
Are there any external accessories that you often use for iPhone photography?
As far as external accessories – I find the Glif works great and have also been using the Slingshot for increased stability. I’ve experimented with the Olloclip – though not really fallen in love with any of those 3 lenses. I want to try one of the telephoto extenders in the coming weeks to see how that might compliment my work.
What advice do you have for new photographers who want to start taking beautiful photos with their iPhone?
Hmm, I would say steady, rock steady. That makes a world of difference as folks who have been into iPhoneography know. And definitely capture a couple of shots – don’t think that you get that awesome capture with just one click of the shutter. Shoot a bunch of photos, then review your work. Take heed what you liked best and what you would do to improve… I believe you can continuously grow – but only when you are paying attention.
Can you describe the story and editing process behind your three favorite iPhone photos?

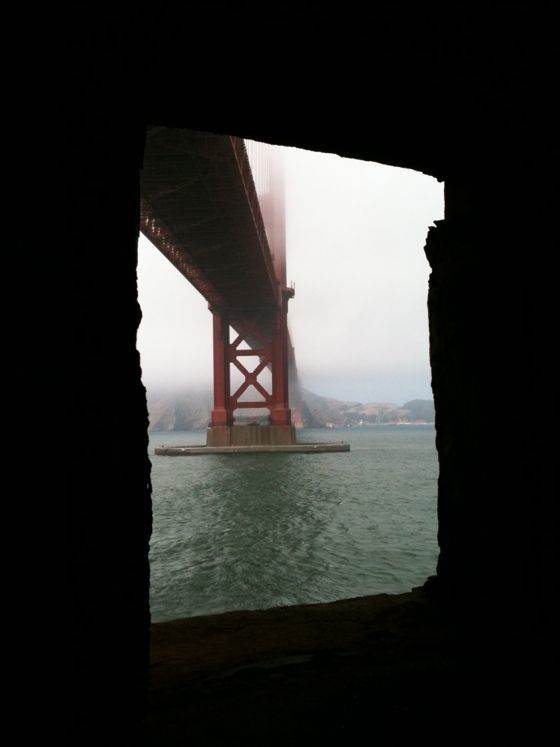
This is a photo I captured on my iPhone last summer while on vacation in the city of Dubrovnik, Croatia.
We were taking a morning walk around the walled city, when I came across this sort of port-hole. It is one of my favorite photos from that vacation… it was not post-processed in any way, just a photo with strong composition. I love the framing of the city, the angle and character of the shadows. The city has a lot to see from this angle, including it’s various rooftop heights and the bit of green from the garden at the right.

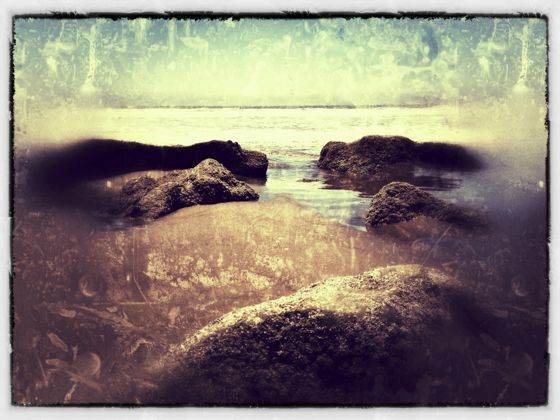
This photo I captured in the seaside town of Split, Croatia.
There was something appealing about this old rowboat… so I captured it and processed it using the ‘Awesomize’ function in the Camera Awesome App. I have used that setting in a number of photos and sometimes it works well, others not so much. This time I was really happy with the results. I like the combination of colors, contrasting colors between the blue boats and the orange buoys… and the texture and color of the water, especially right around the rowboat in the foreground are very full of character.
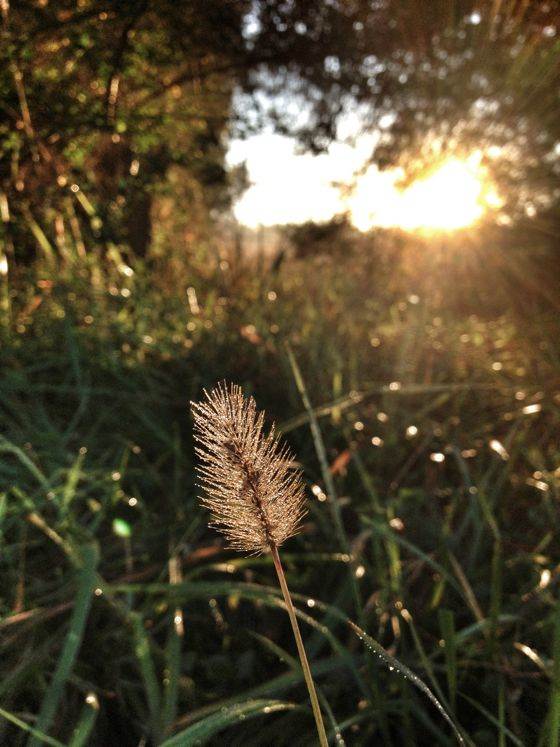
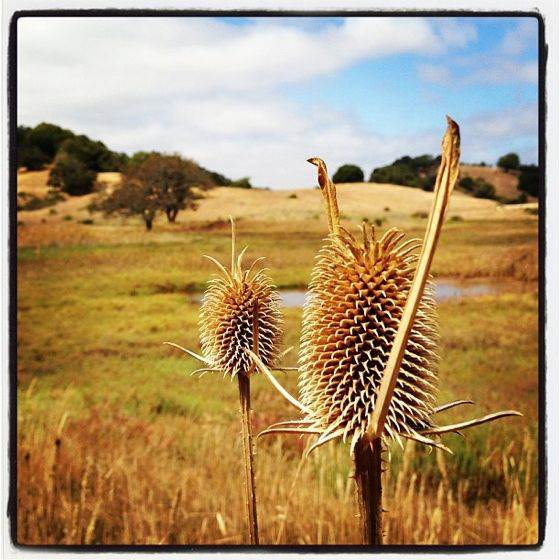
Captured this photo while presenting a workshop in North Carolina (USA) last Fall. Taking an early morning walk I liked how the sun was illuminating this little plant.
I used the Camera Awesome app with it’s split focus/exposure setting. It’s a challenging photo for most cameras and I usually do not like trying this kind of shot on my iPhone due to the lighting but I like how this turned out. I took several different shots and like this one the best. I really enjoy how the feathery parts of the beige weed hold the dew and sparkle. I also love the dew drops hanging on the blade of grass at bottom right. I did do some post-processing in the Snapseed, adding a little more color (Saturation) and playing with the brightness and ‘Dramatic’ level.
You are the author of iPhone Photography Secrets, one of the first iPhone photography courses. How did you decide to create such a course?
I have been teaching folks to shoot and edit video for years. I have some friends who have been seeing my iPhone photography – on Facebook primarily. They said, “I would really like to learn to shoot better photos like you.” And thus the idea for the course was born. I came across the online learning platform Udemy last summer and after launching a free course on Pandora internet radio, I decided to launch the class on that service.
What topics do you cover inside iPhone Photography Secrets? Who should take this course?
I intentionally set out to make my iPhone Photography Secrets class very thorough — but because of the modular approach, you can register and then take only the lessons that appeal to you right now. Then come back later and learn some more, when you’re ready. I would say the class is more for novice or beginning iPhone photographers as it provides a very deep understanding of the tools and techniques, but even more experienced photographers say they have benefitted from the course… as it taught them aspects of apps or techniques they were using or knew of but were not fully clear about.
With more than 7,000 photo and video apps for your iPhone there is no way I (or anyone else) could cover them all, so I teach my students about the ones that work best for me. And lastly – the class is dynamic, and I am continuing to add new content to the class.
The readers of this interview can get a 50% discount for the course by going through this special discount link.

Thanks iPhone Photography School,
It was a delight to be interviewed by you on this piece. Thanks for continuing to share useful info and tips for the iPhone Photography community!