Lightning is beautiful yet dangerous. But have you ever watched lightning and tried to capture it? Most of you probably think that you can’t capture lightning on your iPhone and that only a DSLR could do that. What I’m about to share is a simple technique that anyone can use to capture lightning on the iPhone!
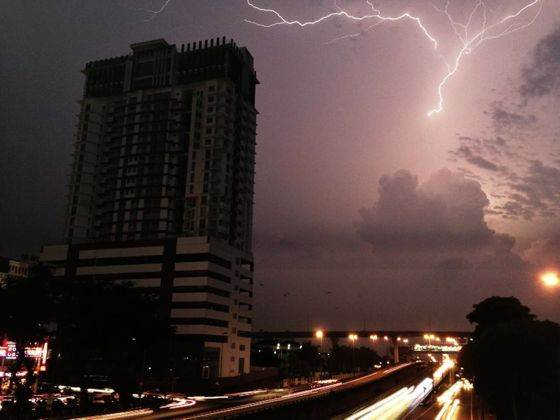
Now, lightning strikes in a flash, too fast to simply capture at the tap of a button. But there is a way to capture it using slow shutter speed or long exposure. Slow shutter speed leaves the shutter open for a longer period of time, and while the shutter stays open, it continuously captures light.
The iPhone can’t do long exposures with the stock camera app. Instead, you need an app called Slow Shutter Cam. You can purchase it for 99 cents, which is a pretty good deal. With Slow Shutter Cam you will not only be able to capture lightning, but also create light trails and a misty water effect.
Other than the app, you may need an iPhone tripod, together with a tripod mount for iPhone. This is to avoid camera shake that blurs the photo. I prefer using my environment as a stable ‘tripod’. I would place my iPhone on rocks or even on the edge of a pedestrian bridge, which is pretty dangerous.

When you open up the Slow Shutter Cam, you will see a couple of options. The first thing you MUST do is go to the settings by tapping the gear icon at the bottom right corner.
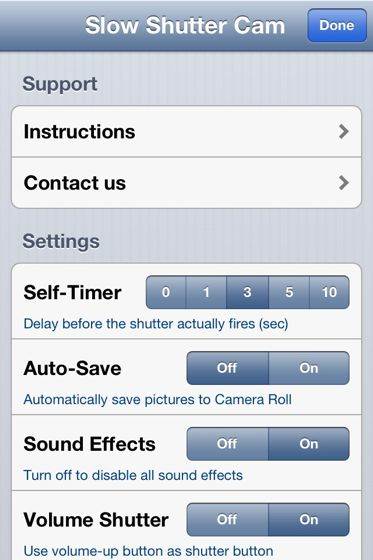
Look for ‘Self-Timer’ and set it to at least 3 seconds. This is to avoid camera shake when tapping the shutter button. If you are on iPhone 5, turn off Low Light Boost. Low Light Boost increases the ISO, or the camera sensor’s sensitivity to light, and you want to avoid that because the higher the ISO, the noisier the picture becomes. It’s better to turn it off for a less noisy picture.
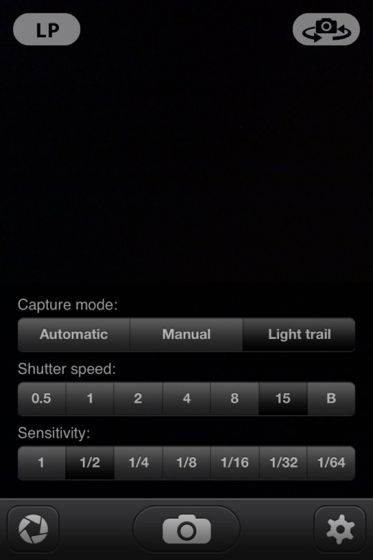
Next, tap the aperture icon at the lower left hand corner to access the shutter settings. In the shutter settings you will see 3 modes: automatic, manual and light trail. For lightning we are going to use the light trail mode, which has the shutter speed settings and the sensitivity settings.
The sensitivity is basically how sensitive the app will be to light. Normally for lightning you would want to set it to about 1/2 or 1/4. As for the shutter speed, I like to set it to 15 seconds or B (bulb), which is an infinite amount of time.

Once you’re done, find a suitable spot where lightning is visible. Make sure you are using a tripod or a stable surface where the iPhone cannot move. Then compose your shot. Time your shot so that you wait till at least half of the interval between lightning strikes before tapping the shutter button. Then tap the shutter button and wait for 15 seconds or longer. And wala! You have your lightning picture!
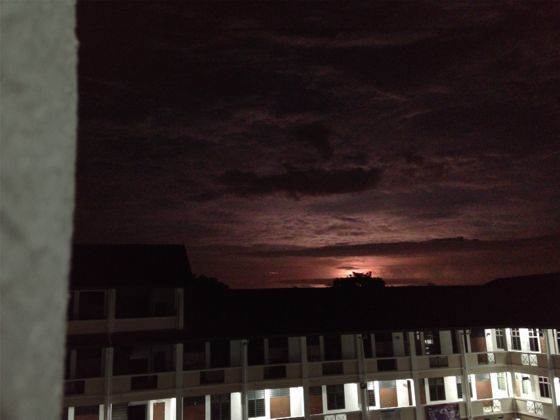
To get the best results you should shoot at least 10-20 times, because each lightning strike is different from the other, and shooting many times allows you to get a variety of lightning photos that you can choose your favorites from.
Remember to stay safe and make sure you know what you’re doing! Always take into consideration the safety aspect of your iPhone and of you especially! And most importantly, have fun!
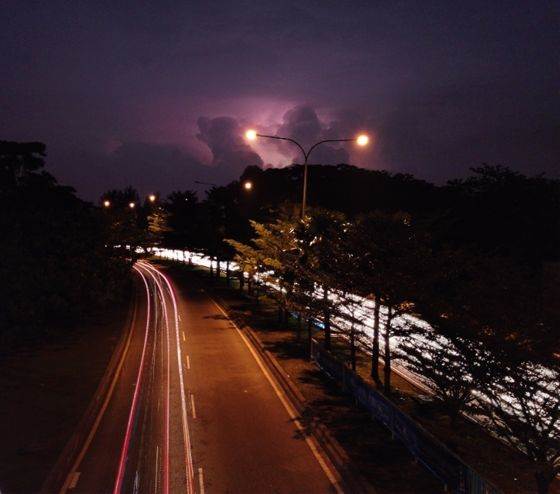
PS. You can include things like light trails to make your shot even more interesting!


Leave a Reply
You must be logged in to post a comment.