The iPhone has to use slower shutter speeds than most digital cameras due to its small sensor size. This is not really an issue in bright sunlight, but in medium and low light it becomes absolutely essential that you keep your iPhone steady, or your photos will end up being blurry. In this article you will find out how to always keep your iPhone camera steady… and your photos sharp.

Keeping the iPhone steady is even more important when shooting a video. Even though iPhone 4S and iPhone 5 use advanced video stabilization algorithms, you may still end up with videos in which the entire frame is constantly shaking.
Let’s start by looking at my two favorite ways of holding the iPhone.
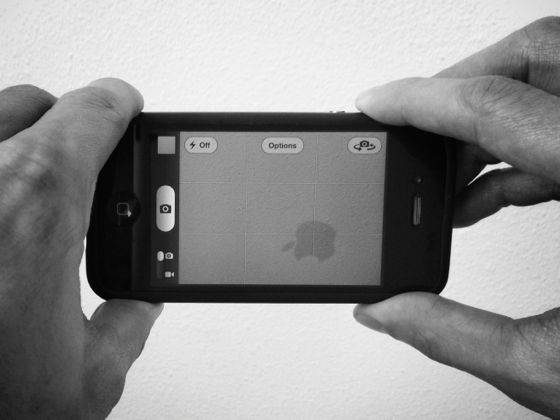
The Camera Way
This is perhaps the most intuitive way to hold your iPhone, and it is indeed convenient in most cases. Since you can use the volume buttons for taking a photo, it really feels like you’re holding a real camera.

However, there are also problems with holding the iPhone like this. Even though it feels very stable, in fact your hands will probably be shaking as you’re holding them in front of you. And as you press the shutter button, which is the most important moment of all, your phone is almost guaranteed to move along with it.
I often choose to hold my iPhone like a regular camera, provided that the light is good. However, in low light this is not the best way to keep your iPhone steady. You can try to eliminated hand shaking by twisting the iPhone in opposite directions from each end, but that isn’t comfortable for long periods of time.
Finally, if you hold your iPhone like this and you’re a Windows user, you may have noticed that your iPhone photos are upside down when you copy them to your computer. The easiest way to fix this is to change the way you hold your iPhone so that the volume buttons are facing down when you are taking photos or videos.
The Smartphone Camera Way
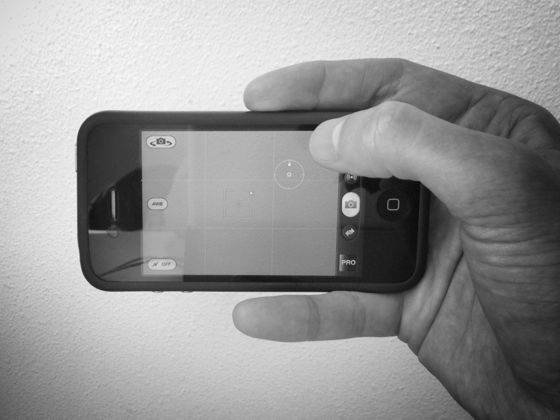
One of the best ways to hold your iPhone is with one hand, as shown in the photo below.

In order to do this, you want to keep your index finger along the top of your iPhone, your pinky along the bottom, and the other two fingers on the back of your iPhone. This leaves your thumb free for pressing the shutter and adjusting the focus and exposure.
This is way of holding the iPhone may take some getting used to, and you may initially feel more comfortable if you’re iPhone is protected with a case or bumper. However, I have never dropped my iPhone like this. It is more secure than it actually feels.
There are several advantages to holding your iPhone like this. First, it is a lot more stable and your photos are less likely to be blurry. It is also easier to hold one hand in front of your rather than two, and you can move your phone towards the subject a lot easier. Finally, it is super easy to change the orientation from landscape to portrait in a split second. Very useful in street photography.
If you are right handed, the volume buttons are naturally facing down this way, so you don’t have to worry about your photos and videos being upside down when you copy them to a computer.
Pressing The Shutter
Regardless of how you prefer to hold your iPhone, it is important that your release the shutter only when your hands are steady. Try to find something to support your iPhone on, such as a railing, a table or even a nearby tree. If that’s not possible, you can also support your elbows against the sides of your body.
Some people may prefer to use an iPhone tripod and iPhone tripod mount for low-light shots, and there are many good options available on the market. However, I never use a tripod. To me iPhone photography is all about mobility and being able to take quick shots when the moment is right. Obviously, you lose some of that mobility with a tripod. But if you choose to use one, it will surely make your low-light shots sharper.
You may also want to pay attention to your breath. Don’t hold your breath, as that will only make your body more tense and your hands more shaky. Instead many photographers have found that their hands are more steady at the end of an exhalation.
It also matters how you press the shutter. Using the volume buttons is convenient, and almost guaranteed to move your iPhone. It’s best to avoid them in low-light situations. If you use the on-screen shutter, keep in mind that the picture is only taken when you release your finger from the screen. I have discovered that gently lifting my finger is far less likely to cause movement than tapping the screen.
Finally, you can also use the volume up button on your Apple headphones, which will completely eliminate any shutter-related camera movement. The headphone shutter is particularly useful if you’re using a tripod or trying to remain unnoticed in street photography.
Image Stabilization
Thanks to its built in accelerometer, your iPhone knows when it’s moving and when it’s being held steadily. You can take advantage of this by downloading a dedicated camera app such as ProCamera or Camera+ and using their image stabilizer function.
It works just like a regular shutter button. However, the image will only be taken when your iPhone is staying still. This is perfect for low-light shots, but obviously impractical for shots of movement that have to be taken quickly.


Thank you Jason and Richard–these are good tips that I will employ in the future and hopefully it will help with my photography hobby as I have very shaky hands. I think its due to holding my breath when I get nervous as you mentioned is one of the things that cause shakiness above.