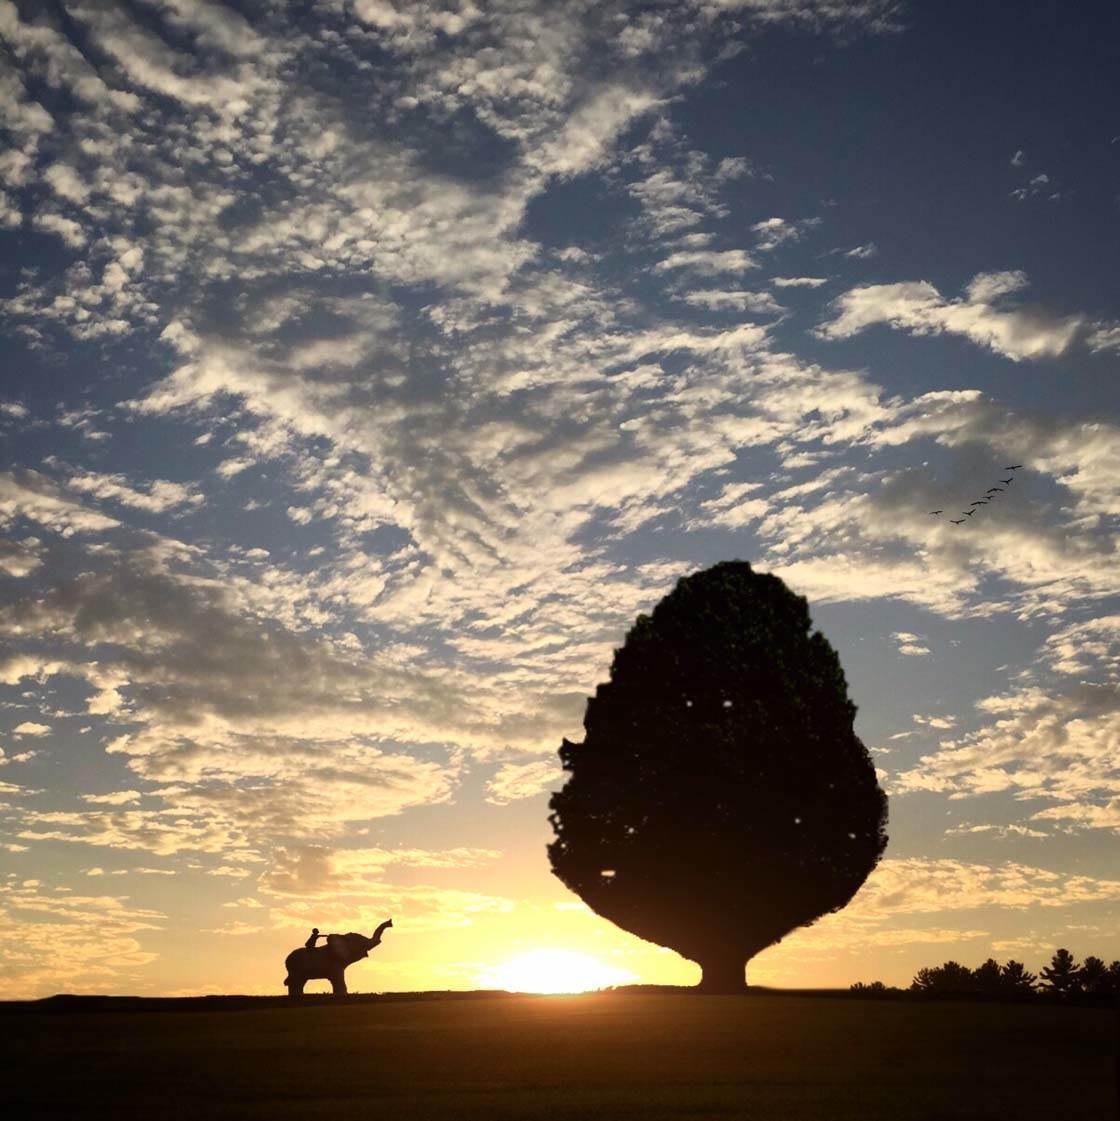
Do you ever wonder how iPhone photographers create those amazing fantasy edits that look so realistic? If so, you’re about to discover how to create these wonderfully imaginative images. In this tutorial, I’ll show you the step-by-step process that I used to create this beautiful fantasy-style silhouette photo. You’ll learn how to come up with an initial vision for your project, take the photos you need, and then use apps to combine the images and add some magical finishing touches.
1. Create A Vision For Your Image
The very first step with a project like this is to come up with a vision for what you want to create. I often get inspiration for my creations from my kids as they have such a wonderful imagination.
If you struggle to think of ideas, kids books, films, TV adverts and even poetry should inspire you. Or look at the work of others who create these fantasy-style images, then try to create something similar but with your own unique twist.
My young son Arlo has a wonderful imagination. His birthday wish list included items such as a “tree that reaches the sky,” “a mountain of dirt,” “new elephant friends,” “kryptonite,” and many other items. This list alone is enough to get my mind going on a month’s worth of photos!
So I decided to create a set of images that I call “Arlo’s World” in his honor. The photo that we’re going to work on here is one from that series. For this creation I knew I wanted to have elephants in the photo.
When Arlo is playing with his toy elephants he often has someone ride them, so I decided to have a person in my photo too – perhaps riding an elephant. I would also need some nice scenery, and I thought a tree would be good to provide a sense of scale.
2. Photograph The Individual Elements
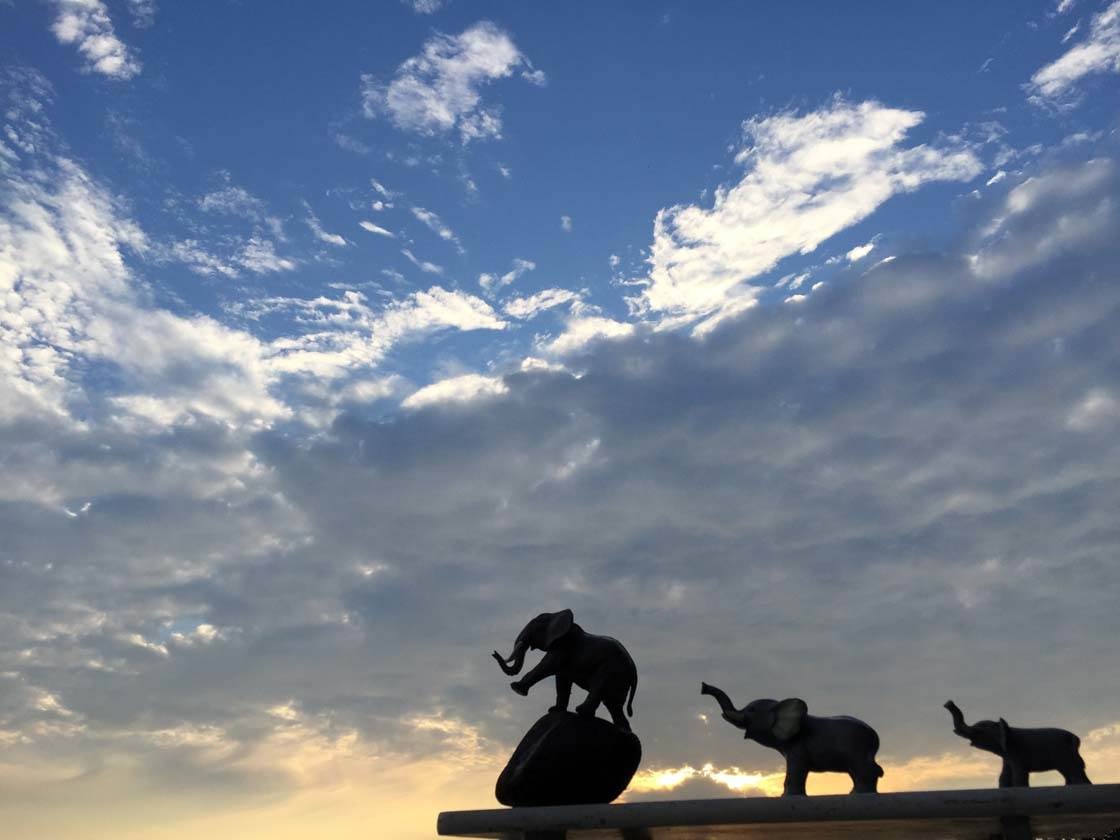
Once you know what you want to include in your final piece, you need to take or find the photos for each individual component. I began by photographing Arlo’s toy elephants.
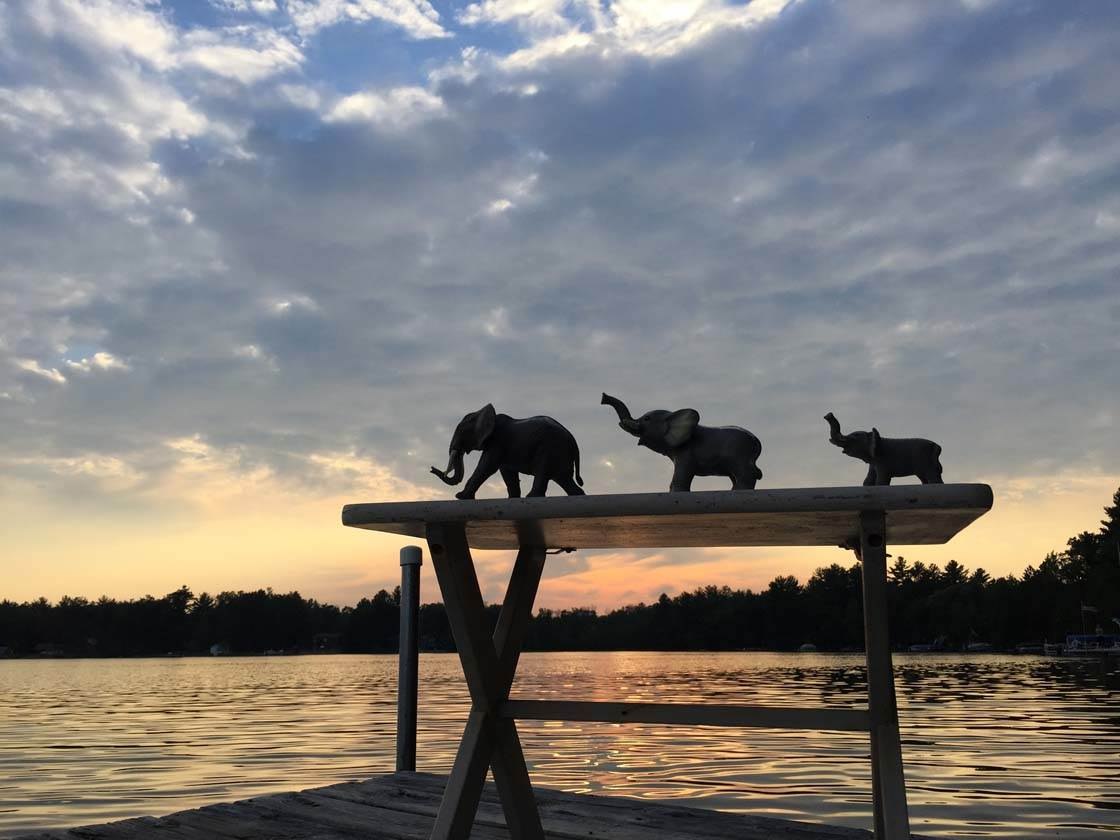
I placed them on a table on the pier and shot them from a low angle so that I could get the perspective I wanted with just plain sky behind them. Shooting at sunset with the light behind them allowed me to capture the elephants as dark silhouettes.
When shooting subjects for a composite image, try to use the same kind of lighting for each of the pieces you shoot. So if your photo includes a sunset as the background, shoot the other elements during sunset if possible so that they all have similar lighting on them.
Consider the angle of the light in each of your shots. For example, if the light is hitting one subject on the left, make sure it hits all of your subjects from the left. If this isn’t possible when shooting, you can always “flip” an image in editing to achieve this.
In my case, I wanted all of my subjects to appear as dark silhouettes in the final piece, so the direction of the light wasn’t actually that important. But it’s important to think about this before you start shooting.
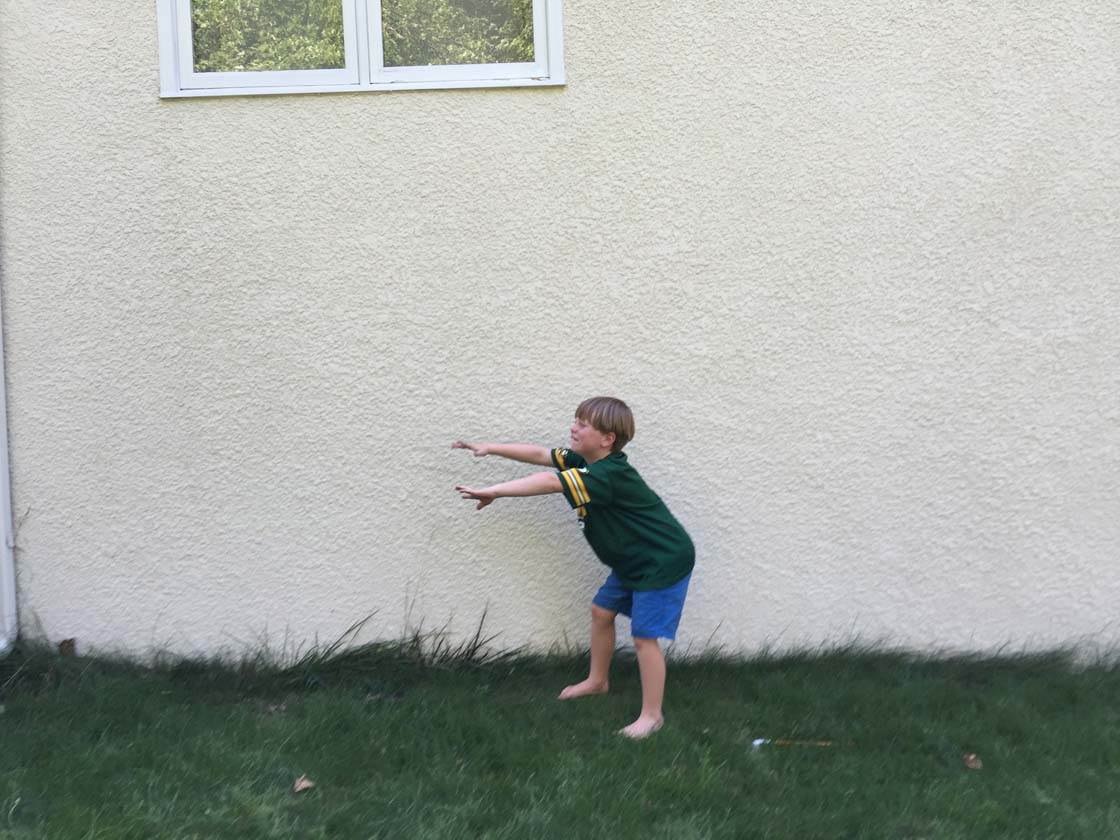
After I shot the elephants, I knew I wanted to add a boy riding one of them. I asked my older son to stand in front of a wall and pretend he was feeding a lion an apple. Then I asked him to pretend he was riding one. The shoot took about two minutes and then we were off on our next adventure!
Note that even though I want him to appear as a silhouette in the final image, he doesn’t have to be photographed as a silhouette as it’s easy to apply that effect in post-processing.
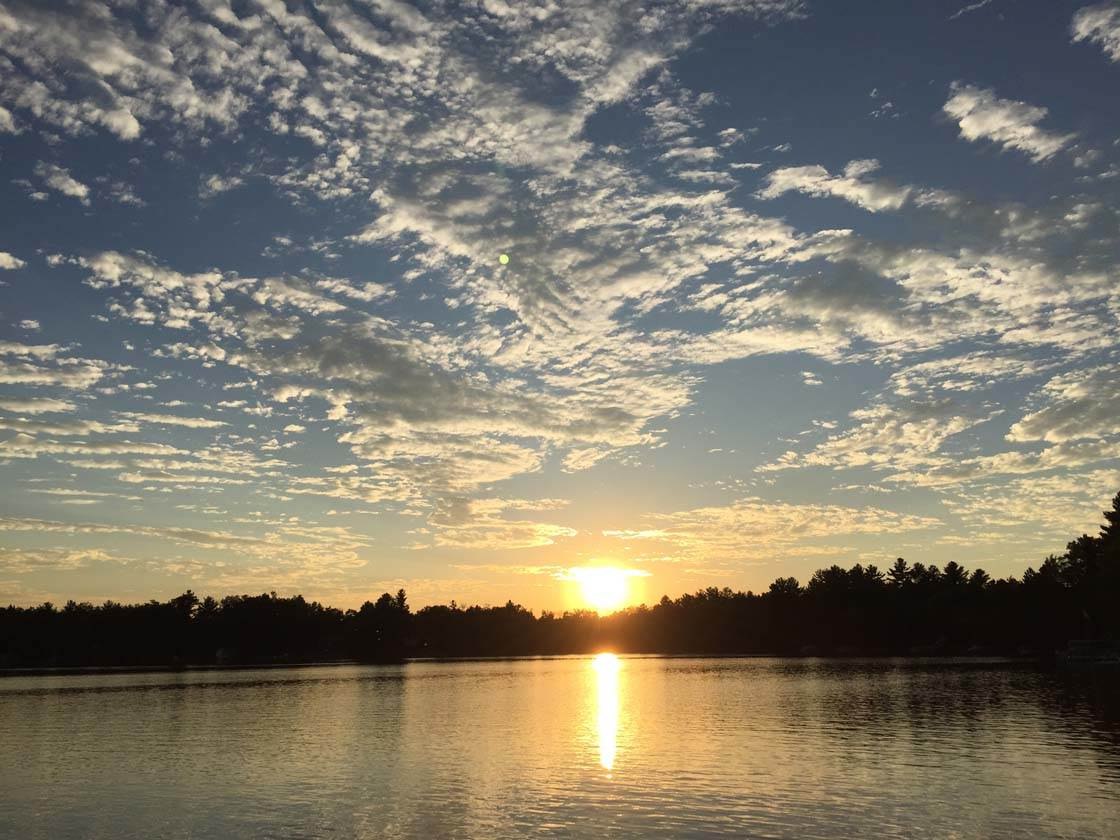
Finally I used a sunset photo and another photo of a lone tree that I already had in my phone. Whenever I see an interesting tree or a pretty sunset, I like to grab a few photos of them just for this purpose.
3. Combine The Elements In Superimpose
Once you have the individual images, you need to assemble them together to create your final composite photo. The best app to use for this is Superimpose.
Below you’ll see the step-by-step process that I used to create my composite image. These same techniques can be used to create many different kinds of composite photo – you just need to start with a background image and then add your other photo elements on top.
The first thing you need to do in the Superimpose app is to open a photo as the background image. Tap the Import icon at the top left of the screen, then tap Photos to access your Camera Roll.
Select the image you want to use, crop it if necessary, then tap Choose. I used the sunset photo as my background.
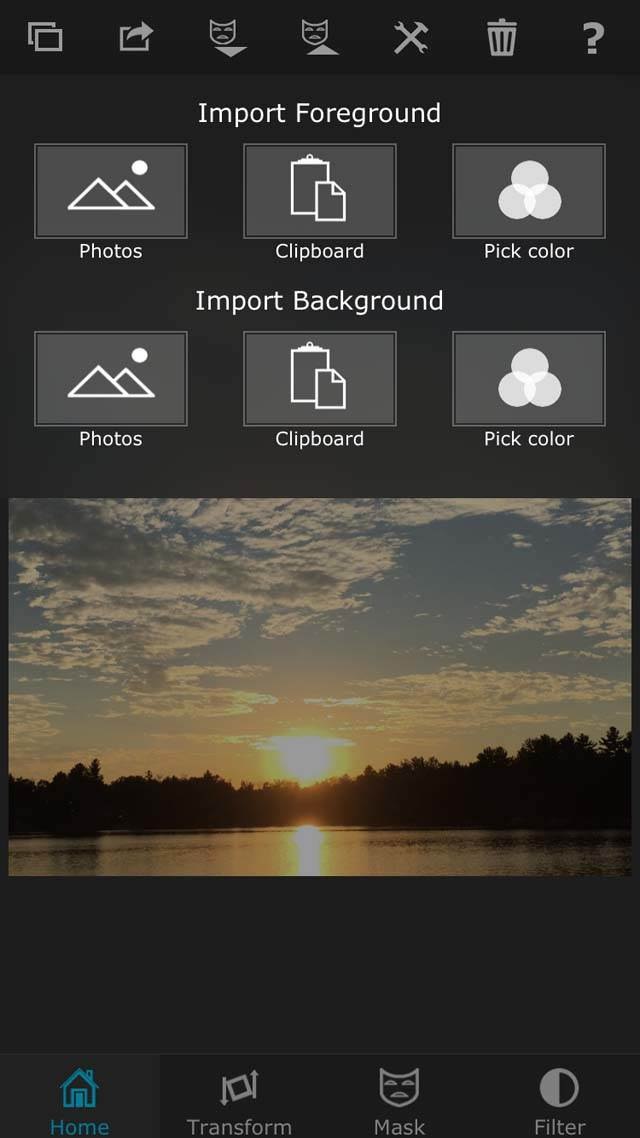
The next step is to open another photo as the foreground image – this will sit on top of the background image. Note that once the foreground image is imported, you can erase the parts that you don’t want so that the background image shows through.
To open a foreground image, tap the Import icon at the top left of the screen, then tap Photos in the Import Foreground section and choose the photo you want to use. For my foreground image, I imported a photo of a tree in a field.
You now need to erase part of the foreground image, leaving just the object that you want to add onto the background image. In my case I erased the sky behind the tree to leave just the field and the tree. The area that is left after erasing is called a “mask.”
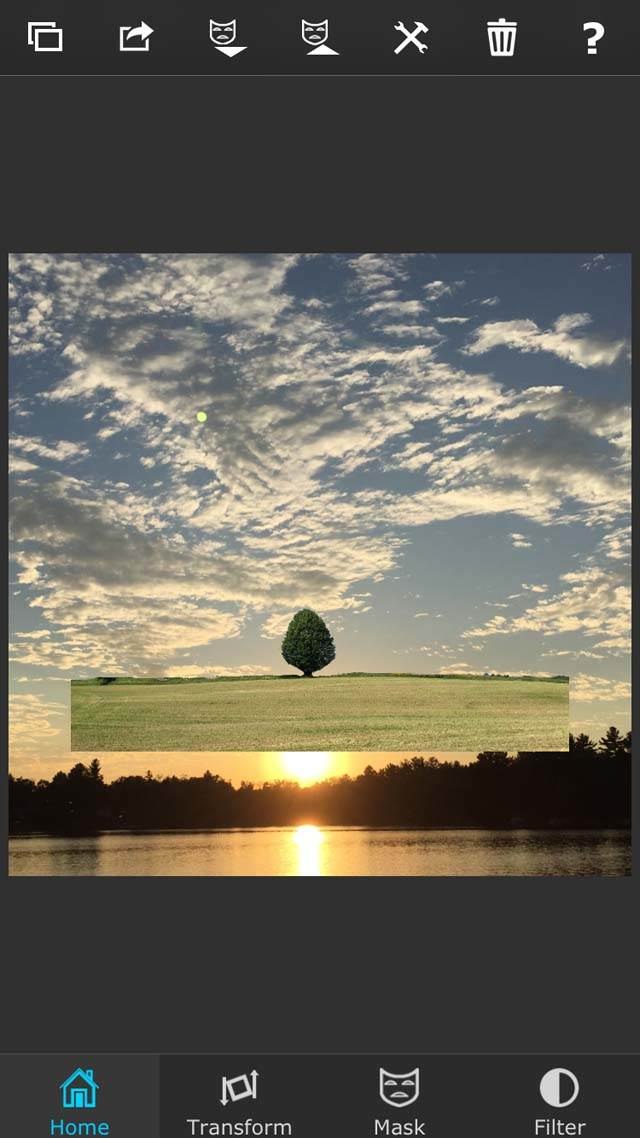
To erase parts of the image, start by tapping Mask at the bottom of the screen. Superimpose has a range of tools for erasing parts of your image, including the brush, magic wand, smart brush and lasso – tap the Settings icon at the top right of the Mask screen to access these tools.
I used the “brush” tool to slowly erase everything in the photo except the tree and field. When erasing parts of an image, zoom in by pinching two fingers apart to make sure you’re being as accurate as possible.
If you erase too much, use the Eraser tool to brush back over the part of the photo you want to bring back. Bear in mind that this process can be fairly time-consuming if your subject is a complex shape, but it’s worth taking the time to erase carefully so that the end result looks seamless.
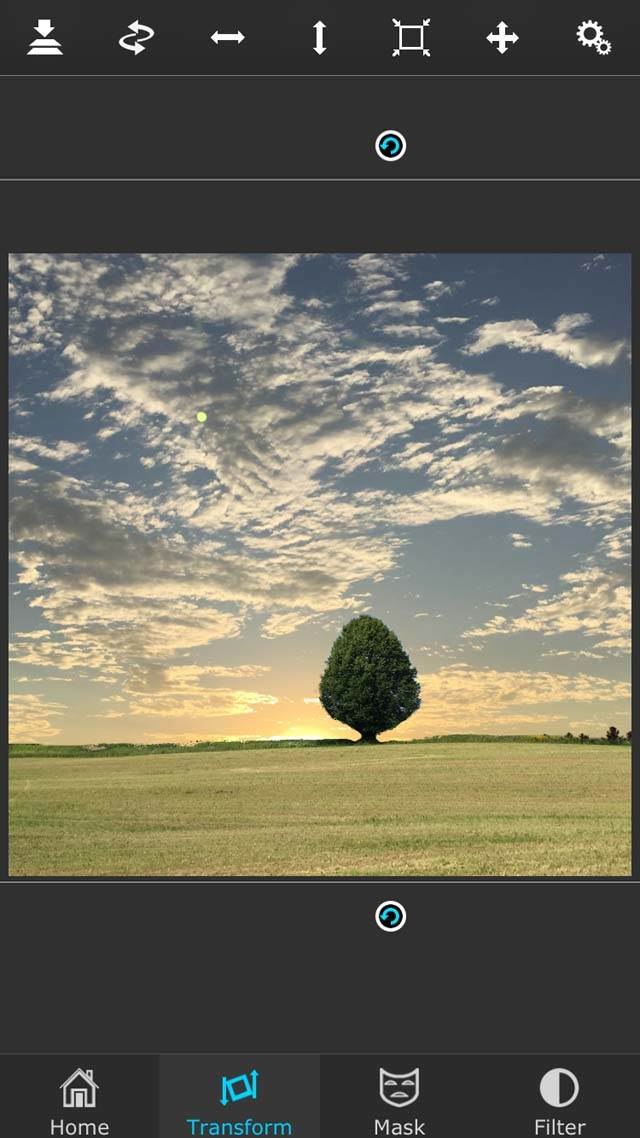
To move, resize or rotate your foreground image, tap Transform at the bottom of the screen. Drag the image to move it, and use the handles around the edges to resize or rotate. Tap the Home icon when you’ve finished positioning your foreground image.
Once your foreground image is in the right place, you might want to make changes to the exposure and color of the foreground or background photo. In my case I wanted to reduce the exposure of the tree and field (foreground image).
To make these alterations, tap Filter at the bottom right, select whether you want to alter the foreground or background image at the top of the screen, then tap the Settings icon at the top right.
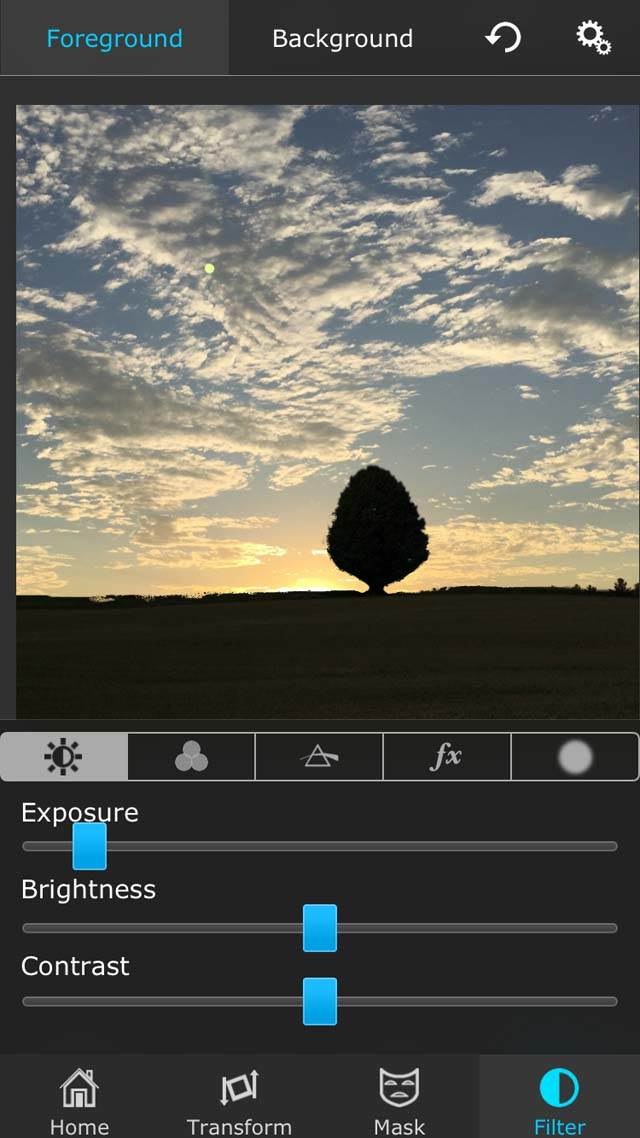
A set of icons and sliders will appear at the bottom of the screen. These allow you to make adjustments such as exposure, brightness, contrast, color saturation, etc. I used the Exposure slider to make my foreground image darker, so that the tree and field appeared as a dark silhouette.
The next step is to bring another object into the composite image – in this case, the elephant. However, before you can bring in another foreground image, the two existing image layers (background and foreground) must be merged into a single layer.
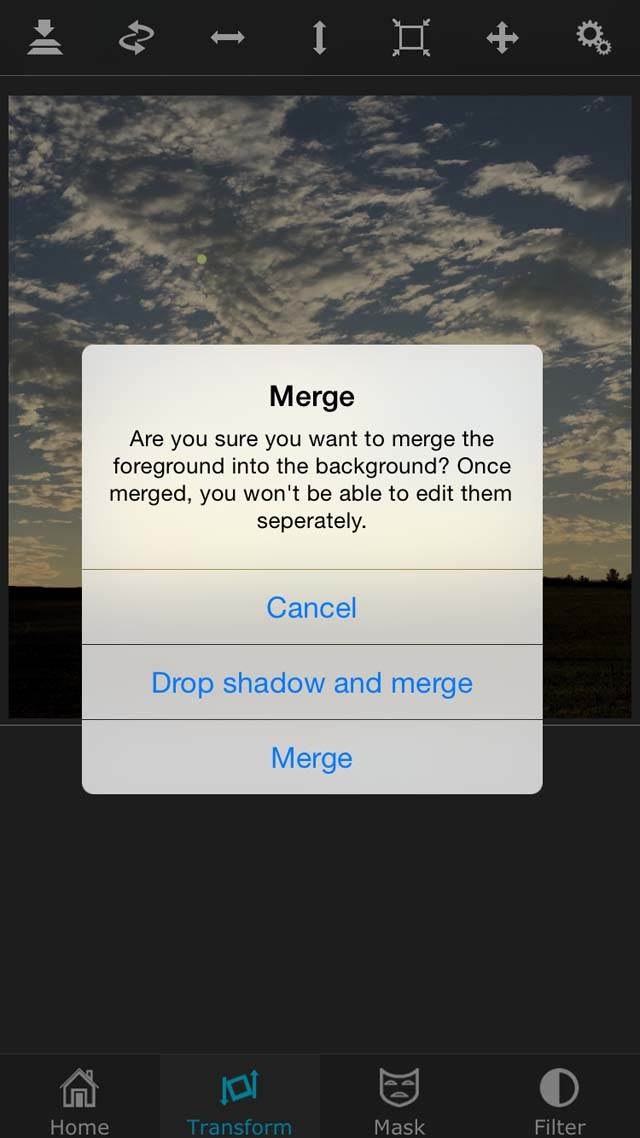
To merge the layers, tap Transform at the bottom of the screen, then tap the Merge icon (arrow pointing down to two layers) at the top left of the screen.
Note that once you’ve merged the layers you can’t make individual adjustments to the two separate images – the foreground image has now become part of the background image.
Once I’d merged the layers, I could now add the elephant in the same way that I added the field/tree image. To add another foreground image, go to the Home tab, then tap the Import icon at the top left and choose the image you want to use.
After importing your image, you’ll need to erase the parts that you don’t want. Tap Mask, then tap the Settings icon at the top right and select the masking brush you want to use.
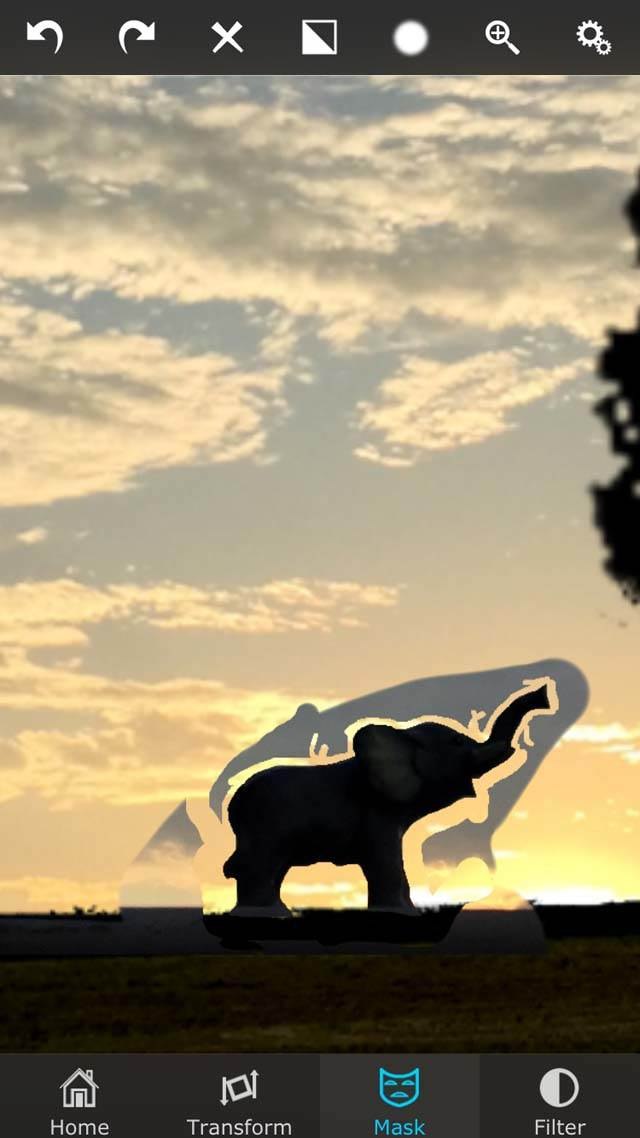
I used the “brush” tool to slowly erase everything in the photo except the elephant. Remember to zoom in to check that your erasing is accurate.
After erasing, tap Transform at the bottom of the screen, then resize and move the object to the position you want.
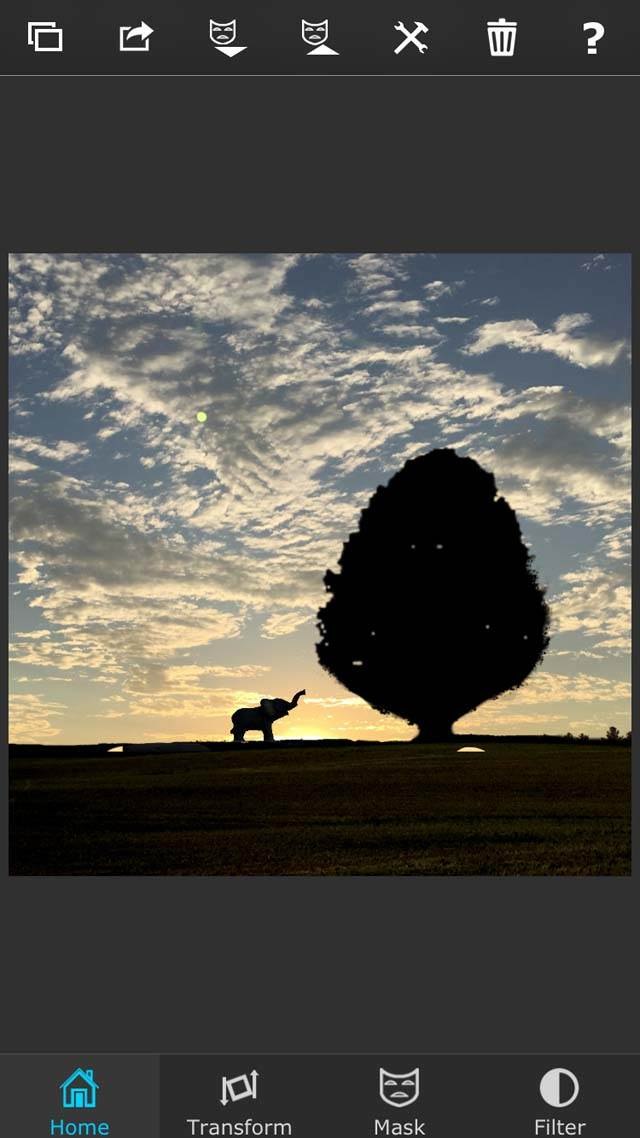
Finally, merge the foreground and background images by tapping the Merge icon at the top left of the screen on the Transform tab.
The final element to bring into my image is the boy. This is done in exactly the same way as the previous elements. Tap the Import icon on the Home tab, then choose the image to import.
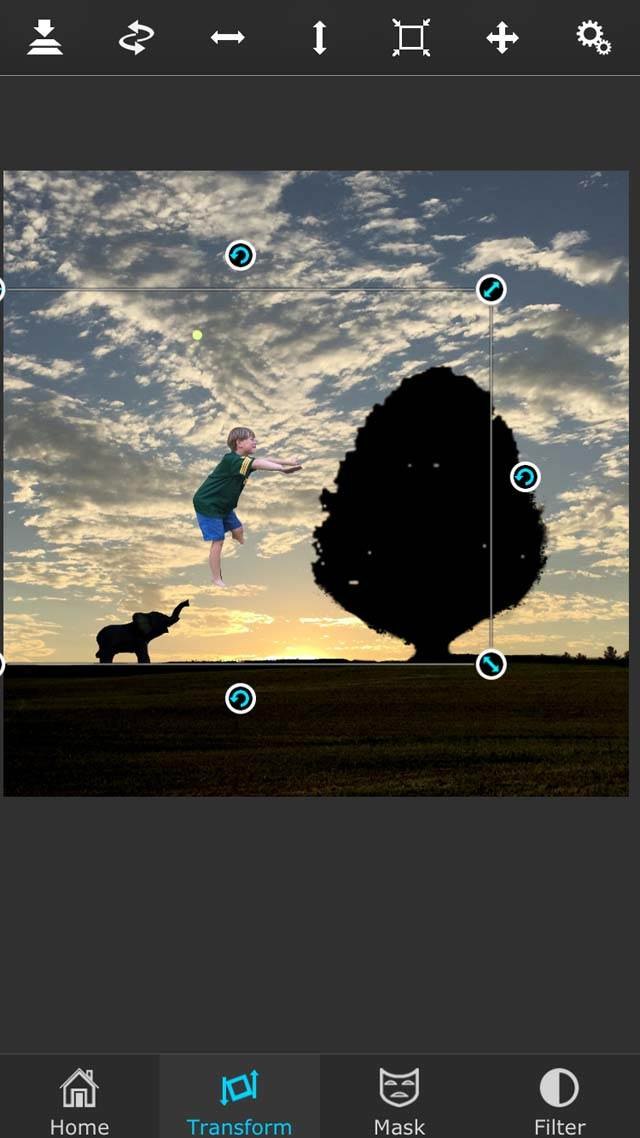
After using the Mask tool to erase the area surrounding the boy, I used the Transform tool to resize him and position him on the elephant.
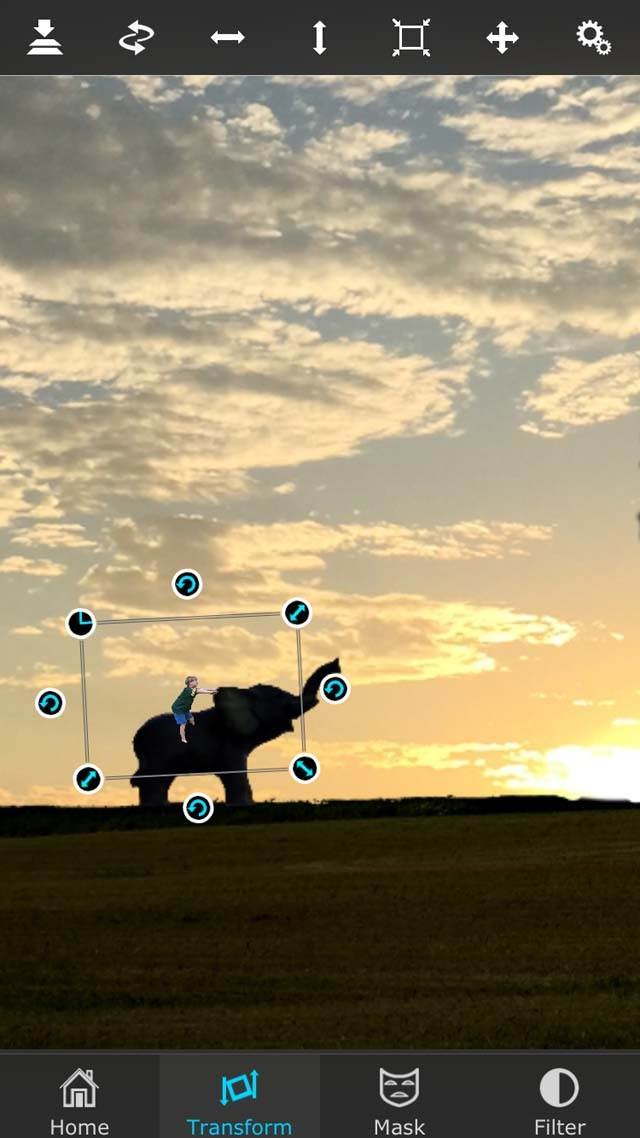
I also used the Exposure tool under the Filter tab to reduce the brightness of the boy so that he appeared as a dark silhouette.
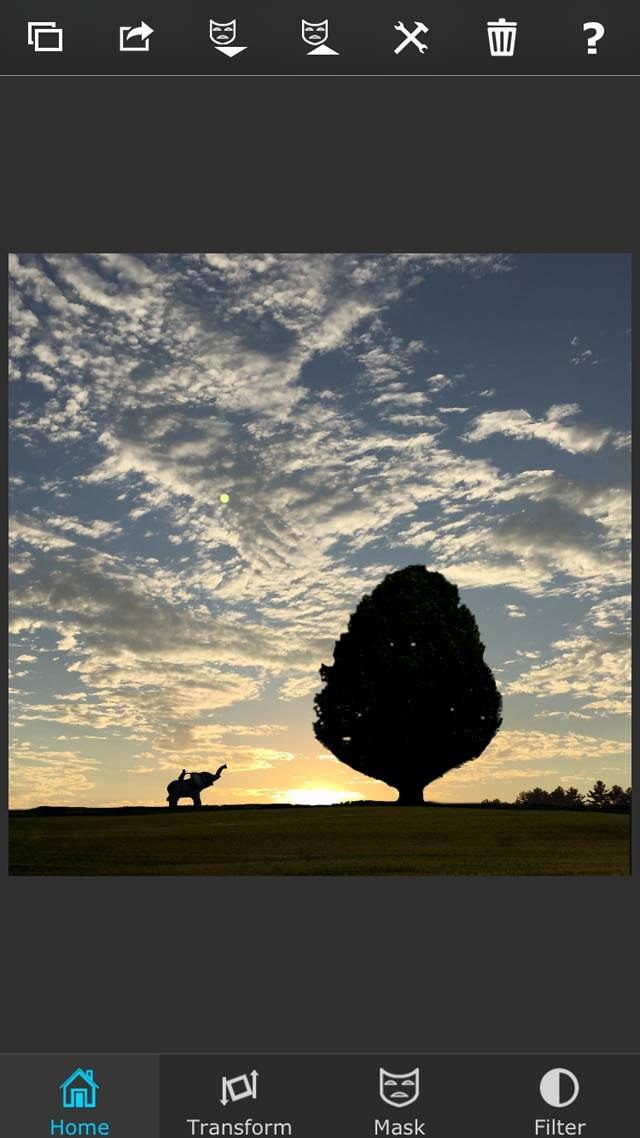
Now that I was finally done “building” all of the elements of my photo, I could merge the layers and save the image. To merge the layers, tap Transform, then tap the Merge icon at the top left.
To save the photo, tap Home, then tap the second icon from the left, and select Photos as the Export Destination.
If you’ve enjoyed this editing process, click here for an in-depth tutorial on how to use the Superimpose app to blend multiple iPhone photos.
4. Edit Image In Snapseed
Once you’ve created your composite image in Superimpose, you might want to make further edits and adjustments to the entire image. For exposure and color adjustments I use the Snapseed app, but you could use another editing app if you prefer.
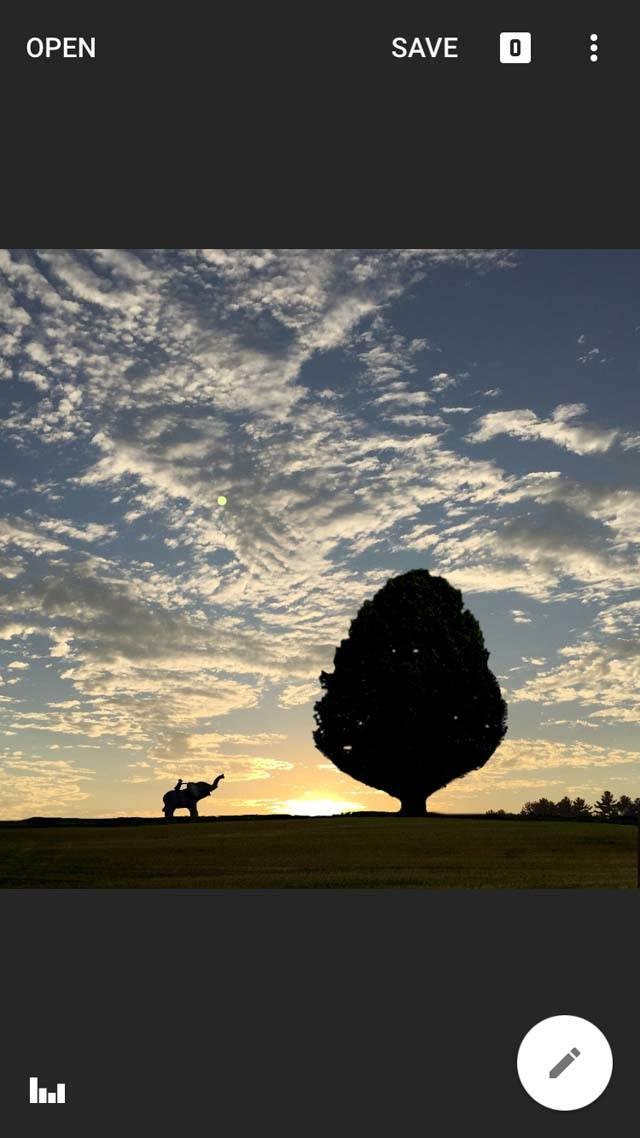
I decided that the field in my photo was a bit too light. So after opening the image in Snapseed, I tapped the icon in the bottom right corner to open up the editing tools menu.
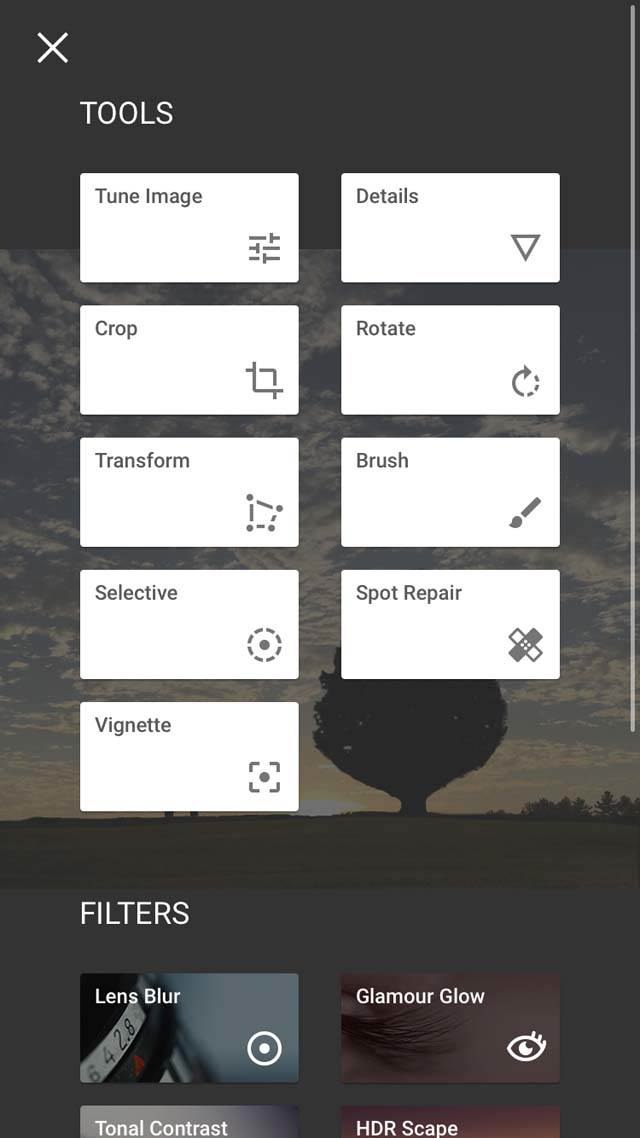
I chose the Selective tool, which is great for applying exposure and color adjustments to just certain parts of an image.
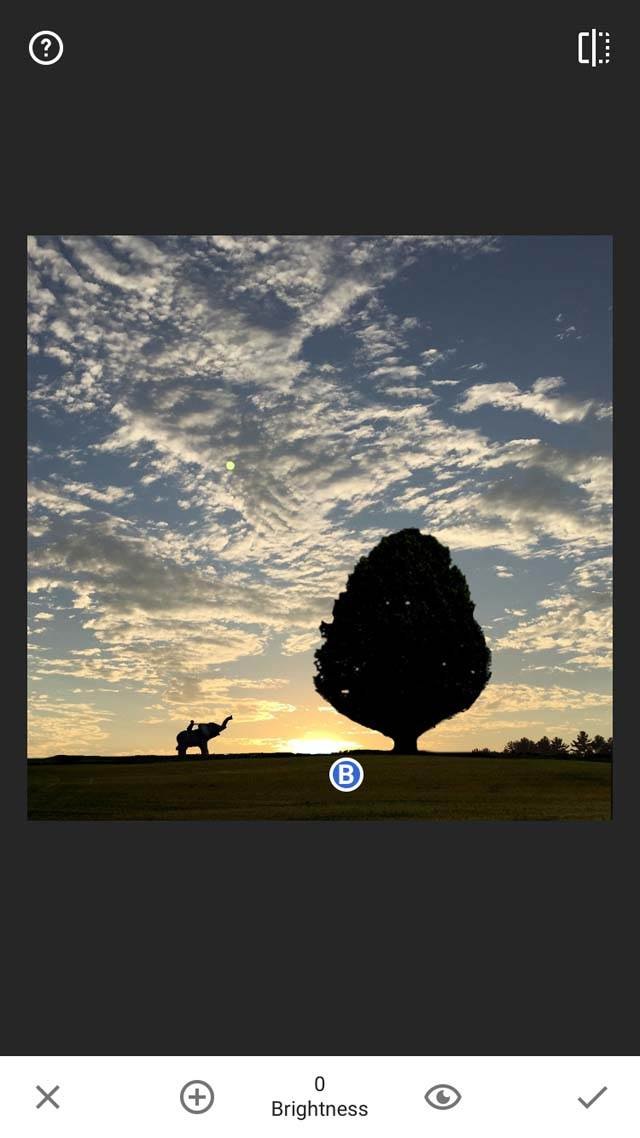
Tap the area you want to adjust (in my case I tapped on an area of the field), then slide your finger up or down on the screen to select the adjustment you want to make – B for Brightness, C for Contrast and S for Saturation.
I chose to adjust the brightness. You can pinch inwards or outwards to change the size of the area that will be adjusted, then swipe left or right to increase or decrease the brightness.
I wanted to apply the same levels of brightness to the other areas of the field, so I copied and pasted the adjustment that I’d just made.
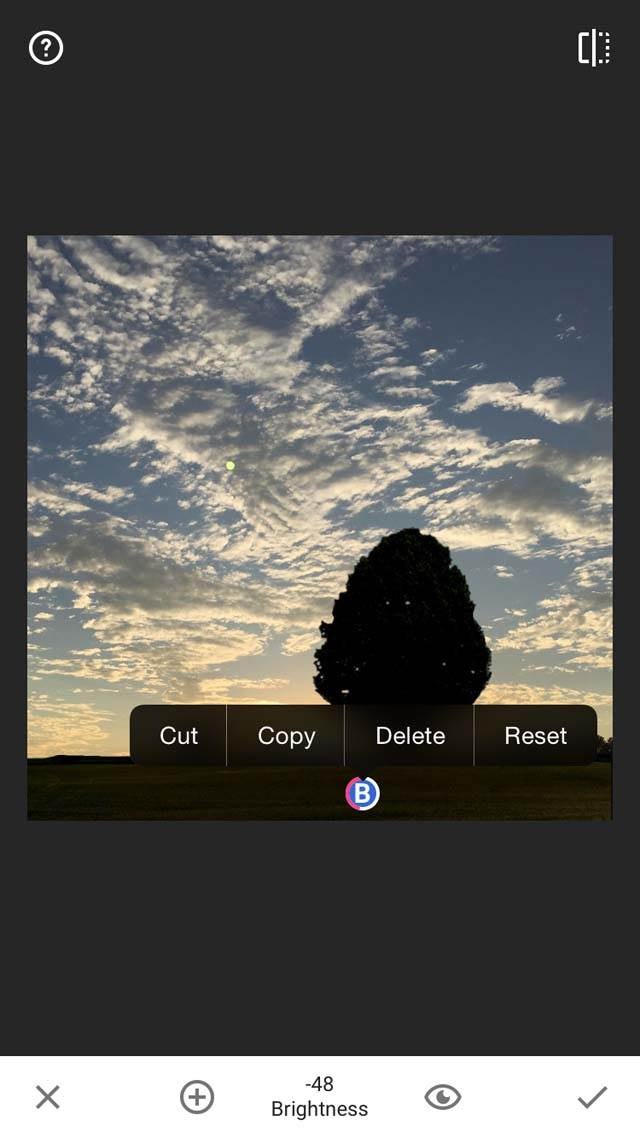
To do this, simply tap the letter B on your image, then select Copy. Now tap the area of the image that you want the same adjustment applied to, and select Paste. Repeat this until you’ve made all of the adjustments that you want.
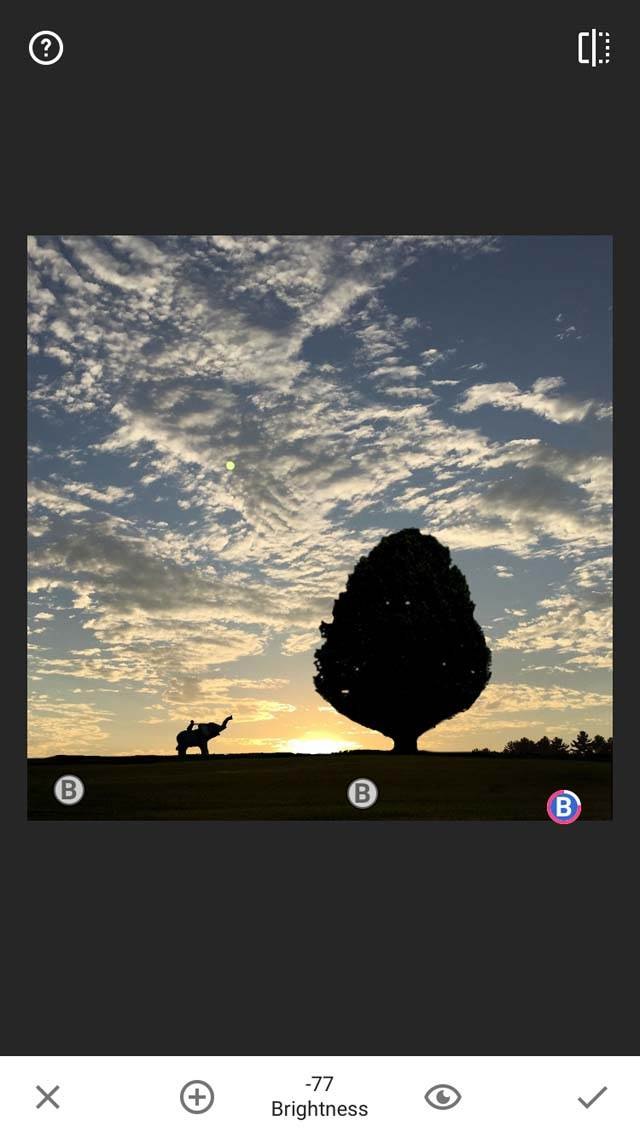
Tap the checkmark at the bottom right to confirm your changes. Of course, you could make any adjustments to your photo that you wish in an editing app like Snapseed. Don’t forget to save your edits by tapping Save at the top right.
Click here for a complete guide to Snapseed photo editing.
5. Remove Unwanted Objects In TouchRetouch
If you want to remove any small objects in your image, TouchRetouch is a great app for this. I had a small dot of light in the sky that I wanted to get rid of.
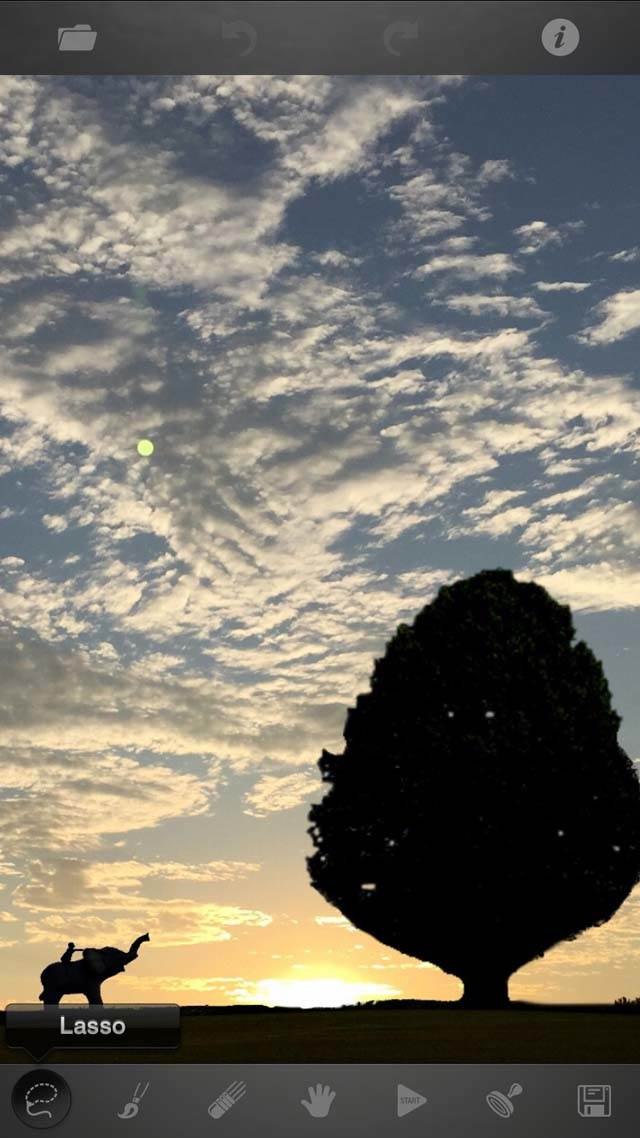
After opening my photo in TouchRetouch, I tapped on the Lasso icon at the bottom left of the screen and used my finger to draw a circle around the dot of light that was in the sky.

Once I took my finger away, that area appeared highlighted in red. To remove the selected area and replace it with pixels from its surroundings, just press the Play button in the bottom menu.
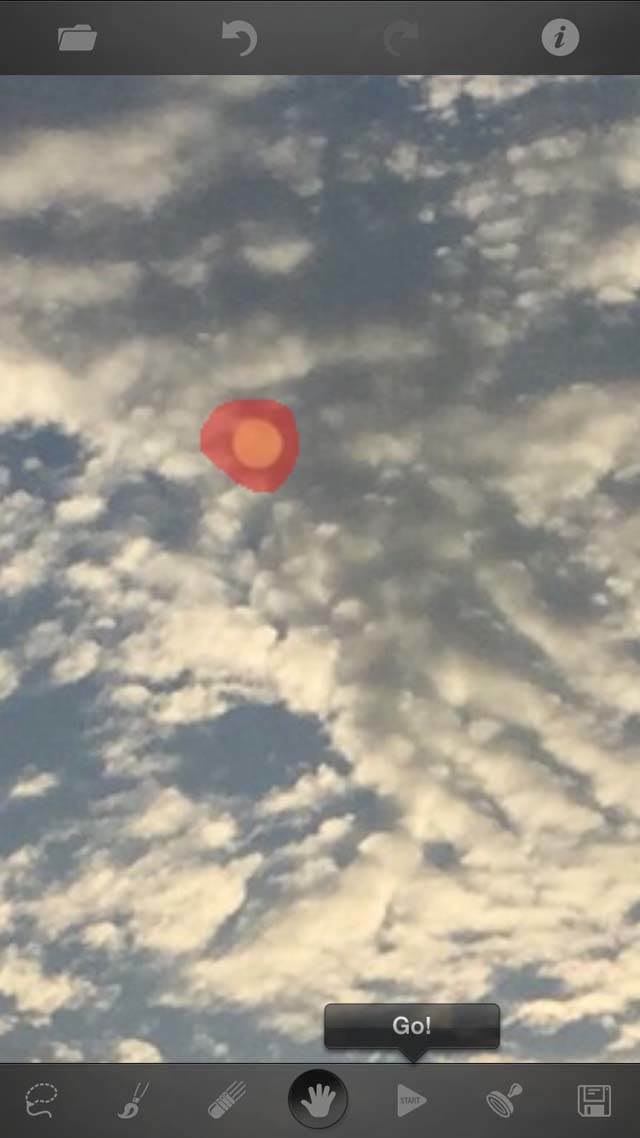
After removing unwanted objects in TouchRetouch, save the edited image using the Save icon in the bottom right corner.
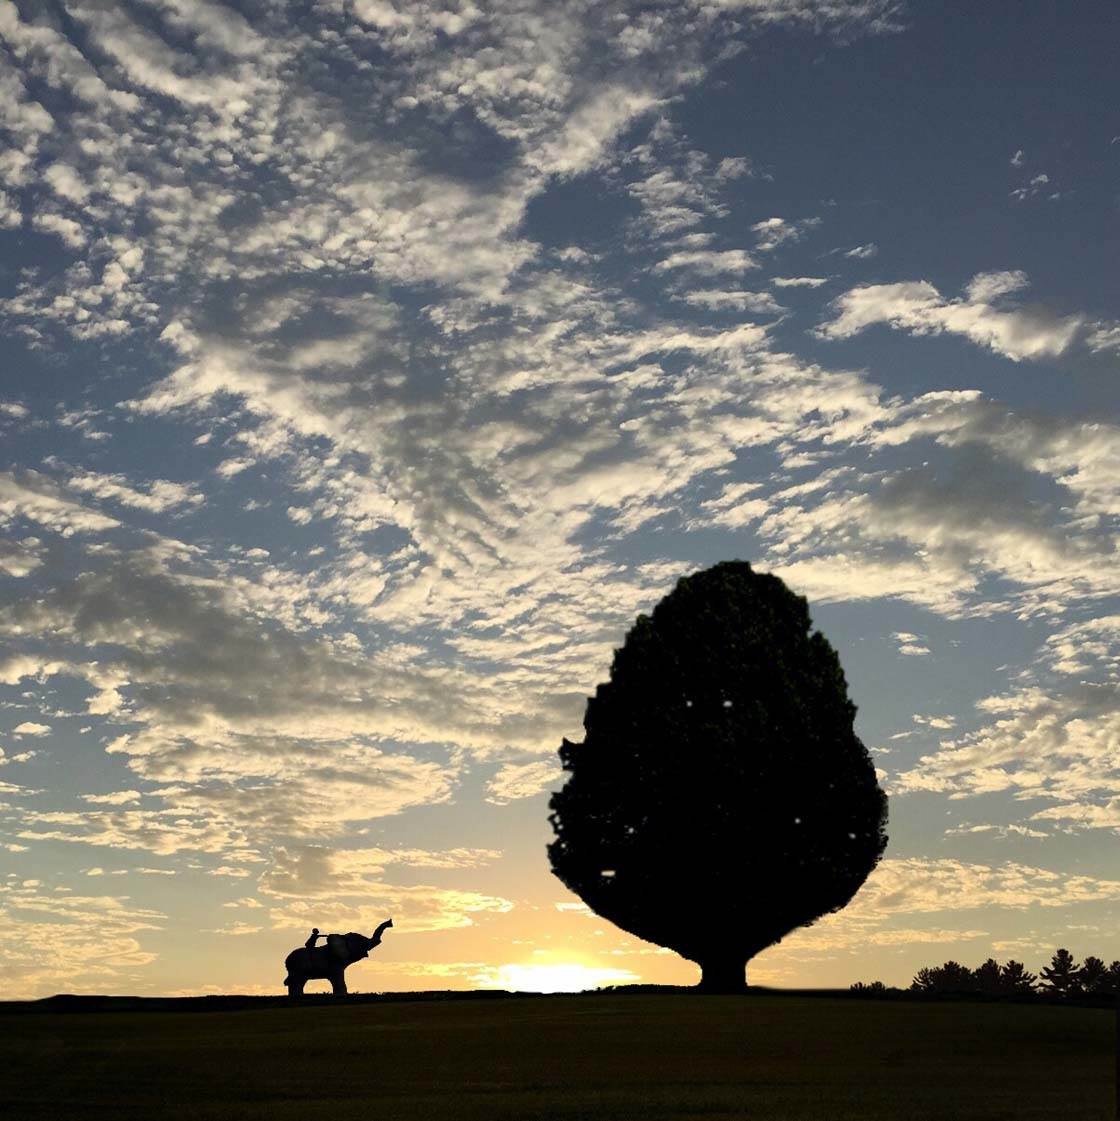
And here’s how the image is looking now. I was happy with how it looked at this point, but I wanted to add a few final touches to give it an extra bit of magic!
6. Add Final Touches In Alien Sky
Alien Sky is a great app for adding extra elements to your images, such as light flares, planets, stars and even flying birds.
I like adding lens flares to my sunset photos because it adds a warmth and dimension that’s hard to create in the composite type shots. I think it helps to draws the viewer in.
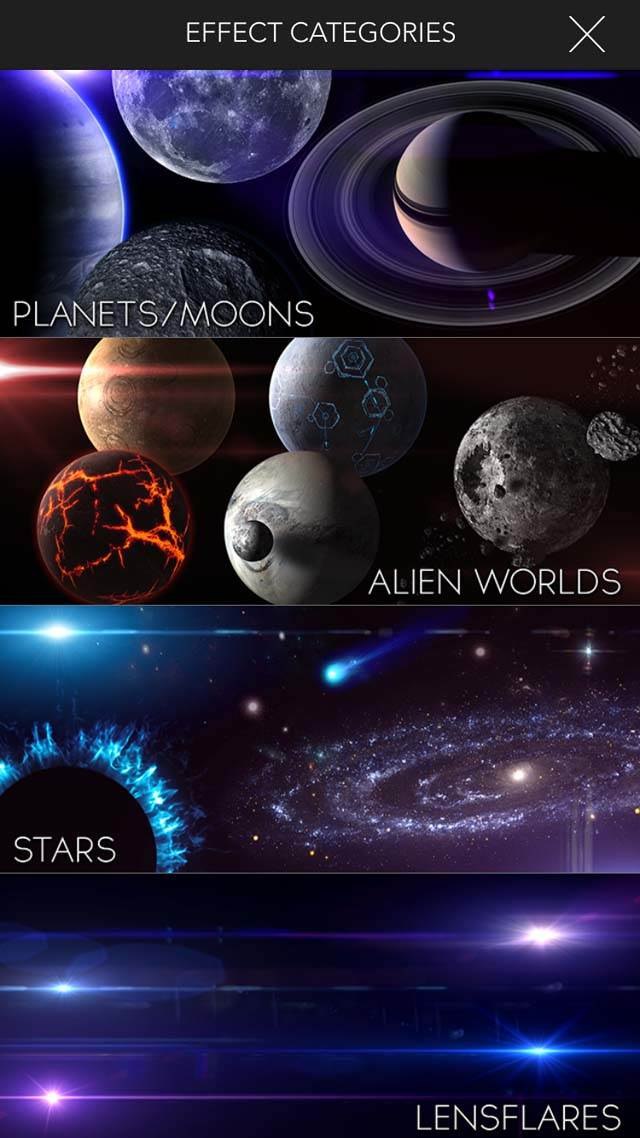
After I opened my photo in Alien Sky, I tapped the Effects option in the bottom menu and selected Lensflares. I chose to apply the Distant Sun flare effect.
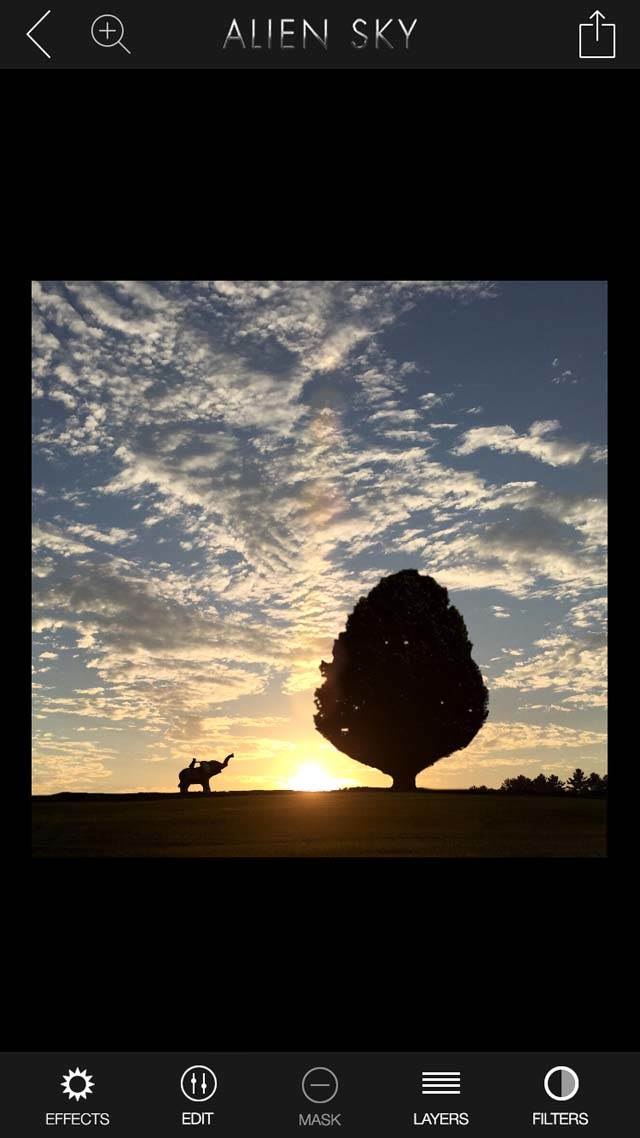
I used my fingers to touch the screen and move the flare to my desired location. You can also change the size of the flare by pinching your fingers together to shrink it or spreading your fingers apart to make it grow.
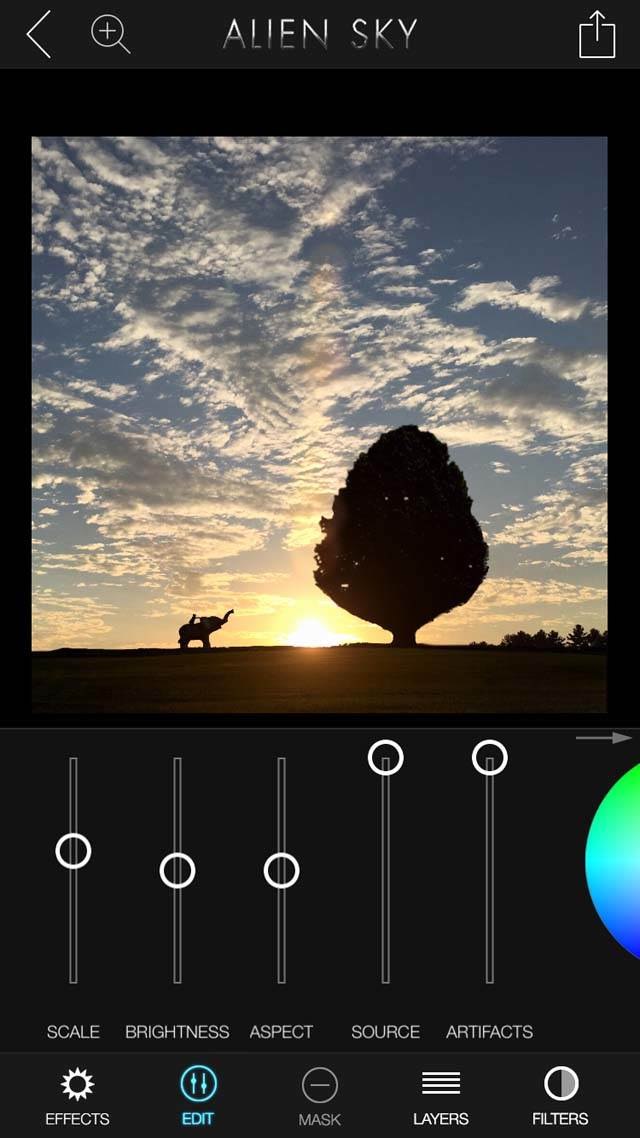
You can make further adjustments by tapping Edit at the bottom of the screen. I played with the Brightness and Scale sliders until I was happy with the effect.
Then I slid the Artifacts slider down until it was completely off. By sliding this bar down, it takes away the extra flares that surround the perimeter of the main flare. It’s just personal preference – you can choose to keep them, but I usually don’t.
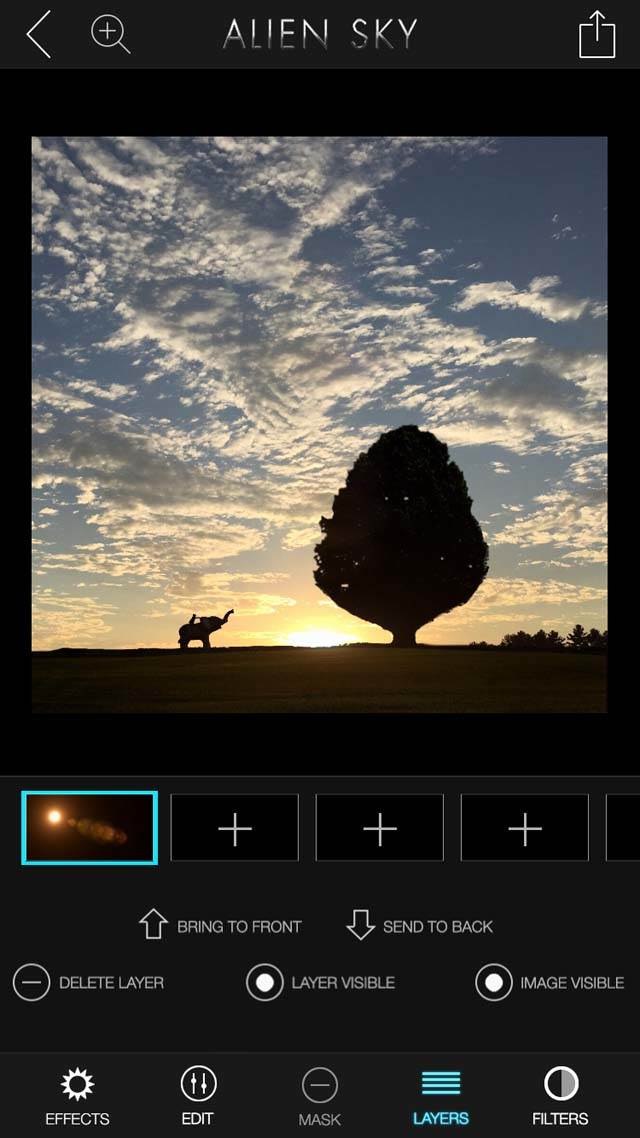
And finally I added some birds into the image. To do this I tapped Layers at the bottom of the screen, then created a new layer by tapping the New Layer button (+ icon) to the right of the lens flare layer icon.
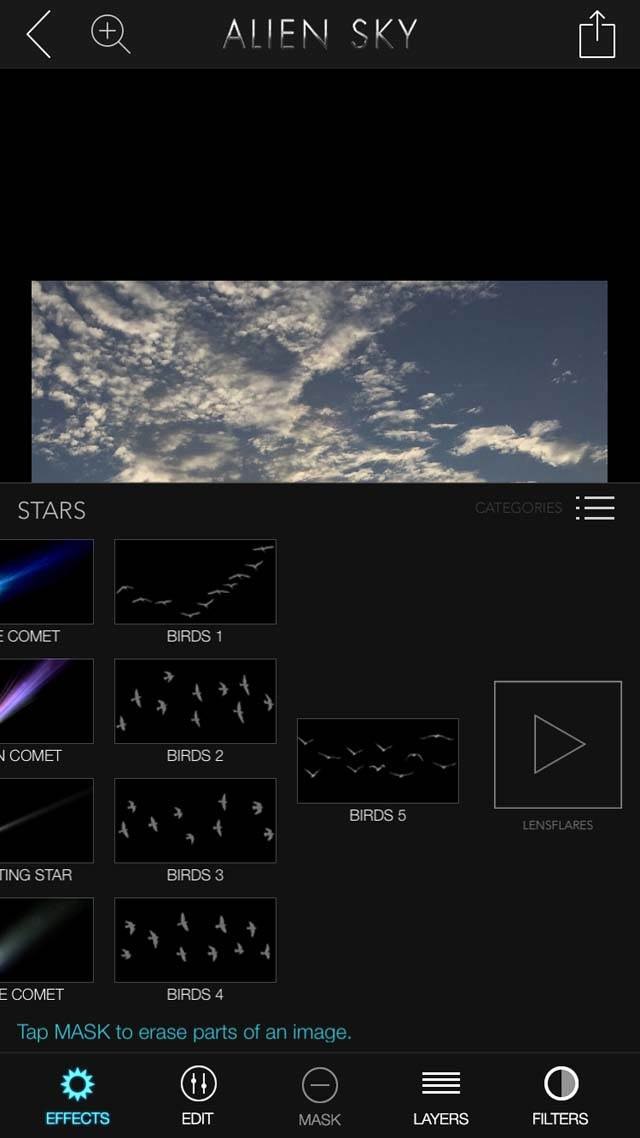
Then I opened up the Stars menu in Effects and scrolled all the way to the right until I reached the Birds section. I selected the birds I liked best, and viola! They were added into my photo where I could position them as I liked.
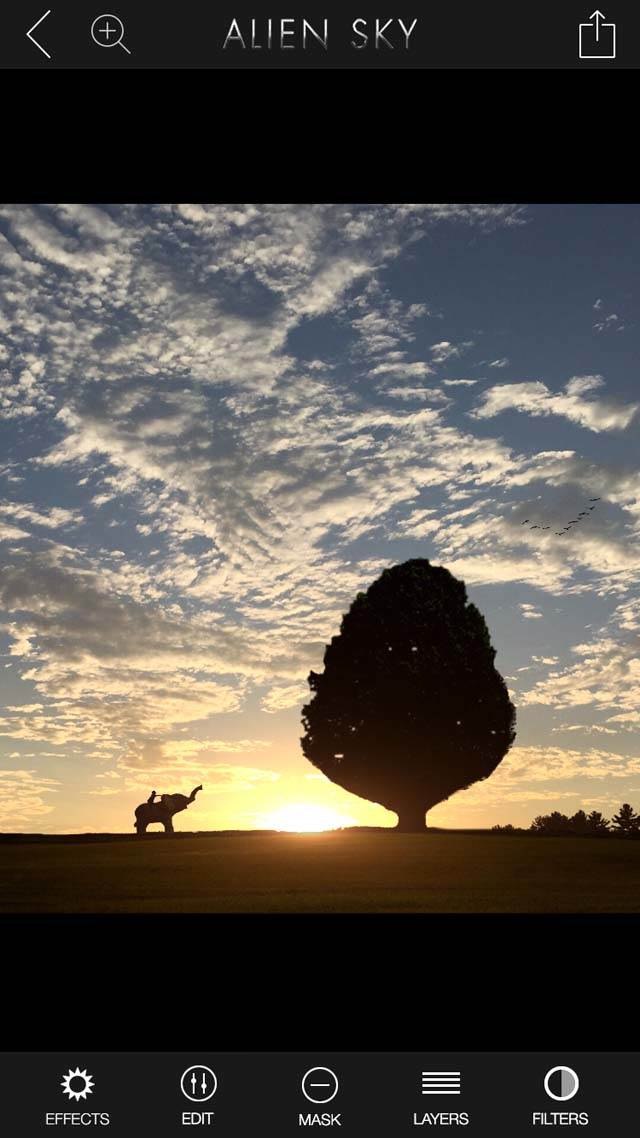
I then saved the image using the icon at the top right of the screen. Below is the image after editing it in Alien Sky.
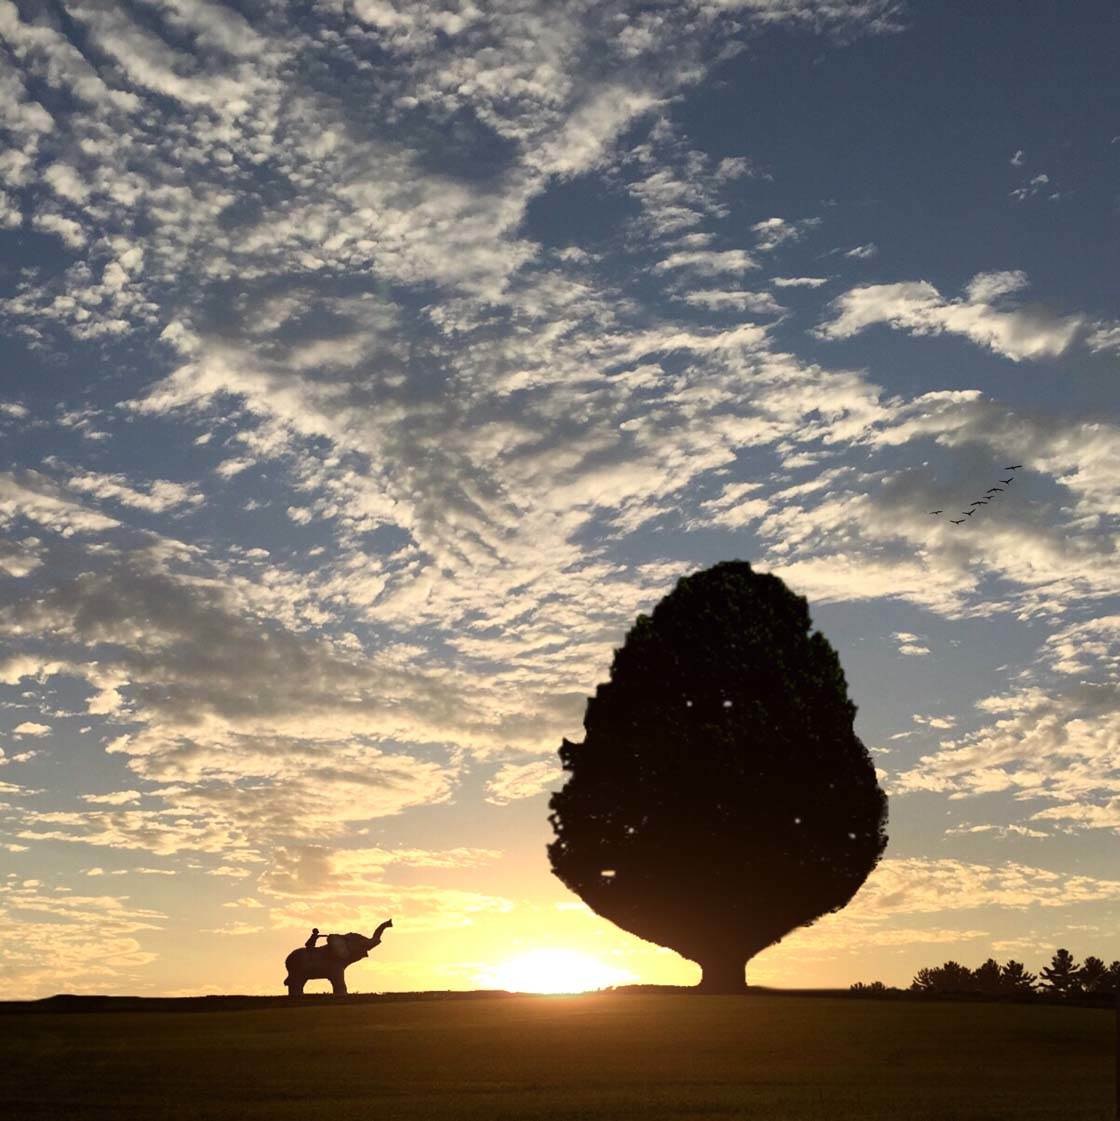
7. Apply Final Edits
My final step to finish this photo was to apply a couple more simple edits. Since I was posting the photo on Instagram, I used this app to apply the edits, but you could use another editing app if you prefer.
After opening the image in Instagram, I opened the editing tools by clicking on the “wrench” icon just beneath the photo.
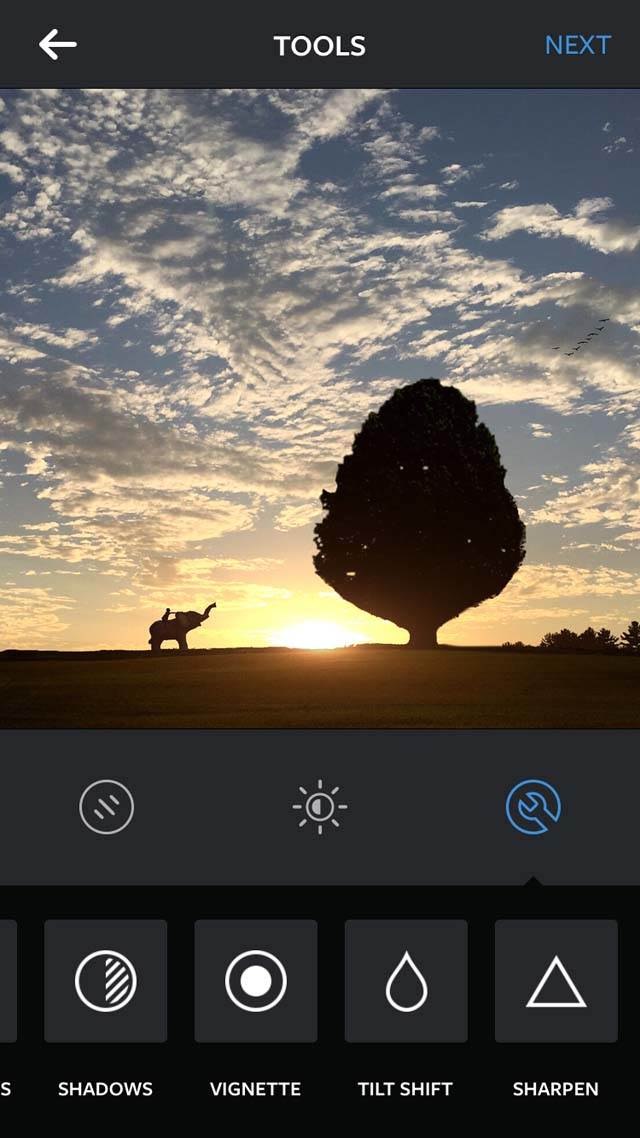
If the sun is in the middle of my photo, I like to add a bit of a vignette to subtly darken the edges of the image. So I opened the Vignette option and slid the bar until I was happy with the effect.
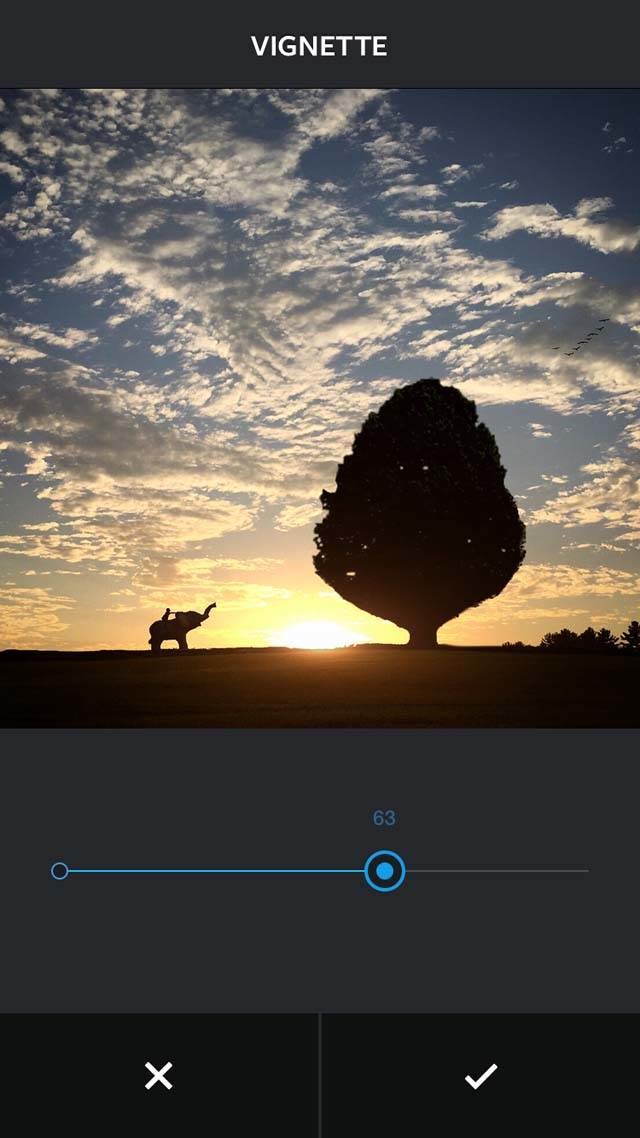
The last edit I made was to open the Warmth option and increase the warmth of the colors a bit. And finally it was done!

Thanks for coming along with me on my editing journey! As you can see, it’s not a quick process – there are a lot of steps and you need to have a bit of patience.
But if you like being creative and building something based solely on your imagination, you’ll love this kind of process – and it’s also great fun!
I consider myself a bit of an artist, and when I’m working on a photo like this, I see it no differently than a painter sitting in front of their canvas and working on creating a picture. It brings great pleasure and is a release for me.
I’m inspired by the fact that I can create anything I envision – just using my iPhone. I hope you have as much fun as I do in creating these wonderful fantasy-style images!

Wonderful job, Jill! Well explained, and a great final image!
Wow! Amazing amount of work to get that final image! I wonder what kind of things jerry uelsmann might have come up with had he started in the digital age!